CM602all_EJM8AESM_Service Manual.pdf - 第65页
Clean the mounting side and the bottom of the level. Position the level. Check the reading of the level. Rotate the level 180 degrees while leaving it in the current position. The example at left: NG Check the reading ag…
Setting Machine Setting
2
Remarks
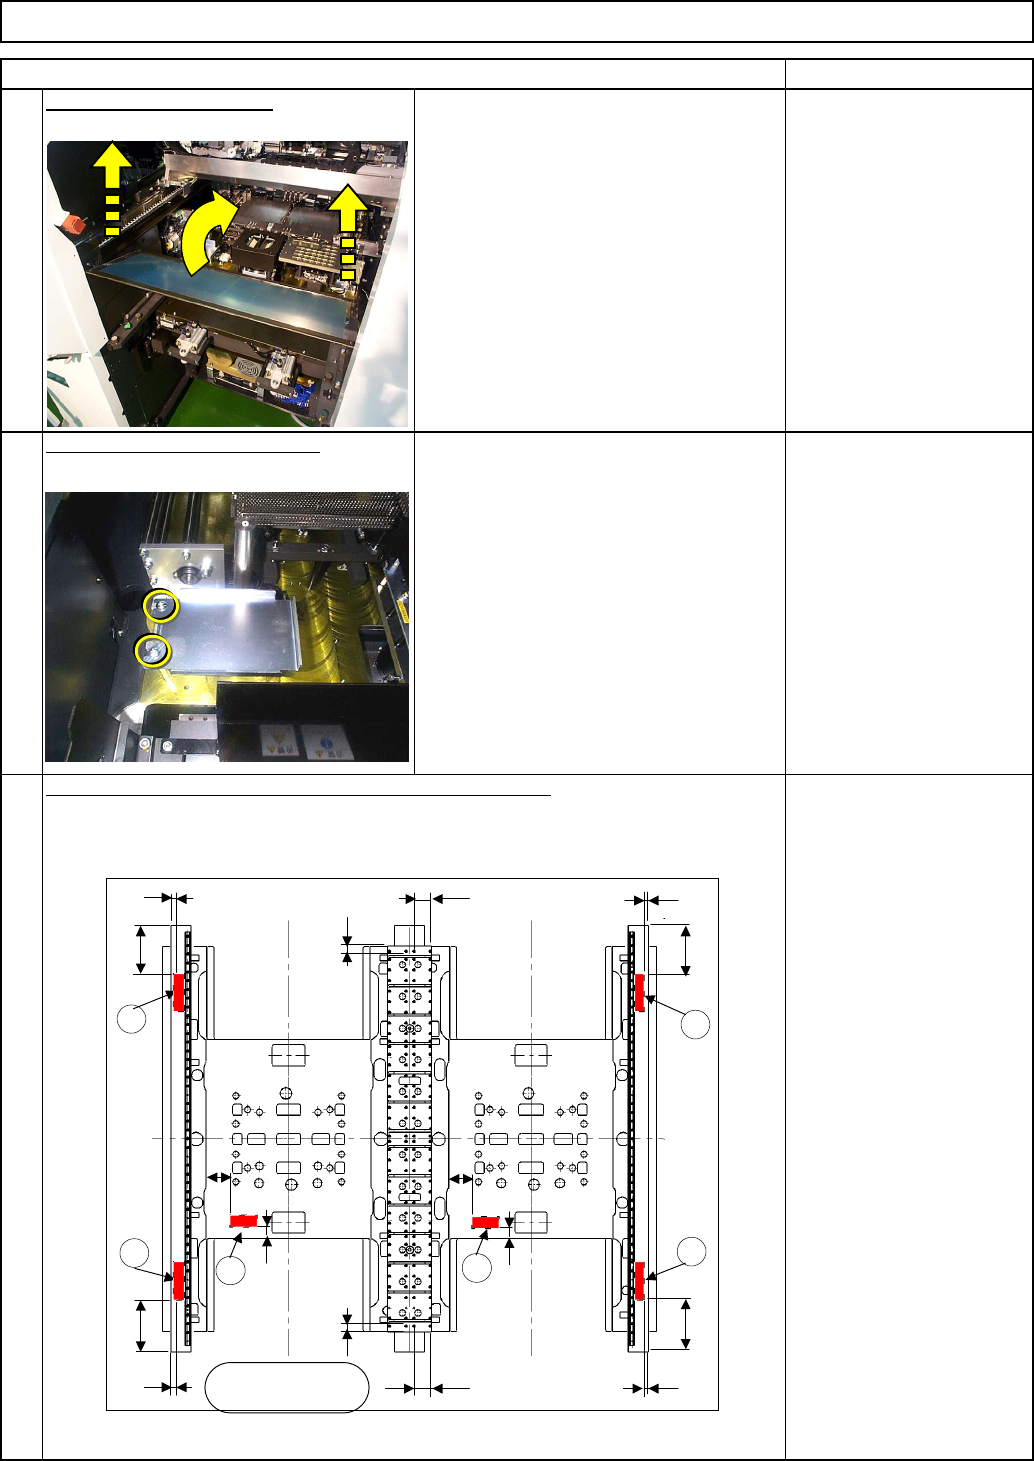
Remove the feeder cover.
Remove the NG discharge box.
Phillips screwdriver #2
Screw M4 2 pcs.
1
Phillips screwdriver #2
Screw M4 2 pcs.
Tool/Spec./Installation
Place the levels as shown below and check the levelness.
Item
3
60
9
245
1
Operator's side
60
43
9
245
9
245
77
9
245
36
36
77
2
3
4
5
60
43
6
EJM8A-E-SMA020102-A01-00
Page 2-1-2-2
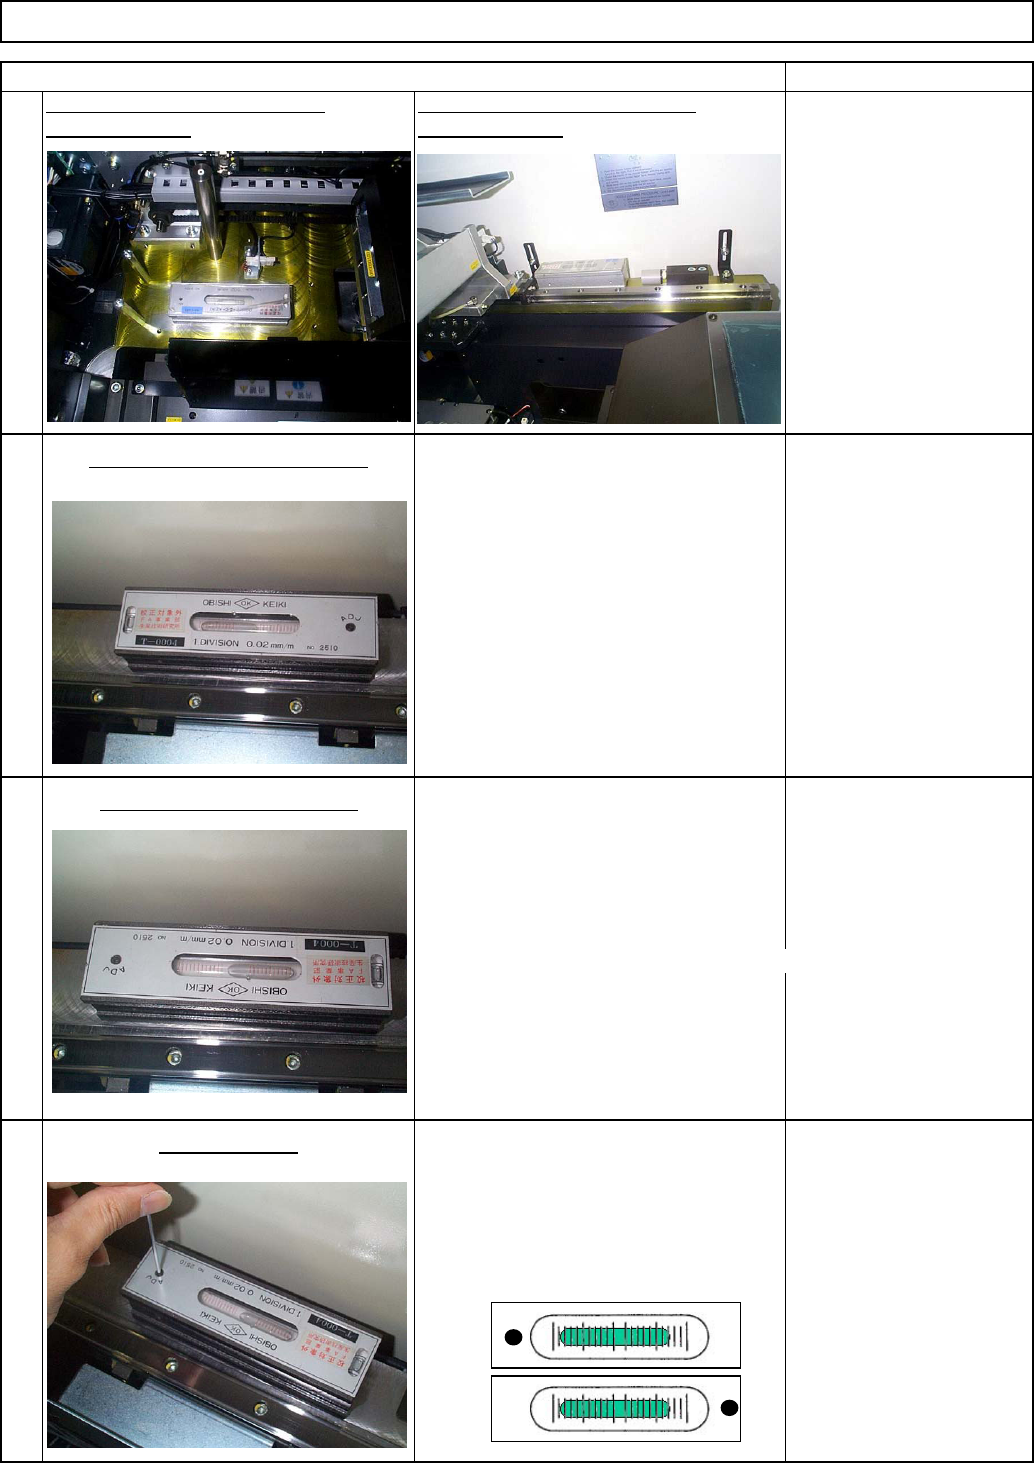
Clean the mounting side and the bottom
of the level. Position the level.
Check the reading of the level.
Rotate the level 180 degrees while
leaving it in the current position.
The example at left: NG
Check the reading again.
The readings are different
between Steps 4-2 and 4-3.
[Judgment G/NG]
The readings are the same in Steps 1 and 2: Good
The readings are different: NG
Specifications: The reading should be
the same after the level is rotated 180
degrees. (0 division)
Level the level with the adjustment
screw.
Rotate the level 180 degrees.
Adjust the level.
When the reading does not
change after the level is
rotated 180 degrees: Good
Setting Machine Setting
4-3
Tool/Spec./Installation
Tool/Spec./Installation
Item
Check the condition of the level.
4-2
Tool/Spec./Installation
Remarks
4-4
4-1
Place the level in the X direction
Place the level in the Y direction
as shown below: as shown below:
EJM8A-E-SMA020102-A01-00
Page 2-1-2-3

Reference of Levelness Jud
g
ment
When the reading remains
same after the level is
rotated, the level has been
leveled.
Proceed to levelness of the
machine.
4-5
4-6
Machine Setting
Item Remarks
Check after the level is leveled.
Setting
60
9
245
1
Operator's
side
60
43
9
245
9
245
77
9
245
36
36
77
2
3
4
5
60
43
6
EJM8A-E-SMA020102-A01-00
Page 2-1-2-4