CM602all_EJM8AESM_Service Manual.pdf - 第404页
Machinery Part Replacement Remarks Switch off the power and the air supply. Remove all nozzles from the head. Place bubble wrap over the line sensor camera. To prevent damage in case the head assembly falls onto the came…
Machinery Part Replacement
This section describes the procedures for replacing the transfer head assembly.
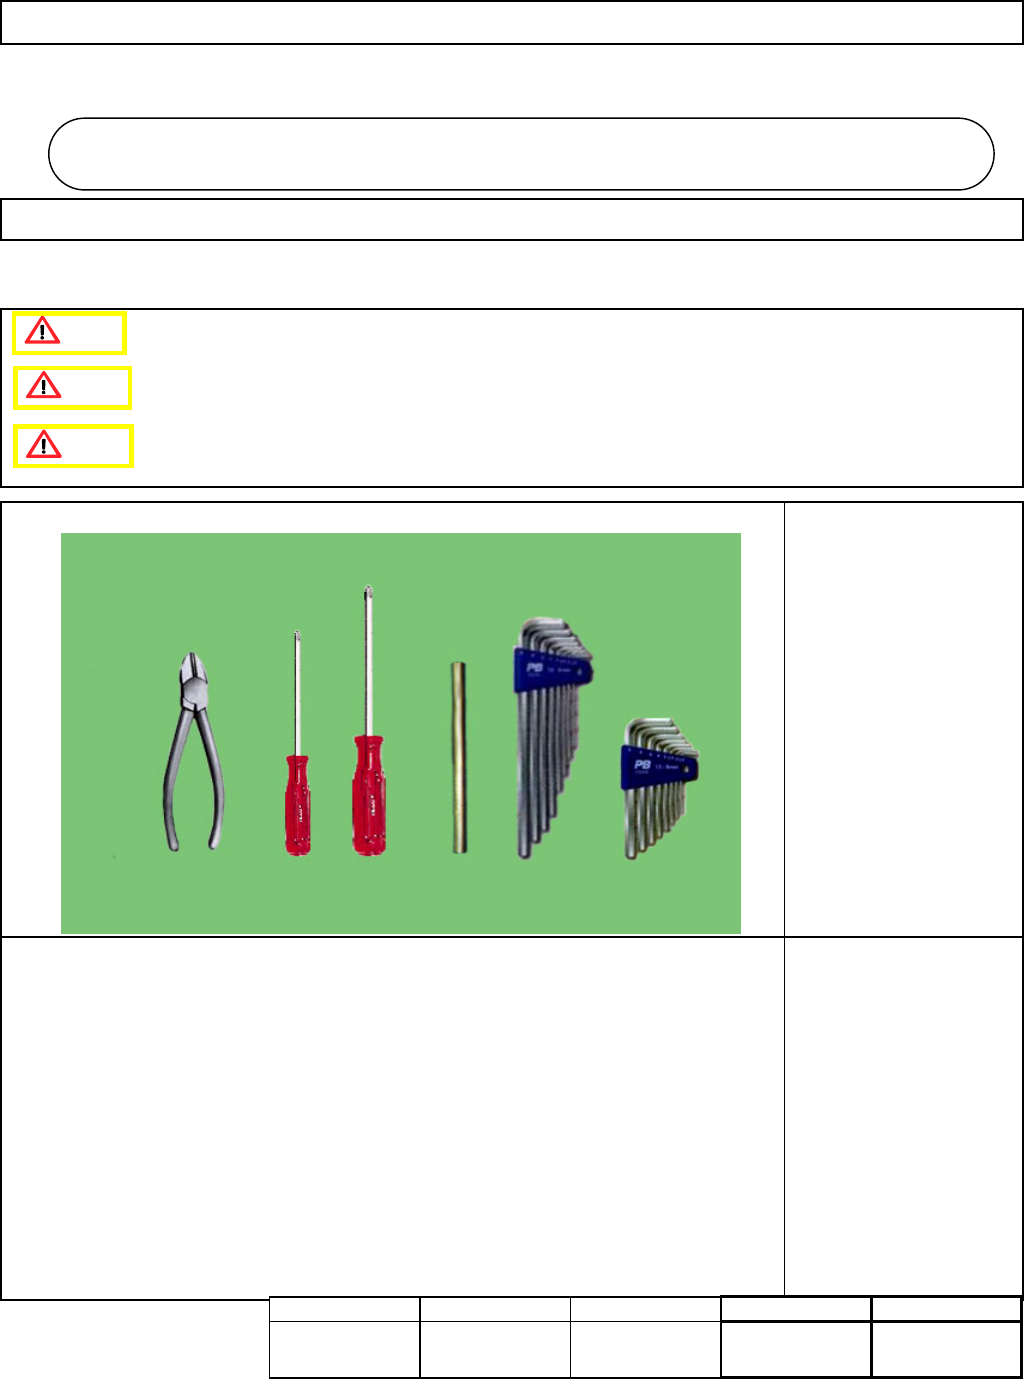
・Tools
Phillips screwdriver #1
Phillips screwdriver #2
Allen key 5 mm
Pipe
Nipper
・Jig
Refer to teaching sections
of this manual.
Be sure to remove the nozzles and the nozzle holders beforehand.
[Check before replacement!!]
All head driver software versions should be the same.
If alll the versions are not the same, trouble may occur.
L
ight Transfer-Head Assembly (8-nozzle type
)
5-3-1 Transfer Head Assembly Replacement
Caution
Dange
r
Warning
Assembly/Adjustment
30 min.
Teaching
77 min.
Removal/Disassembly
10 min.
Total Time
117 min.
Part Weight
k
g
s.
10
Li
g
ht Transfer-Head Assembl
y
(
8-nozzle t
yp
e
)
5-3
EJM8A-E-SMA050301-A01-00
Page5-3-1-1
Machinery Part Replacement
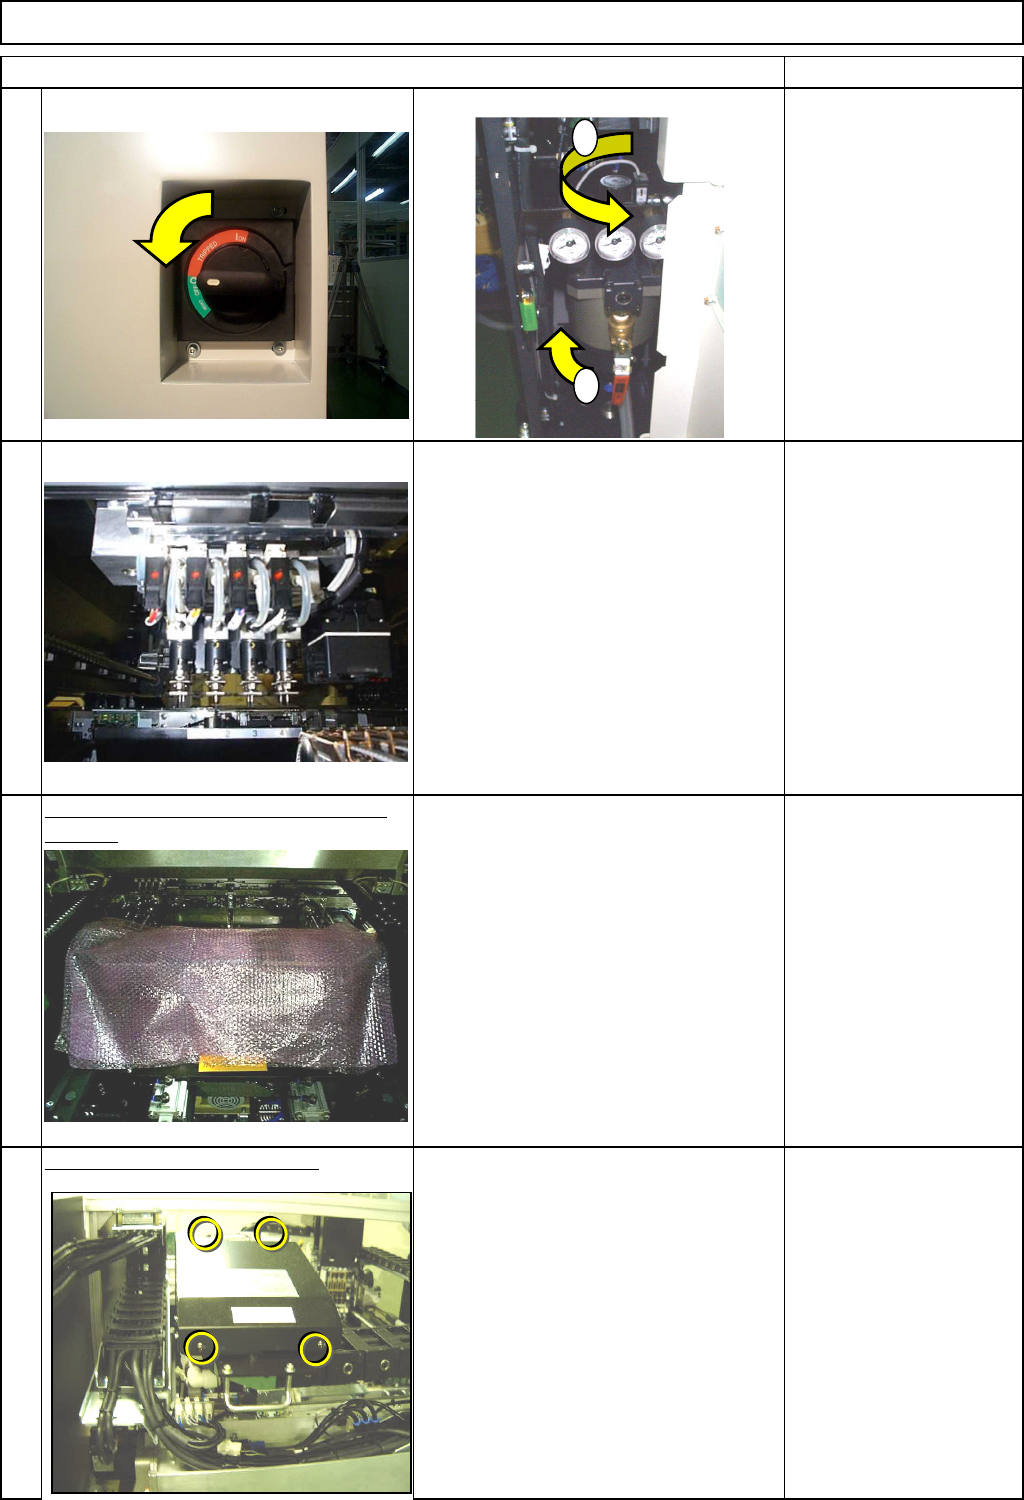
Remarks
Switch off the power and the air supply.
Remove all nozzles from the head.
Place bubble wrap over the line sensor
camera.
To prevent damage in case the head
assembly falls onto the camera.
Bubble wrap
Remove the upper head cover.
Phillips screwdriver #2
Round cross-head screw
M4 x 4
3
Item
4
1
2
Transfer Head Assembly (8-nozzle type)
1
2
EJM8A-E-SMA050301-A01-00
Page5-3-1-2
Machinery Part Replacement
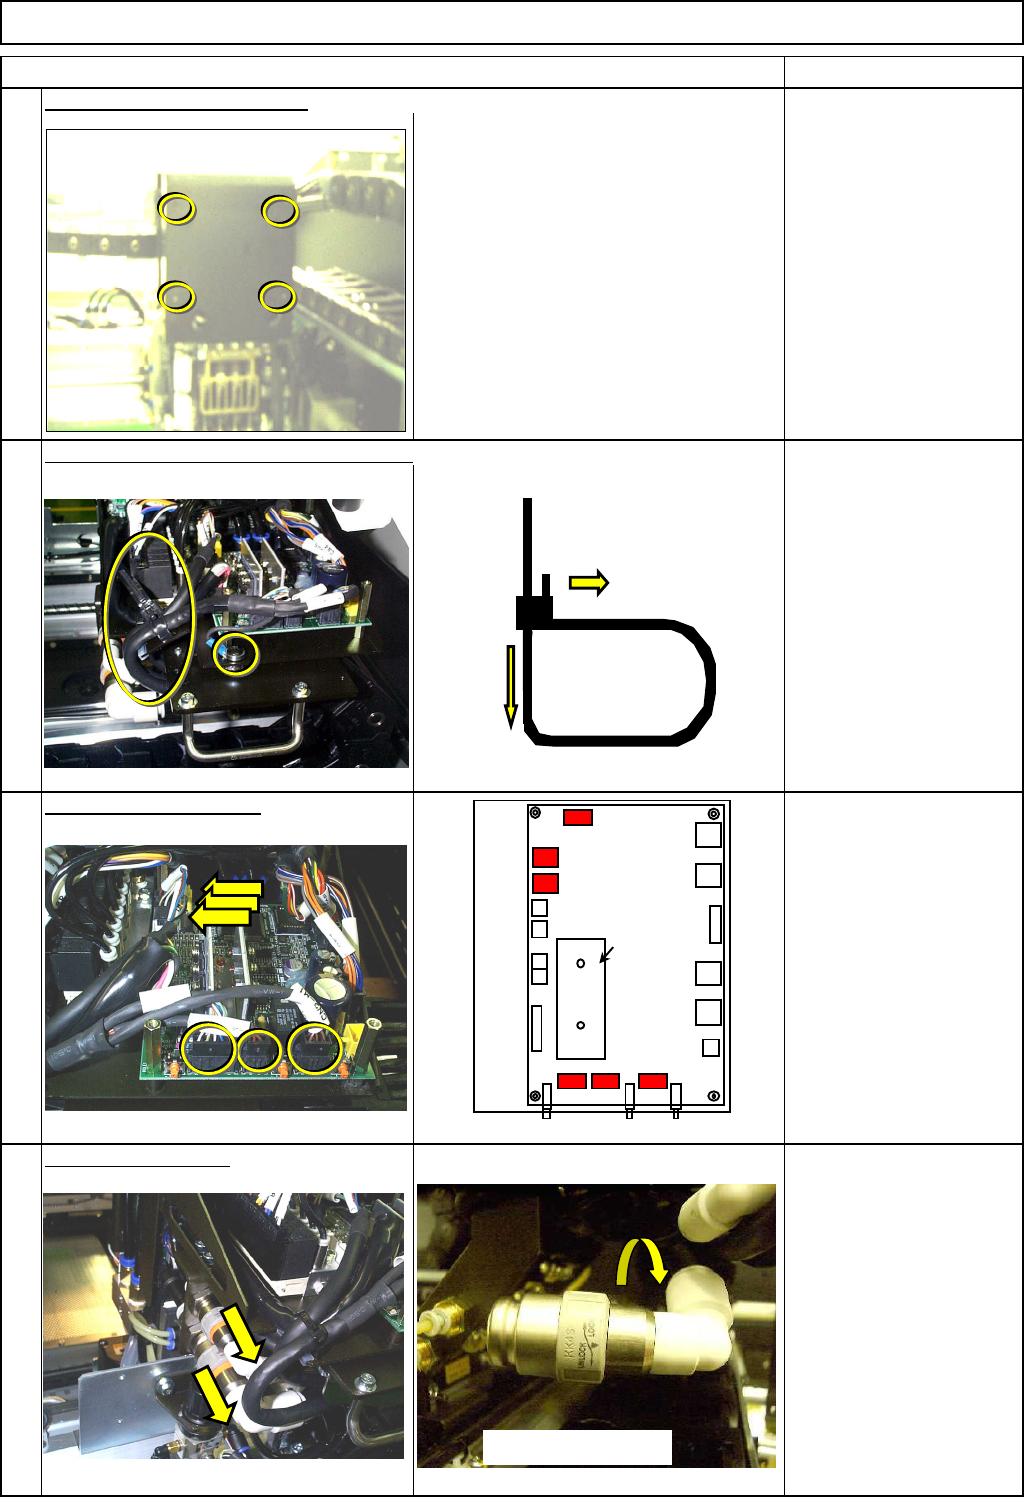
Remarks
Item
Transfer Head Assembly (8-nozzle type)
Phillips screwdriver #1
Round cross-head screw
M3 x 4
Remove the cable tie and the earth cable.
Phillips screwdriver #2
Round cross-head screw
M4 1pc.
Remove the connectors.
Remove the air tube. Remove the air tube.
Remove the front head cover.
6
5
8
7
Put down the pin.
Pull it out.
CN13
MC15CX
Heat sink
CN3
SW1
CN1
CN12
CN16
CN11
SW2
CN2
SW3
CN10
CN4
CN5
CN7
CN6
CN9
CN8
CN15
CN14
Turn and remove.
EJM8A-E-SMA050301-A01-00
Page5-3-1-3