CM602all_EJM8AESM_Service Manual.pdf - 第83页
56 Each time the button shown below is pressed, Set ③ "Output screen to FD" to OFF ④ "ON" and "OFF" are displayed alternately. 55 Set ③ "System parameters - Output pu t screen to FD&quo…
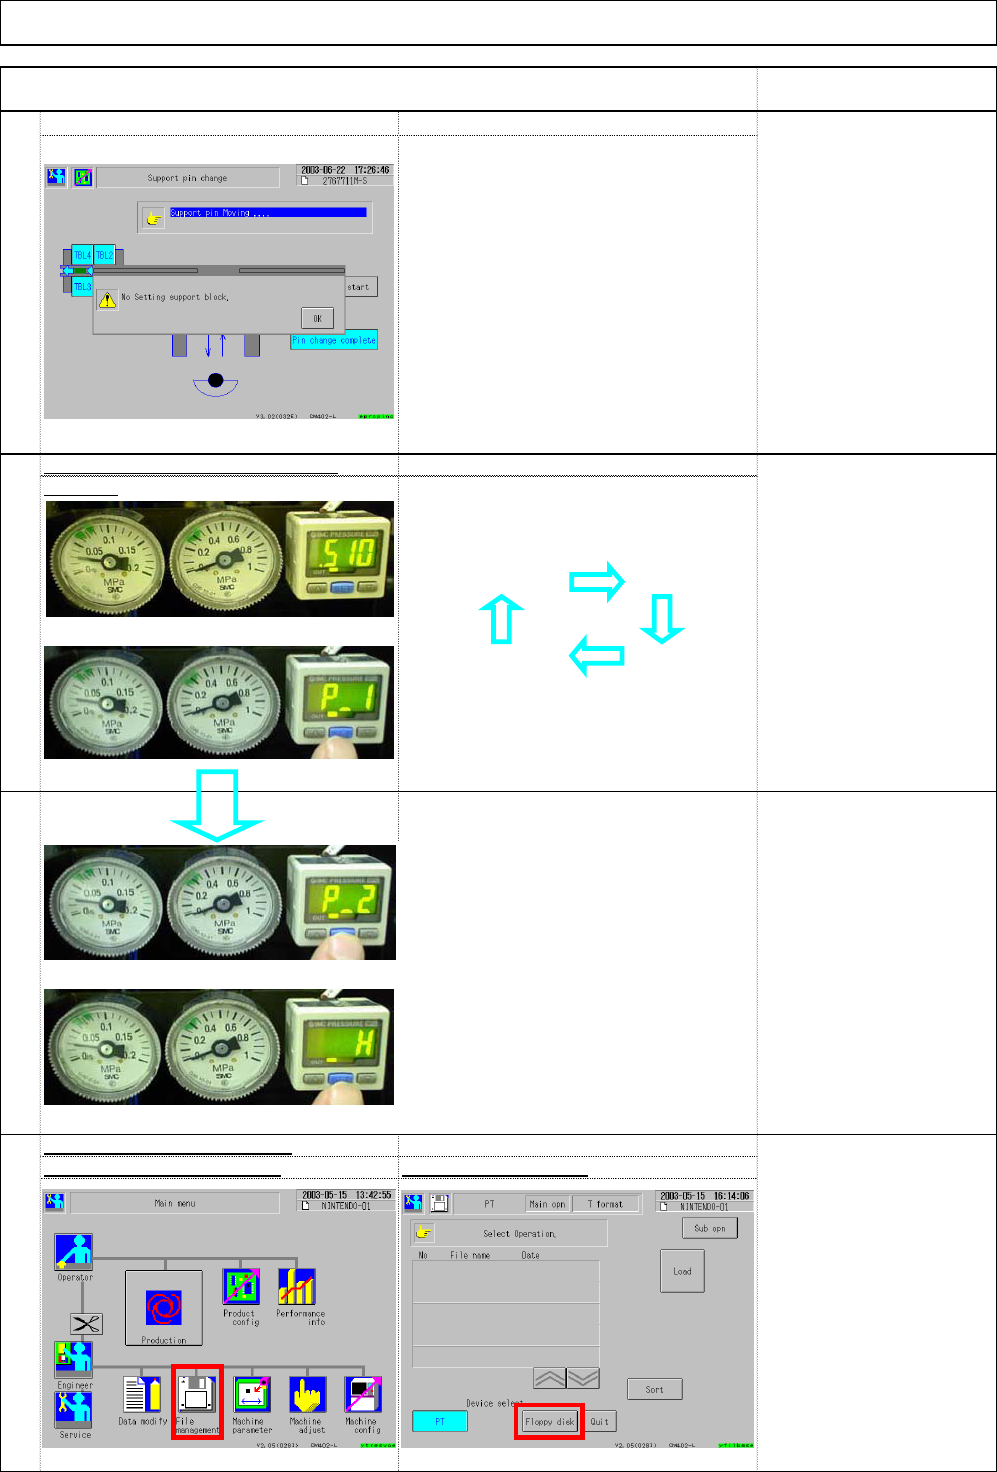
. Check that the warning appears as
shown at right when the plate is
pulled and the hook is lowered.
. Each time "SET" is pressed,
[Setup before shipping]
the reading is changed as follows:
P_1 ; 0.450MPa
P_2 ; 0.600MPa
_ H ; 0.050MPa
. Enter the lowest pressure into P1.
[Specifications]
* When air pressure is affected easily
by factory's conditions, adjust P-1
Air pressure: 0.49MPa
and P-2 according to those
conditions.
Size of Inlet: 3/8
Error example:
Amount of air supplied:
The other machines were stopped at the
150L/min
factory finishing time so the main air
Others
pressure rose and exceeded the
8L/min is necessary
maximum limit.
for each bulk feeder
Installation Machine Installation
Item Remark
49
Setup guide
0.4 Mpa.
. It was set before shipping; check only.
50
Check that the air pressure is set t
o
51
Select (2) Floppy diskSelect (1) File management
.
Select [Floppy disk] from
the window at left.
52
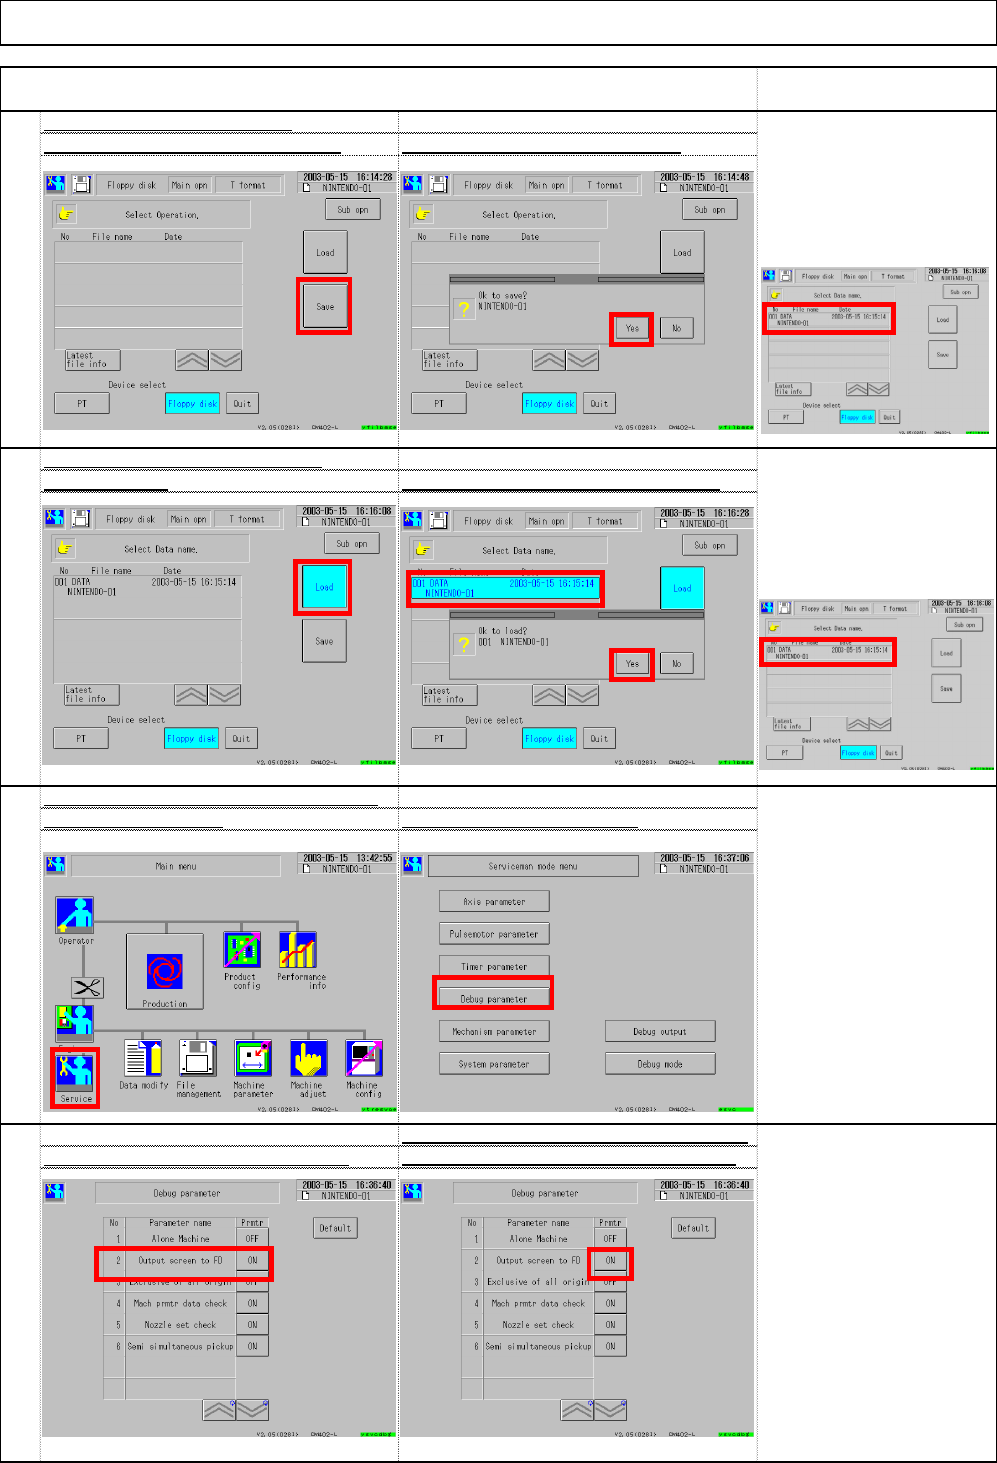
Check saving to a floppy disk
(1)
(2)
(3)
(4)
『P_2』
『_ H』
(1)
(2)
[Current reading] [P_1]
EJM8A-E-SMA020103-A01-00 Page 2-1-3-14
56
Each time the button shown below is pressed,
Set ③"Output screen to FD" to OFF
④"ON" and "OFF" are displayed alternately.
55
Set ③ "System parameters - Output pu
t
screen to FD" to OF
F
Select ② Debug parameter
.
54
Check loading from a floppy disk
Select ①Load. Select ② data name and then ③ Yes.
[Judgment]
The machine should be
operated normally. File
name is displayed
Insert a floppy disk. Select ③ Save. Select ④ Yes. ⇒ Saving starts
.
[Judgment]
There should be no problems
with loading. The window
below shows conditions.
Check saving to a floppy disk
Installation Machine Installation
Item Remark
53
(3)
(4)
(1)
(2)
(3)
(1)
(2)
(3)
(4)
File name should
be displayed.
EJM8A-E-SMA020103-A01-00 Page 2-1-3-15
[Outline]
CN01 CN00 CN01 CN00
CN00: connects the previous machine
CN01: connects the next machine.
60
Connect the connection cables (signal) CN00 and CN0
1
For signal connection, see separate spec.
* Various signals are used; the standard is shown below:
59
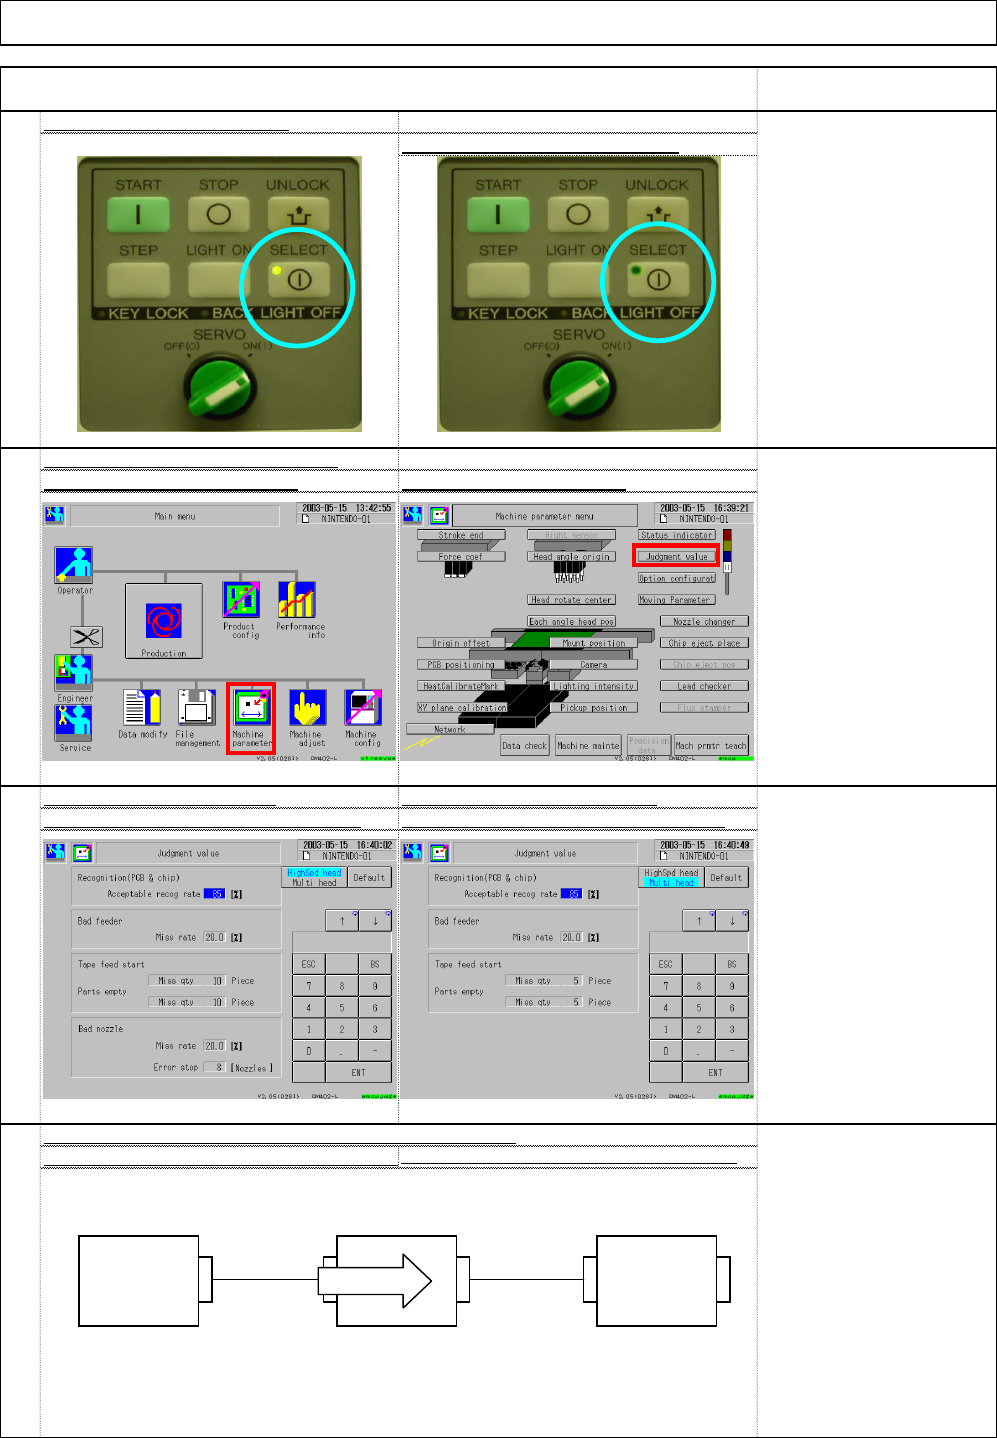
"High-speed" Setup windo
w
"Multi-purpose" Setup windo
w
Set (3) Acceptable recog rate to 85%
.
Set (4) Acceptable recog rate to 85%
.
58
Set the recognition judgment valu
e
Select (1) Machine parameter Select (2) Judgment value
57
Display of the panel selected
Display of the panel non-selecte
d
[Judgment]
The "SELECT"-side lamp
should be ON.
Installation Machine Installation
Item Remark
(1)
(2)
Machine 1 Machine 2 Machine 3
Board flow
EJM8A-E-SMA020103-A01-00 Page 2-1-3-16