CM602all_EJM8AESM_Service Manual.pdf - 第145页
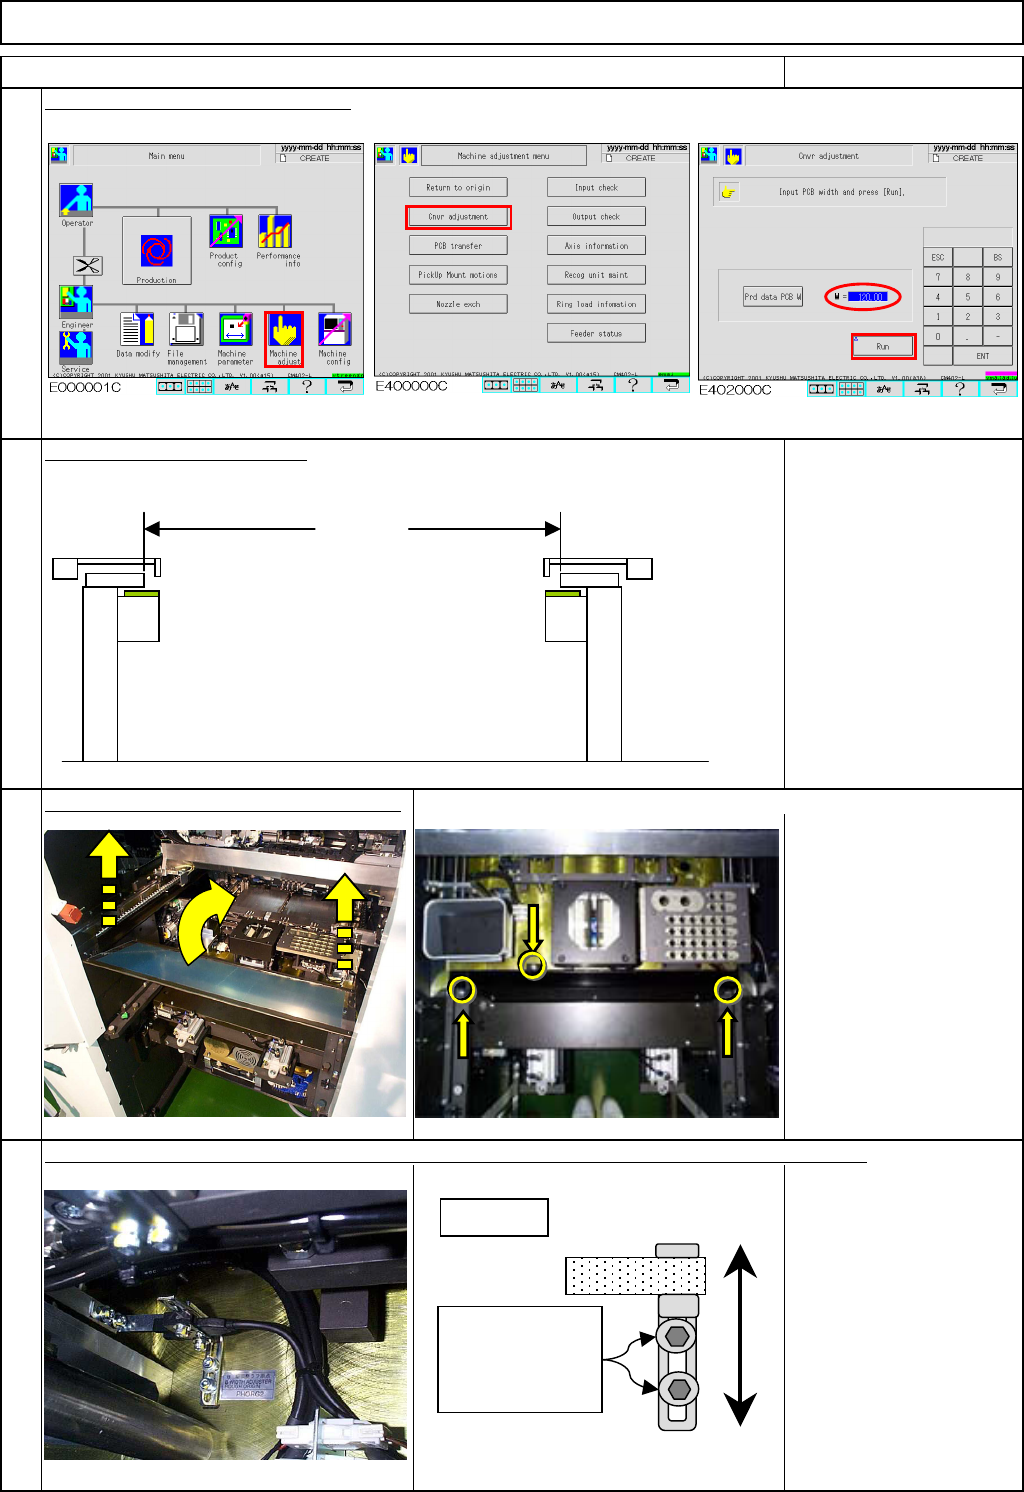
Maintenance Adjustment Main Body Beam Remarks Set the conveyor width to 460 mm. Enter 460 into the [W] box and press [Run] so that the conveyor width becomes 460.5 mm automatically. Check the width with calipers. Specifi…

Maintenance Adjustment Main Body Beam
・Tools
Phillips screwdriver #2
Allen key 2.5 mm
Allen key 3 mm
Caliper 500 mm
Ruler 500 mm
・Jig
None
This section describes the procedures for adjusting the original width of the board transfer conveyor.
Remove the support pins beforehand.
4-1-3 Adjusting the Original Width of the Board Transfer Conveyor
Assembly
Adjustment
10min.
Teaching
min.
Total Time Weight of
Part
Removal
Disassembly
10min.
20min.
kgs
Caution
Dange
r
Warning
EJM8A-E-SMA040103-A01-00
Page 4-1-3-1
Maintenance Adjustment Main Body Beam
Remarks
Set the conveyor width to 460 mm.
Enter 460 into the [W] box and press [Run]
so that the conveyor width becomes 460.5 mm automatically.
Check the width with calipers.
Specifications:
460.5 mm+0 mm to
0.2mm
(460.5 mm to 460.7 mm)
Remove the feeder cover and the chute.
Phillips screwdriver #2
Allen key 3 mm
Screw M4 2 pcs.
Screw M4-10 3 pcs.
Thick washer 3 pcs.
If the width is out of the specification, change the position of the width-adjusting origin sensor.
Allen key 2.5 mm
Screw M3 2 pcs.
Item
Remove the three screws below. Pull up the chute and remove it.
3
4
1
2
Sensor
Dog
Loosen the two
screws and
adjust the sensor
position.
460.5 mm
EJM8A-E-SMA040103-A01-00
Page 4-1-3-2
Maintenance Adjustment Main Body Beam
Remarks
Item
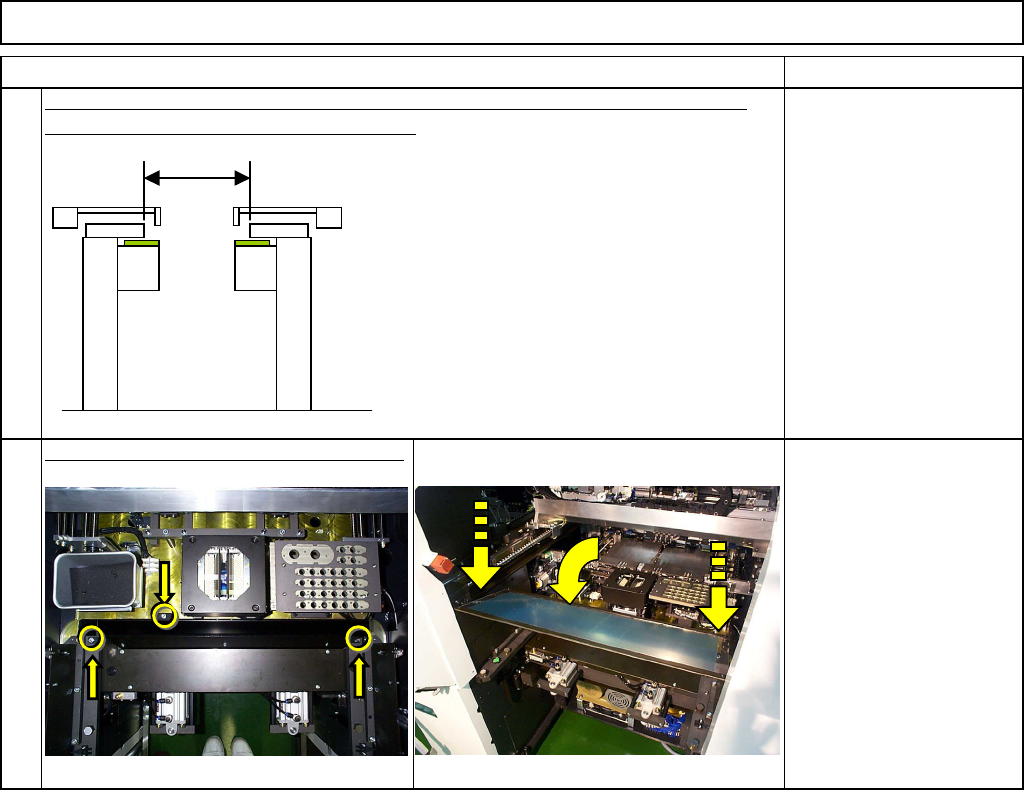
Once the sensor position is adjusted, enter 50 into the [W] box and press [Run].
Measure the width. It should be 50. 5 mm.
50.5 mm+0 mm to 0.2mm
(50.5 mm to 50.7 mm)
Put back the feeder cover and the chute.
Ti
g
hten the two screws at both ends o
f
the cover. Close the cover.
Phillips screwdriver #2
Allen key 3 mm
Screw M4 2 pcs.
Screw M4-10 3 pcs.
Thick washer 3 pcs.
5
6
50.5 mm
EJM8A-E-SMA040103-A01-00
Page 4-1-3-3