CM602all_EJM8AESM_Service Manual.pdf - 第315页
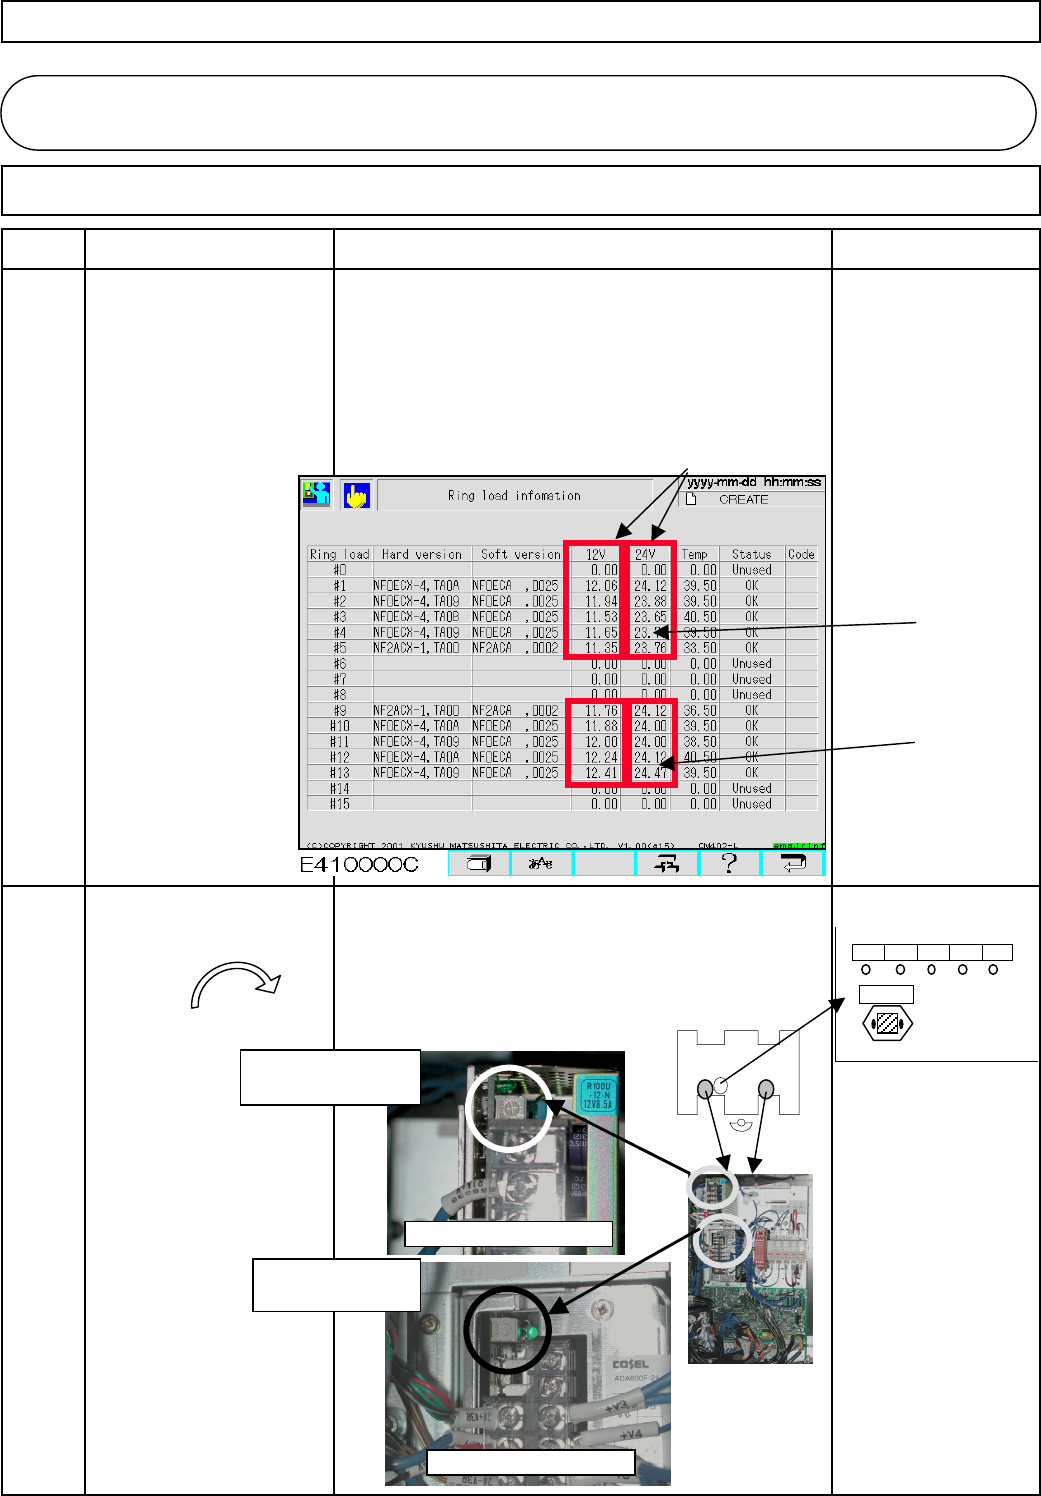
1. Check the rin g load O p en the Rin g Load Information screen. Check the Note: volta g e. volta g e for 12V and 24V of each rin g load board. To check volta g e after If the volta g e is excessivel y low , ad j ust it…
(over the NG box).
The head of the selected stage returns
to the origin.
Press the "Return" key.
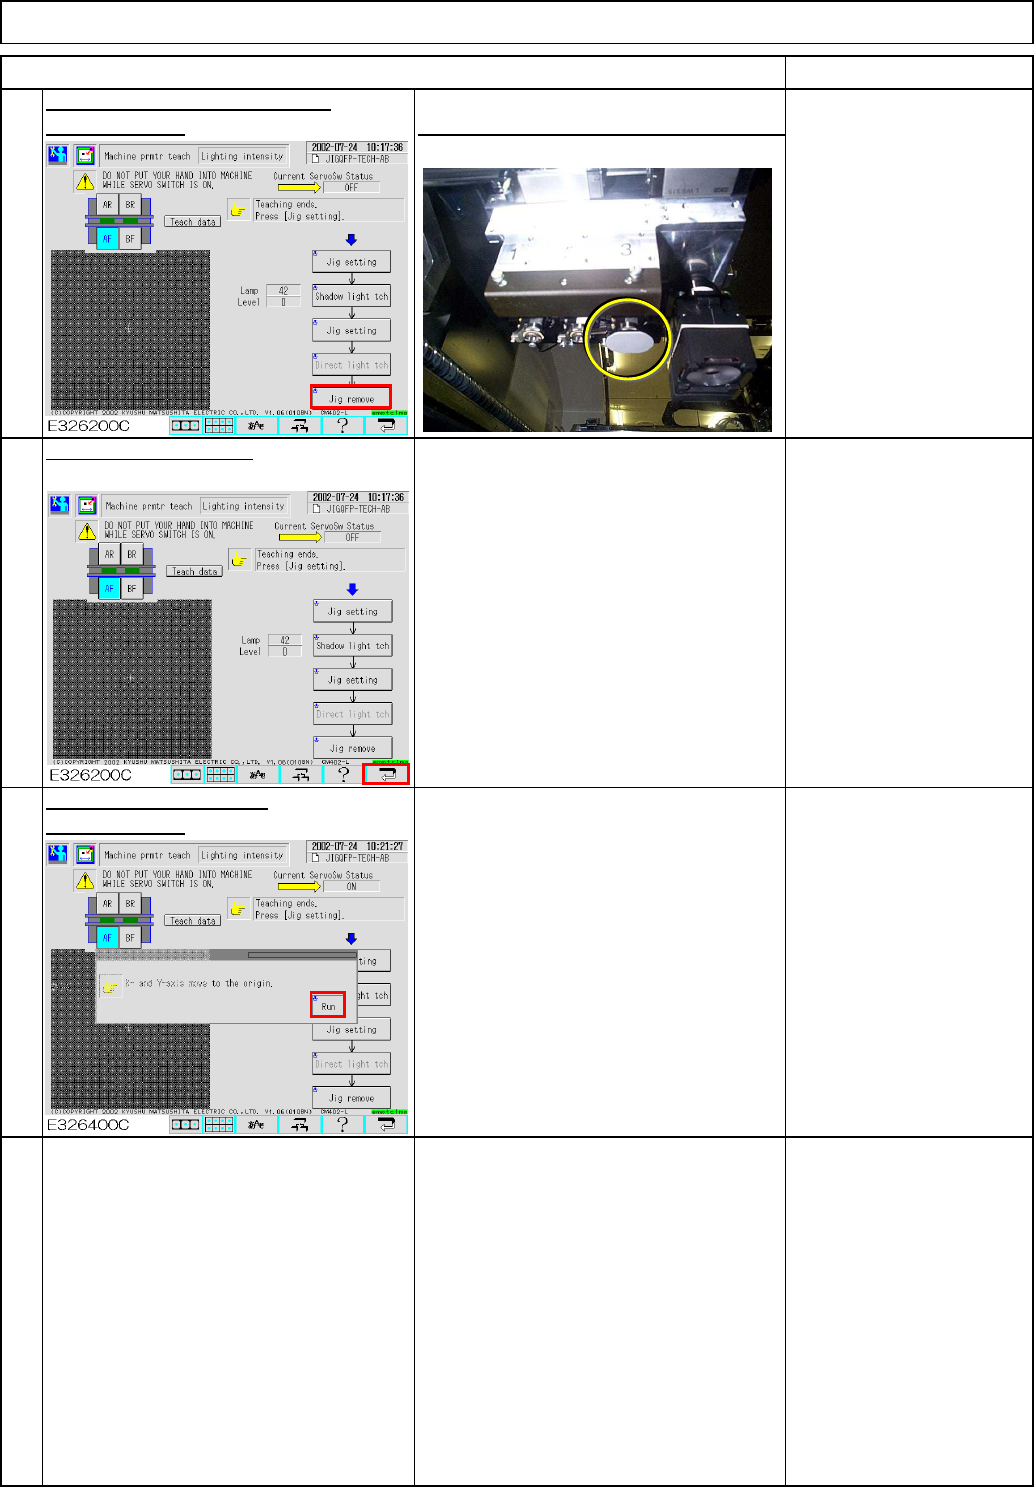
Press [Unlock] and [Run]
simultaneously.
Light Transfer-Head Assembly (3 nozzles)
Item Remarks
simultaneously.
The head moves to the jig setting positio
n
Press [Unlock] and [Jig remove]
7
6
5
Maintenance Adjustment
Remove the jig from
Nozzle Position 3.
EJM8A-E-SMA040312-A01-00
Page 4-3-12-3
1. Check the rin
g
load O
p
en the Rin
g
Load Information screen. Check the Note:
volta
g
e. volta
g
e for 12V and 24V of each rin
g
load board. To check volta
g
e after
If the volta
g
e is excessivel
y
low
,
ad
j
ust it
,
followin
g
th
e
ad
j
ustin
g
volta
g
e
,
p
rocedures in Ste
p
2. close and o
p
en the
(
1
)
12V
p
ower volta
g
e should be 11.3V or hi
g
her. Rin
g
Load Information
(Upper limit at Power terminal:13.0V (Overcurrent protection:13.8 V))
screen.
(
2
)
24V
p
ower volta
g
e should be 23.3V or hi
g
her.
(
Onl
y
the values when
(Upper limit at Power terminal:26.0V (Overcurrent protection:31.0 V))
the screen is o
p
ened
Check these values. are dis
p
la
y
ed.
)
Sta
g
e
A
Sta
g
e B
2.
A
d
j
ust the
p
ower volta
g
e.
A
d
j
ust the volta
g
e controls of the 12V
p
ower and 24V
p
ower,
on the
p
ower unit
(
#1 & 2
)
and se the volta
g
e, monitorin
g
the volta
g
e with the volta
g
e check terminals at the lower
left of the CPU box.
Note 1: Be sure to connect all feeder change cart connectors beforehand.
To increase the volta
g
e, turn the volta
g
e control clockwise.
P12-B: 12V power voltage monitor Stage B
P24-A: 24V power voltage monitor Stage A
P24-B: 24V power voltage monitor Stage B
Item Description
P12-A: 12V power voltage monitor Stage A
Maintenance Adjustment The Control Section
4-4-1 Ring Load Voltage Adjustment Procedures
Step Remarks
The Control Section
4-4
Power unit
12V Power
Voltage control
24V Power
Voltage control
Ring load 12V power
To increase
voltage
Ring load 24V power
A
C100V
P12-
GN
P12-B P24- P24-B
EJM8A-E-SMA040401-A01-00
Page 4-4-1-1

5 Machinery Part
Replacement
This chapter describes the procedures for replacing
machine parts.
EJM8A-E-SMAA-0000
Confidential