CM602all_EJM8AESM_Service Manual.pdf - 第677页
Machinery Part Replacement Remarks Press [Chip recog camera θ axis OriginOffset]. Select the stage to teach. Press [Jig setting]. • Remove the numbers 1 to 12 nozzles and nozzle holders. • Put the 5-hole 12-nozzle jig (w…

Machinery Part Replacement
Tools
None
Jig
5-hole 12-nozzle-camera-
teaching Jig
12-Nozzle Head Teaching
5-11-4 Chip Recognition Camera --- θ−Axis Origin Offset
Remove the nozzle holders.
Remove the NG box.
This section describes the procedures for setting the offset for the origin of the chip recognition camera theta axis.
Caution
Dange
r
Warning
EJM8A-E-SMA051104-A01-00
Page 5-11-4-1
Machinery Part Replacement
Remarks
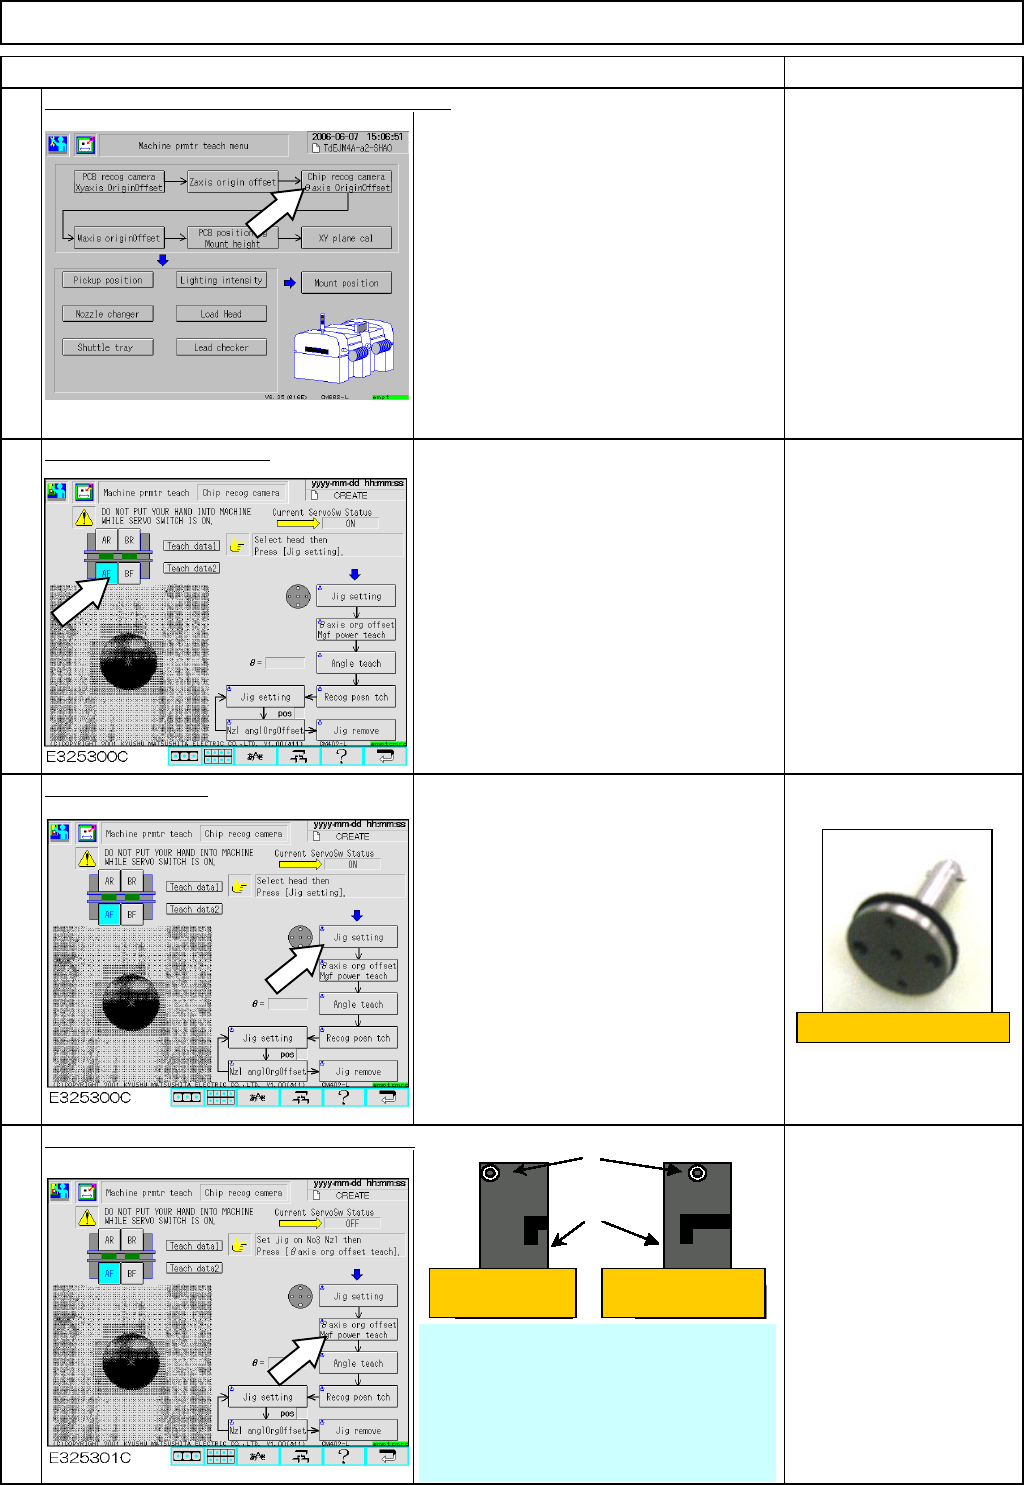
Press [Chip recog camera θaxis OriginOffset].
Select the stage to teach.
Press [Jig setting].
• Remove the numbers 1 to 12 nozzles
and nozzle holders.
• Put the 5-hole 12-nozzle jig (with
spring) on the number 5 holder.
Press [
θaxis or
g
offset M
g
f power teach].
When asked to turn 180°,
it is not necessary to
rotate the nozzle as long
as the setscrew is
positioned in the center as
shown at left. ⇒ 0° origin
Item
1
2
3
4
12-Nozzle Head Teaching
5-hole 12-nozzle jig
Setscrews
Holders
Select 'Yes.' Select 'No.'
• When pressing [θ axis org offset teach],
recognition operation is repeated until the θ
value satisfies the +/- 0.02-mm range.
* (If the value does not satisfy the +/- 0.02-
mm range even after ten round trips, a
recognition error occurs. Re-teach θ-axis
offset.)
EJM8A-E-SMA051104-A01-00
Page 5-11-4-2
Machinery Part Replacement
Remarks
Item
12-Nozzle Head Teaching
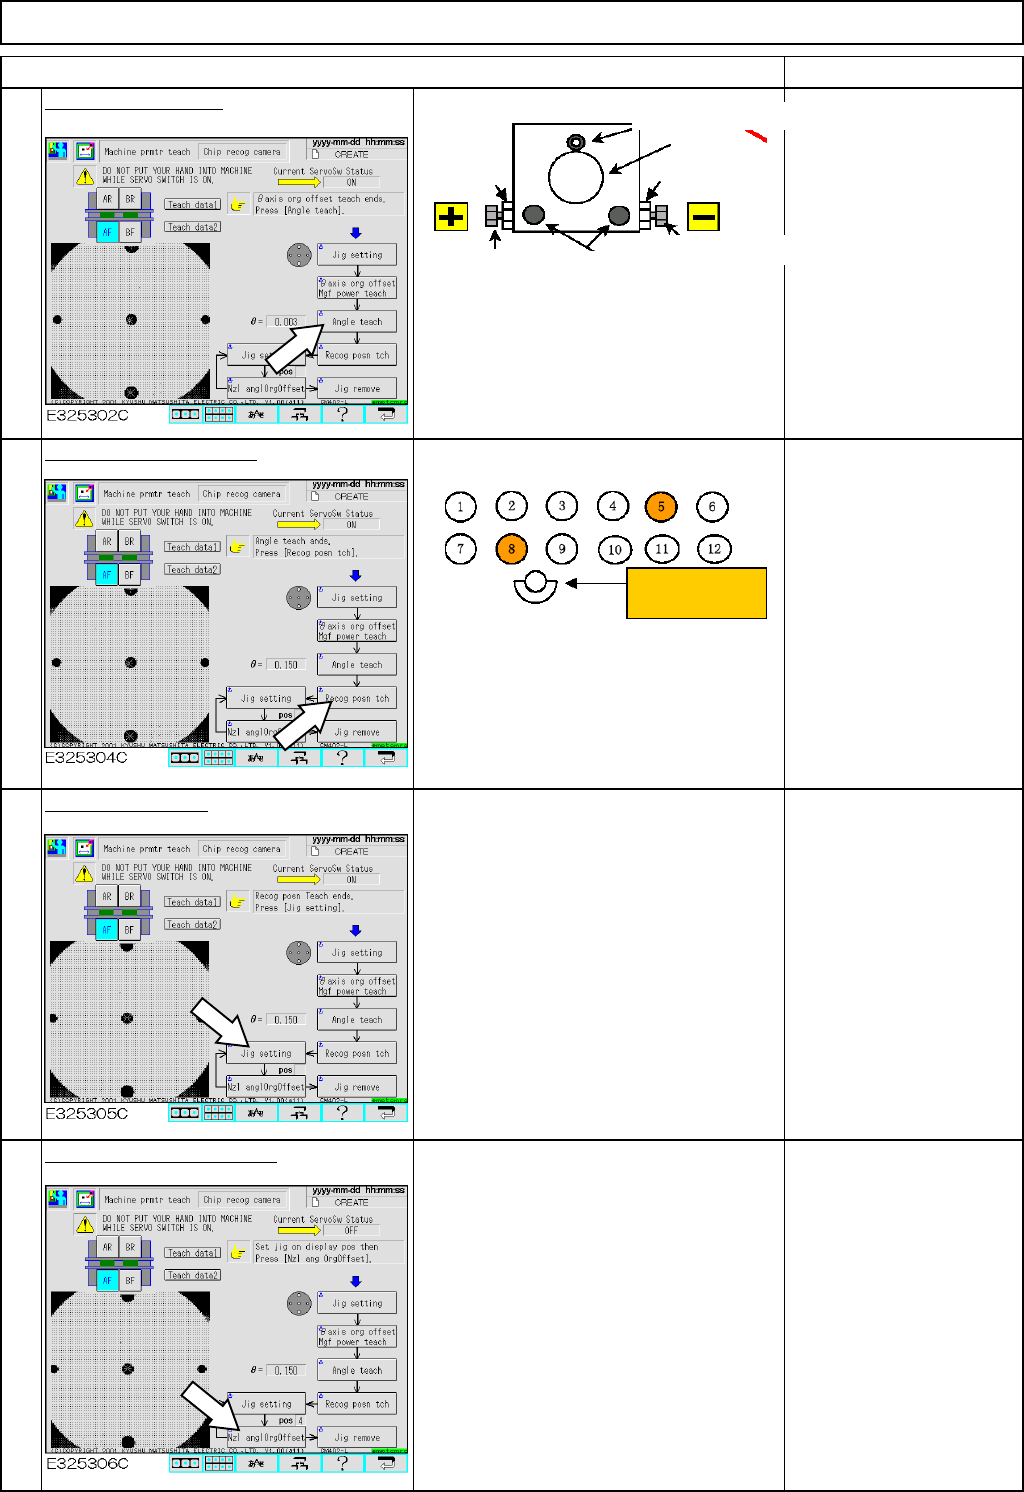
Press [Angle teach].
• To adjust the angle of the
chip camera with [Angle
teach]:
When the θ value on the
screen is positive, use the
negative angle adjusting
bolt.
When the value is negative,
use the positive one.
• Once the angle has been
adjusted, tighten the M4 and
M5 bolts, press [Angle
teach] and check the θ value
satisfies the specifications.
Press [Recog posn tch].
Press [Jig setting].
• The POS box below [Jig setting]
indicates 5. Put the 5-hole jig on the
number 5 holder.
* Each time [Jig setting] is pressed, the
POS indication changes from 6, 5 to 4.
Press [Nzl anglOrgOffset].
• To teach the nozzle, press [Nzl angl
Org Offset].
* Once the nozzle angle origin offset is
finished, press [Jig setting] above POS
again and repeat the procedures until
POS 4 teaching is finished.
• When No.5 recognition
teaching is finished, the
window tells you to set the
jig on the No. 8 nozzle
position. Put the 5-hole 12-
nozzle jig on the No. 8
position. Press the
confirmation key on the
window. Carry out No.8
recognition position
teaching.
* When moving the jig from
No. 5 to No. 8, make the jig
face in the same direction.
5
6
7
8
* Specifications: ⇒
θ
= within +/-0.05
Tightening bolt M4
Lens
Nut
Tightening bolt M5
Angle adjusting bolt
Angle adjusting
Nut
Nozzle positions
Operator's side
EJM8A-E-SMA051104-A01-00
Page 5-11-4-3