CM602all_EJM8AESM_Service Manual.pdf - 第334页
Machinery Part Replacement Main Body Remarks Switch off the main power. Turn the switch to the left. Remove the lower chute. Allen key 4 mm Screw M5x 12mm 4 pcs. Thick washer 4 pcs. Phillips screwdriver #2 Round cross-cu…
Machinery Part Replacement Main Body
This section describes the procedures for replacing the vacuum pump.
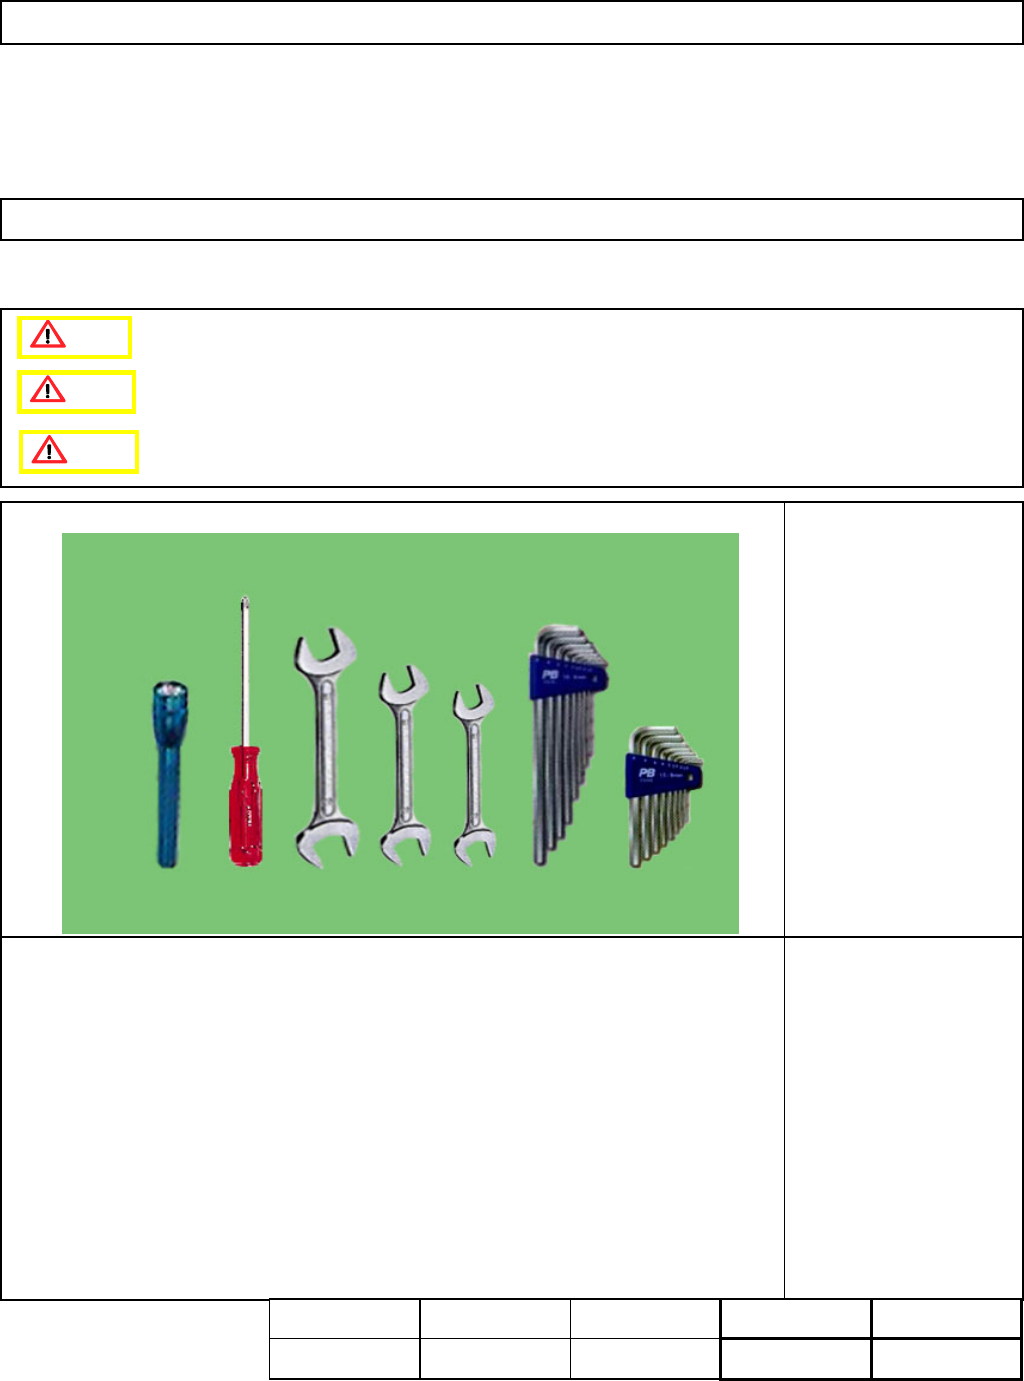
Tools
Phillips screwdriver #2
Allen key 6 mm
Torch
Wrench 22 mm
Wrench 19 mm
Wrench 14 mm
Jig
None
5-1-4 Vacuum Pump Replacement
Assembly
Adjustment
15min.
Teaching
min.
Total Time Weight of
Part
Removal
Disassembly
15min.
30min. 25kgs
Caution
Dange
r
Warning
EJM8A-E-SMA050104-A01-00
Page 5-1-4-1
Machinery Part Replacement Main Body
Remarks
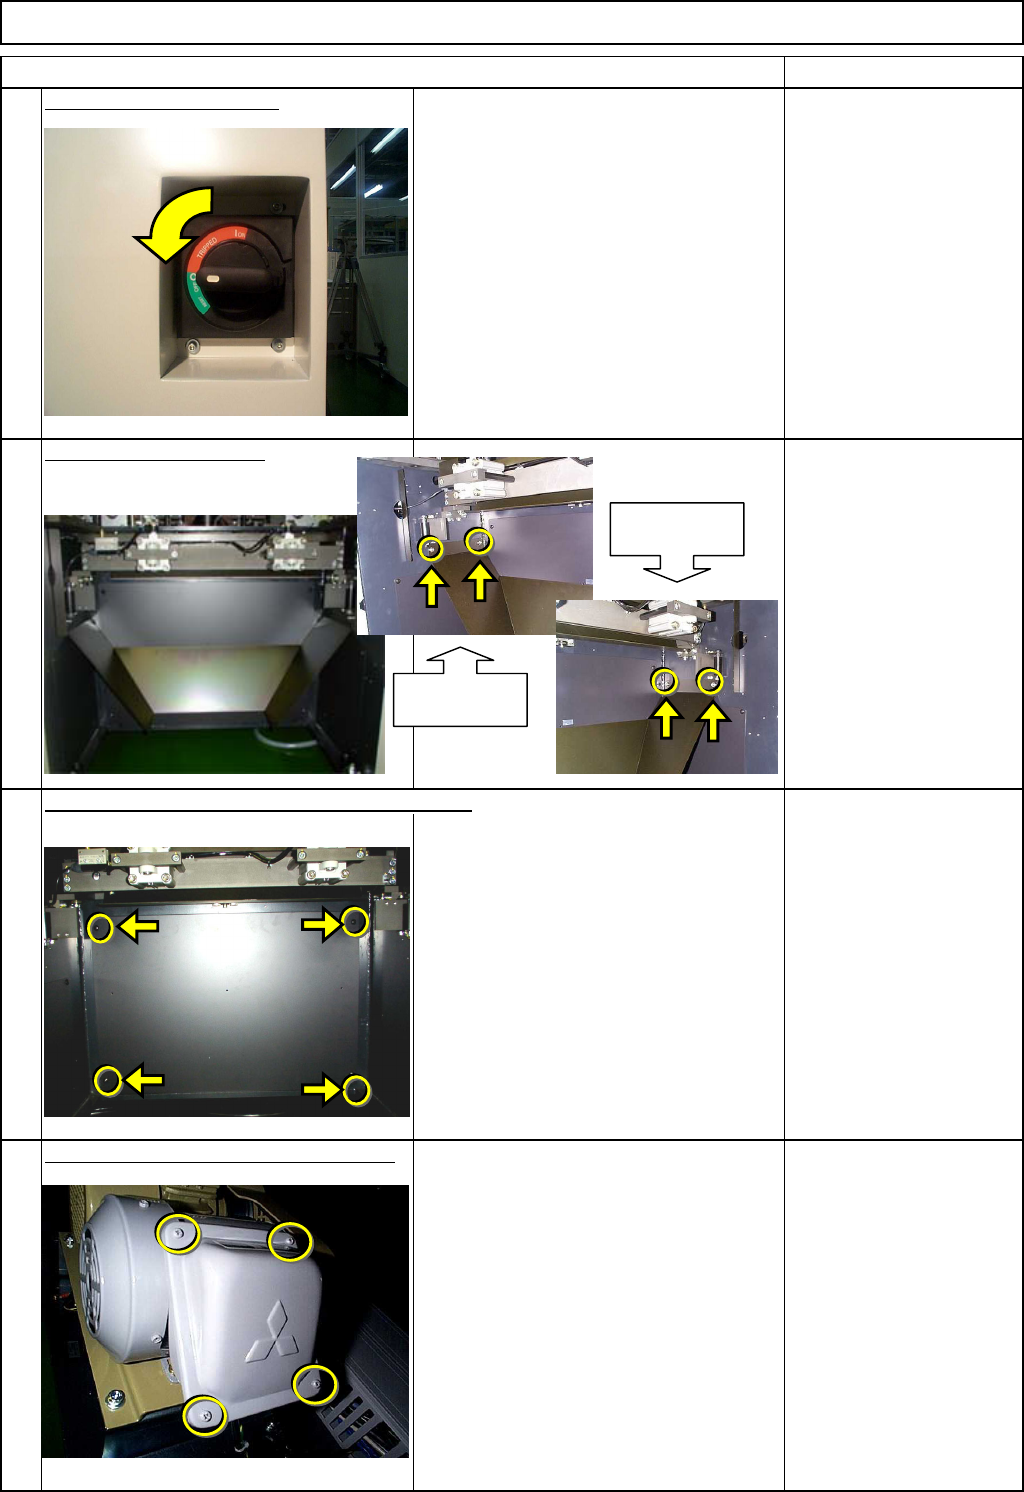
Switch off the main power.
Turn the switch to the left.
Remove the lower chute.
Allen key 4 mm
Screw M5x 12mm 4 pcs.
Thick washer 4 pcs.
Phillips screwdriver #2
Round cross-cut screw
M5 4 pcs.
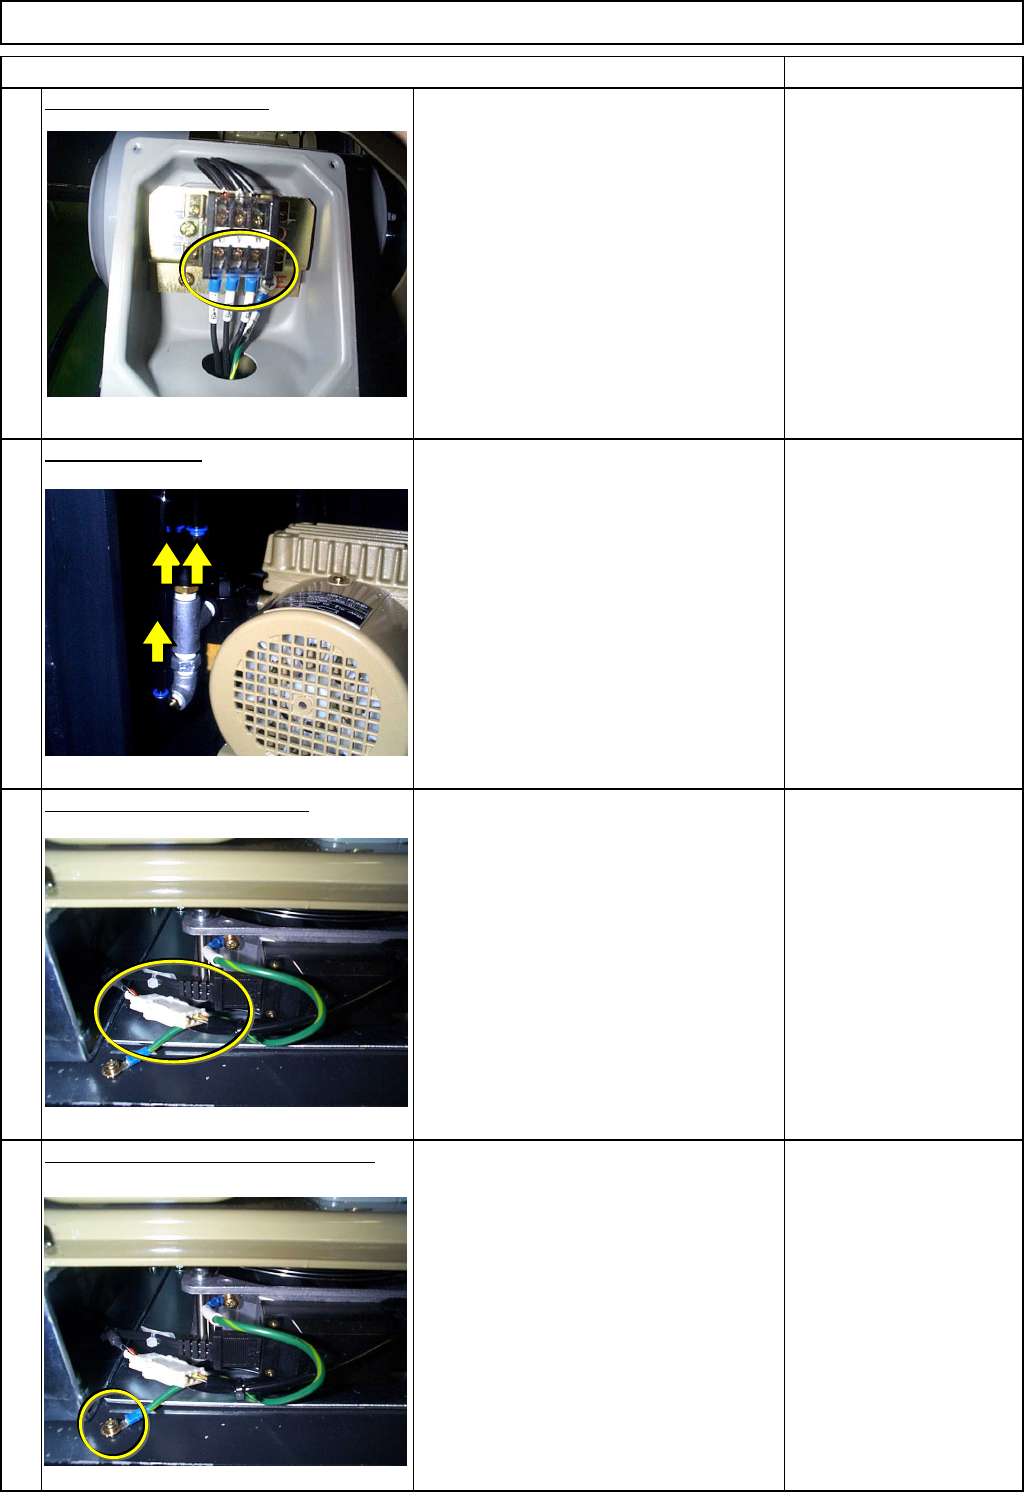
Open the vacuum pump terminal cover.
Phillips screwdriver #2
Screw M4 4 pcs.
3
4
1
Item
2
Remove the bottom cover from Stage AR or BR.
Chute holding
section (left)
Chute holding
section (right)
EJM8A-E-SMA050104-A01-00
Page 5-1-4-2
Machinery Part Replacement Main Body
Remarks
Item
Disconnect the terminals.
Phillips screwdriver #2
Screw M4 4 pcs.
Remove the tube.
φ 10 2 pcs.
φ 6 1 pc.
Disconnect the fan connector.
Connector No. FANP-1.FANAP
Remove the earth cable from the fan.
Phillips screwdriver #2
Screw M4 1 pc.
7
8
5
6
EJM8A-E-SMA050104-A01-00
Page 5-1-4-3