CM602all_EJM8AESM_Service Manual.pdf - 第822页
Remarks Component-Thickness-Measuring Unit Item Option Part and Accessory Replacement Open the amplifier cover. Open the connector lock. Open the new amplifier cover. 10 11 9 12 Remove the sensor cables from the amplifie…
Remarks
Component-Thickness-Measuring Unit
Item
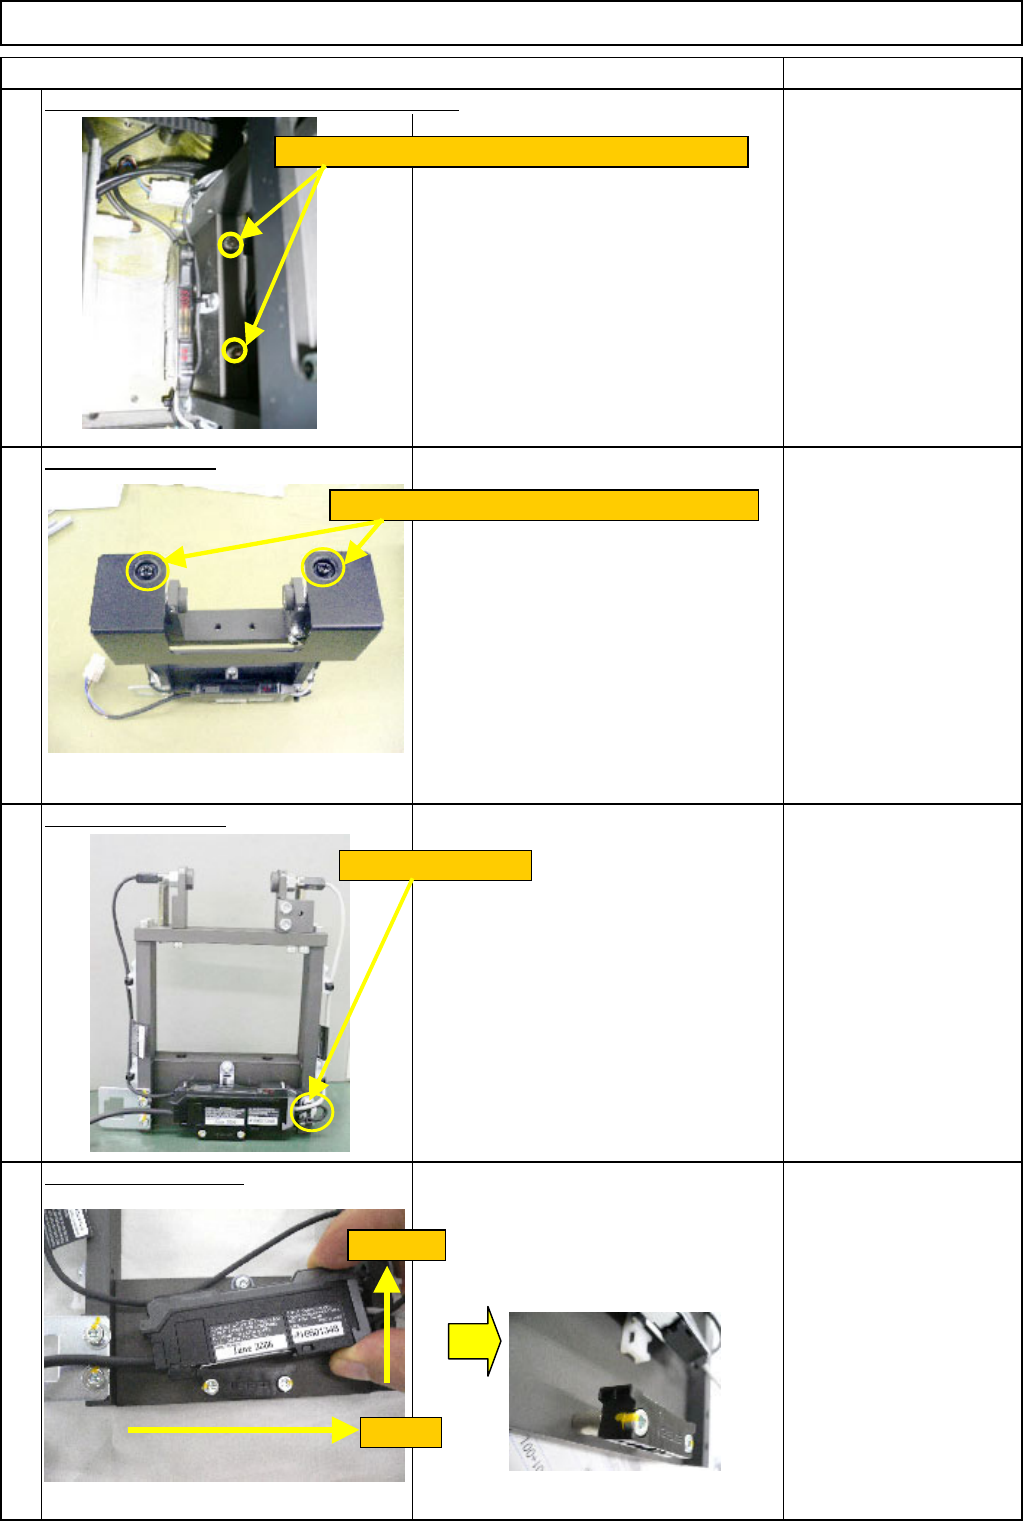
Option Part and Accessory Replacement
Allen key M6
M6 x 60L ( 2 pcs.)
Remove the cover.
Phillips screwdriver #2
Cut off the cable tie.
Nipper
Remove the amplifier.
5
6
8
7
Remove the component-thickness-sensor unit.
Loosen the two M6 x 60L bolts and remove the unit.
Cut off the cable tie.
(1) Pull.
(2) Raise.
Loosen the two M4 screws. Remove the cover.
EJM8A-E-SMA060404-A01-00
Page 6-4-4-3
Remarks
Component-Thickness-Measuring Unit
Item
Option Part and Accessory Replacement
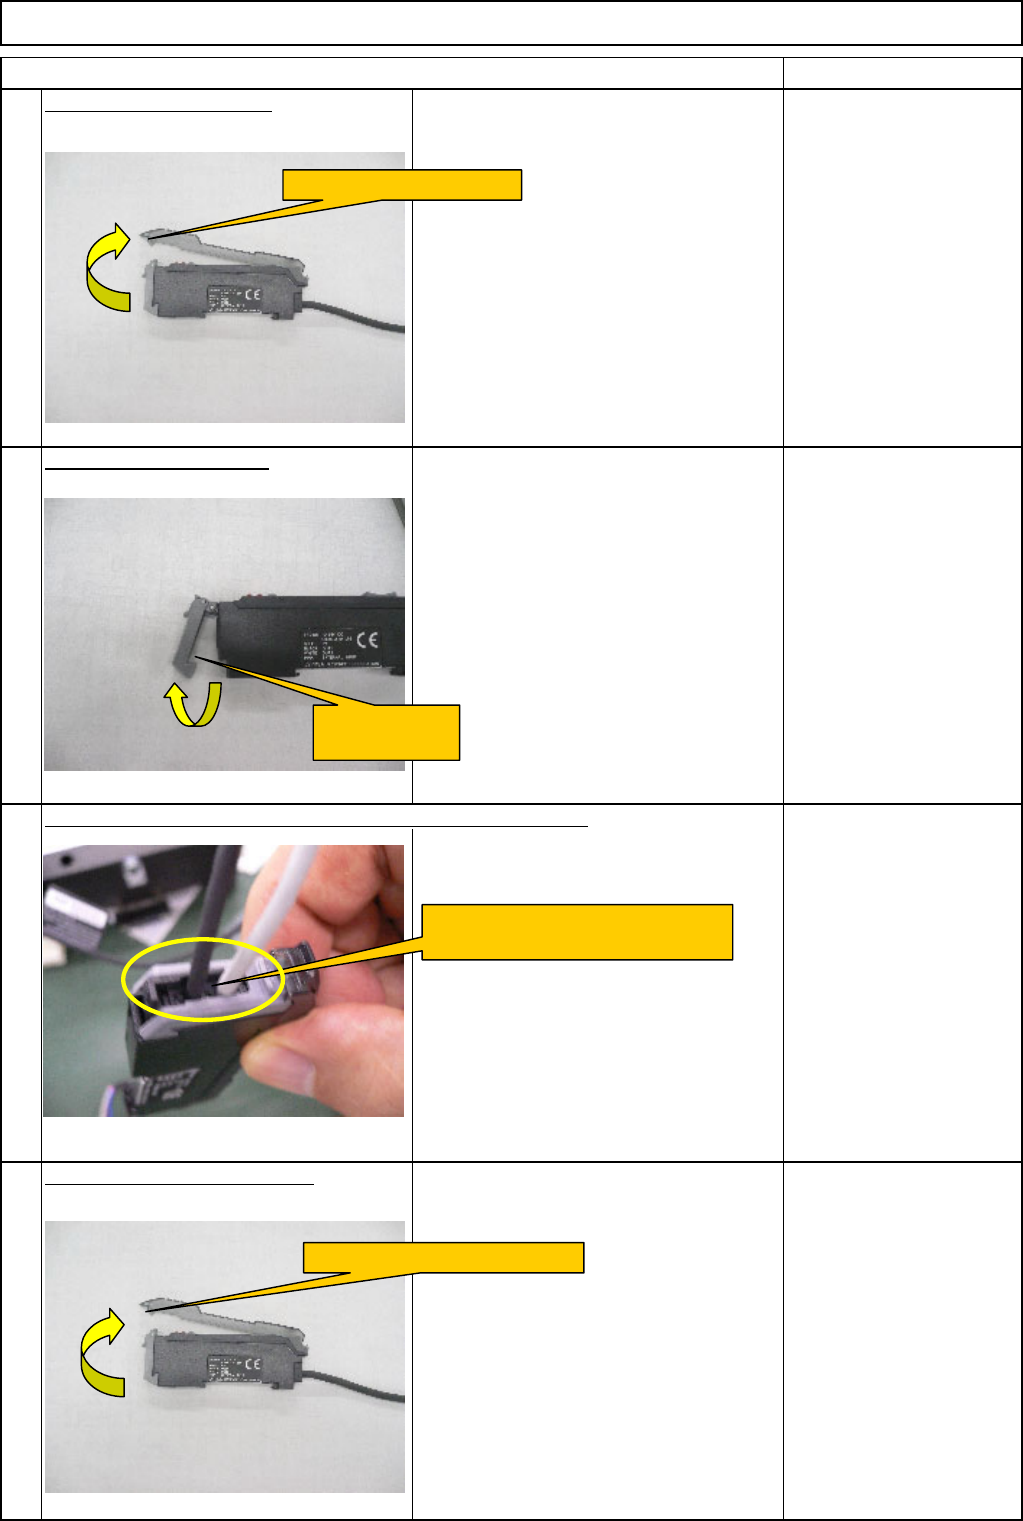
Open the amplifier cover.
Open the connector lock.
Open the new amplifier cover.
10
11
9
12
Remove the sensor cables from the amplifier connector lock.
Open the amplifier cover.
Open the
connector lock.
Remove the sensor cables
from the amplifier connector lock.
Open the new amplifier cover.
EJM8A-E-SMA060404-A01-00
Page 6-4-4-4
Remarks
Component-Thickness-Measuring Unit
Item
Option Part and Accessory Replacement
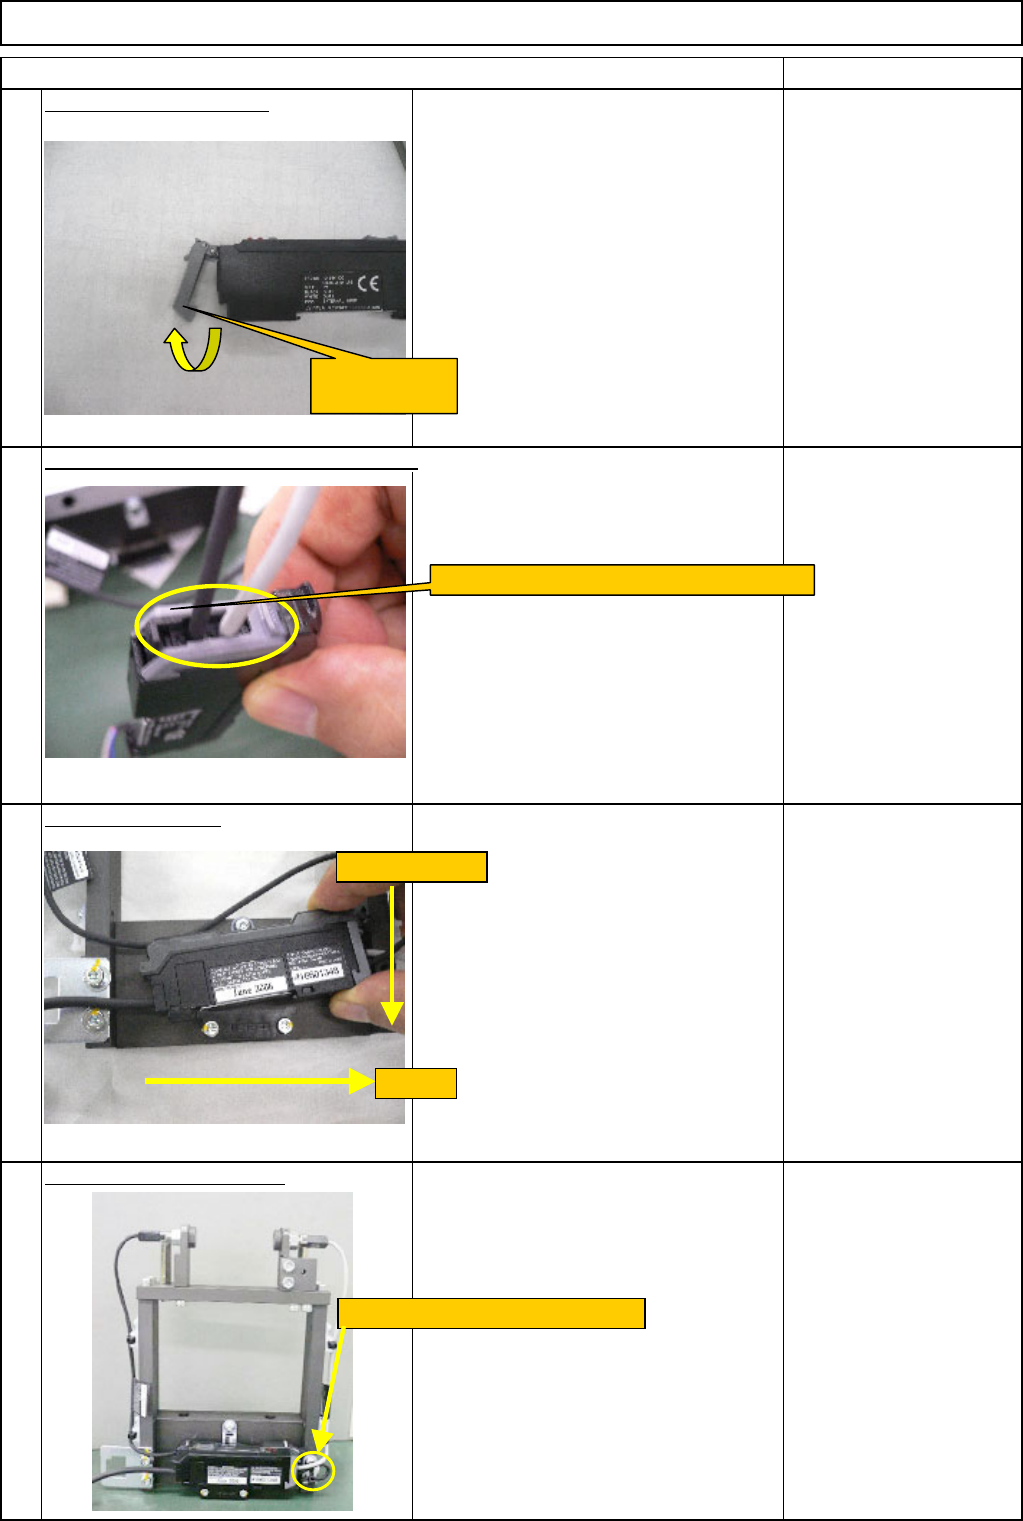
Open the connector lock.
Install the amplifier.
Secure the amplifier cable.
Insert the sensor cables into the amplifier.
13
14
15
16
Open the
connector lock.
Insert the sensor cables into the amplifier.
(1) Pull.
(2) Press down.
Secure the cable with a cable tie.
EJM8A-E-SMA060404-A01-00
Page 6-4-4-5