CM602all_EJM8AESM_Service Manual.pdf - 第84页
[Outline] CN01 CN00 CN01 CN00 CN00: connects the previous machine CN01: connects the next machine. 60 Connect the connection cables (signal) CN00 and CN0 1 For signal connection, see separate spec. * Various signals are …
56
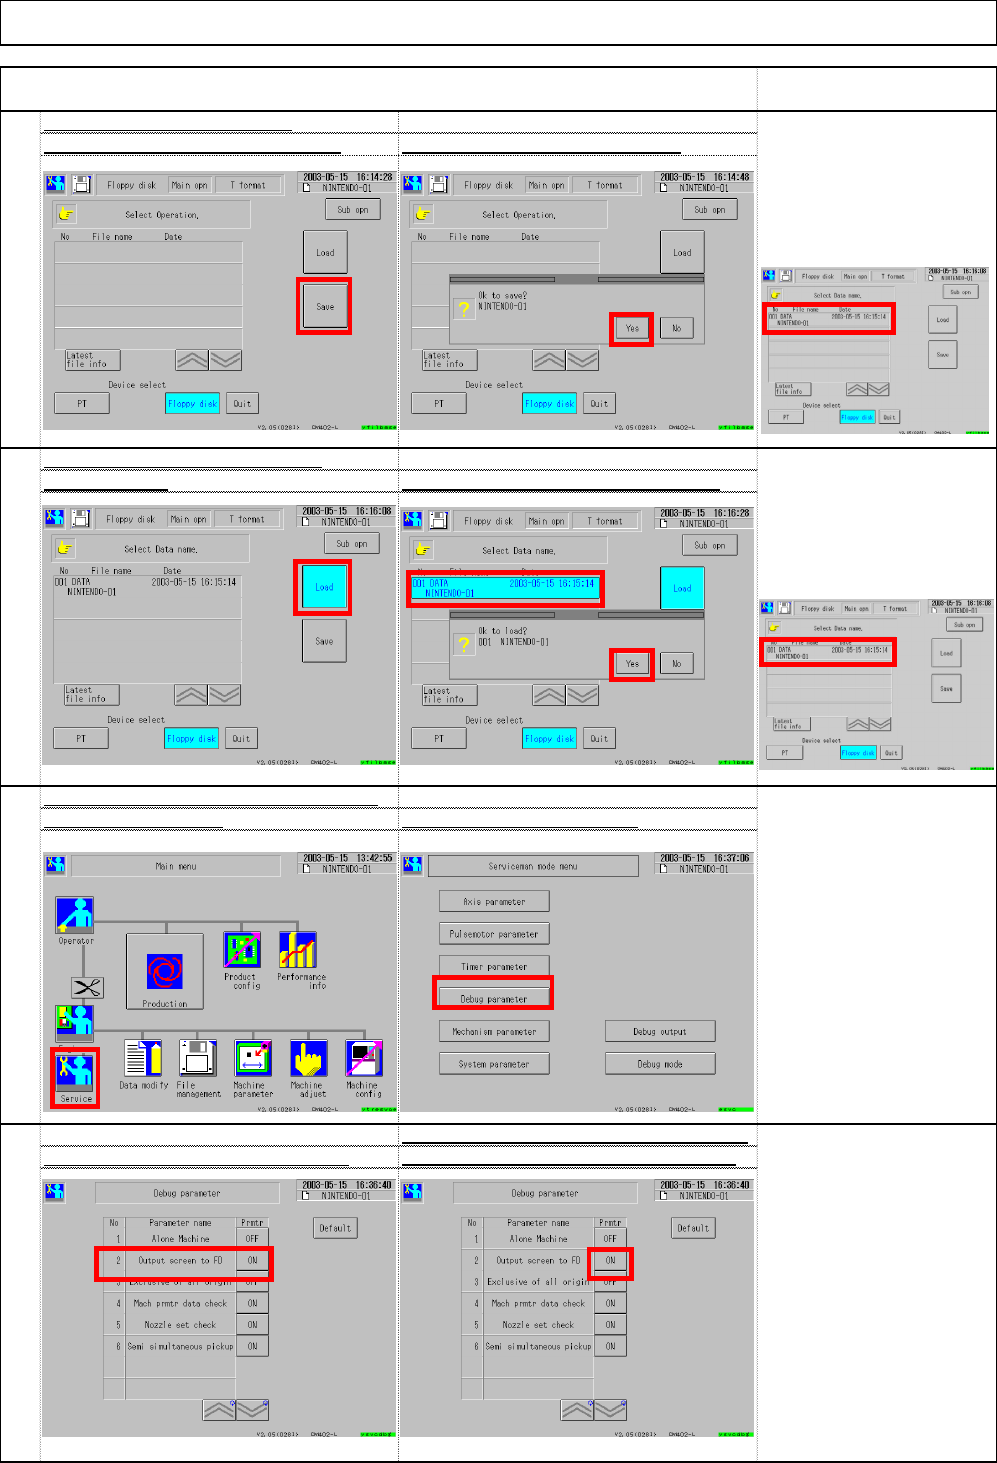
Each time the button shown below is pressed,
Set ③"Output screen to FD" to OFF
④"ON" and "OFF" are displayed alternately.
55
Set ③ "System parameters - Output pu
t
screen to FD" to OF
F
Select ② Debug parameter
.
54
Check loading from a floppy disk
Select ①Load. Select ② data name and then ③ Yes.
[Judgment]
The machine should be
operated normally. File
name is displayed
Insert a floppy disk. Select ③ Save. Select ④ Yes. ⇒ Saving starts
.
[Judgment]
There should be no problems
with loading. The window
below shows conditions.
Check saving to a floppy disk
Installation Machine Installation
Item Remark
53
(3)
(4)
(1)
(2)
(3)
(1)
(2)
(3)
(4)
File name should
be displayed.
EJM8A-E-SMA020103-A01-00 Page 2-1-3-15
[Outline]
CN01 CN00 CN01 CN00
CN00: connects the previous machine
CN01: connects the next machine.
60
Connect the connection cables (signal) CN00 and CN0
1
For signal connection, see separate spec.
* Various signals are used; the standard is shown below:
59
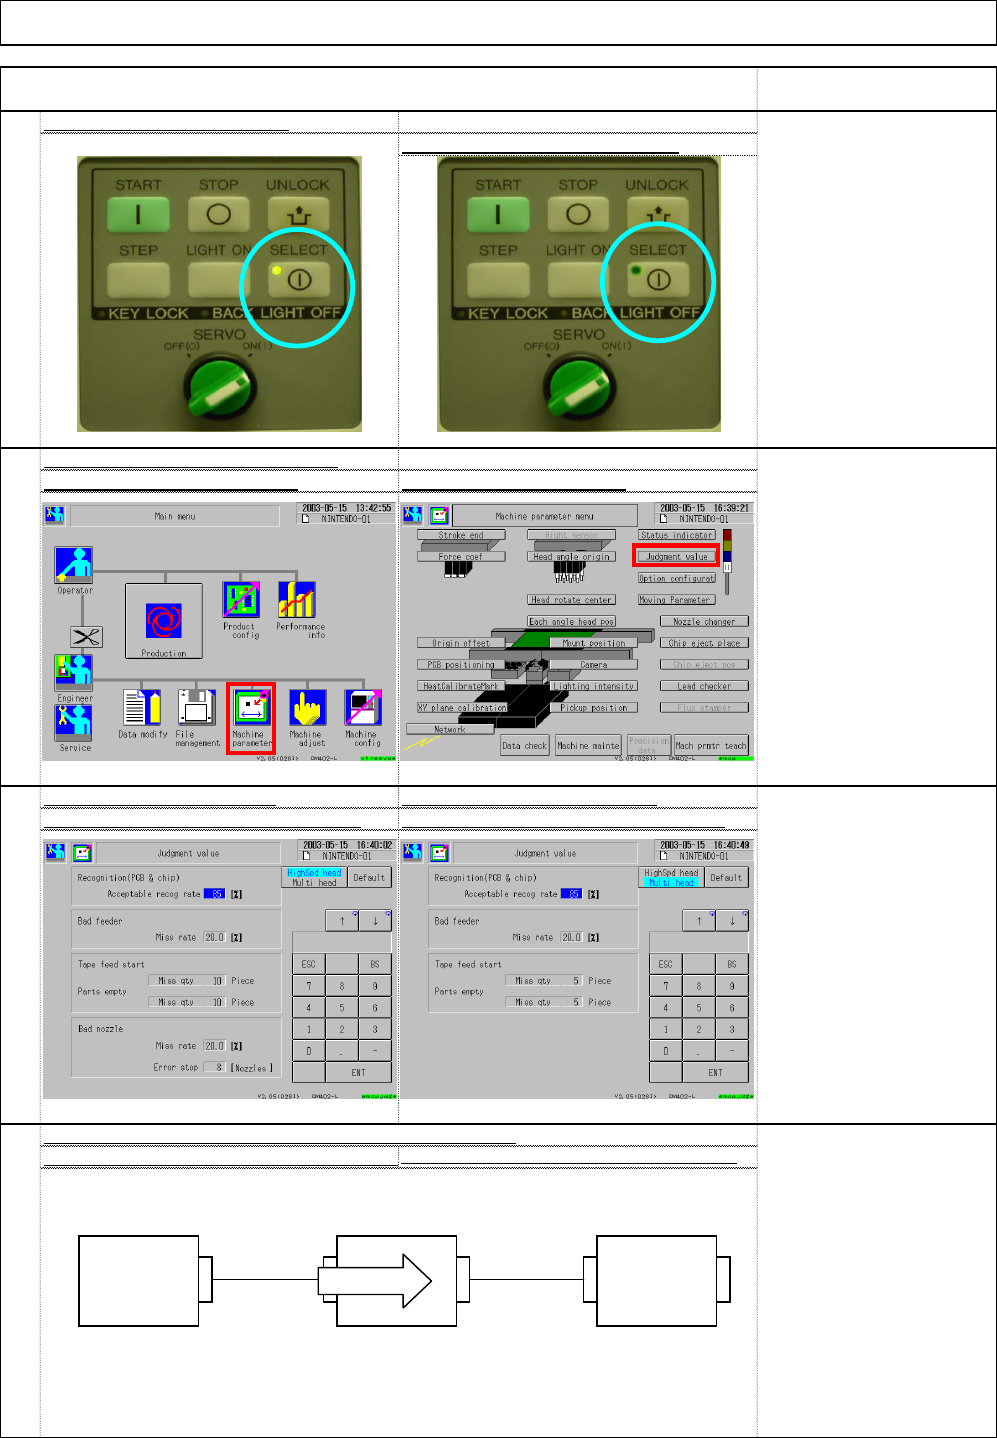
"High-speed" Setup windo
w
"Multi-purpose" Setup windo
w
Set (3) Acceptable recog rate to 85%
.
Set (4) Acceptable recog rate to 85%
.
58
Set the recognition judgment valu
e
Select (1) Machine parameter Select (2) Judgment value
57
Display of the panel selected
Display of the panel non-selecte
d
[Judgment]
The "SELECT"-side lamp
should be ON.
Installation Machine Installation
Item Remark
(1)
(2)
Machine 1 Machine 2 Machine 3
Board flow
EJM8A-E-SMA020103-A01-00 Page 2-1-3-16
* No connection to (2) above.
Voltage 200V only
* Connect the LAN cable (1).
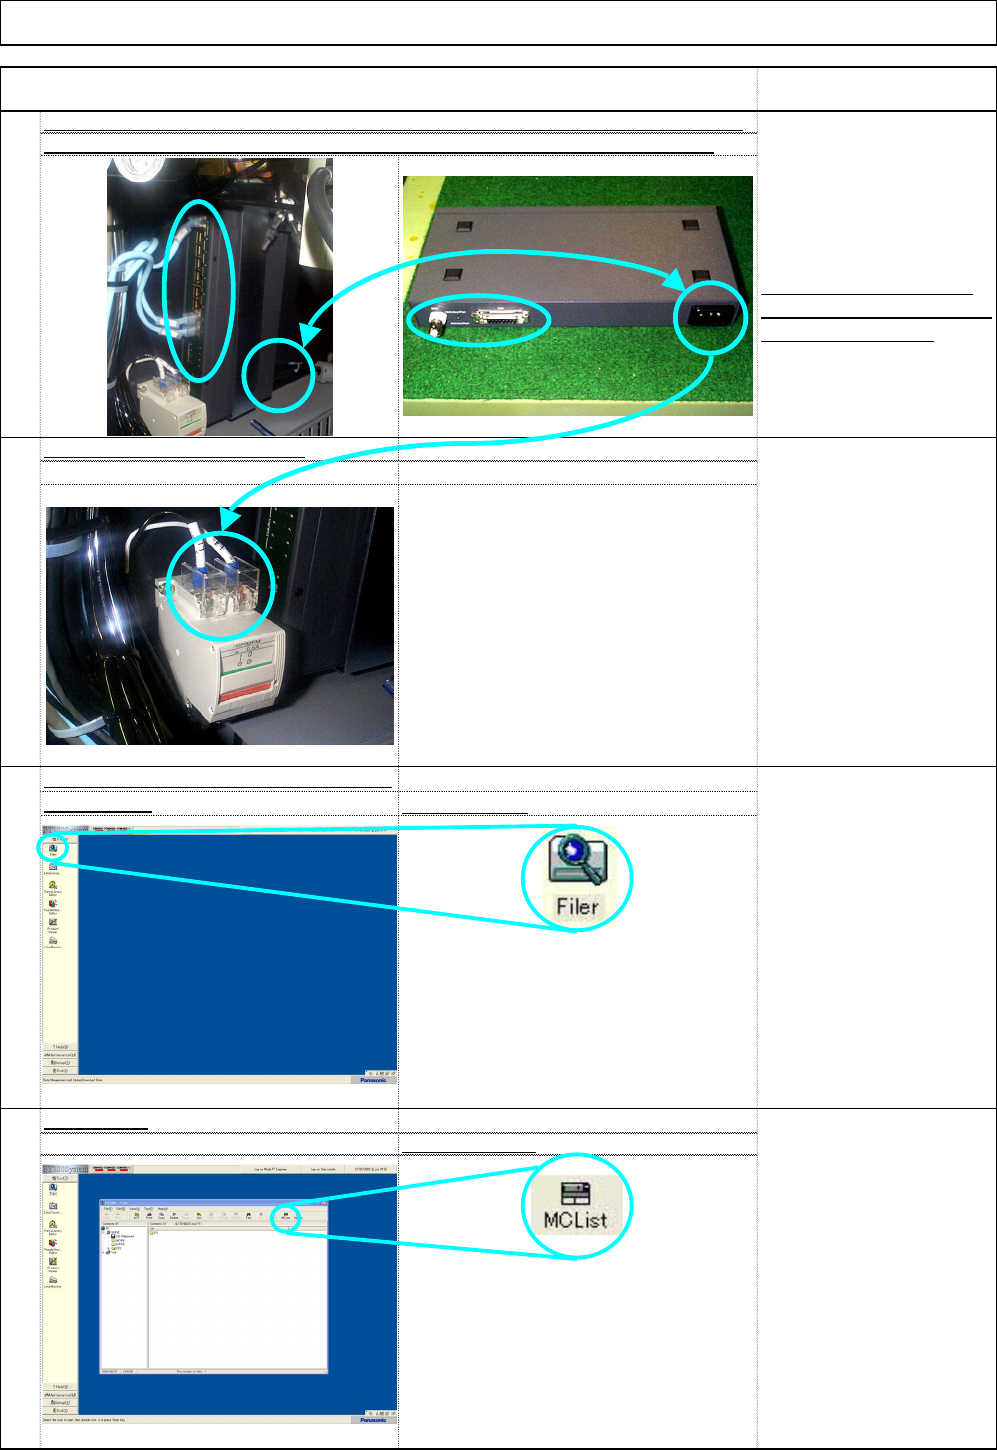
Select the data to be
loaded beforehand.
64
Select "MC list.
"
Filer window
63
Check loading machine data from the PT.
Main window
Select "Filer."
[Danger]
Be sure to turn off the
factory's electric source
before checking
connection.
Even though the machine
is turned off, the HUB 200V
is always connected.
Item Remark
61
Check the HUB power and the communication cable for connection. For the receptacle
position, see the right picture below. From Hub to the circuit protector in Step 6
2
Installation Machine Installation
62
Connect to the circuit protector.
(1)
(2)
EJM8A-E-SMA020103-A01-00 Page 2-1-3-17