CM602all_EJM8AESM_Service Manual.pdf - 第46页
CM602- L Se r vi c e Manual 44 Handli n g of t he cut ti ng uni t on t he 6-r ow feeder mount (opt ion) W hen the direct t ray f eeder is connect ed, t he 6-row f eeder m ount is always connect ed to i ts right . The 6-r…

CM602-L
Service Manual
43
Handling of the component thickness sensor (option)
Since the component thickness sensor (option) complies with the Class 1 limits of IEC60825-1 (Laser
Safety Standards), it is basically safe under a normal usage pattern. In maintenance or operation,
however, avoid looking directly at it.
2.
Component thickness sensor (fixed-on-the-machine type) (optional for the high-speed head (8 nozzles))
The component thickness sensor (fixed-on-the-machine type) can be installed in the front and the rear
of the machine.
The maximum output of the laser components is 0.35 mW. The sensor head has such a structure as
will not expose workers directly to the laser radiation if they open its cover. For safety’s sake, however,
never open the cover of the sensor head.
Item Laser specifications
Manufacturer Panasonic Factory Solutions Co., Ltd.
Model No. N610016841AA
Wavelength 655 nm
Output 0.350 mW
Class Class 1
Emission
duration
Anytime during power on
Installation
location
See the left figure.
Limits IEC60825-1 2001
Laser class label on the machine
The following label is attached to the machine with the component thickness sensor
(fixed-on-the-machine type) installed.
EJM8A-E-XXA00-A04-00
EJM4A-AA01
EJM4A-AA01
EJM8A-110E
CM602-L
Service Manual
44
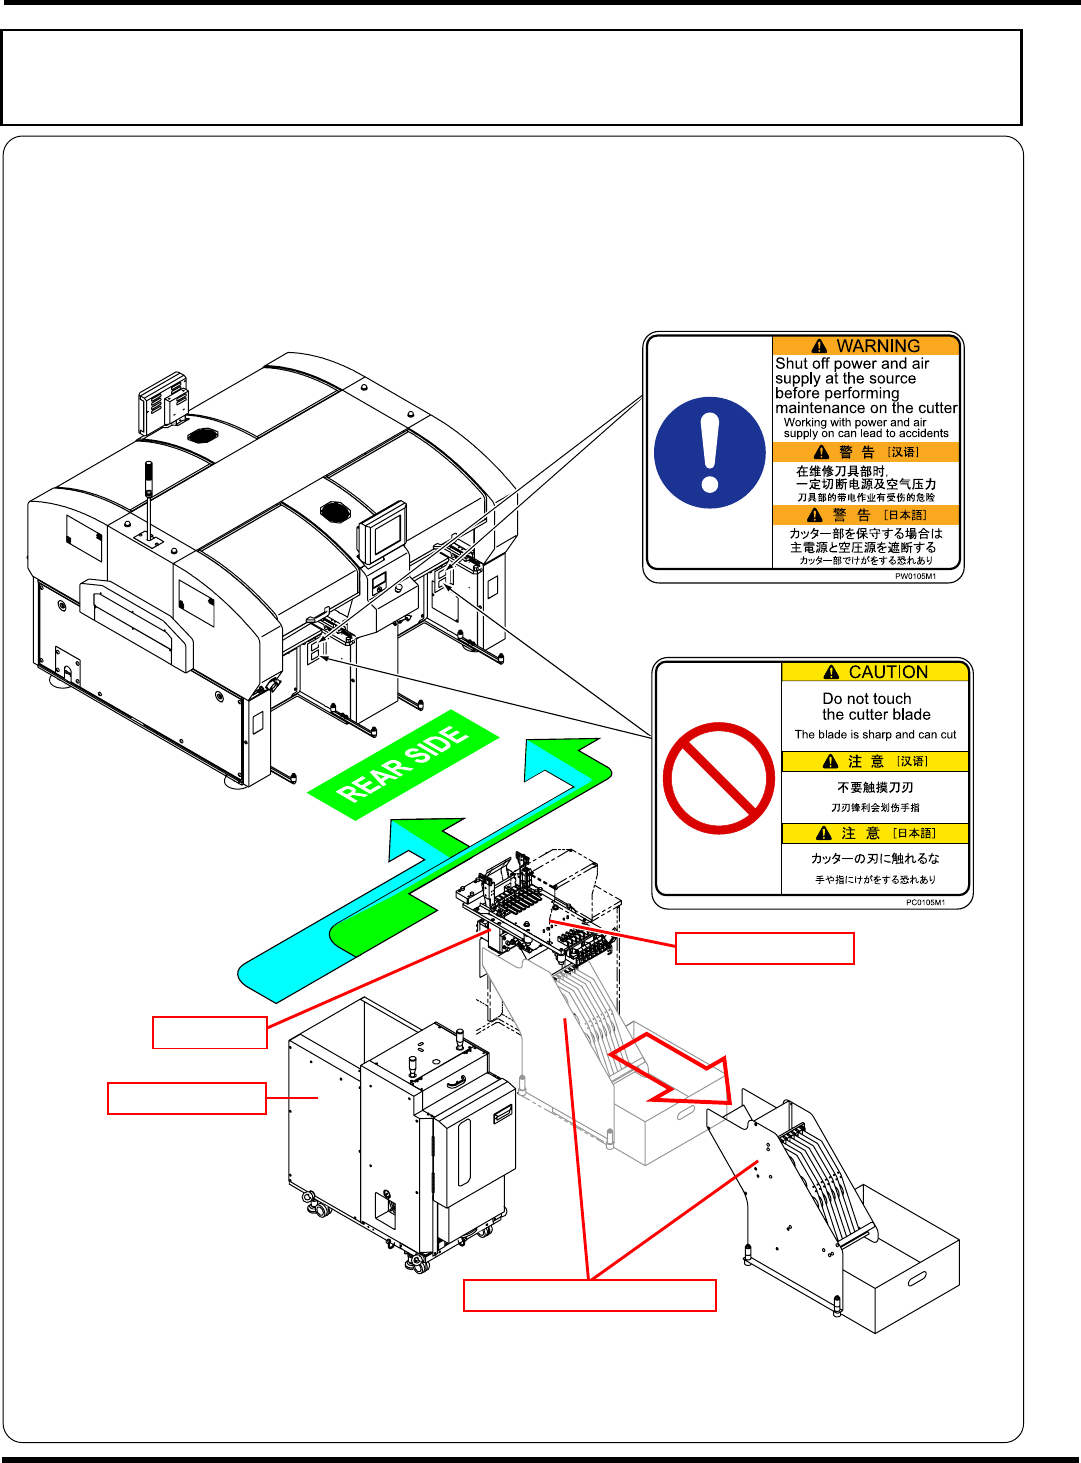
Handling of the cutting unit on the 6-row feeder mount (option)
When the direct tray feeder is connected, the 6-row feeder mount is always connected to its right. The
6-row feeder mount is equipped with the cutting unit for tape cutting. You cannot touch its cutter blade
because the component reel holder unit in front of the cutting unit is fixed in normal cases. If you unfix it
and put your hands in, you may touch the cutter blade directly. Although the warning/caution labels are
affixed for safety, never put your hands in there.
EJM8A-E-XXA00-A04-00
EJK1A-013E
Direct tray feeder
Cutting unit
6-row feeder mount
Component reel holder unit
CM602-L
Service Manual
47
Handling of floppy disk
The data and program for this machine, which are managed by PT basically, can also be saved to and
loaded from a floppy disk if necessary. In order to protect important data and programs, this section
describes the instructions for protection and handling of floppy disks.
NOTICE
It is only 3.5-inch 2HD (1.44 MB format) floppy disks that this machine can use. The
2DD type cannot be used.
1.
Backing up data and program
A floppy disk is a compact and lightweight storage medium that is convenient for storage and carrying;
however, the stored data may be erased or may not be loaded owing to an improper handling.
Be sure to back up the program and data in order to guard against the loss of data. Backup means
making an identical copy of a floppy disk.
For information on how to back up, see the disk copy procedure under file operations.
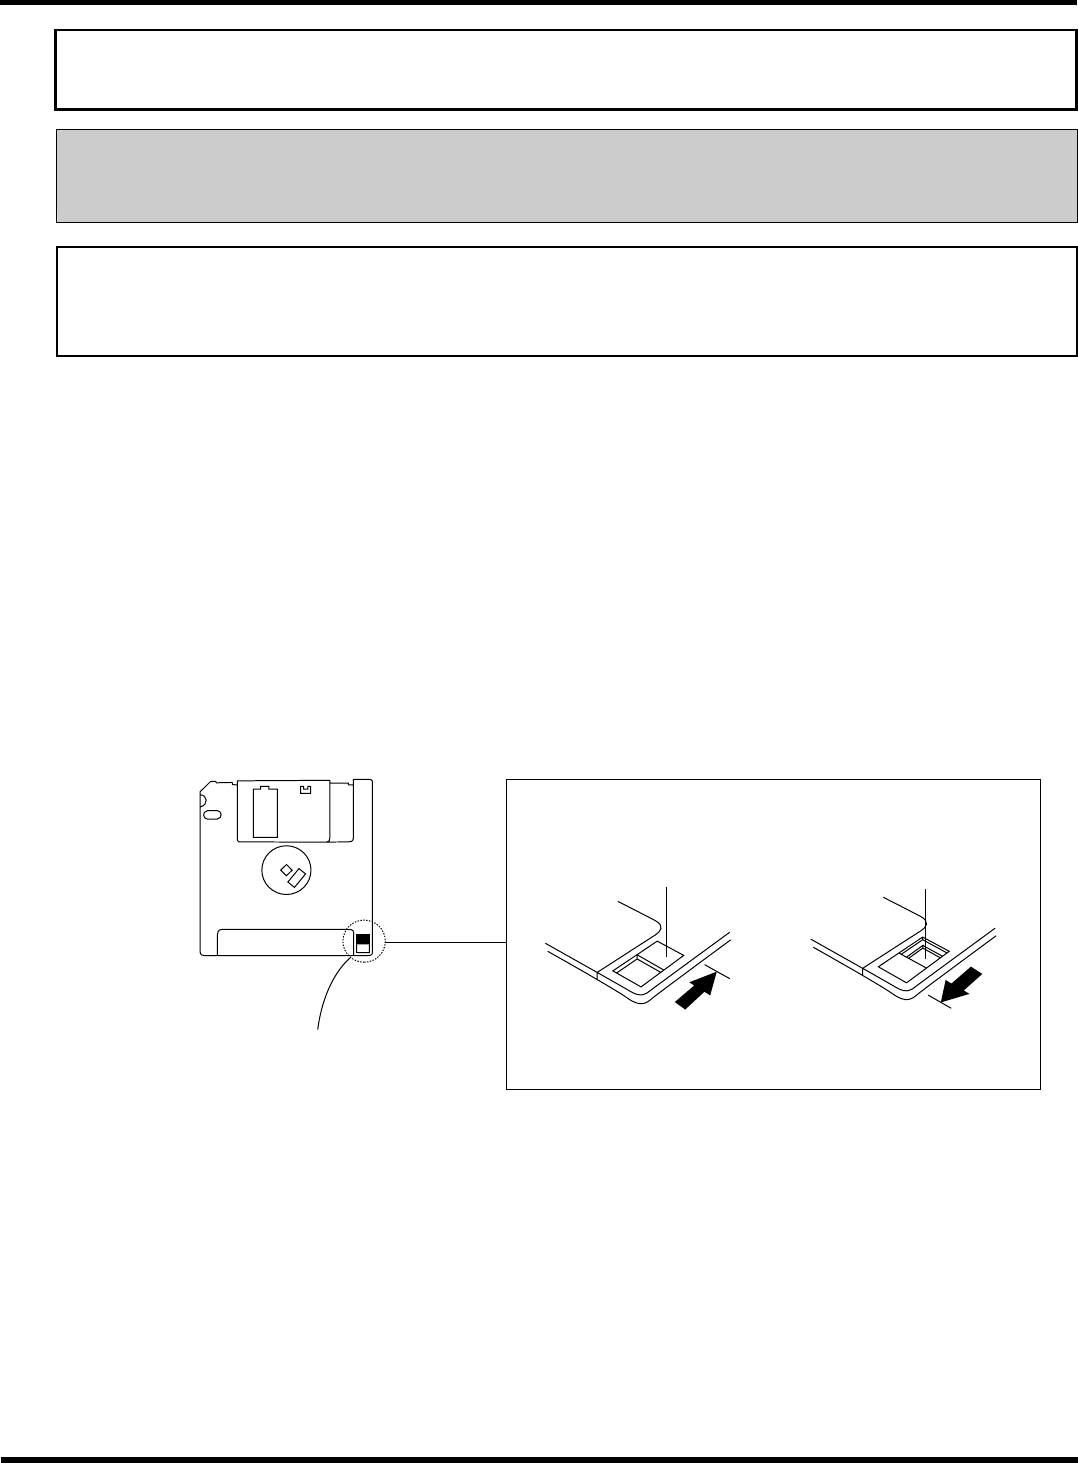
2.
Write protection
It is possible to mechanically protect the stored data from an accidental erasure or rewrite.
∗
Write protection can be set or disabled by sliding the write protect tab located in the lower part of a
floppy disk with a ballpoint-pen tip or the like.
The hole is closed.
Reverse side
Write protect tab
“Released” position
Enables deleting and
saving.
“Protected” position
Disables deleting and
saving.
The hole is open.
Slide this with a ballpoint-
pen tip or the like.
4Z4C-018E
EJM8A-E-XXA00-A05-01