CM602all_EJM8AESM_Service Manual.pdf - 第780页
Remark Item Component-Thickness-Measuring Unit Option Part and Accessory Replacement O p en the am p lifier cover. Check the am p lifier is p owered u p . Switch on the component-thickness-sensor-adjusting jig. 24 25 26 …
Remark
Item
Component-Thickness-Measuring Unit
Option Part and Accessory Replacement
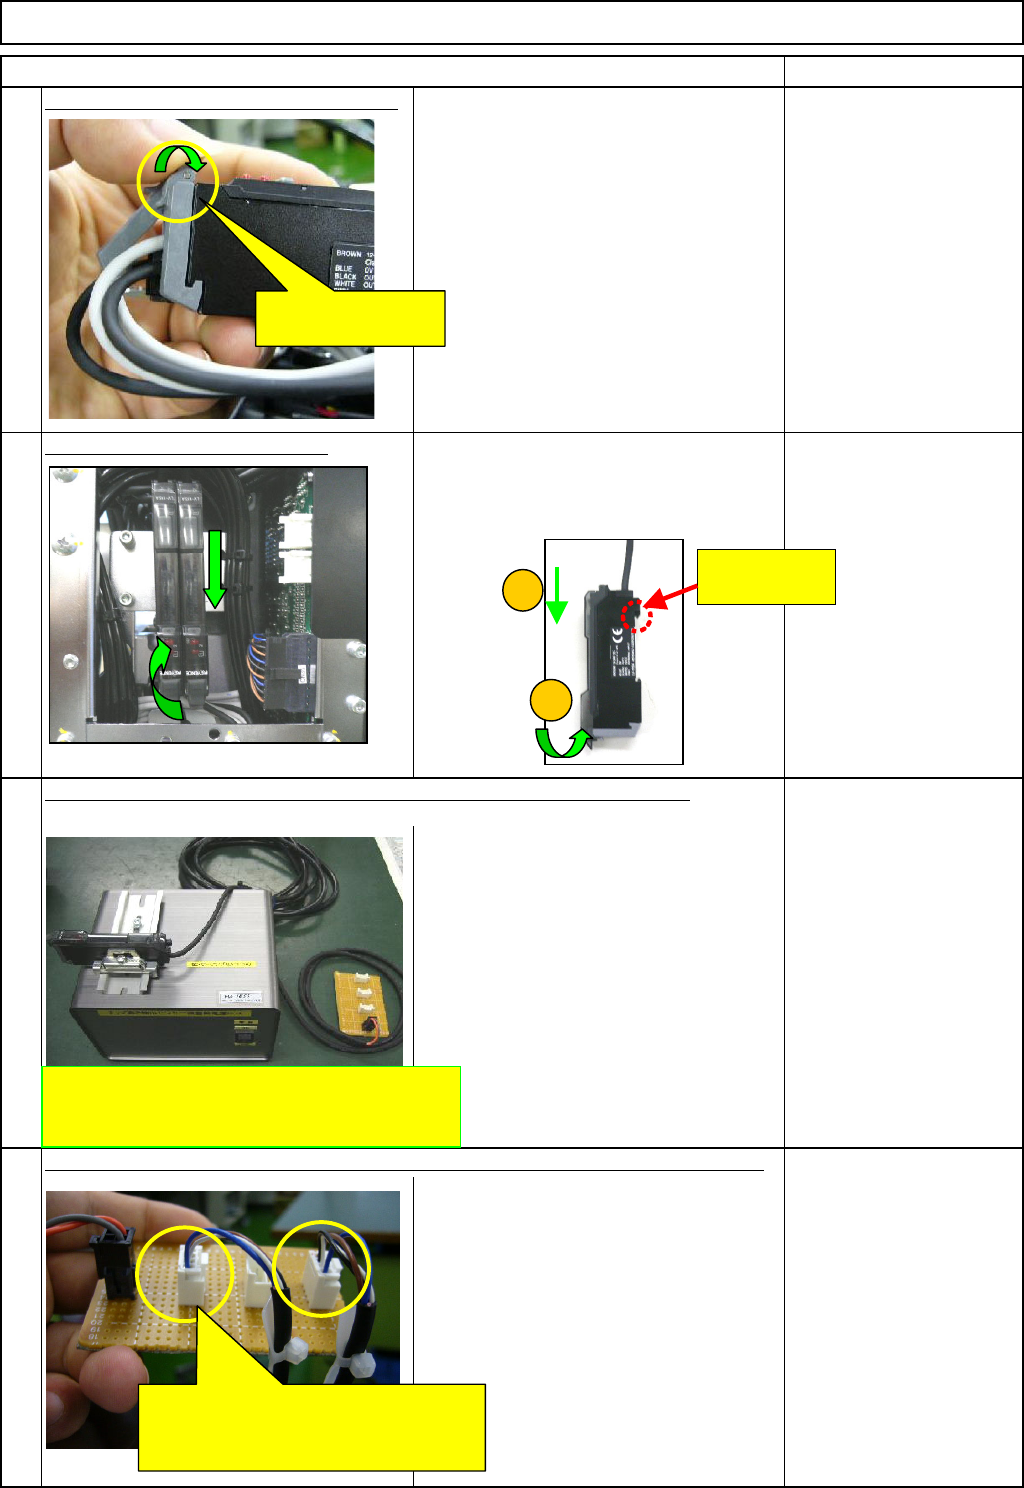
Lock the connector lock of the am
p
lifier.
Put the am
p
lifier on the bracket.
Move the amplifier in the (1) and (2)
directions below, and fit the amplifier.
Component-height-
detection-sensor-
adjusting power source.
FM-1853(1)
21
22
20
23
Connect the amplifier connector to the component-thickness-sensor-adjusting jig.
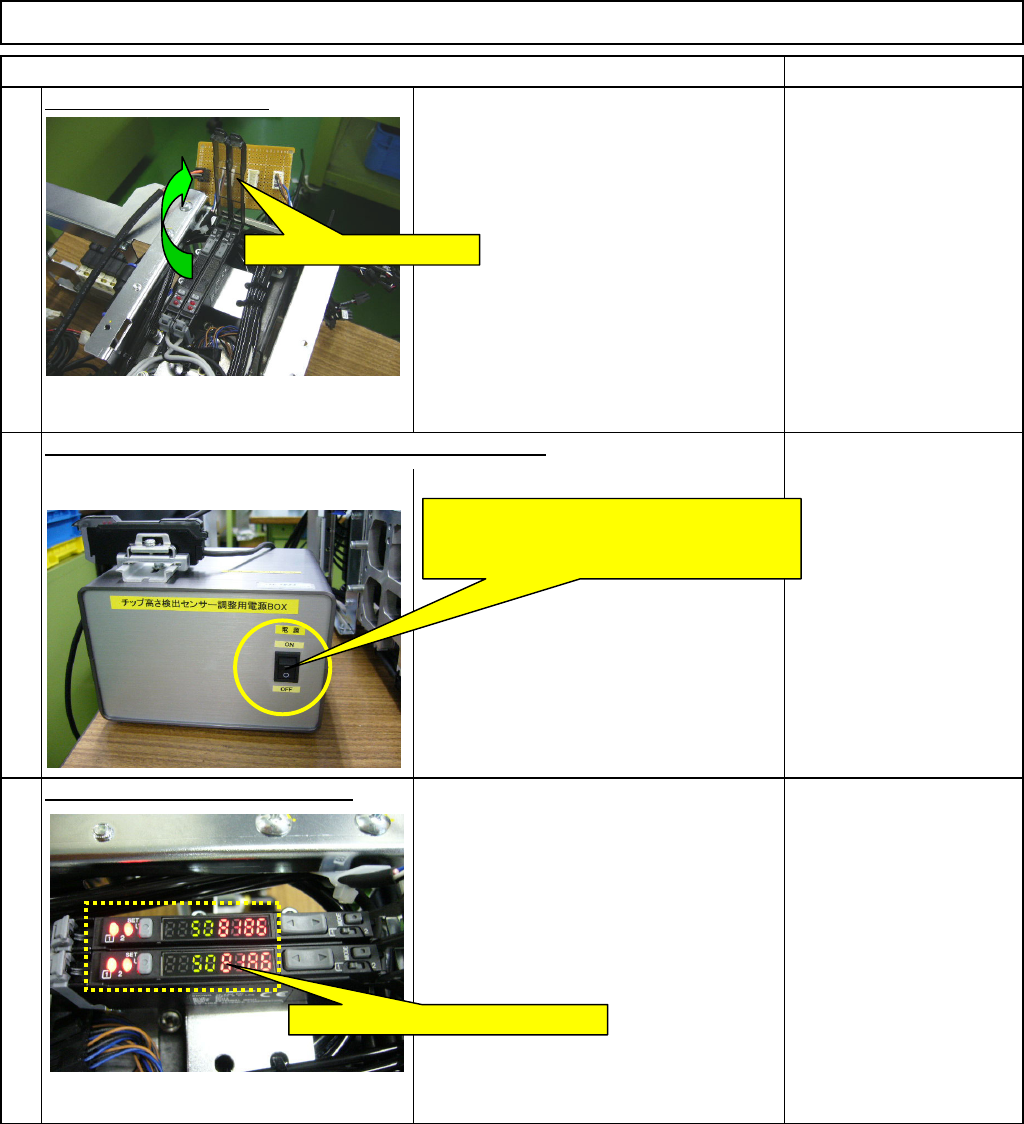
Prepare the component-height-detection-sensor-adjusting power source.
Lock the connector
lock of the amplifier.
Component-height-detection-sensor-adjusting
power source.
<FM-1853(1)>
Connect the amplifier connector to
the component-height-detection-
sensor-adjusting power source.
This hook can
move.
1
2
EJM8A-E-SMA060401-A01-01
Page 6-4-1-7
Remark
Item
Component-Thickness-Measuring Unit
Option Part and Accessory Replacement
O
p
en the am
p
lifier cover.
Check the am
p
lifier is
p
owered u
p
.
Switch on the component-thickness-sensor-adjusting jig.
24
25
26
Open the amplifier cover.
Switch on the component-height-
detection-sensor-adjusting power source.
* The jig should be plugged in.
Check the amplifier is powered up.
EJM8A-E-SMA060401-A01-01
Page 6-4-1-8
Remark
Item
Component-Thickness-Measuring Unit
Option Part and Accessory Replacement
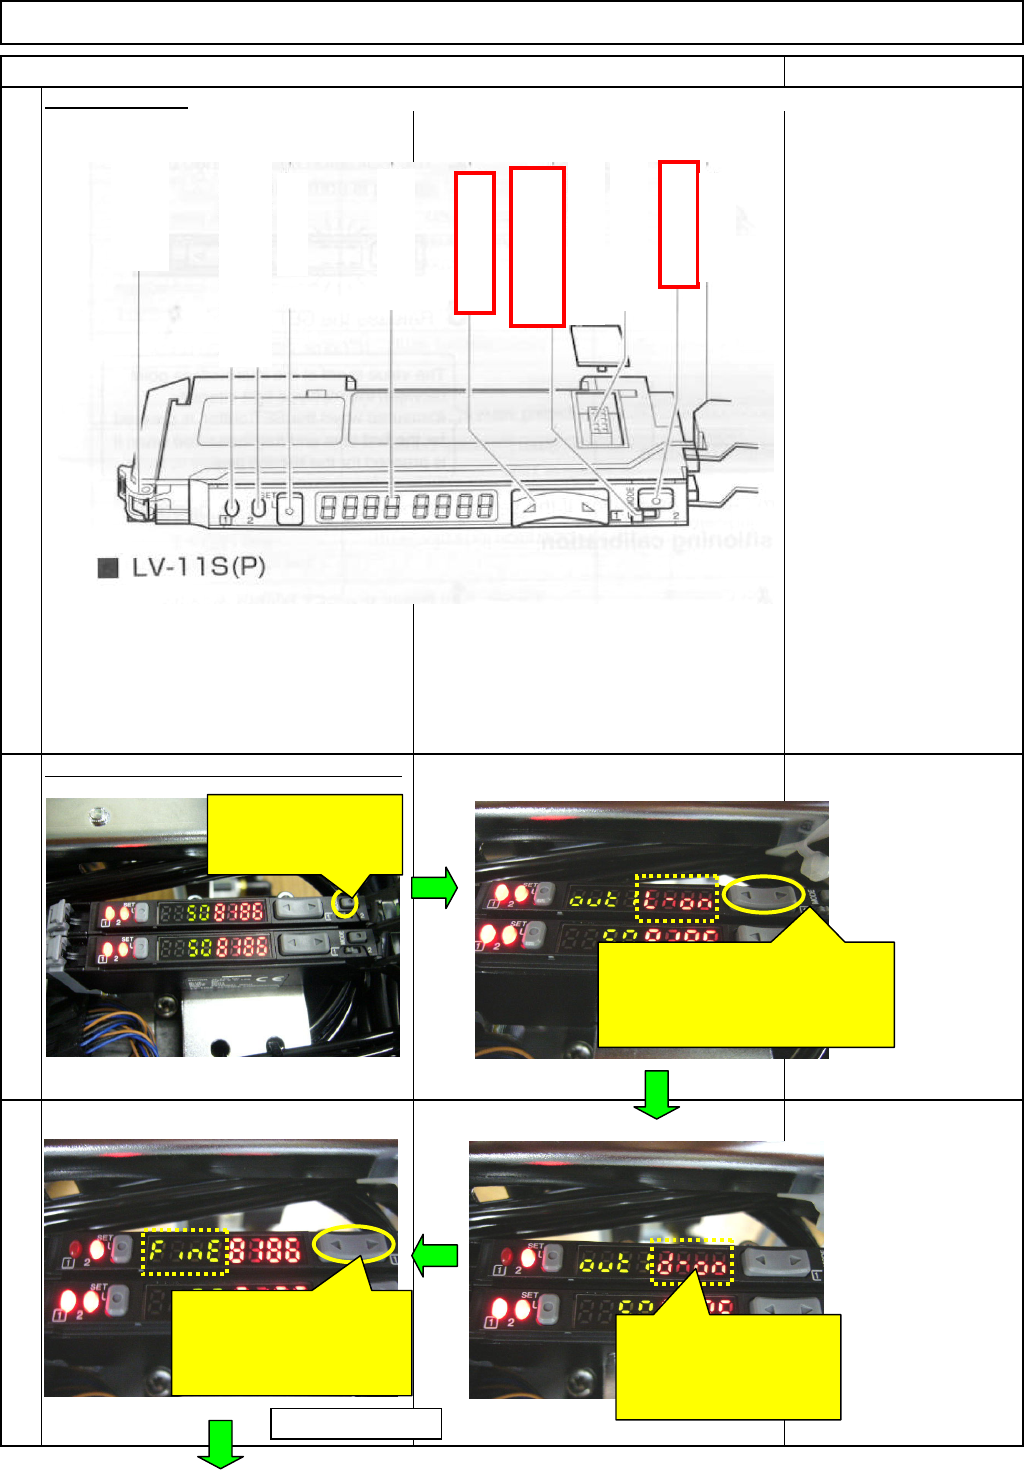
A
mplifier setting
Settin
g
of nozzle front line
(
1 to 6
)
CN40
27
28
29
Hold down the Mode
button for a few
seconds.
When "L-on" is displayed,
press the Manual button to
change the display to "d-on."
* Press either side of the button.
Check "d-on" and press
the Mode button.
* Do not hold it down for
a long time.
When "FinE" is displayed,
press the Manual button
to change the display to
"hsp."
To the next page
Mode button
A
dd-in
p
rotection cover
C
hannel switch
(
dis
p
la
y
settin
g)
Manual button
Dust cover
A
dd-in connector
Di
g
ital monitor
Set button
Hold lock
bar
Out
p
ut indicator
(
Control out
p
ut 2
)
Out
p
ut indicator
(
Control out
p
ut 1
)
EJM8A-E-SMA060401-A01-01
Page 6-4-1-9