CM602all_EJM8AESM_Service Manual.pdf - 第320页
See No.4. Remarks 8 Leave secondary-part storing place beforehand. Do not put a magnetic material close to the part. Before removing the cover from the part, prepare a substitute cover (non- magnetic). The bolts should b…
Four bolts come with the cover jig.
3
4
Remove the head, referring to the
Allen key 3 mm
Screw M4 (Special) x 2
Main Body
Remarks
Machine Part Replacement
Item
Non-magnetic Allen key
(M4)
Short-processed
For tightening lightly
Not for securely.
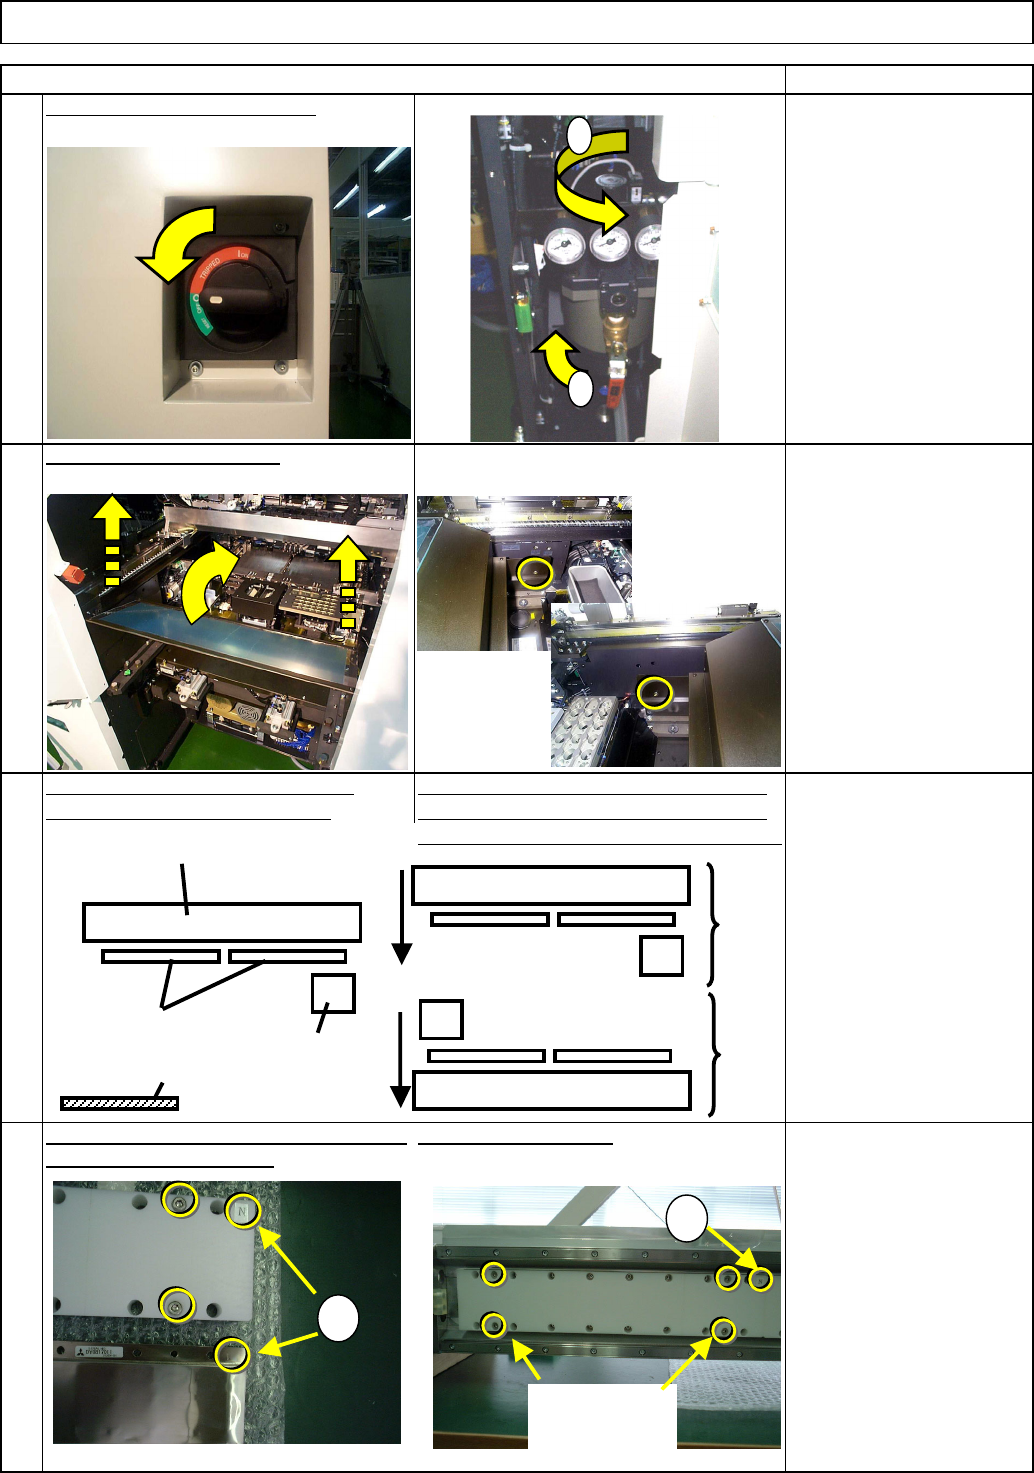
To replace the rear-side part, move the
front and rear beams towards you. One
set of two secondary parts (right and left)
Remove the feeder cover.
Head Replacement Procedures.
Tighten the four bolts.
1
Put the cover (large) over the left secondary-
part, aligning the "N" marks.
Turn off the power and the air.
2
1
2
Secondary parts
Beam
Head
installing
plate
Cover
N
N
Bolts that come
with the cover.
Cover (large)
Secondary
part
Front
Rear
EJM8A-E-SMA050101-A01-00
Page 5-1-1-2
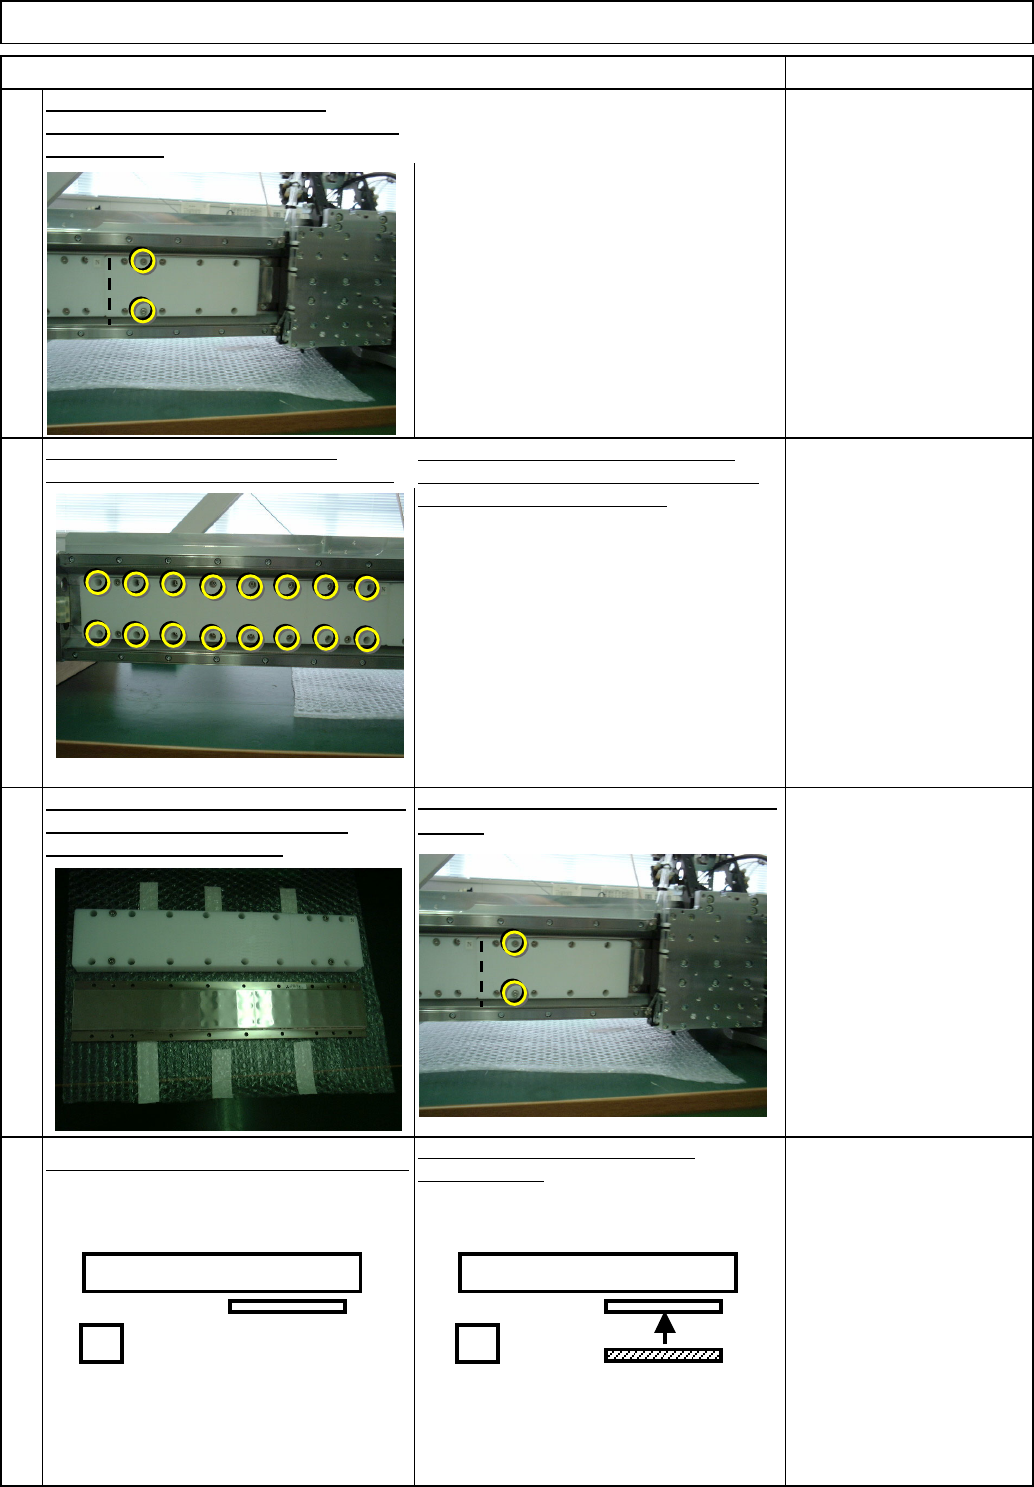
See No.4.
Remarks
8
Leave secondary-part storing place
beforehand. Do not put a magnetic
material close to the part.
Before removing the cover from the part,
prepare a substitute cover (non-
magnetic).
The bolts should be removed from the
part.
Loosen the 16 secondary-part bolts.
Do not remove the bolts. Just loosen them.
Since magnetism of the secondary part
prevents the bolts from falling, remove the
secondary part from the beam.
Put the cover (small) over the right
secondary-part with the two bolts that come
with the cover.
6
7
5
Item
Machine Part Replacement
Non-magnetic Allen key
(M4)
Short-processed
For tightening lightly
Not for securely.
Non-magnetic Allen key
(M4)
Short-processed
For tightening lightly
Not for securely.
Non-magnetic Allen key
(M4)
Short-processed
For tightening lightly
Not for securely.
Main Body
Loosen the two bolts. Remove the cover
(small).
Move the head installing plate to the left.
Put the cover (large) over the right
secondary-part.
Remove the cover from the part. (That cover
will be used for the right part.) * Put a
substitute cover immediately.
Cover
(small)
(Large)
Cover
(small)
(Large)
EJM8A-E-SMA050101-A01-00
Page 5-1-1-3
s
10
12
11
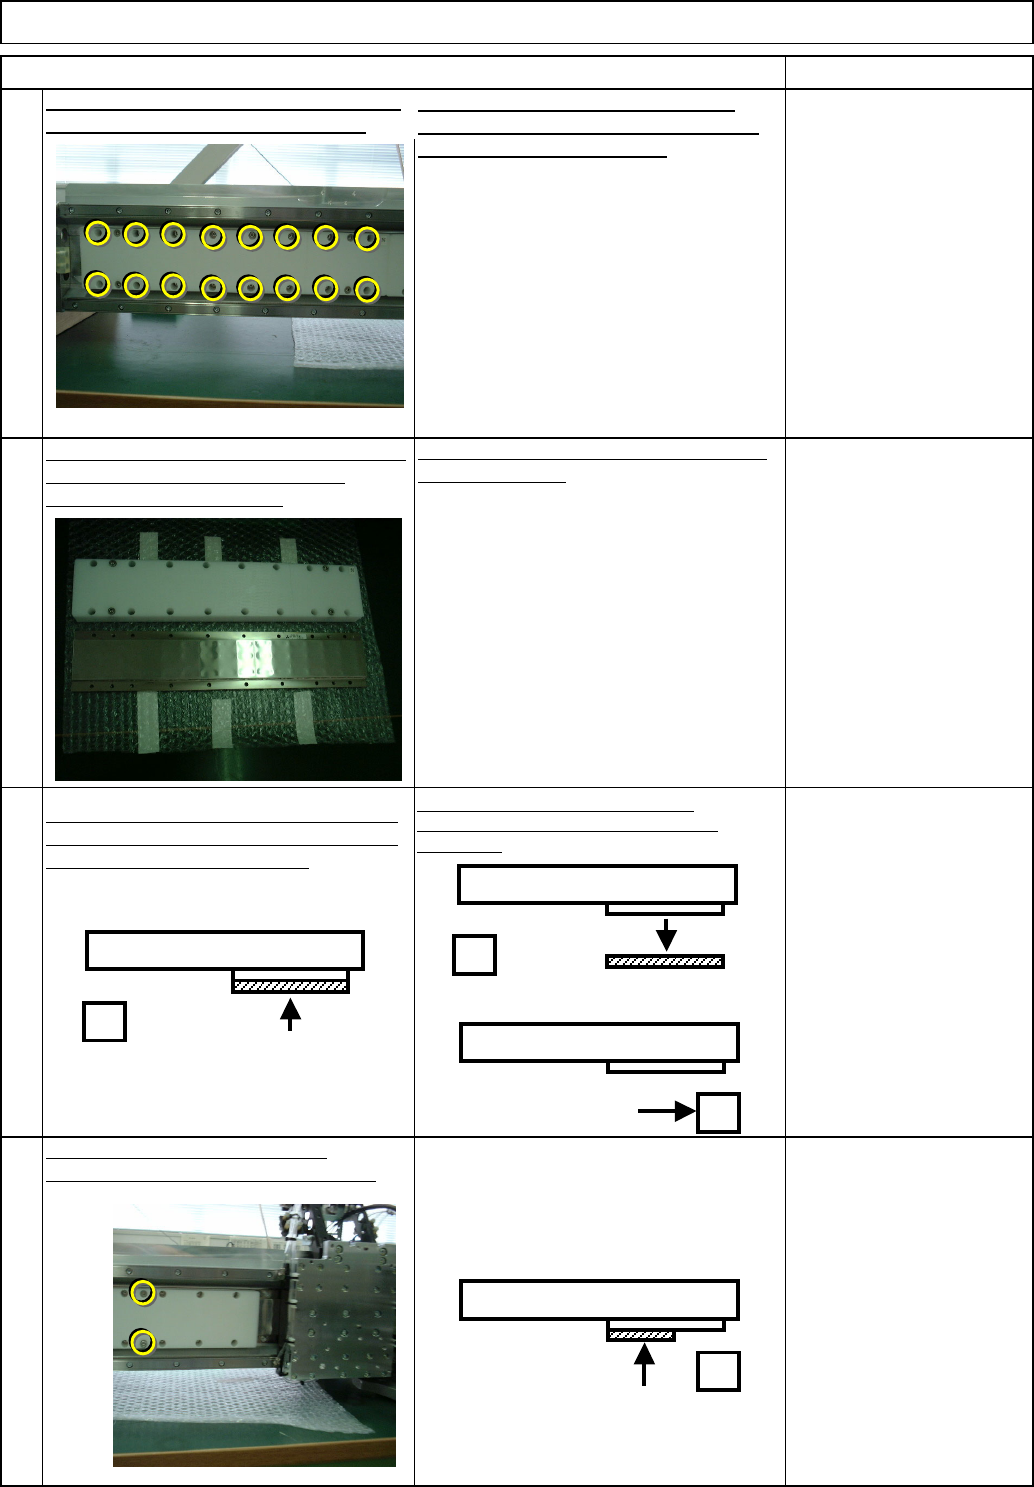
Loosen the bolts that were
securely tightened with a
non-magnetic Allen key.
Do not securely tighten.
(The Allen key is Not
sufficiently strong.)
Put the removed cover over (large) the new
part. (See Step 4.)
Tighten the two bolts onto the right
secondary part. Put the cover (small) on.
Item
Machine Part Replacement Main Body
9
Leave secondary-part storing place
beforehand. Do not put a magnetic
material close to the part.
Before removing the cover from the part,
prepare a substitute cover (non-
magnetic).
The bolts should be removed from the
part.
Loosen the bolts that were
securely tightened with a
non-magnetic Allen key.
Do not securely tighten.
(The Allen key is Not
sufficiently strong.)
Remarks
Put the cover that has smaller
serial number on the right
secondary part.
Put 16 bolts into the part.
(1) Remove the cover from the right part.
(2) Move the head to the right. (Be careful of
magnetism.)
Loosen the 16 secondary-part holding bolts.
Do not remove them; just loosen them.
Since magnetism of the secondary part
prevents the bolts from falling, remove the
secondary part from the beam.
Remove the cover from the part. (That cover
will be used for the new part.) * Put a
substitute cover immediately.
Install the right secondary part. Tighten one
bolt after another, positioning the bolt in the
center of the bolt hole. (16 bolts)
(1)
(2)
Cover (small)
EJM8A-E-SMA050101-A01-00
Page 5-1-1-4