CM602all_EJM8AESM_Service Manual.pdf - 第823页
Remarks Component-Thickness-Measuring Unit Item Option Part and Accessory Replacement Open the connector lock. Install the amplifier. Secure the amplifier cable. Insert the sensor cables into the amplifier. 13 14 15 16 O…
Remarks
Component-Thickness-Measuring Unit
Item
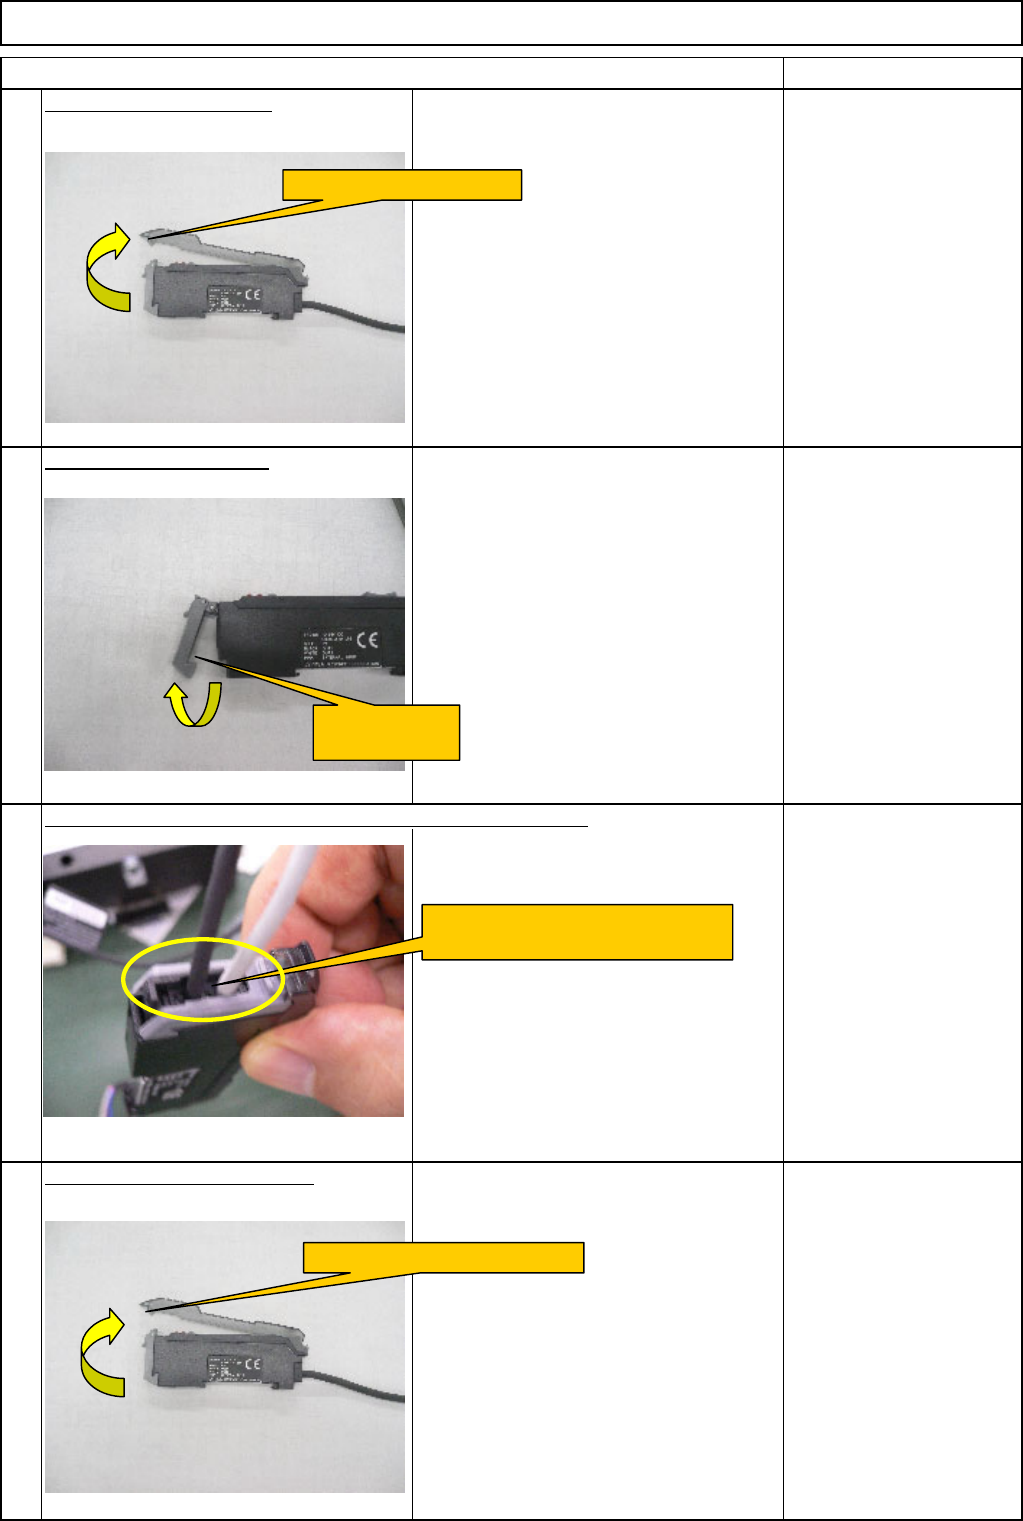
Option Part and Accessory Replacement
Open the amplifier cover.
Open the connector lock.
Open the new amplifier cover.
10
11
9
12
Remove the sensor cables from the amplifier connector lock.
Open the amplifier cover.
Open the
connector lock.
Remove the sensor cables
from the amplifier connector lock.
Open the new amplifier cover.
EJM8A-E-SMA060404-A01-00
Page 6-4-4-4
Remarks
Component-Thickness-Measuring Unit
Item
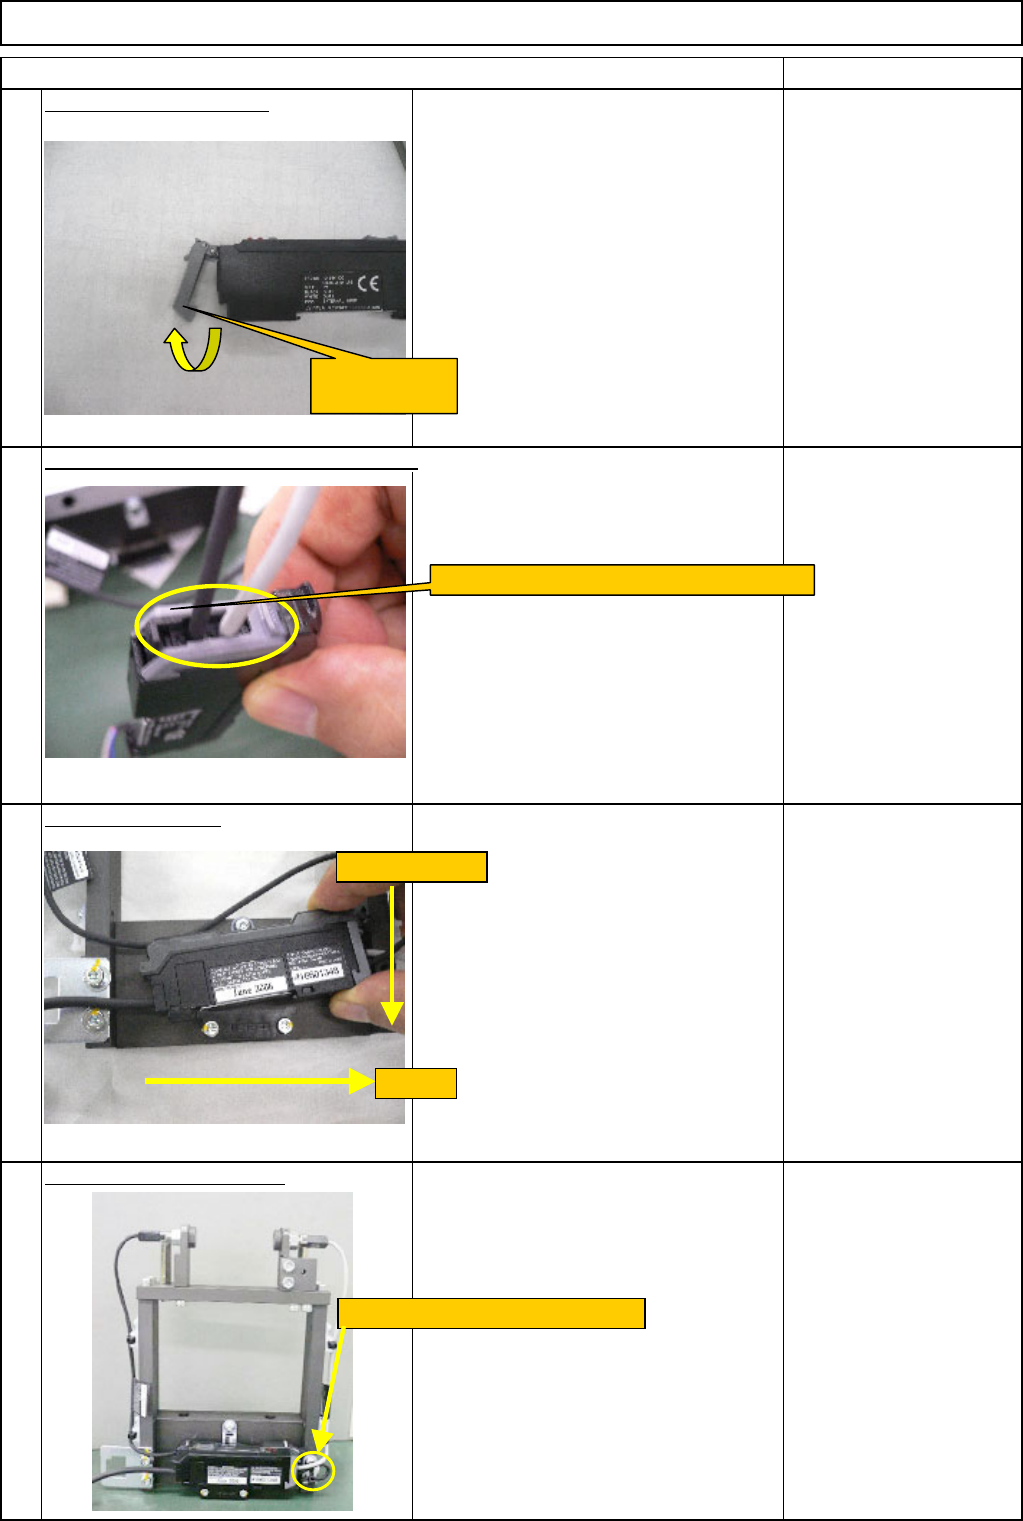
Option Part and Accessory Replacement
Open the connector lock.
Install the amplifier.
Secure the amplifier cable.
Insert the sensor cables into the amplifier.
13
14
15
16
Open the
connector lock.
Insert the sensor cables into the amplifier.
(1) Pull.
(2) Press down.
Secure the cable with a cable tie.
EJM8A-E-SMA060404-A01-00
Page 6-4-4-5
Remarks
Component-Thickness-Measuring Unit
Item
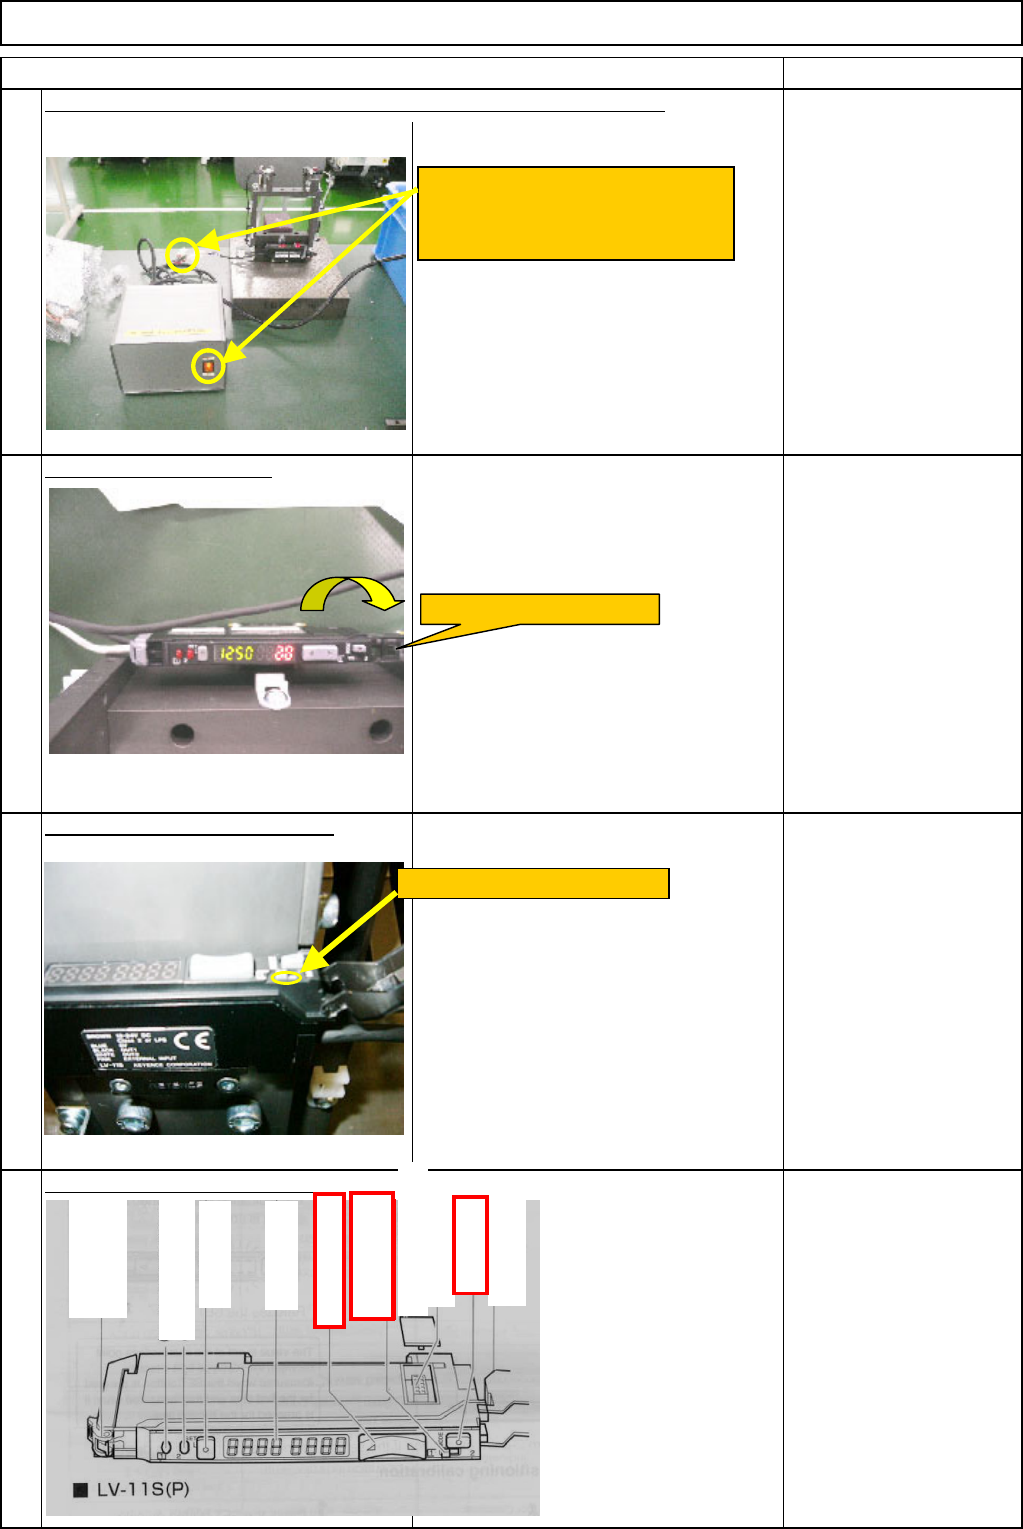
Option Part and Accessory Replacement
FM-1962(1) Component-
thickness-measuring-unit-
lightl-axis-adjusting jig (1.
Component-height-
detection-sensor-
adjusting-power box)
Open the amplifier cover.
Set the amplifier output type "1."
Set the amplifier detection mode.
19
17
18
20
Connect the component-height-detection-sensor-adjusting-power box.
Connect the amplifier connector to
the power-box connector. Turn on
the power switch.
Open the amplifier cover.
Set the channel switch to "1."
A
dd-in protection cover
Ch
anne
l
sw
it
c
h
(display setting)
Manual button
Dust cover
A
dd-in connector
Digital monitor
Set button
Hold lock bar
Output indicator
(
Control output 2
)
Output indicator
(
Control output 1
)
Mode button
EJM8A-E-SMA060404-A01-00
Page 6-4-4-6