CM602all_EJM8AESM_Service Manual.pdf - 第558页
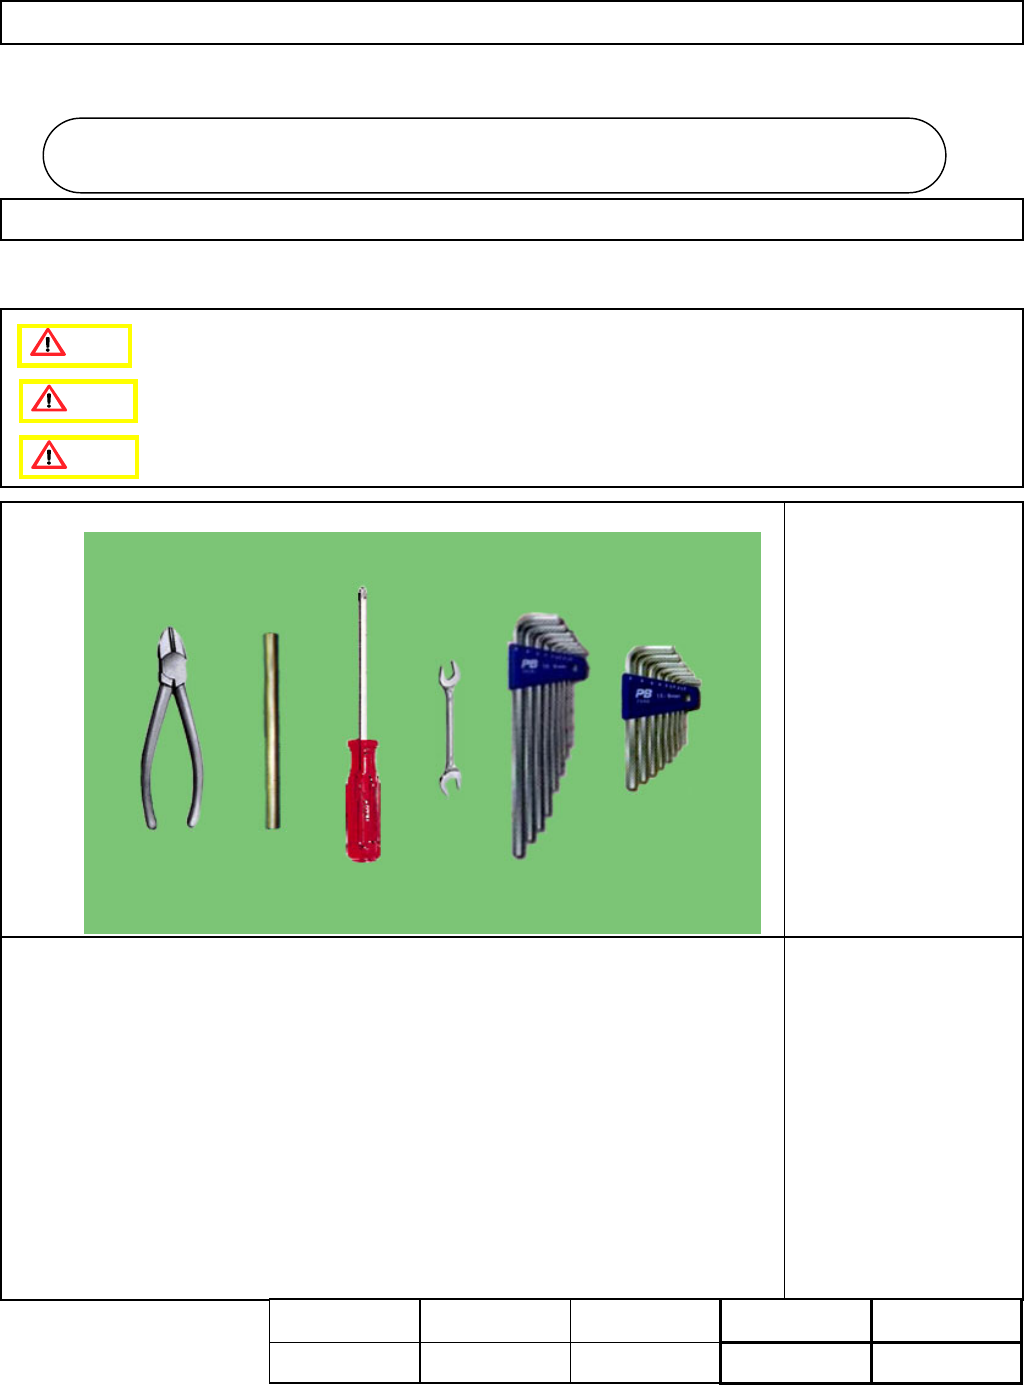
Machinery Part Replacement This section describes the procedures for replacing the line camera. ・ Tools Phillips screwdriver #2 Allen key 2.5 mm Allen key 3 mm Allen key 4 mm Allen key 5 mm Special short wrench 4 mm Pipe…
Refer to "Head Camera Adjustment
--- Focus and Theta --."
Machinery Part Replacement Head Camera Unit
Section 4-1-2
Tools and Specifications
Item Remarks
9
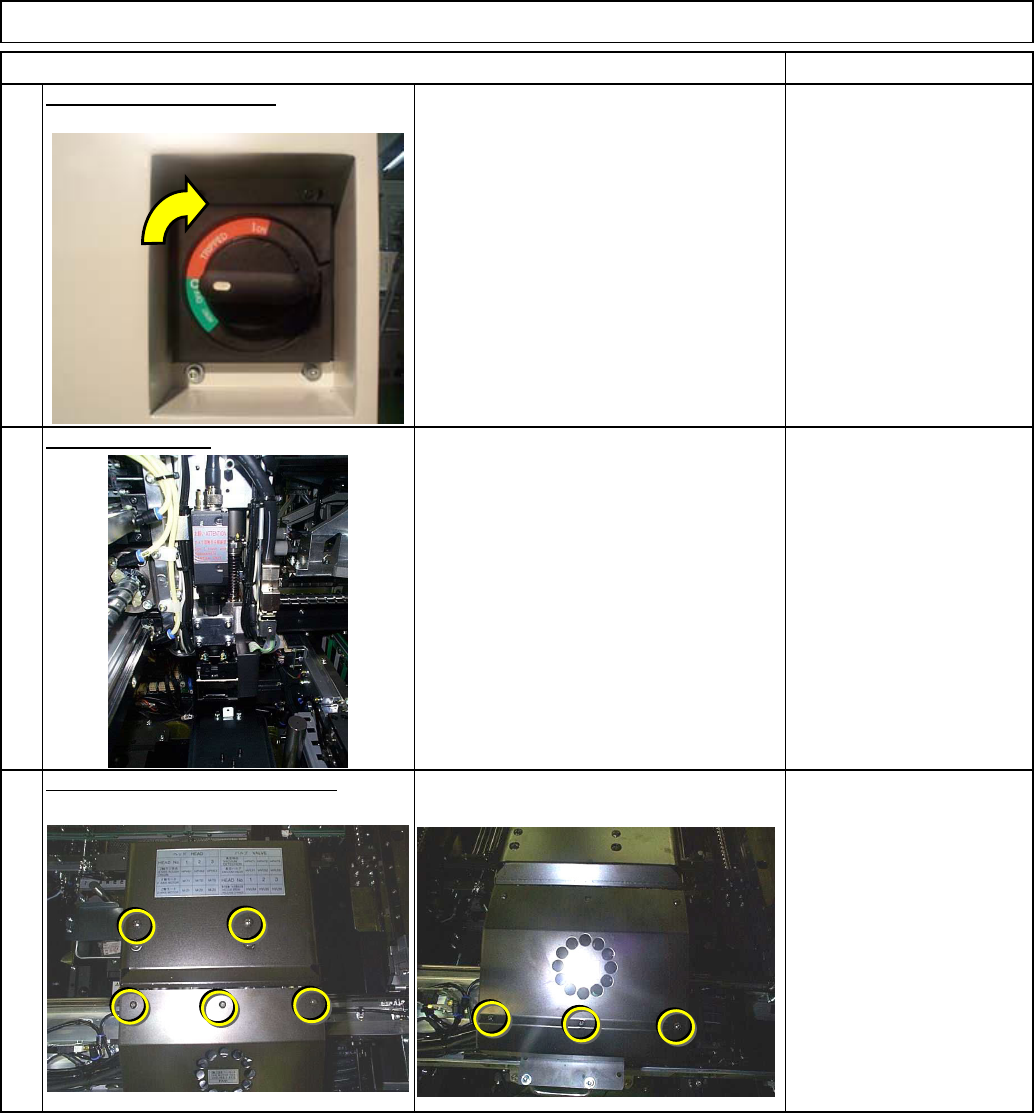
Switch on the main power.
Tools and Specifications
Adjust the camera.
Tools and Specifications
Phillips screwdriver #1
Phillips screwdriver #2
Screw M3 8 pcs.
M4 4 pcs.
10
11
Put B214the head cover back on.
EJM8A-E-SMA050603-A01-00
Page 5-6-3-4
Machinery Part Replacement
This section describes the procedures for replacing the line camera.
・Tools
Phillips screwdriver #2
Allen key 2.5 mm
Allen key 3 mm
Allen key 4 mm
Allen key 5 mm
Special short wrench 4
mm
Pipe
Wrench 5.5 mm
Nipper
・Jig
None
5-7-1 Line Camera Replacement
Line Camera Unit
Line Camera Unit
5-7
Caution
Dange
r
Warning
Assembly
Adjustment
50min.
Teaching
55min.
Total Time Weight of
Part
Removal
Disassembly
30min.
135min.
kgs
EJM8A-E-SMA050701-A01-00
Page 5-7-1-1

Machinery Part Replacement
Remarks
Switch off the main power.
Remove the feeder cover and the chute.
Phillips screwdriver #2
Allen key 3 mm
Screw M4 2 pcs.
Screw M4x10 mm 3 pcs.
Thick washer 3 pcs.
Remove the lower chute.
Allen key 4 mm
Screw M5x12mm 4 pcs.
Thick washer 4 pcs.
Remove the lower cover.
Phillips screwdriver #2
Round cross-head screw
M5 4 pcs.
Line Camera Unit
Item
3
4
1
2
Chute installing
section (left)
Chute installing
section (right)
EJM8A-E-SMA050701-A01-00
Page 5-7-1-2