CM602all_EJM8AESM_Service Manual.pdf - 第882页
I Since this adjustment requires releasing the safety cover switch, only those who are authorized to release it based on the Document "Key Switch/Key Disk Receipt Confirmation and Safety Precautions" are permit…
I Since this adjustment requires releasing the safety cover switch, only those who are
authorized to release it based on the Document "Key Switch/Key Disk Receipt
Confirmation and Safety Precautions" are permitted to perform this adjustment.
II Since this adjustment requires parameter changes using the key disk, only those who
are authorized to use the key disk based on the "Key Switch/Key Disk Receipt
Confirmation and Safety Precautions" are permitted to perform this adjustment.
Shuttle TrayTray
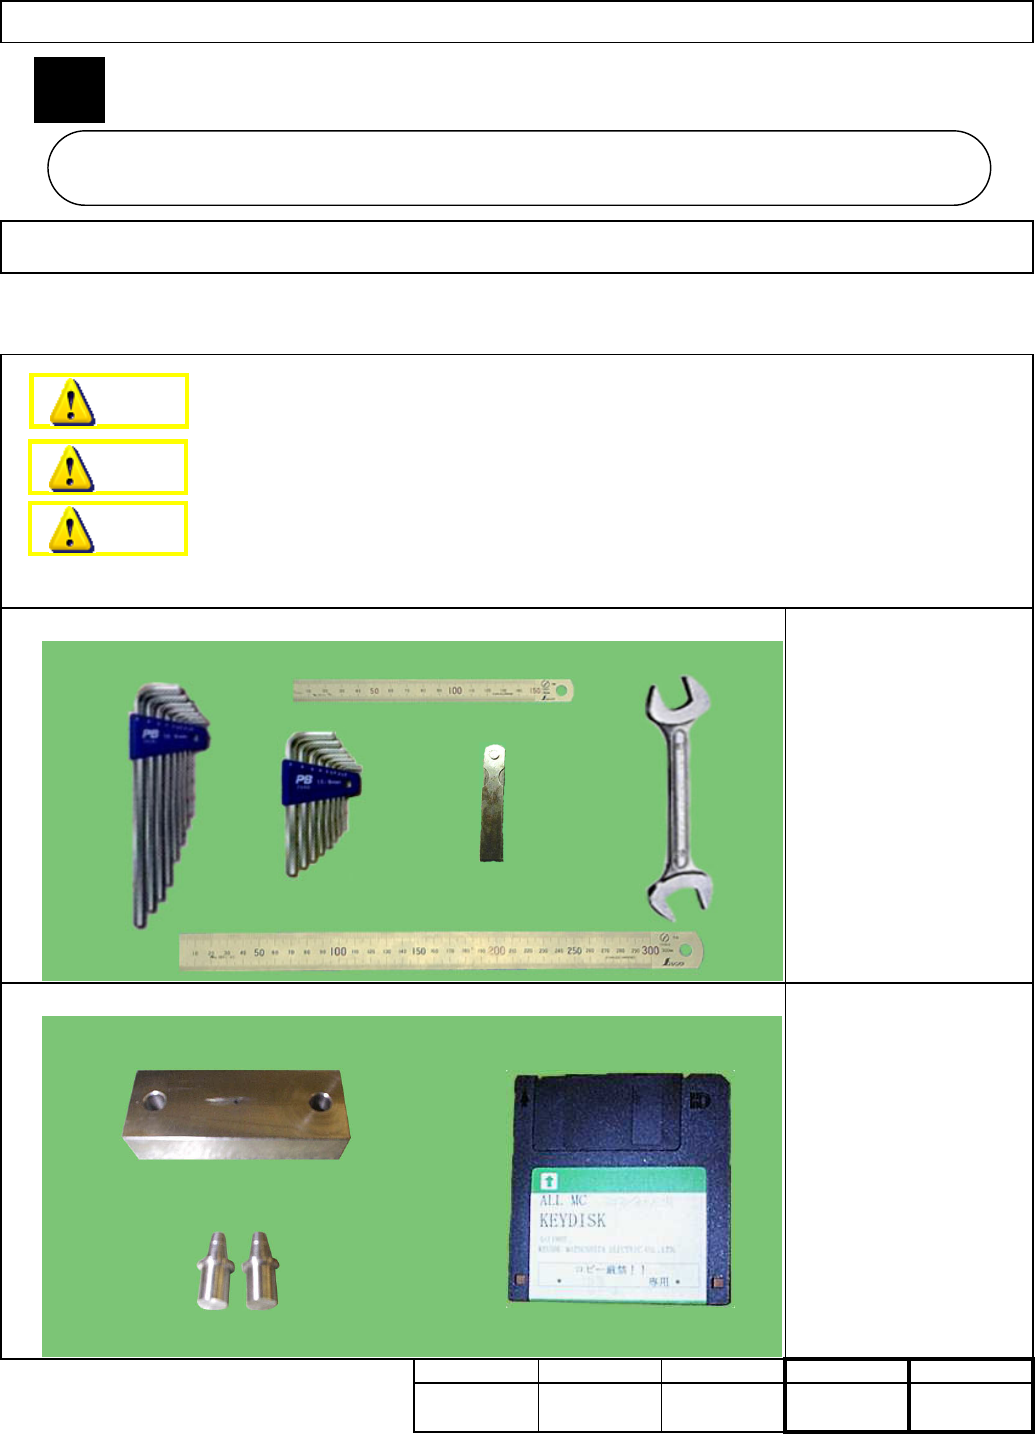
Allen key 4 mm
Allen key 5 mm
Allen key 6 mm
Wrench 270mm
Feeler gauge 0.5 mm
Ruler 150 mm
Ruler 300 mm
kgs.
7-1-1 Installing the Shuttle Tray Feeder
・Jigs
40
Removal/Disassembly
• This section describes the procedures for installing the shuttle tray.
・Tools
Total
Key disk
Pickup position adjustment
jig
Nozzle jig
Teaching
45
Min.
Part Weight
Min.
Assembly/Adjustment
5
Tray
Min. Min.
Shuttle Tra
y
7-1
Dange
r
Warning
Caution
7
EJM8A-E-SMA070101-A01-00
Page 7-1-1-1
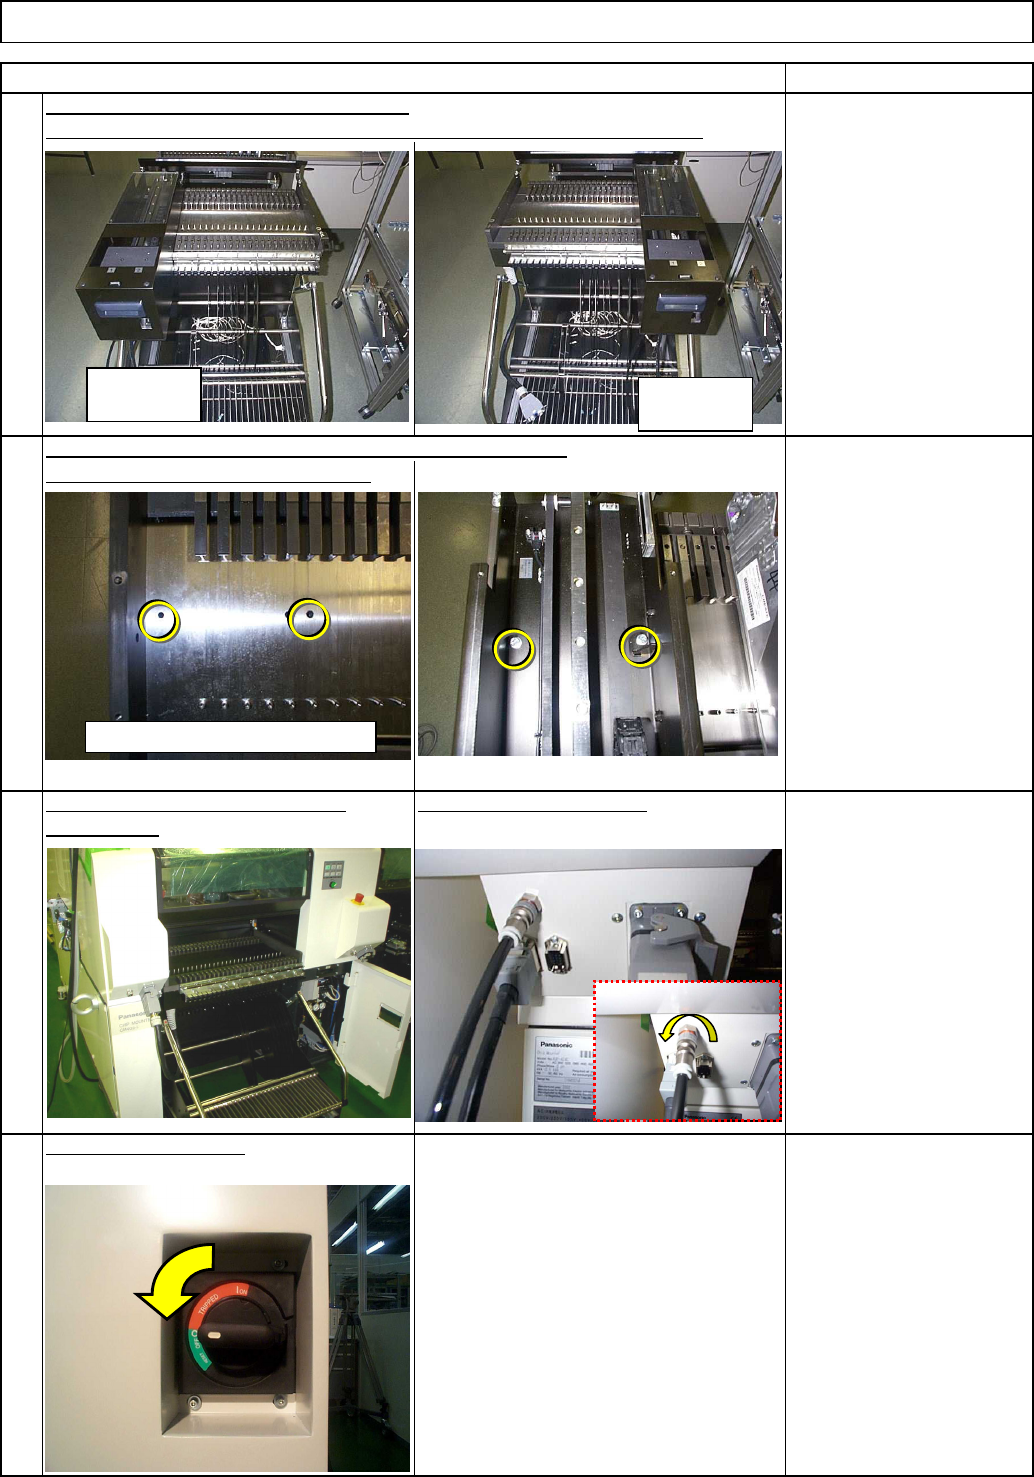
Switch OFF the power.
Install the feeder exchange cart in To lock the air joint, turn it.
the machine.
3
4
See Section 5-8-1
"Feeder Cart Installation
and Removal"
Item
Remove the upper clear cover from the shuttle transfer unit.
2
1
Tighten the two screws shown below:
Allen key 5 mm
Screw M6 x 30L 2 pcs.
Tray Shuttle Tray
Remarks
Mount the shuttle transfer unit on the cart.
Push the unit forwards until it clicks and is connected to the cart completely.
Tray transfer unit fixing holes
Installing in
on BR
Installing it
on AR.
EJM8A-E-SMA070101-A01-00
Page 7-1-1-2