CM602all_EJM8AESM_Service Manual.pdf - 第222页
Maintenance Adjustment Light Transfer-Head Assembly (8 nozzles) Remarks Press [XY plane cal]. Conveyor width is adjusted automatically. (Y=460 ㎜ ) Press [Jig setting]. The AF head moves away. Place the jig on the conveyo…
Maintenance Adjustment Light Transfer-Head Assembly (8 nozzles)
This section describes the procedures for carrying out the XY plane calibration.
・Tools
None
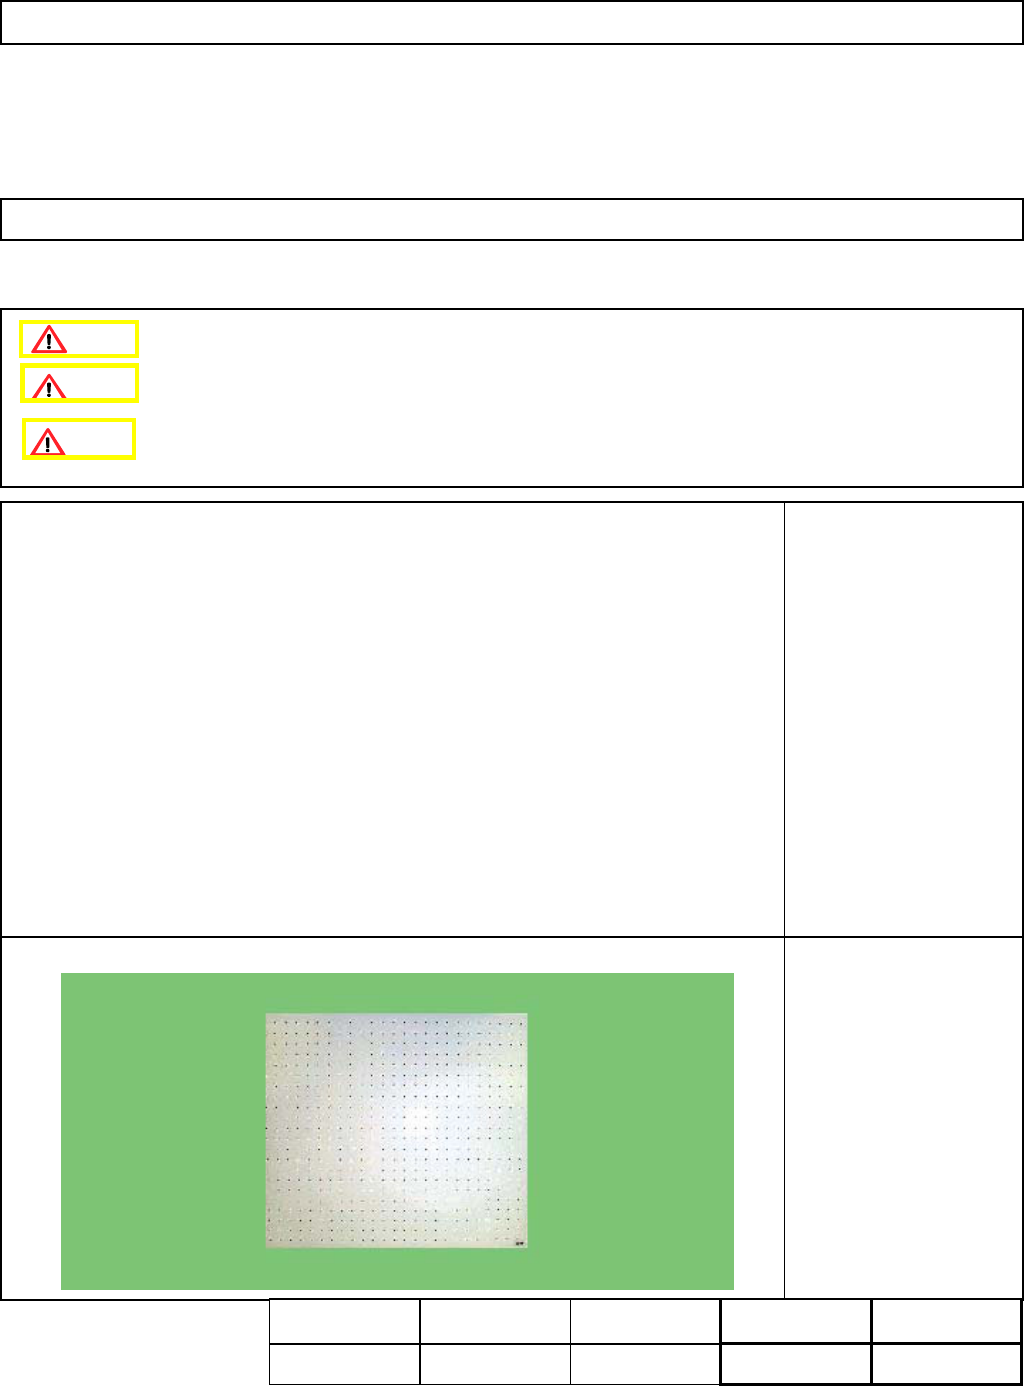
・Jig
FM-1045
XY plane calibration jig
510 mm x 460 mm
Remove dirt from the
recognition side of the jig
with soft cloth.
4-2-6 XY Plane Calibration
Remove the support pins beforehand.
Handle the jig with care since it is made of glass.
This calibration should be carried out on the operator's side;
it cannot be performed at the rear.
Assembly
Adjustment
min.
Teaching
20min.
Total Time Weight of
Part
Removal
Disassembly
min.
20min. kgs
Caution
Dange
r
Warning
EJM8A-E-SMA040206-A01-00
Page 4-2-6-1
Maintenance Adjustment Light Transfer-Head Assembly (8 nozzles)
Remarks
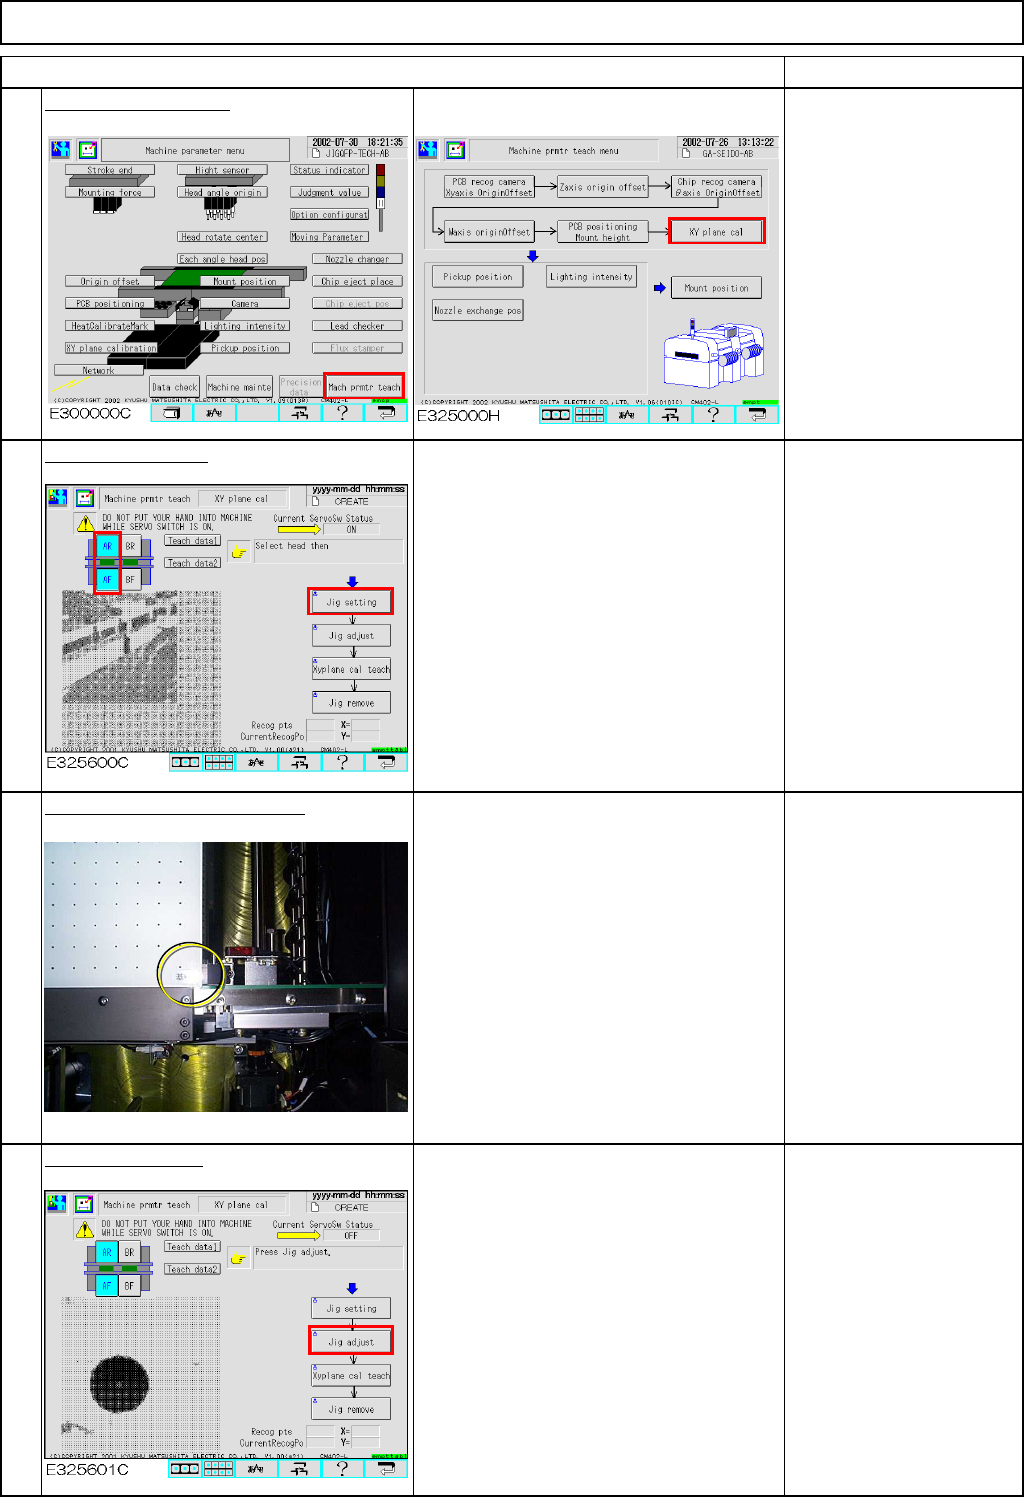
Press [XY plane cal].
Conveyor width is
adjusted automatically.
(Y=460㎜)
Press [Jig setting].
The AF head moves away.
Place the jig on the conveyor.
Place the jig by hand, pressing the
reference-mark corner of the jig against
the fixed conveyor and the board
stopper.
Press [Jig adjust].
The jig is clamped in the Y direction.
(Option)
Check that the jig is
locked once it is clamped
in the Y direction.
3
4
1
Item
2
EJM8A-E-SMA040206-A01-00
Page 4-2-6-2
Maintenance Adjustment Light Transfer-Head Assembly (8 nozzles)
Remarks
Item
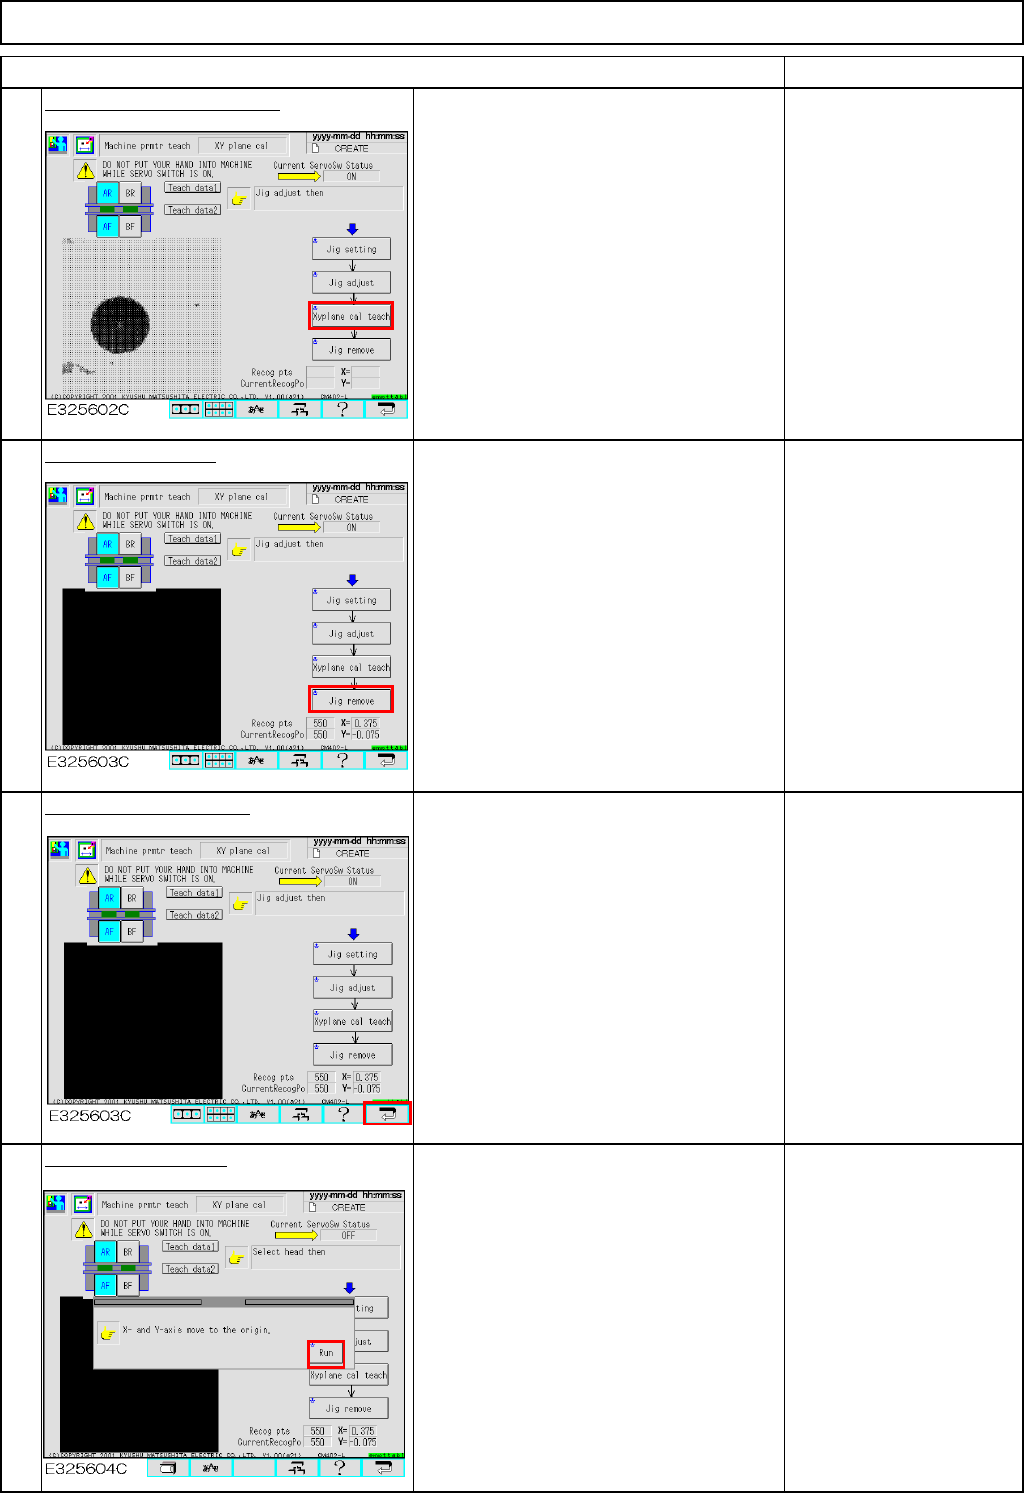
Press [Xyplane cal teach].
The jig is clamped in the Z direction.
The AF head recognizes the dots on the
jig. Then the AR head recognizes them.
Press [Jig remove].
Both AF and AR heads move away.
Once they finish moving away, remove
the jig.
Press the "Return" key.
Press the "Run" key.
5
6
7
8
EJM8A-E-SMA040206-A01-00
Page 4-2-6-3