CM602all_EJM8AESM_Service Manual.pdf - 第508页
Place the multi-purpose nozzle changer. Remove the high-speed nozzle changer. Z Unit (3-nozzle type) Remarks Place the laser board. See Section "6-1-3 Nozzle Changer Replacement (High-Speed Machines)." See Sect…
interference sensor dog.
Place the lead checker sensor amplifier.
See Section "6-2-5 3-Head
Support Regulator
Replacement."
See Sections "6-3-1.
Installing the Lead
Checker"
Place the electropneumatic regulator.
Do not move the dog.
Feeler gauge
Remarks
6
7
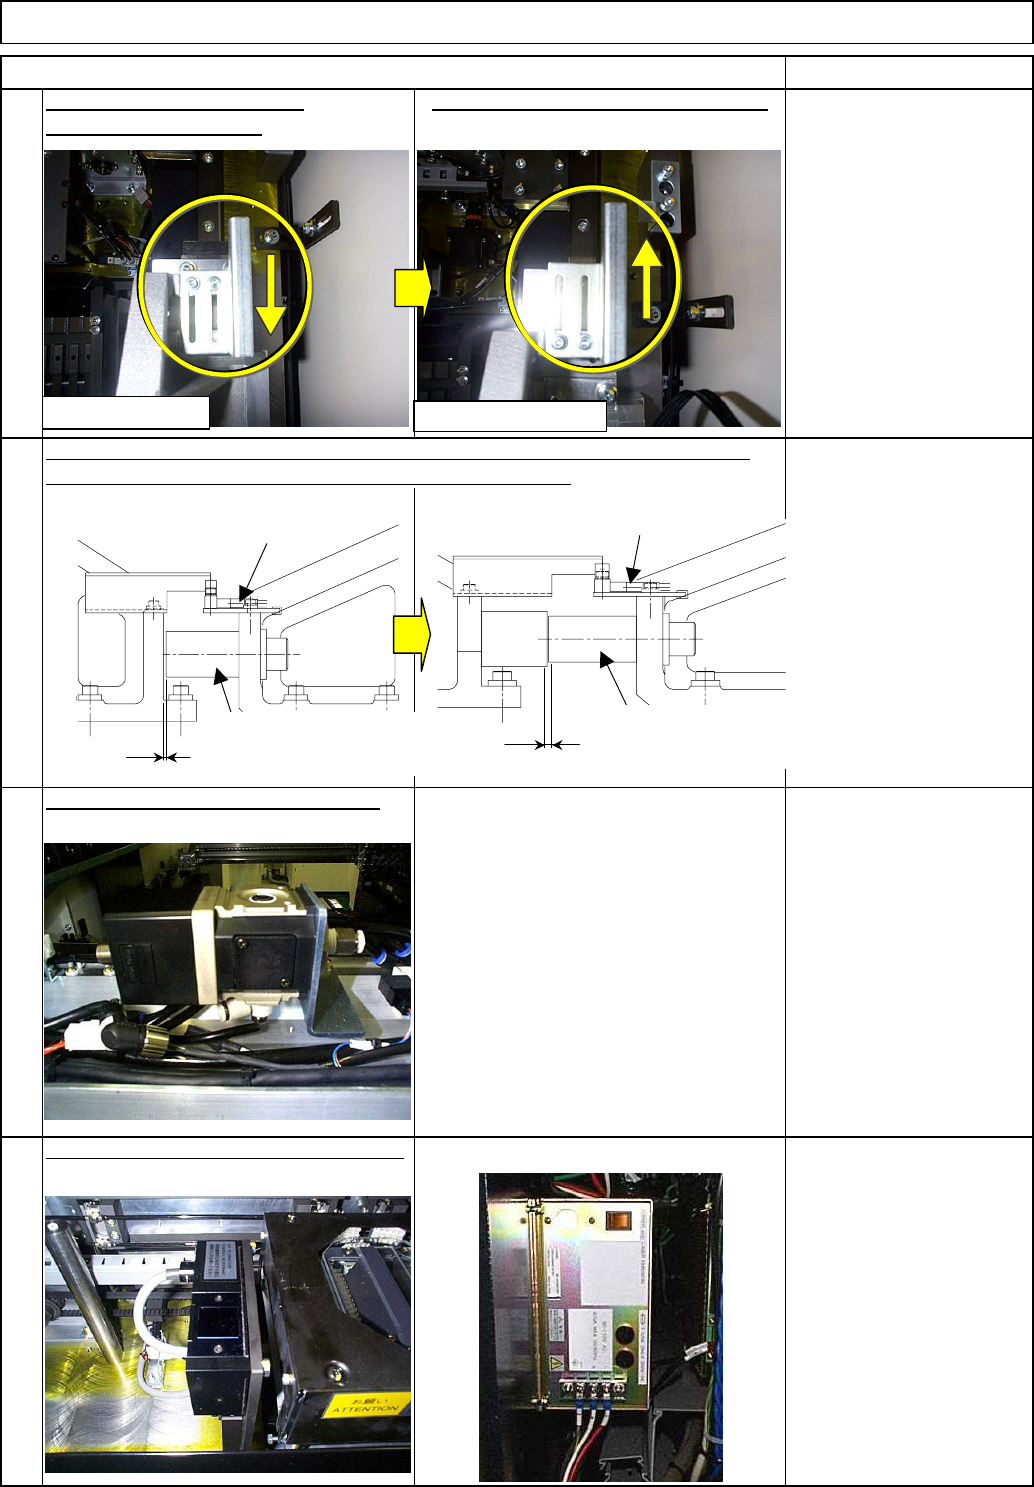
Adjust the collision preventing photo sensor so that it turns ON when the gap of
the collision preventing stopper and the X beam is 0.5 mm.
5
Move it up to the other end of the cut.
Item
Precisely position the Y-axis
8
Machinery Part Replacement
Z Unit (3-nozzle type)
[Multi-purpose head][High-speed head]
0.5
Dog
0.5
High-speed head
Multi-purpose head
Collision preventing
stopper
PH bracketDog
Collision preventing
stopper
PH bracket
EJM8A-E-SMA050503-A01-00
Page 5-5-3-3
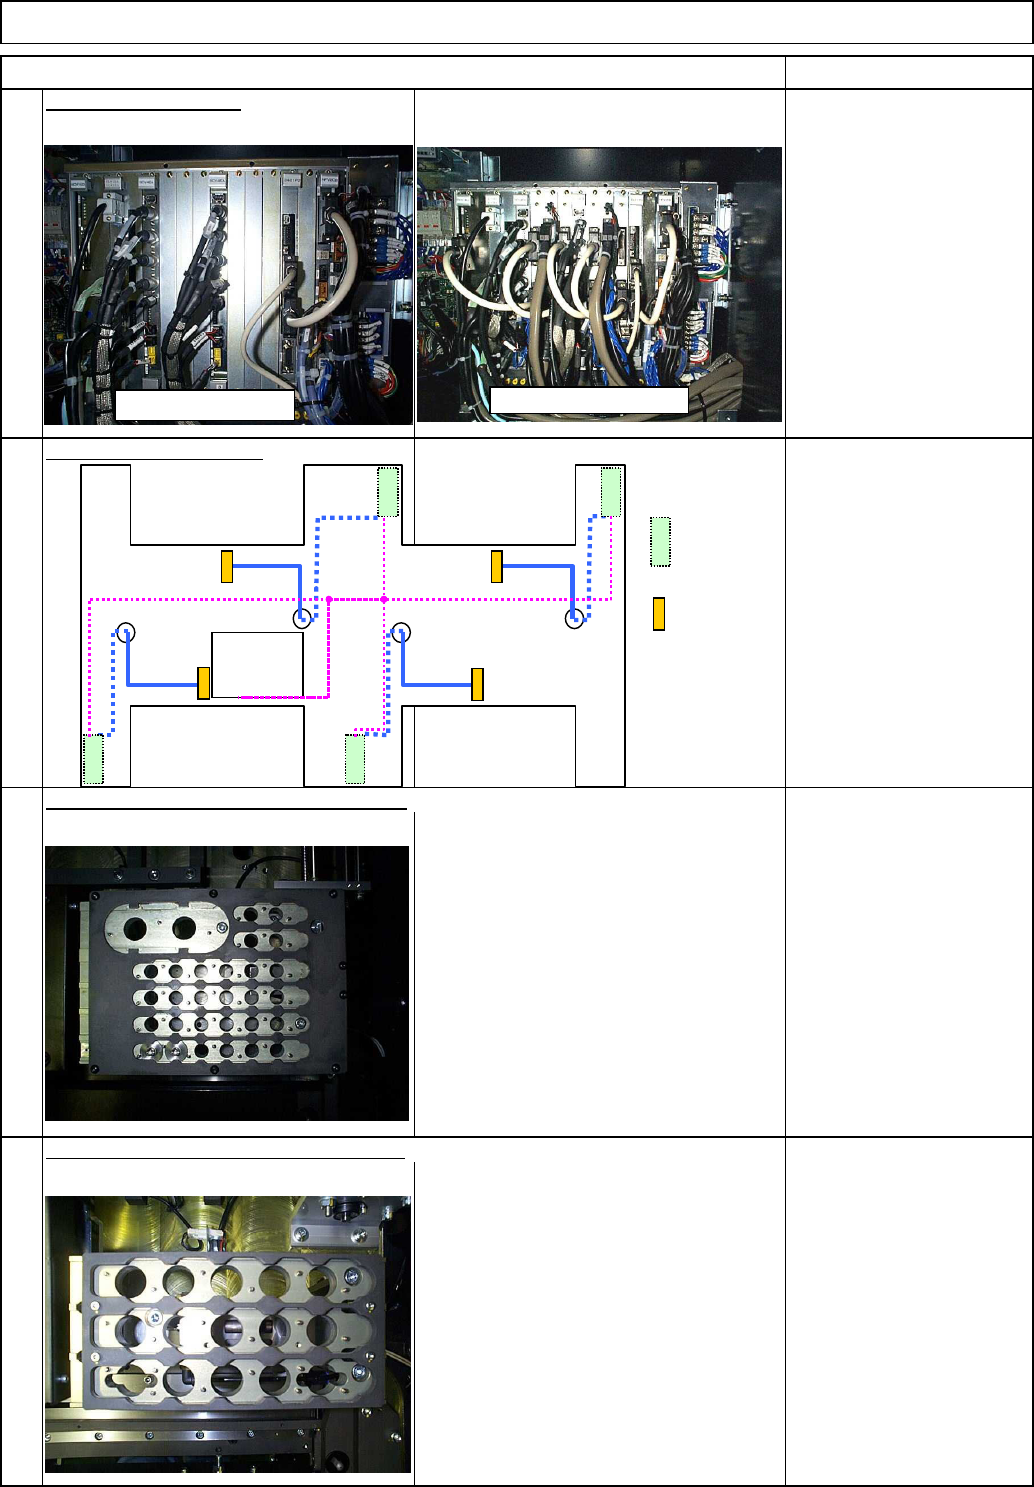
Place the multi-purpose nozzle changer.
Remove the high-speed nozzle changer.
Z Unit (3-nozzle type)
Remarks
Place the laser board.
See Section "6-1-3
Nozzle Changer
Replacement (High-Speed
Machines)."
See Sections "6-3-1.
Adding a Lead Checker"
10
11
9
Machinery Part Replacement
Item
Connect the connectors.
12
See Section "6-2-3.
Nozzle Changer
Replacement (Multi-
Purpose Machines)."
Amplifier
Sensor
CPUBO
X
Multi-purpose head
High-speed head
EJM8A-E-SMA050503-A01-00
Page 5-5-3-4
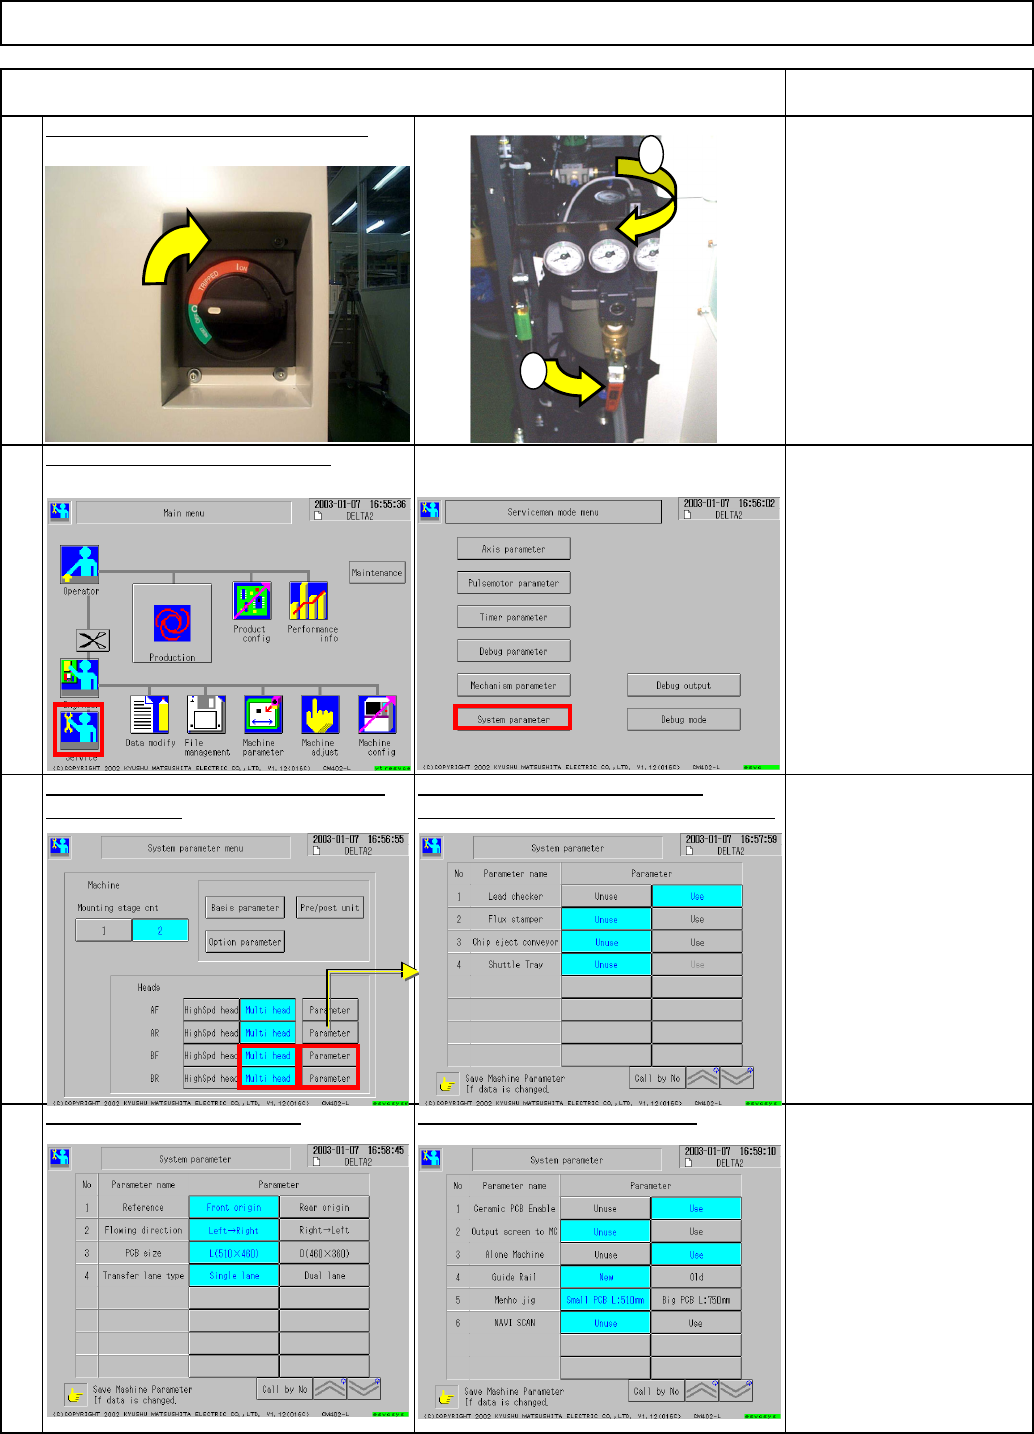
Change the system parameters.
Change the setup of the desired stag
e
Change the system parameters
to "Multi head."
Check the basic parameters. Check the optional parameters.
according to the machine specifications.
16
15
14
13
Switch on the power and air supply
.
From 0.49 Pa
To 0.54MPa
Item Remarks
Machinery Part Replacement
Z Unit (3-nozzle type)
1
2
EJM8A-E-SMA050503-A01-00
Page 5-5-3-5