CM602all_EJM8AESM_Service Manual.pdf - 第346页
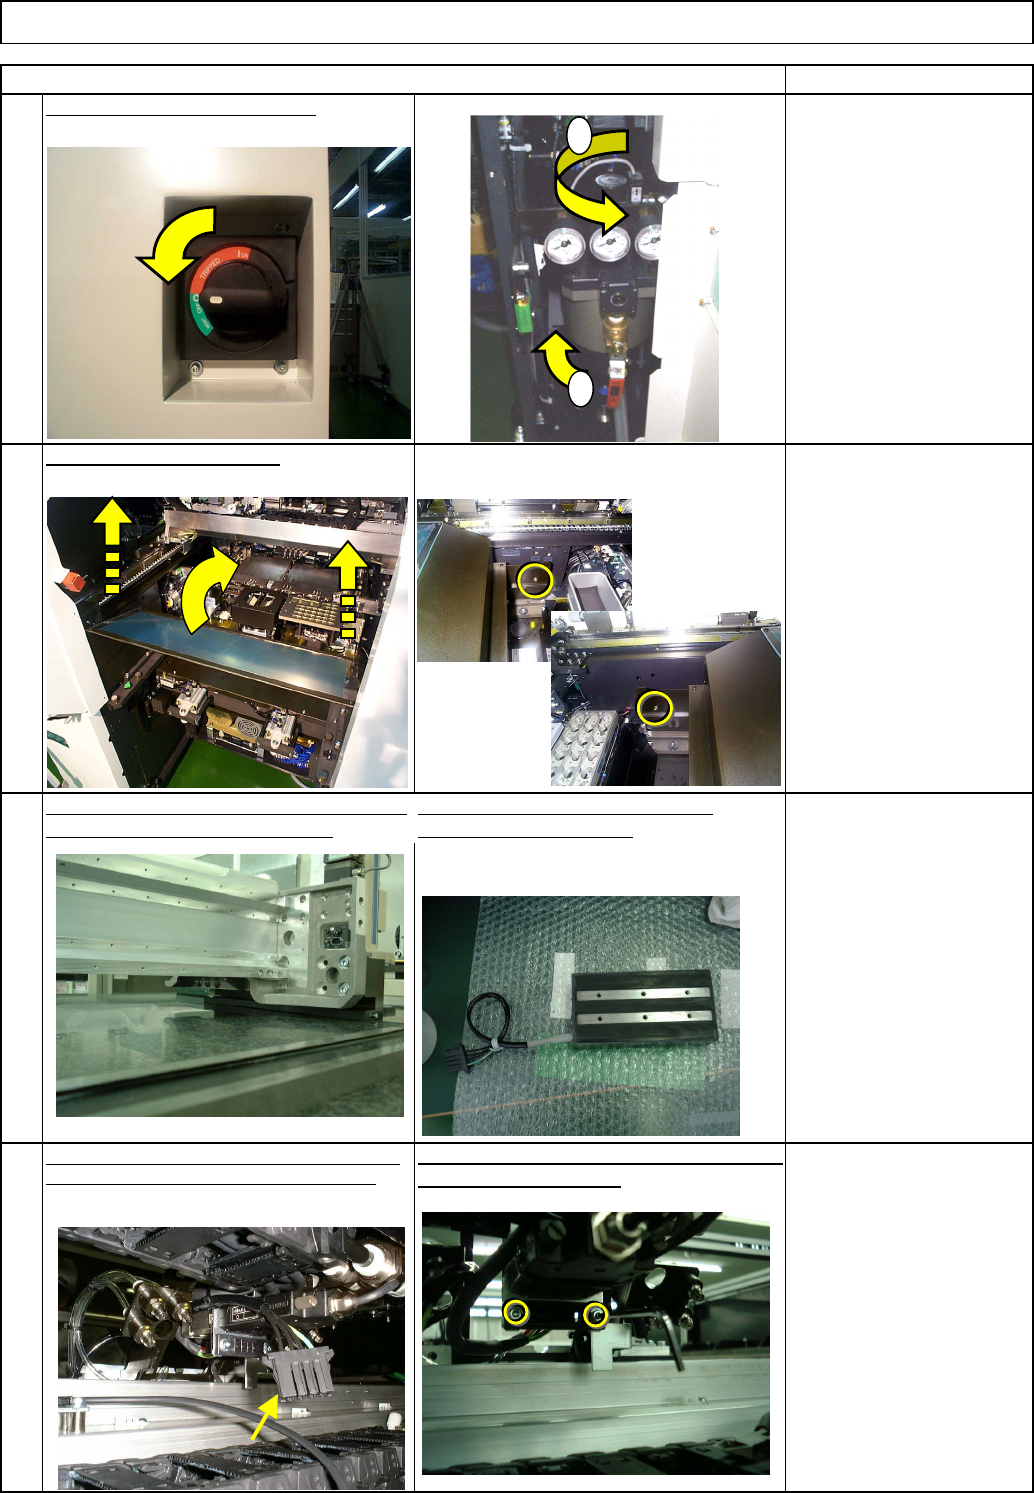
Bakelite (Pale purple plate) 6 7 8 Remarks Holding the secondary part, loosen the other two bolts. Item Move the head installing plate to the center of the X axis. Loosen the four secondary-part holding bolts. Move the s…
Picture when seen from the front side.
3
4
Allen key 3 mm
Screw M4 (Special) x 2
Item
Remove the secondary parts, referring to "X-
axis Secondary-Part Replacement."
Remarks
Remove the feeder cover.
2
Turn off the power and the air.
Machine Part Replacement Main Body
Remove the head, referring to "Head
Replacement Procedures."
The secondary part is positioned on the rear
side of the head installing plate.
Disconnect the connector connecting the secondary
part near the X-axis cable bearer to the machine.
Loosen the secondary-part connector holding
bolt. Cut off the cable tie.
1
1
2
EJM8A-E-SMA050106-A01-00
Page 5-1-6-2
Bakelite (Pale purple plate)
6
7
8
Remarks
Holding the secondary part, loosen the other
two bolts.
Item
Move the head installing plate to the center of the X
axis. Loosen the four secondary-part holding bolts.
Move the secondary part horizontally and pull it out. At that time, be careful not to let the
Bakelite fall, which is between the head installing plate and the secondary part,
5
Clean the new secondary part using cloth
with alcohol
Insert the secondary part behind the head installing
plate so that the part cable is positioned at right.
Insert the Hollow-set screws into the holes on the
secondary part. Mount the Bakelite, aligning it with
the holes. Hollow set: Approximately 20-mm long
Align the convex hollow-set screws with the head-
installing-plate hole, and tighten the bolts in the center
of the hole. Bolt x 4
Machine Part Replacement Main Body
EJM8A-E-SMA050106-A01-00
Page 5-1-6-3
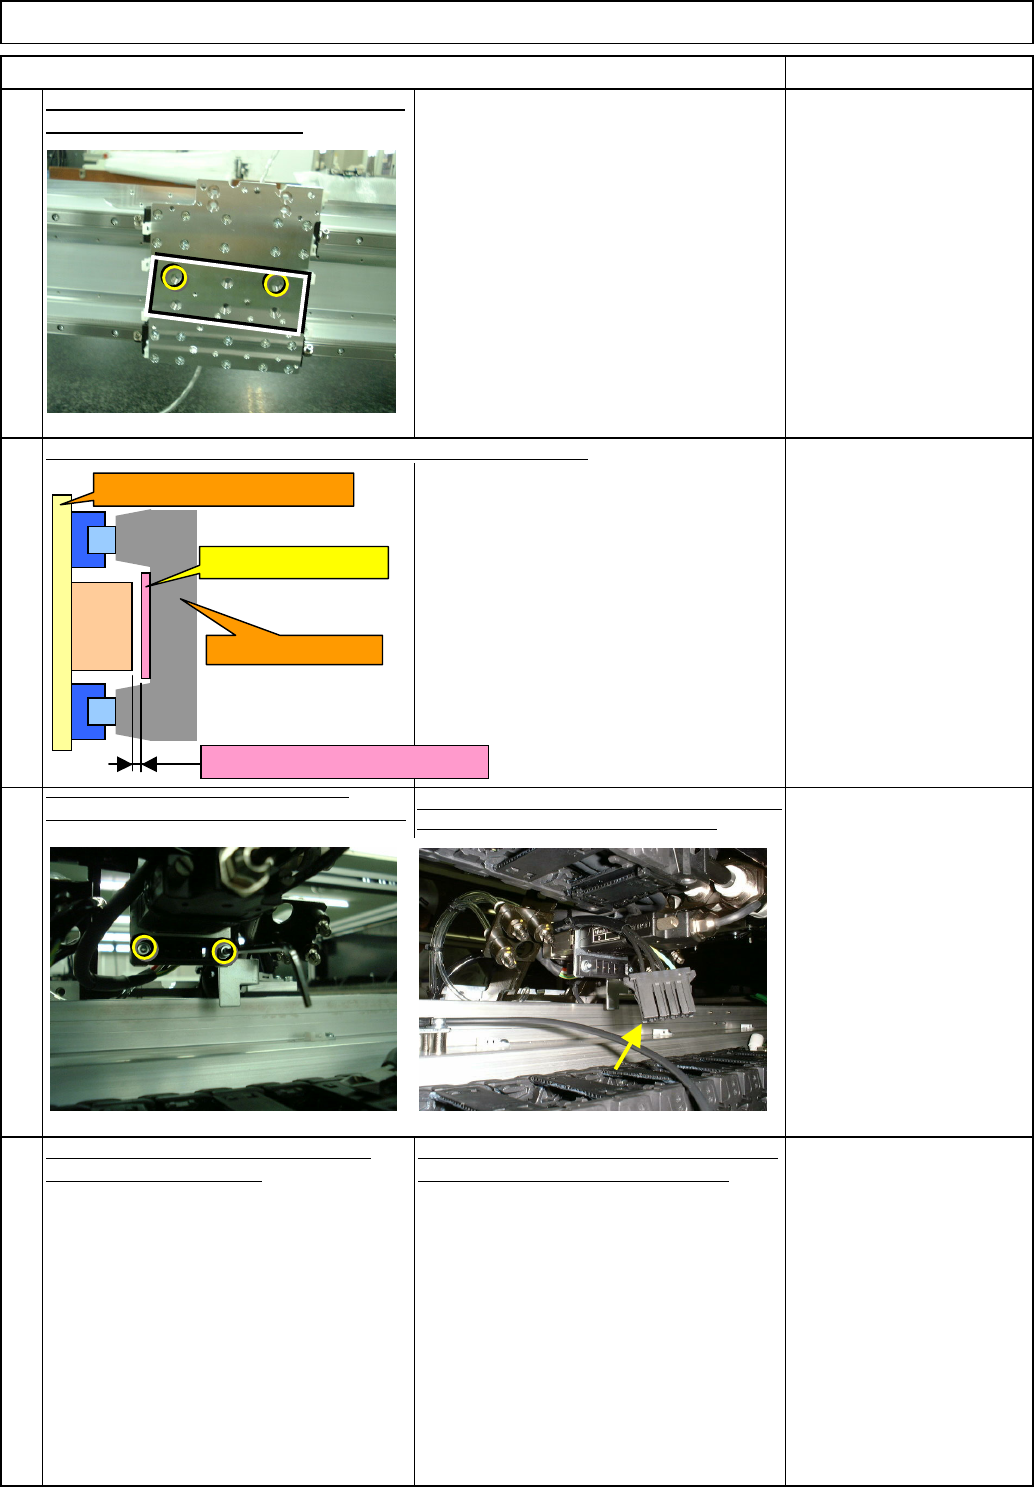
Check the gap between the primary and the secondary parts.
Tighten
the
secondary
-
part
-
connector
holding bolts. Secure the cables with a cable
tie
Connect the connector connecting the secondary part
near the X-axis cable bearer to the machine.
Put the head back on, referring to "Head
Replacement Procedures."
10
11
12
Check the gap with a non-
magnetic material.
Gap: 0.3 mm
Machine Part Replacement
9
Item
Main Body
Remarks
Remove the hollow-set screws. Put the bolts
and tighten them. Bolt x 2 pcs.
Put the secondary parts back on, referring to
"X-axis Secondary-Part Replacement."
Secondary part
Gap should be 0.3 mm.
X-axis beam
Head installing plate
Primary
part
EJM8A-E-SMA050106-A01-00
Page 5-1-6-4