CP643 系统参考.pdf - 第135页
(2) Setting Automatic Block Skip Marks In this case, the camera will read the block skip marks on the board and automatically skip the appropriate blocks. 1. Decide positions to put block skip marks on the board. It does…
3. Press the [PROGRAM], [SKIP] and [BLOCK] command function keys.
The display will change to the one shown below. In this display block 5 has been set
to be skipped.
4. Enter the block number you want to skip using the
numerical keypad (see figure at right).
Press the number to be set as the block number and
then press the carriage return [CR] to enter the value.
[Example]
The display will change accordingly. If 3 is entered “B 3P (green)” will change to “B
3S (yellow).”
Note: Refer to Chapter 3 “Command Descriptions” in Part 3 “Commands” for further details.
5. A block skip displayed in red indicates that the block has been set at the host
computer and cannot be changed on the machine.
6. Enter the block skip number (the block number displayed in yellow) one more time to
cancel the block skip flag.
[Example]
The display will change accordingly. If 3 is entered “B 3S (yellow)” will change to “B
3P (green).”
7. If the user presses the [RETURN] command function key after all the block skips have
been set, the previous screen will display.
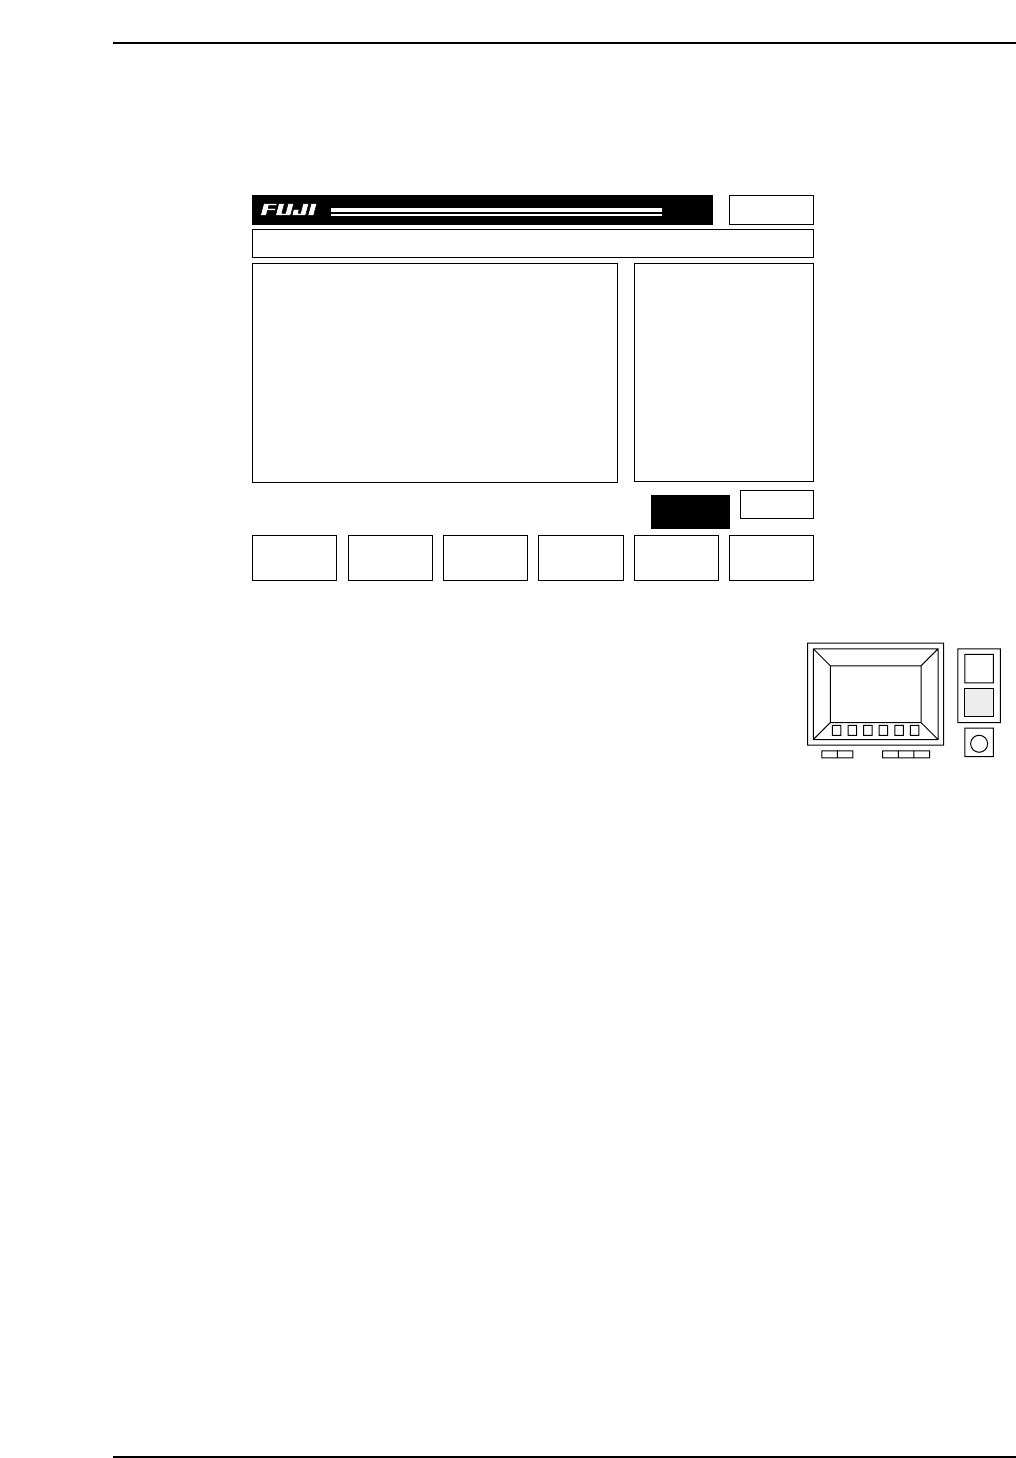
B 1P (green): Placing will be carried out on Block 1.
B 2S (yellow) Block 2 will be skipped. This skip was set at the machine.
B 3S (red): Block 3 will be skipped. This skip was set in the program and cannot
be canceled at the machine.
CP643S2040
Page 000
Off line
B1P
B2P
B3P
B4P
B5S
Prod 00000 Sche 00000CP_6.PROGRAM
v1.10
000000000000
000000000000
jog X Y
C
CP643S2039B
Part 2 Chapter 1 Basic Operation
Edition 1.1 2-1-77 CP643E System Reference
(2) Setting Automatic Block Skip Marks
In this case, the camera will read the block skip marks on the board and automatically
skip the appropriate blocks.
1. Decide positions to put block skip marks on the board. It doesn’t matter whether they
are inside of each block. Each block has to have an individual block skip mark
position.
2. In Mark_data of production program, enter the mark type (B), mark color (B/W),
mark size (Size_X, Y) and reading threshold level (CCD).
3. Enter every block number into sequence data (N_data) block number (B) column.
4. Enter the letter B into sequence data (N_data) device type (W).
5. Enter the Mark_data Mark No. as the device number (D) in sequence data (N_data).
6. Finally, enter the XY-coordinates for each block skip mark position into sequence data
(N_data).
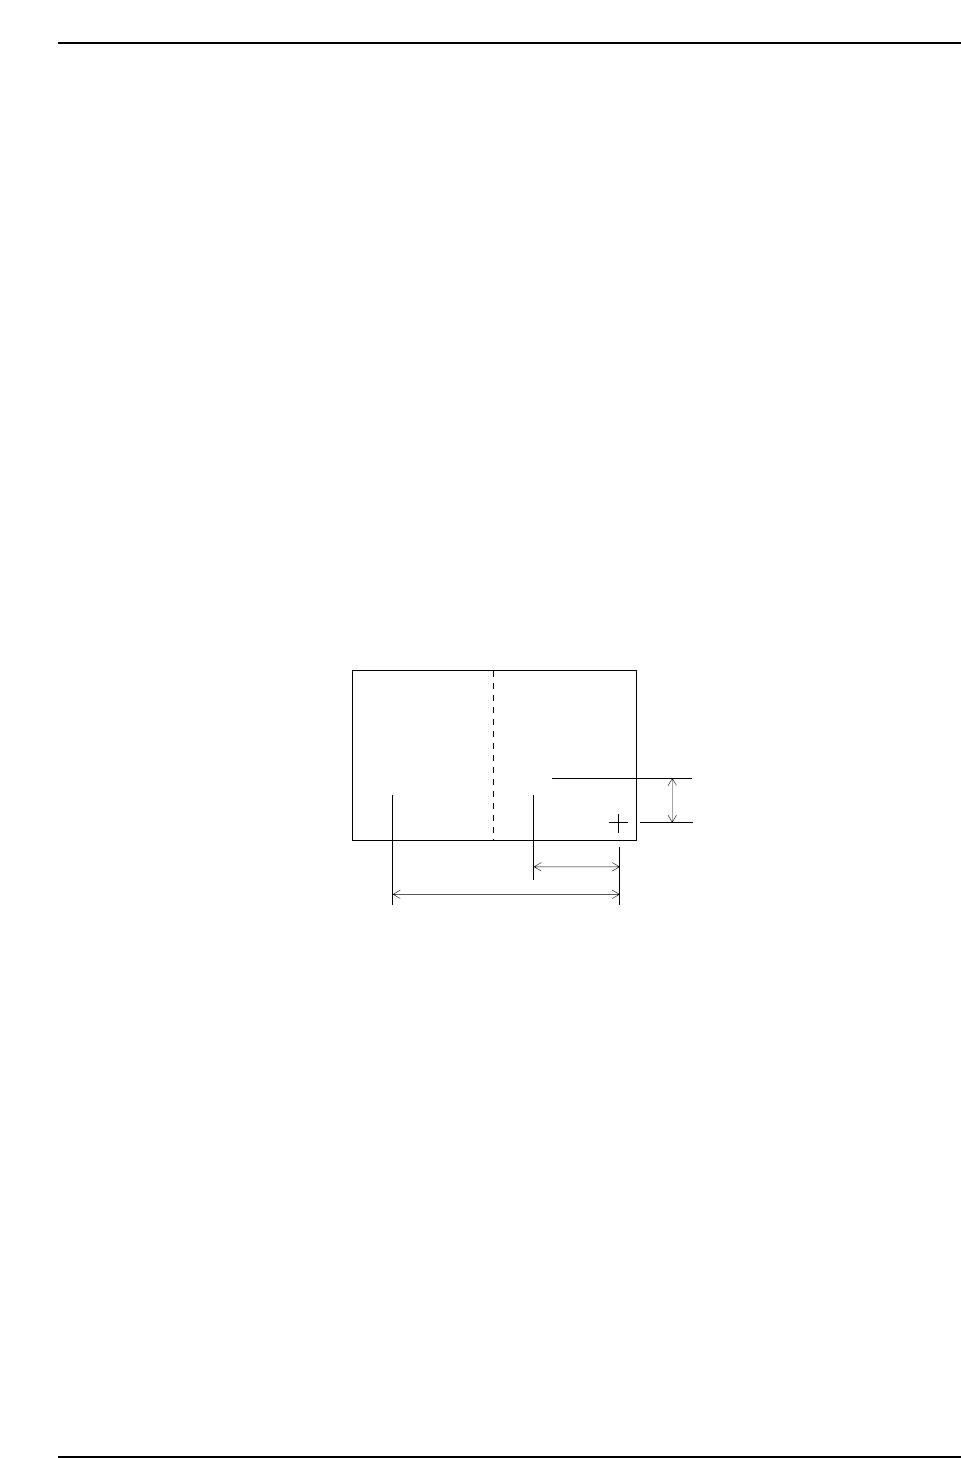
The example below shows the entries for two block skip marks.
For the sequence which B is entered in the W column, the machine will automatically
read the block skip mark and based on the results will skip the blocks that are marked
appropriately.
Mark sizes (Size X, Size Y) and reading threshold levels (CCD) can also be set at the
machine. See Chapter 3 “Command Descriptions” in Part 3 “Commands” for further
details.
CP643S2041
Block 2
Block skip
mark 2
Block skip
mark 1
Block 1
••
1000
2000
6000
Part 2 Chapter 1 Basic Operation
Edition 1.1 2-1-78 CP643E System Reference
<for MCS>
[Program] Mark_data
Mark_data Type Ptn B/W CCD L/S Scan Size_a Size_b Size_c Size x Size_y
-----------------------------------------------------------------------------------------------------------------
001 B 00 B 150 – 200 100 000 50 100 100
[Program] N_Data
N_Data B W D X Y Q
-----------------------------------------------------------------------------------------------------------------
001 1 B 1 -2000 1000 0.00 : Block 1, block skip mark 1
input
002 2 B 1 -6000 1000 0.00 : Block 2, block skip mark 2
input
<For F4G>
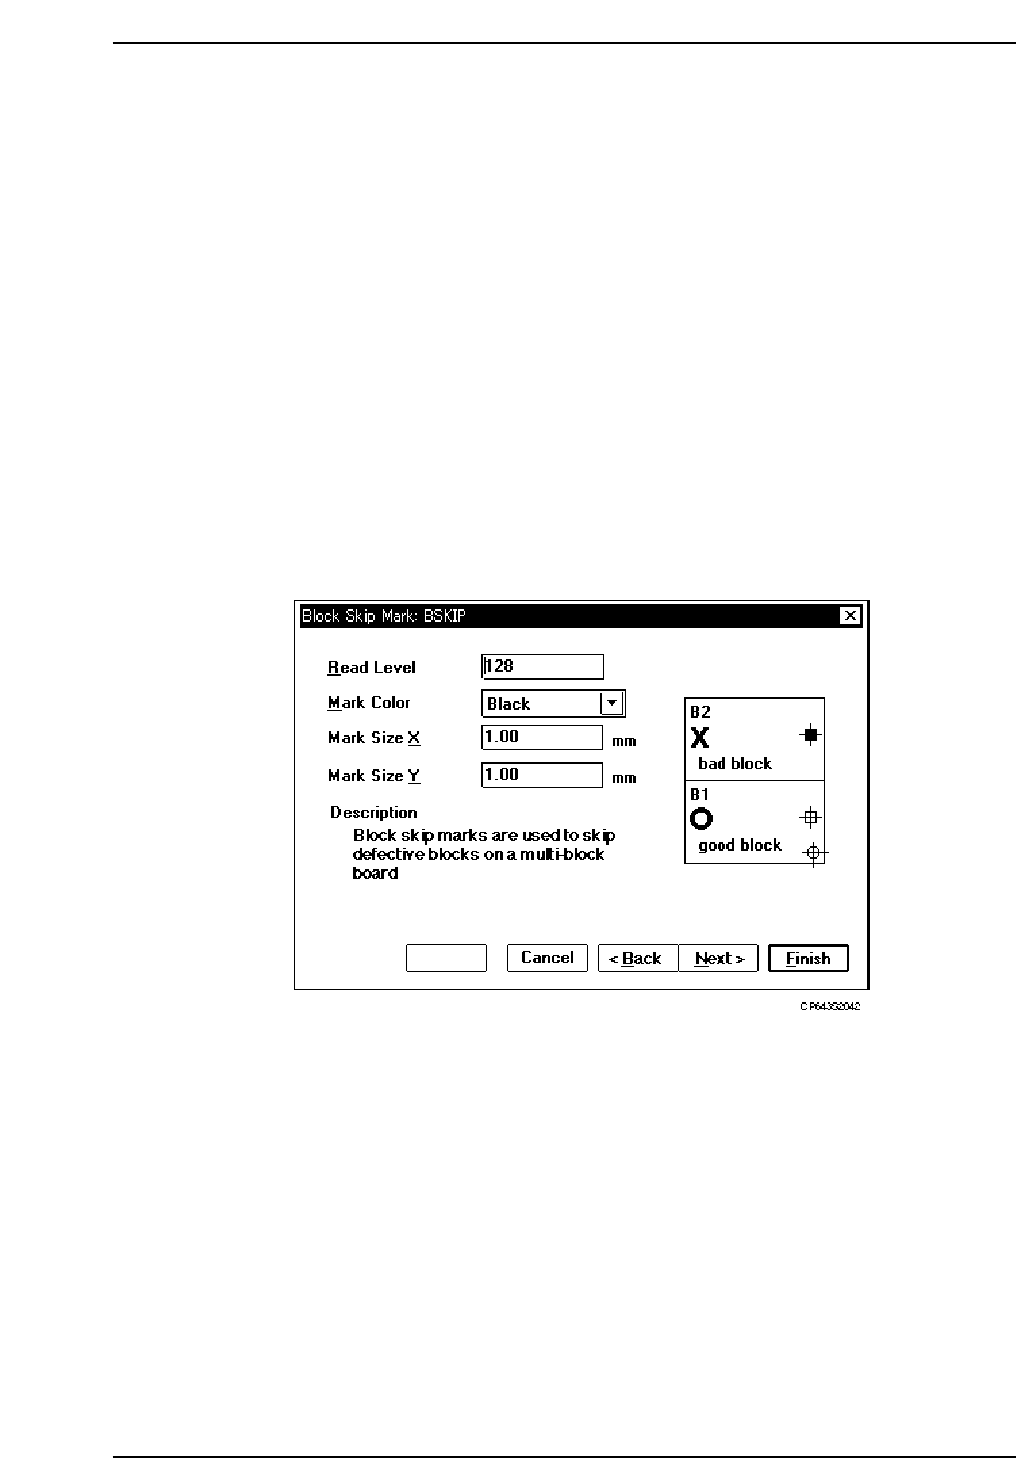
1. Start the GUE (Graphical Editor).
2. Create new Mark Data.
3. Select a Block Skip Mark as the mark type.
4. Enter the following settings: Read Level, Mark Color, Mark Size X, Mark Size Y.
5. Name and save this data.
Part 2 Chapter 1 Basic Operation
Edition 1.1 2-1-79 CP643E System Reference