Q170226E01.pdf - 第102页
4.1 Inspection Check List SERVICE MANUAL RH5 4.1−19 DA3SEC−80−020−B0 3. Drawing out the filter case Draw out the filter from Panadac 791. =NOTE= Be careful not to get the filter case caught in the flat cable. Flat cable …
RH5
4.1 Inspection Check List
SERVICE MANUAL
4.1−18
DA3SEC−80−020−B0
Clean the inlet port filter of the Panadac 791 once a month without fail.
(Clogged filter will increase the temperature in the controller and cause trouble.)
The method to clean and replace the filter is as follows:
How to Clean and Replace the Filter
(Once a month)
1. Turning the power OFF
Turn OFF the main switch.
OPERATION READY
ON OFF
Main Switch
=CHECK=
Be sure to turn the power OFF before starting the work.
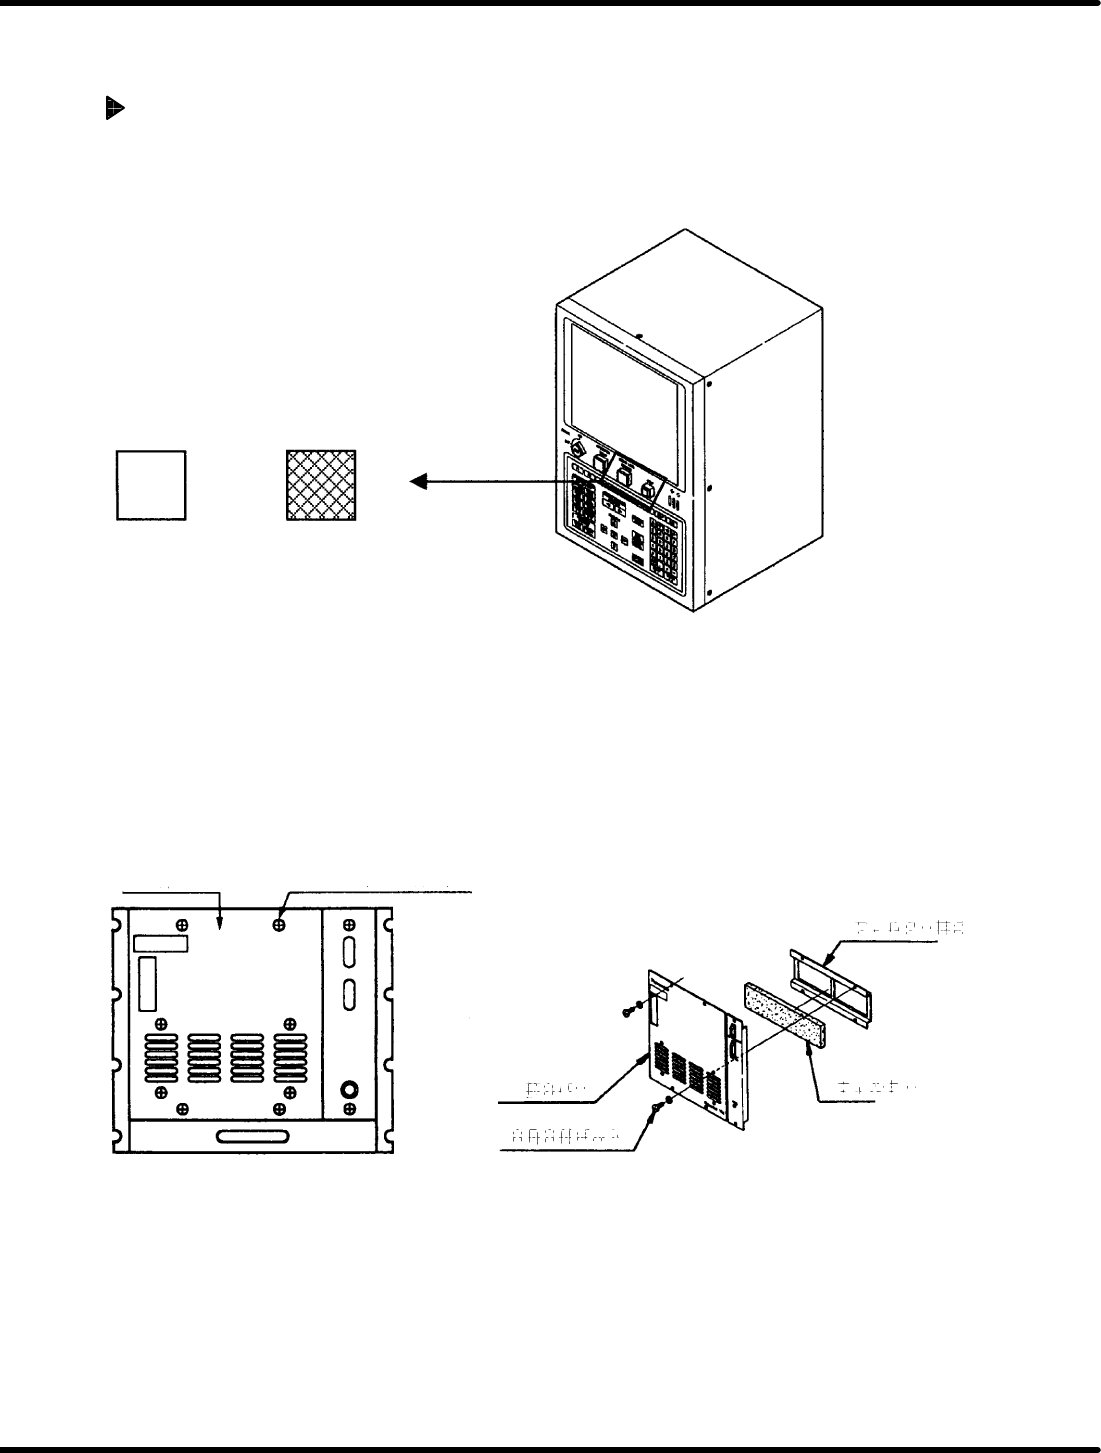
2. Detaching the front cover
x Remove the four cross−recessed head machine screws.
x Detach the front cover.
x Remove the four hexagon socket head cap bolts to take out the filter.
Front cover
Cross−recessed
head machine screw
Hexagon socket
head cap bolt
Front cover
Filter
Filter
Filter holder
Front Cover
4.1 Inspection Check List
SERVICE MANUAL
RH5
4.1−19
DA3SEC−80−020−B0
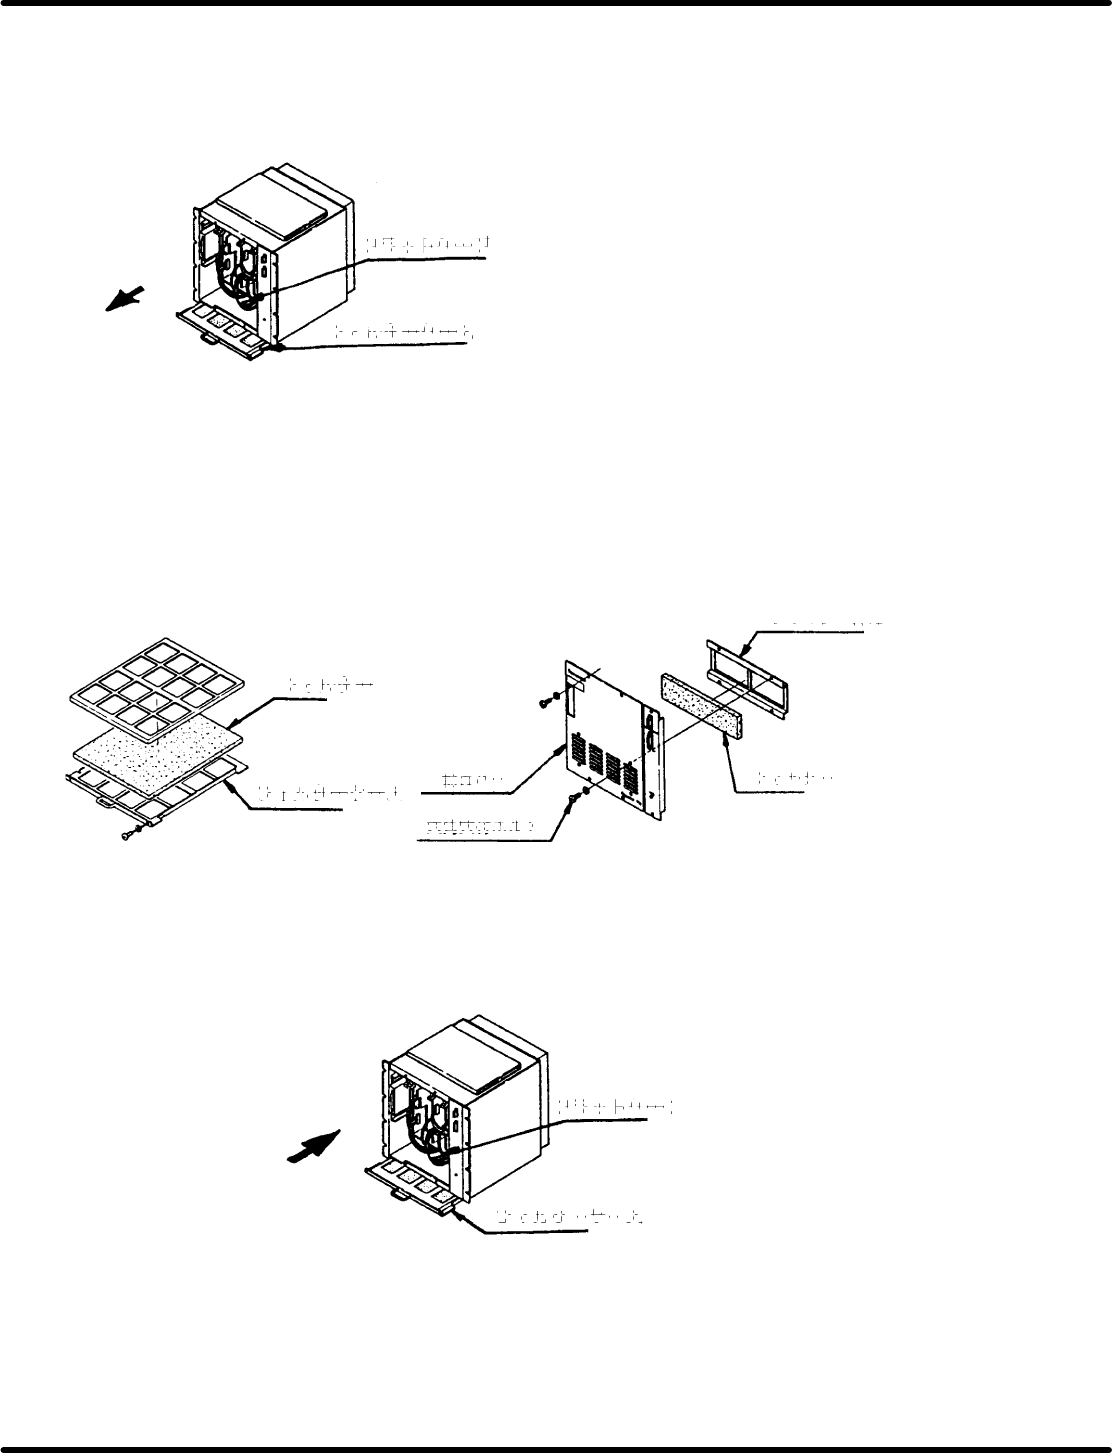
3. Drawing out the filter case
Draw out the filter from Panadac 791.
=NOTE=
Be careful not to get the filter case caught in the flat cable.
Flat cable
Filter case
Drawing out the Filter Case
4. Cleaning the filter
Take out the filter from the filter case and remove any adhered dust using a vacuum cleaner.
=CHECK=
Replace the filter if it is considerably dirty or deteriorated.
5. Setting the filter
Set the filter to the case and the front cover.
Filter case
Hexagon socket
head cap bolt
Front cover
Filter holder
Filter
Filter
Setting the Filter
6. Setting the filter case
Set the filter case to the Panadac 791.
=CHECK=
Be careful not to get the filter case caught in the flat cable.
Flat cable
Filter case
Setting the Filter Case
RH5
4.1 Inspection Check List
SERVICE MANUAL
4.1−20
DA3SEC−80−020−B0
7. Attaching the front cover
Attach the front cover by securing the four cross−recessed machine screws.
8. Turning the power ON
Turn ON the main switch
OPERATION READY
ON OFF
Main Supply