Q170226E01.pdf - 第151页
RH5 5.16 Replacing Anvil Distortion Gauge SERVICE MANUAL 5.16−2 DA3SEC−83−8YO−A0 Replacing distortion gauge 1. Loosen bolt A (x 4), bolt B (x 2) and bolt C (x 4) and remove movable blade A (x 2)/B (x 1) and fixed blade (…

5.16 Replacing Anvil Distortion Gauge
SERVICE MANUAL
RH5
5.16−1
DA3SEC−83−8YO−A0
5.16 Replacing Anvil Distortion Gauge
DA3SEC−83−8YO−A0
Sentence No.
Precautions in attaching anvil distortion gauge
1. Storing fast setting adhesive
1) Use an adhesive specified by manufacturer .
2) Put an adhesive into cold storage.
3) Do not use an adhesive that has not been stored in the cold storage.
2. Finishing the attaching plane
1) Do not perform the mirror finishing on the attaching surface. (Finish it roughly.)
2) Using a piece of new sand paper (#320−400), finish it crosswise or circularly
3. Status of the attaching plane
1) Use solvent to remove any fats and oil on the attaching plane.
2) Make sure the attaching plane is flat.
4. How to attach the gauge
1) Do not push down the gauge with tweezers on the gauge or toothpick, etc.
2) Place a polyethylene sheet and press it for more than one minutes using an eraser or
something with elasticity.
5. Time to be left after attaching
1) After attaching the distortion gauge, let it for more than three to four hours for fast setting
adhesive to be cured completely.
2) More than three to four hours are needed to cure the coating completely.
When to perform
x When insertion detection errors occur frequently. (The machine stops due to an error even though
electronic components are properly inserted.)
Required tools
x Allen wrench, cutter, tester, Industrial alcohol (wash solvent)
x Polyethylene sheet. eraser, soldering iron, solder, spiral tube (curl code)
x New distortion gauge (110−130:), gauge terminal
x Fast setting adhesive for attaching (X004−032) lock tight 495
x Coating (X004−031): Two−liquid quick bonding set.
x Sand paper (#320−400)
RH5
5.16 Replacing Anvil Distortion Gauge
SERVICE MANUAL
5.16−2
DA3SEC−83−8YO−A0
Replacing distortion gauge
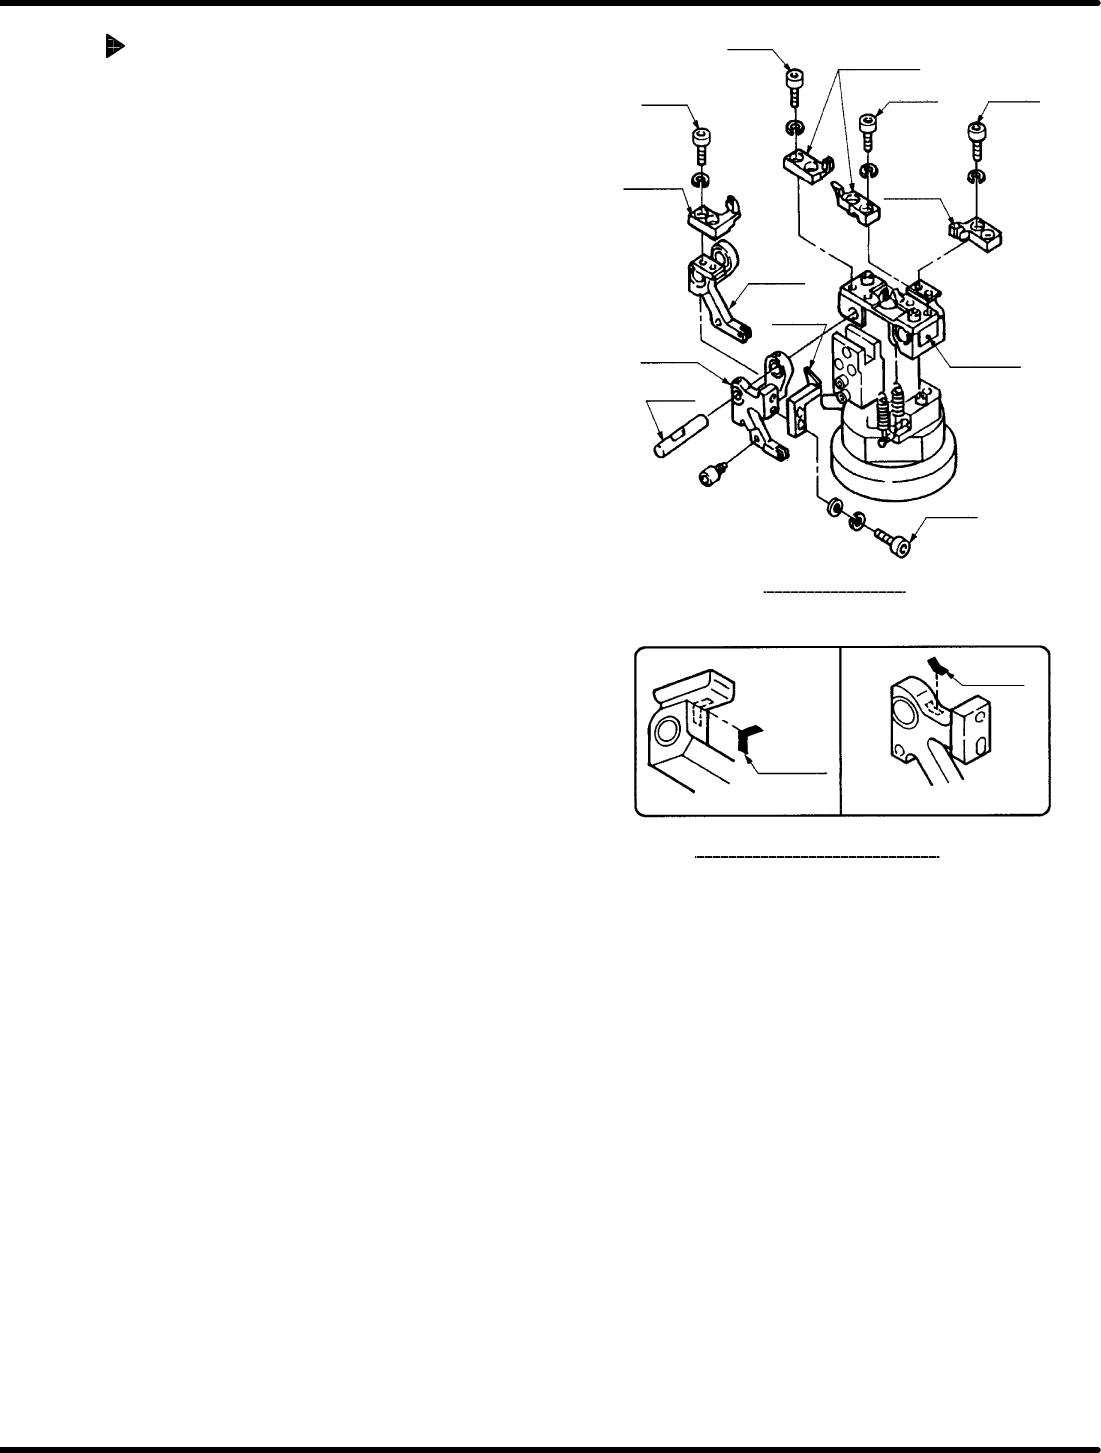
1. Loosen bolt A (x 4), bolt B (x 2) and bolt C (x 4)
and remove movable blade A (x 2)/B (x 1) and
fixed blade (x 2).
2. Loosen the set screw and remove the shaft to
detach the chuck levers A and B.
3. Use a cutter , etc. to remove any coating from
the chuck levers A and B, the distortion gauge
and gauge terminal.
4. Finish the attaching plane of the distortion
gauge on the chuck lever A/B and gauge
terminal with a piece of sand paper (#320−400)
until they are flat. After doing this, remove any
fits and oils completely from them with Industrial
alcohol or wash solvent.
5. Apply adhesive to the chuck levers A/B so that it
may not bulge out from the chuck levers. Then
attach it to the distortion gauge and gauge terminal
to one another . At this time, press the attaching
planes at least for one minute.
Bolt C
Bolt C Bolt A
Bolt B
Fixed blade
Movable
blade A
Set screw
Shaft
Movable
blade B
Movable
blade A
Bolt A
Chuck
lever A
Chuck
lever B
Anvil
disassembling
Distortion
gauge
Distortion
gauge
Distortion gauge installing
position
5.16 Replacing Anvil Distortion Gauge
SERVICE MANUAL
RH5
5.16−3
DA3SEC−83−8YO−A0
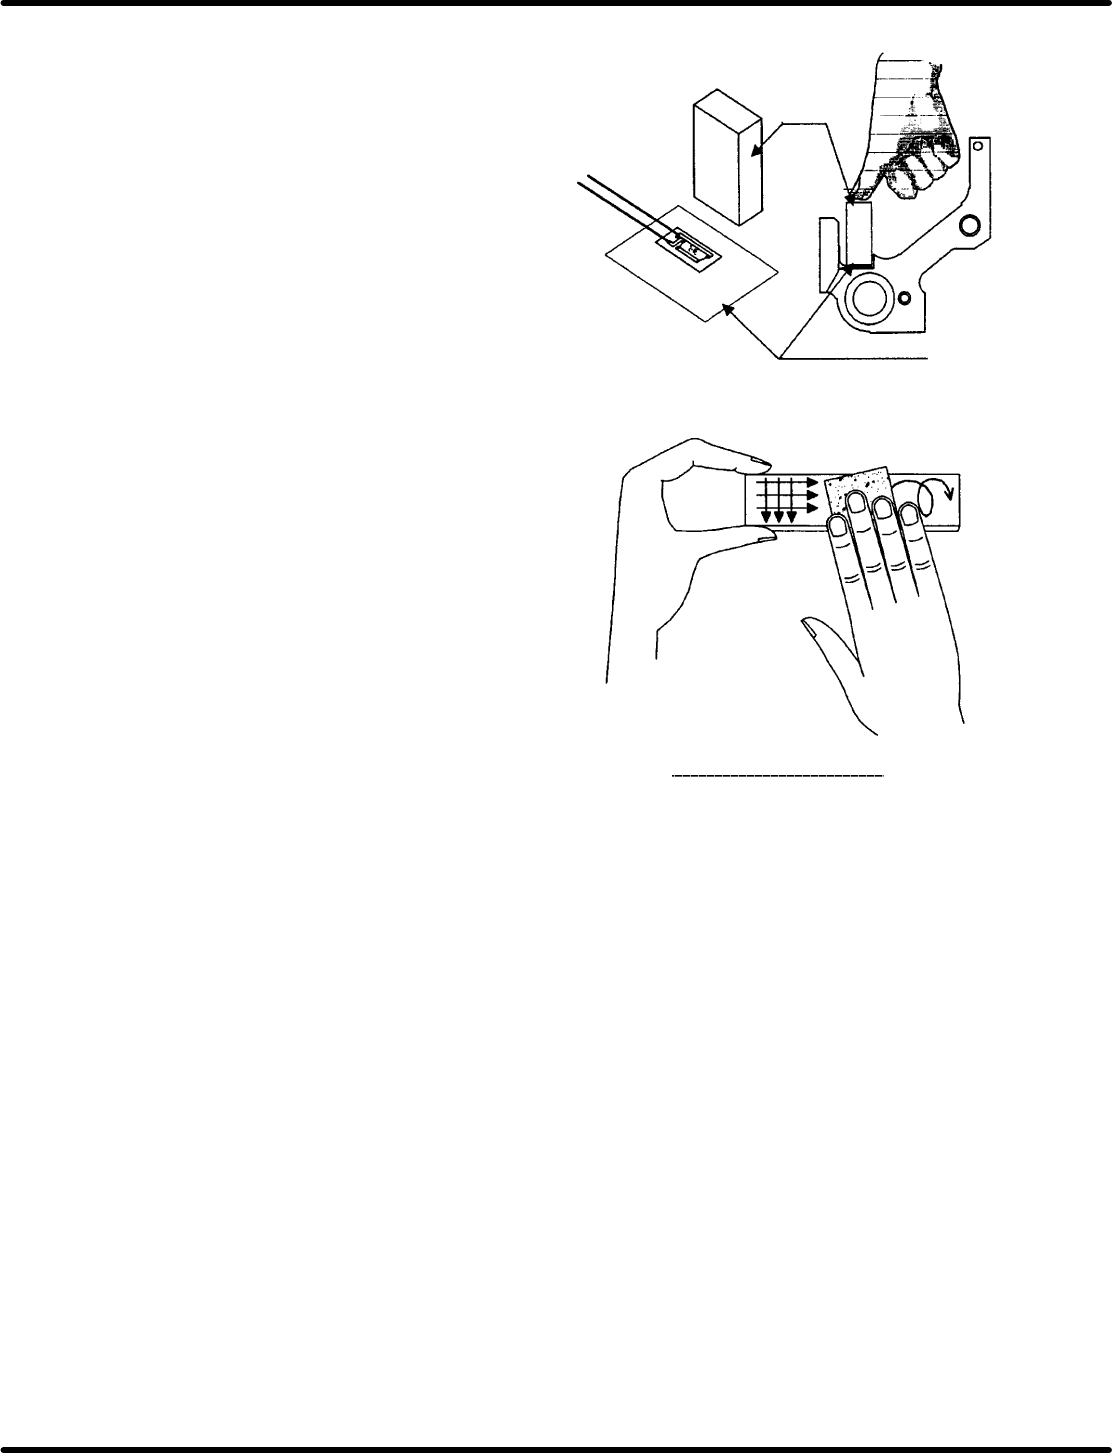
=CHECK=
x Lay a polyethylene sheet under an eraser or
elastic products that can hold the distortion
gauge entirely by hand.
x Don’t perform the mirror finishing on the
attaching surface with a piece of sand
paper. (Finish it crosswise or circularly.)
x When attaching the distortion gauge and
gauge terminal, check that no gap is
found between them.
Precautions in handling adhesive
x Take out the adhesive from the container
immediately before attaching the units.
x When attaching the gauge, keep the
pressure between 49.5 and 98.1 KPa.
x Attach the gauge rapidly before the
adhesive is cured by reaction with moisture
in the air.
x After applying adhesive and pressing down
the gauge for more than one minute, it aside
for three or four hours to increase the
adhesive strength before coating.
x After using adhesive, do not leave it in high
temperature environment. (Put it into cold
storage.)
Finishing with a piece of sand
Eraser
Polyethylene sheet