Q170226E01.pdf - 第149页
RH5 5.15 Lead Cutter and T ape Cutter Replacement and Adjustment SERVICE MANUAL 5.15−4 DA3SEC−83−8XO−A0 = MEMO =
5.15 Lead Cutter and Tape Cutter Replacement and Adjustment
SERVICE MANUAL
RH5
5.15−3
DA3SEC−83−8XO−A0
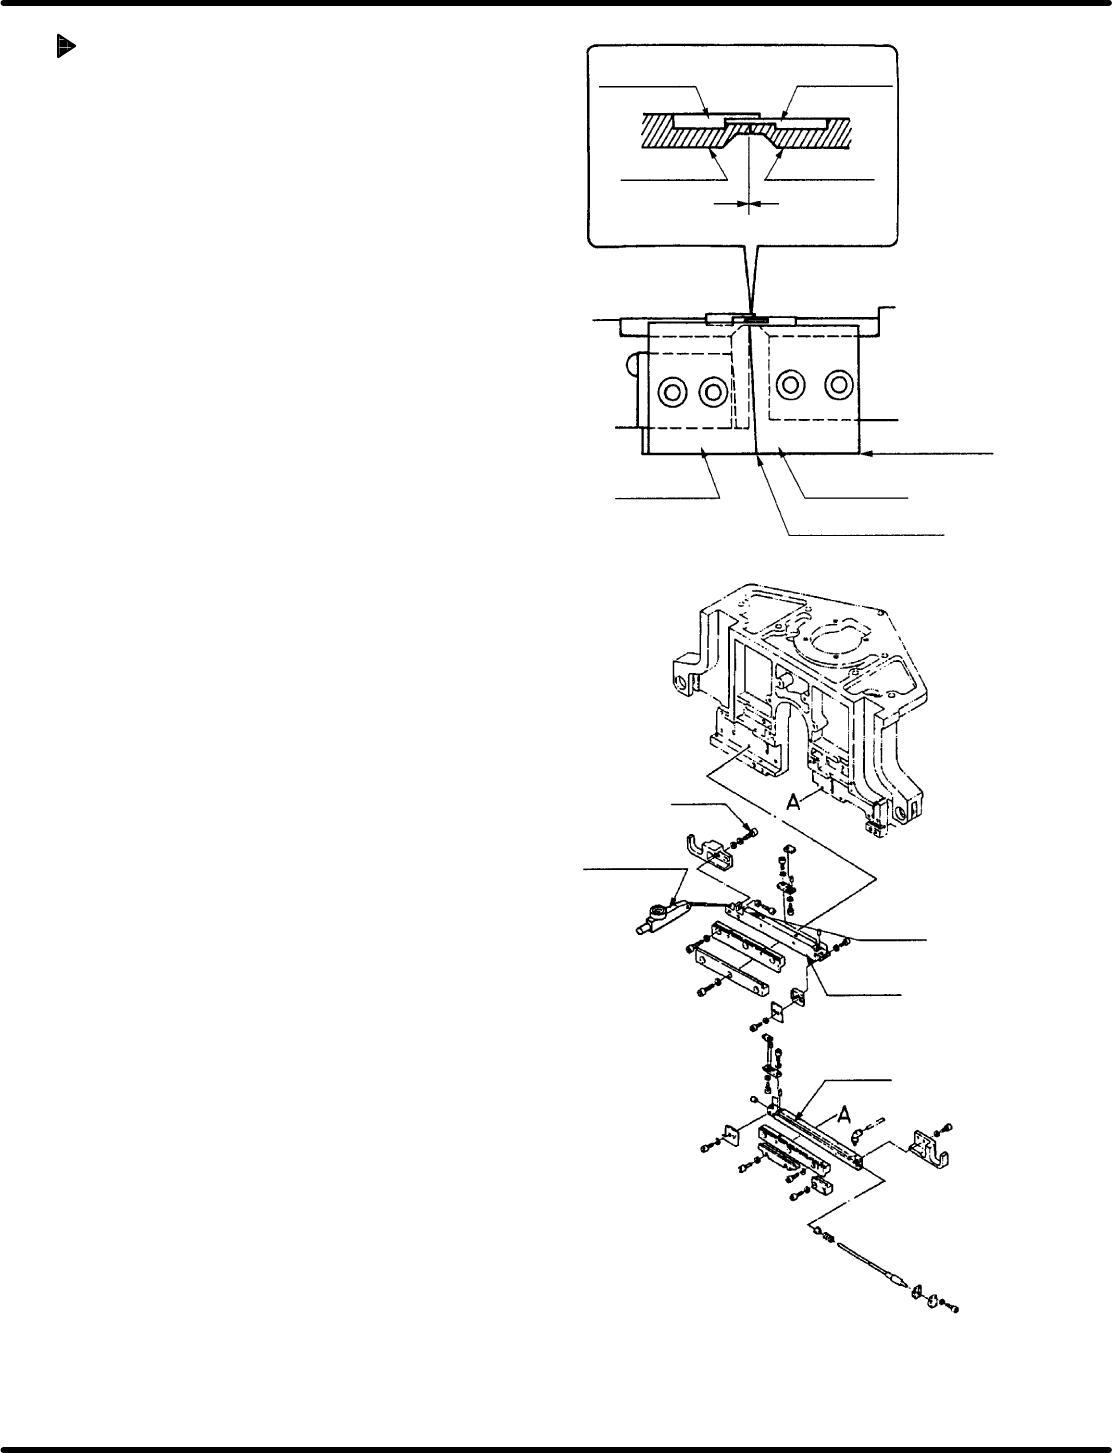
Tape cutter and lead cutter
mounting and check
1. Fix the tape cutters (A) and (B) with bolts A1
and B1and lead cutters (A) and (B) with A2
and B2 respectively.
2. Check the bottom edges of the tape cutter (A)
and tape cutter (B) are level with one another.
3. Release the fitting bolt (x 2) of the cutter 2
slider.
4. Turn the hand wheel to set the digital
sequence timer to 315q.
5. Move the cutter 2 slider to the blade surfaces
of the lead cutters (A) and (B) which engaged
without leaving gap and secure them with the
fitting bolt (x 2).
6. Turn the hand wheel to set the digital
sequence timer to 0q.
7. Set the dial gauge on the cutter 2 slider.
8. Release the fitting bolt (x 2) of the cutter 2
slider again and retighten 2 bolts with the
drive amount 0.1 to 0.15 mm.
Lead guide A
Lead guide B
Lead cutter A
Lead cutter B
Tape cutter A
Tape cutter B
Cutter overlap here
Make sure bottom
edges are level
Bolt
Level−operated
dial gauge
Cutter 2
Slider
Cutter 1

RH5
5.15 Lead Cutter and Tape Cutter Replacement and Adjustment
SERVICE MANUAL
5.15−4
DA3SEC−83−8XO−A0
= MEMO =

5.16 Replacing Anvil Distortion Gauge
SERVICE MANUAL
RH5
5.16−1
DA3SEC−83−8YO−A0
5.16 Replacing Anvil Distortion Gauge
DA3SEC−83−8YO−A0
Sentence No.
Precautions in attaching anvil distortion gauge
1. Storing fast setting adhesive
1) Use an adhesive specified by manufacturer .
2) Put an adhesive into cold storage.
3) Do not use an adhesive that has not been stored in the cold storage.
2. Finishing the attaching plane
1) Do not perform the mirror finishing on the attaching surface. (Finish it roughly.)
2) Using a piece of new sand paper (#320−400), finish it crosswise or circularly
3. Status of the attaching plane
1) Use solvent to remove any fats and oil on the attaching plane.
2) Make sure the attaching plane is flat.
4. How to attach the gauge
1) Do not push down the gauge with tweezers on the gauge or toothpick, etc.
2) Place a polyethylene sheet and press it for more than one minutes using an eraser or
something with elasticity.
5. Time to be left after attaching
1) After attaching the distortion gauge, let it for more than three to four hours for fast setting
adhesive to be cured completely.
2) More than three to four hours are needed to cure the coating completely.
When to perform
x When insertion detection errors occur frequently. (The machine stops due to an error even though
electronic components are properly inserted.)
Required tools
x Allen wrench, cutter, tester, Industrial alcohol (wash solvent)
x Polyethylene sheet. eraser, soldering iron, solder, spiral tube (curl code)
x New distortion gauge (110−130:), gauge terminal
x Fast setting adhesive for attaching (X004−032) lock tight 495
x Coating (X004−031): Two−liquid quick bonding set.
x Sand paper (#320−400)