Q170226E01.pdf - 第196页
Origin board for recognition adjustment 67.5 mm 140.0 mm ORG 5.32 Setting Offset V alues SERVICE MANUAL RH5 5.32−1 DA3SEC−83−9Q0−A0 5.32 Setting Offset V alues DA3SEC−83−9Q0−A0 Sentence No. When to perform x After replac…
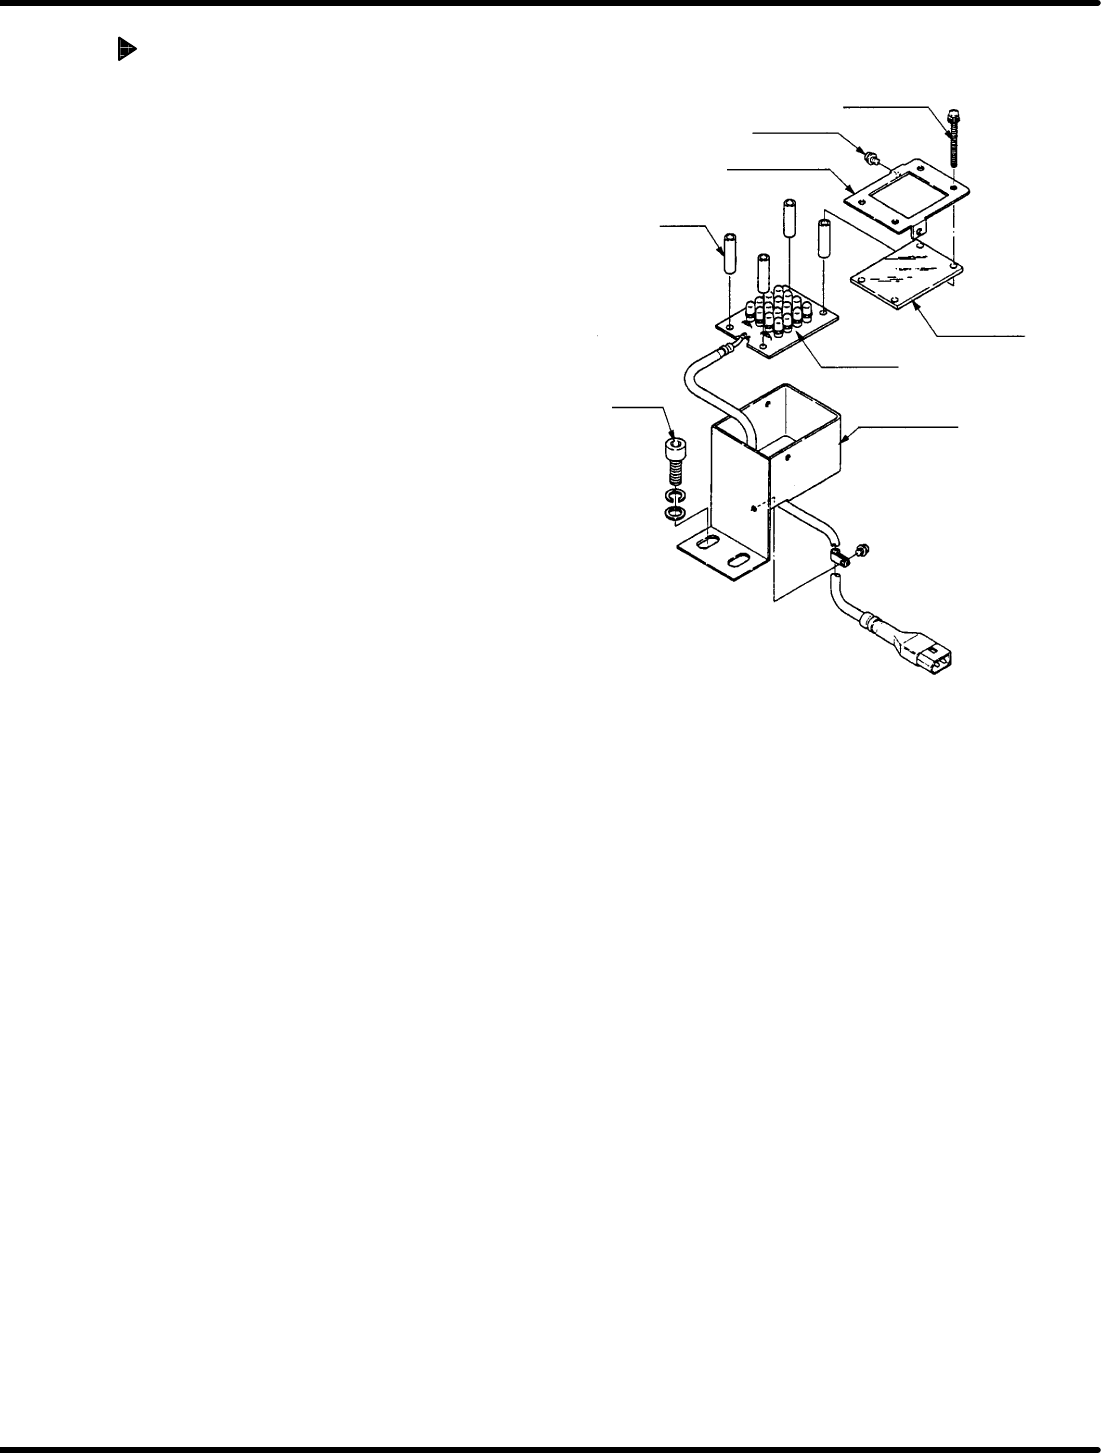
Set screw B
Set screw A
Acrylic plate
LED board
Acrylic plate
holder
Collar
Bolt
LED bracket
RH5
5.31 Recognition Camera Lens Lamp Replacement and Adjustment
SERVICE MANUAL
5.31−2
DA3SEC−83−9P0−A0
Acrylic plate replacement
1. Loosen set screw A (x 2) and B (x 4).
2. Detach plate holder to remove acrylic
plate.
3. Install a new acrylic plate and attach the
plate holder.
4. Tighten set screws A (x 2) and B (x 4).
=REFERENCE=
When changing the LED board,
replace the whole unit.
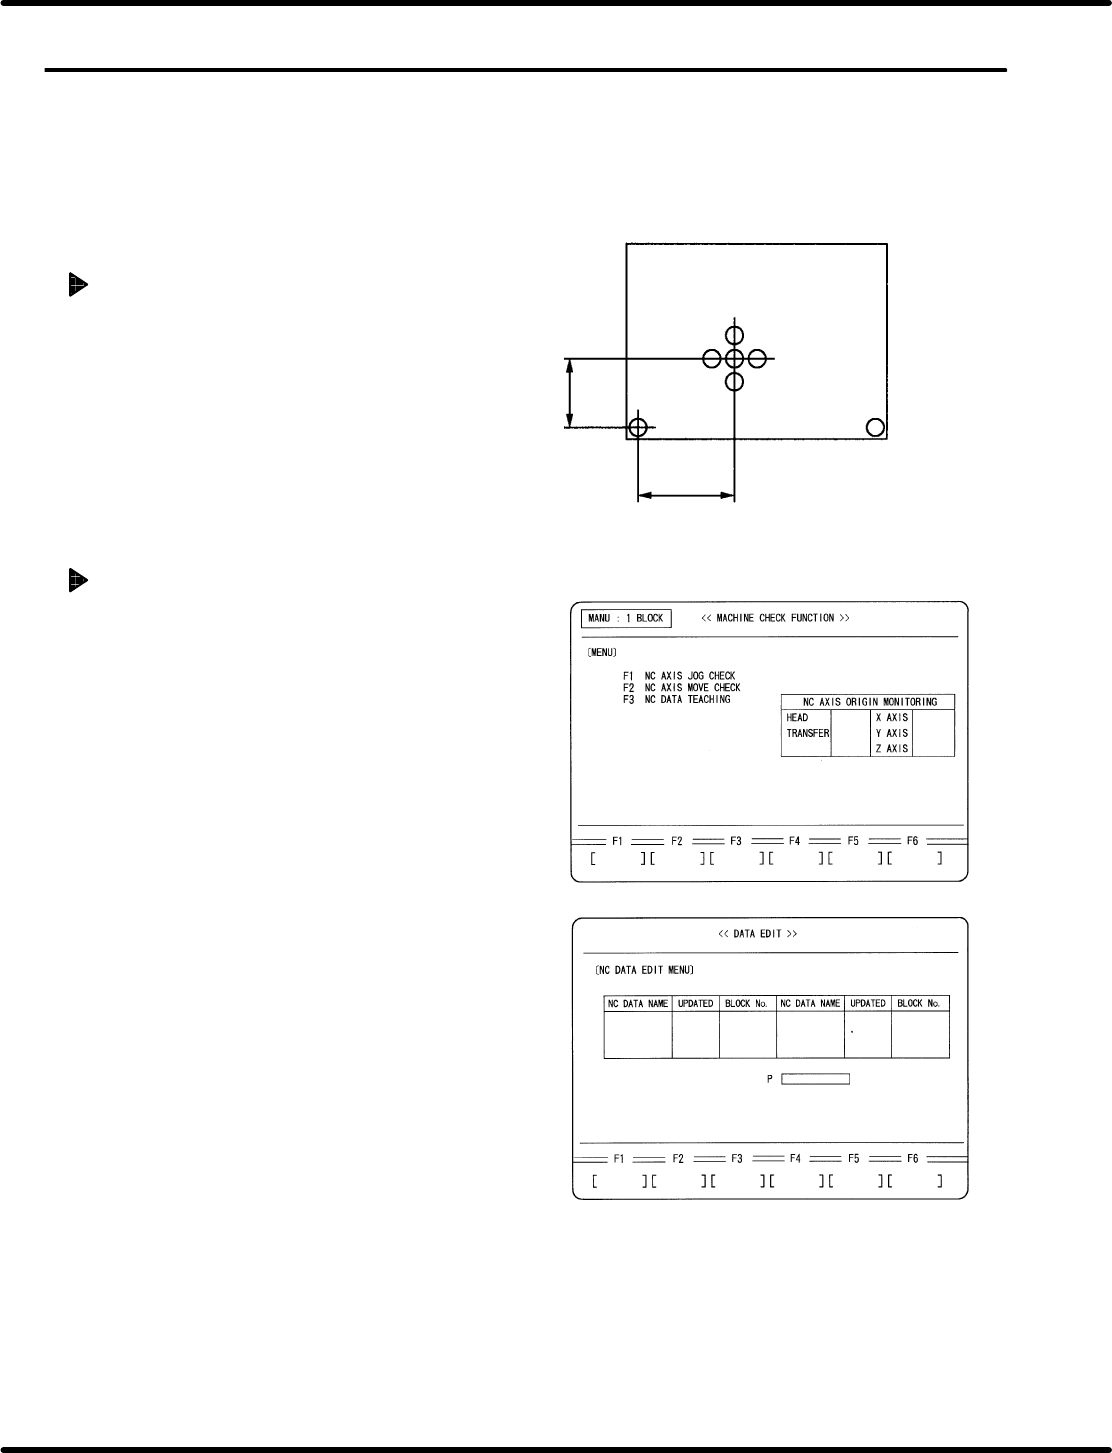
Origin board for recognition adjustment
67.5 mm
140.0 mm
ORG
5.32 Setting Offset Values
SERVICE MANUAL
RH5
5.32−1
DA3SEC−83−9Q0−A0
5.32 Setting Offset Values
DA3SEC−83−9Q0−A0
Sentence No.
When to perform
x After replacing the recognition camera.
Preparation
x Origin board for recognition adjustment
Preparations
1. Prepare an origin board for recognition
adjustment.
2. Set the widths of XY table, loader and
unloader to that of the prepared board.
3. Set a reference pin. (I4.0)
Creating NC data
1. Turn power ON.
x Press OPERATION READY.
2. Call up the NC DATA EDIT (CREATE)
screen.
x Press REQUEST.
x Press F2 (DATA EDIT).
x Press F1 (NC DATA).
x Press F1 (CREATE).
RH5
5.32 Setting Offset Values
SERVICE MANUAL
5.32−2
DA3SEC−83−9Q0−A0
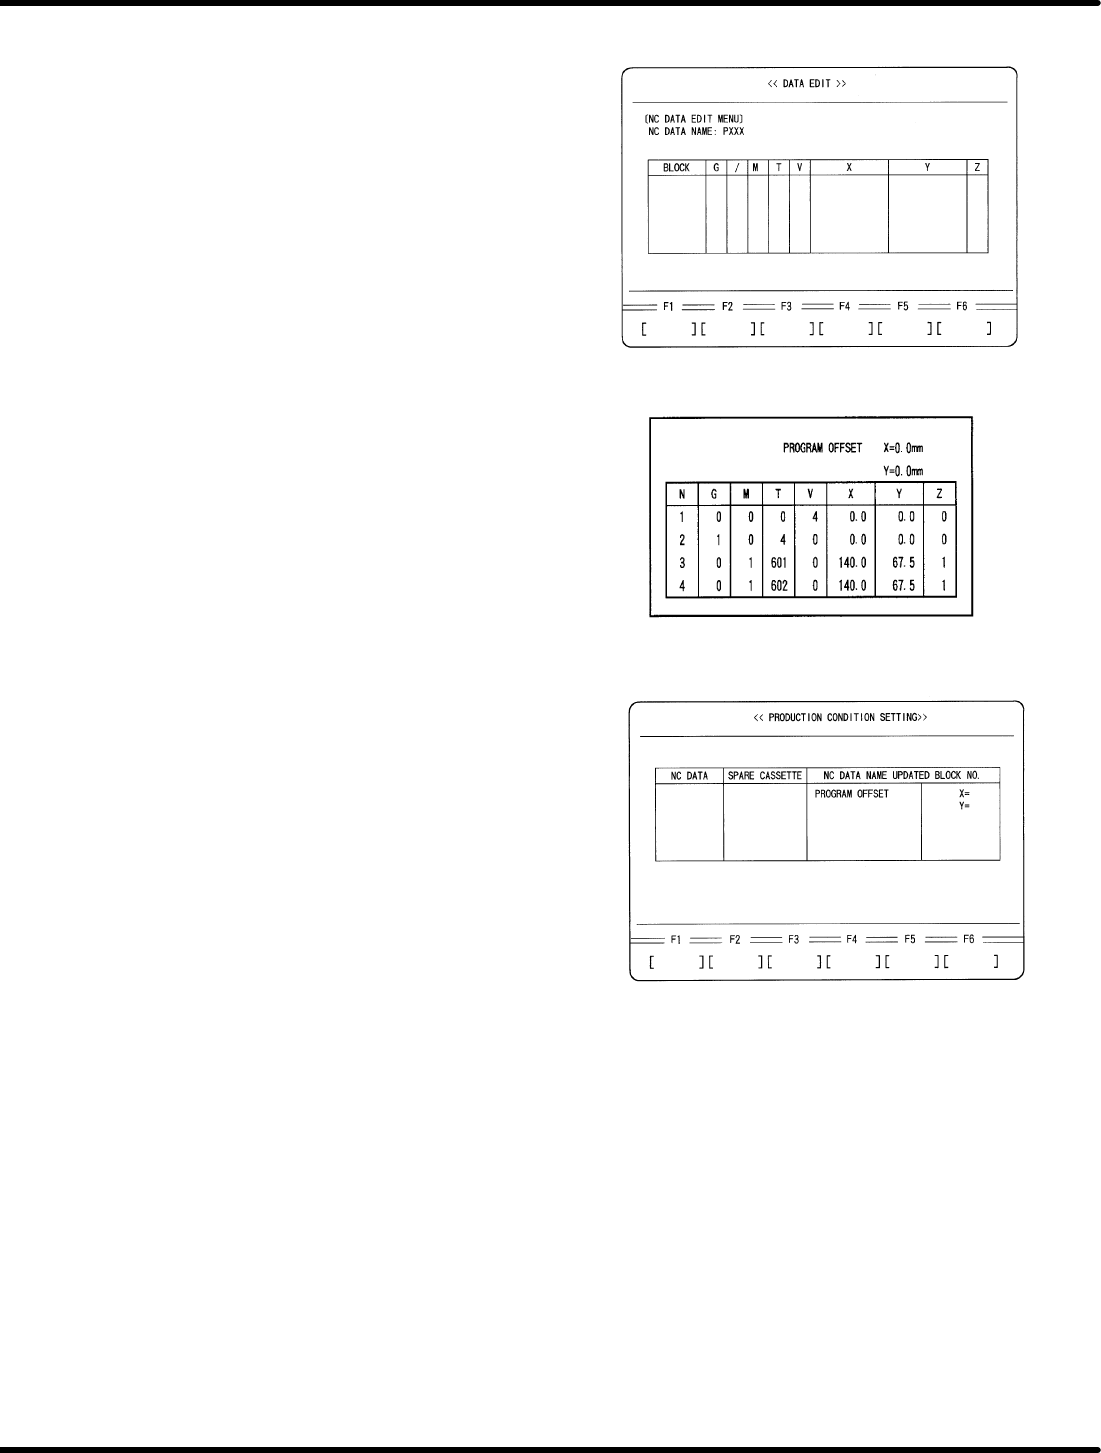
3. Enter an NC data name.
x Enter a name of NC data to be created
for recognition adjustment.
x Press ENTER.
x Press F1 (YES).
4. Create an NC data for recognition
adjustment.
x Enter data as follows.
5. Enter program offset.
x Press ESC three times.
x Press F1 (PRODUCTION CONDITION
SETTING).
x Select the NC data for recognition
adjustment with npkeys.
x Using mokeys, move the cursor to
PROGRAM OFFSET and enter as
follows:
X = −160.0 mm
Y = −255.0 mm