XP-142E System Reference-SYS-XP142-2.0E.pdf.pdf - 第131页
8.3 System Restoration Using the Recovery Disk (ESR0603b) If the machine fails to boot up due to a corrupted or damaged hard disk, etc., a floppy disk can be used to boot up the machine and reinstall the system. If a dat…
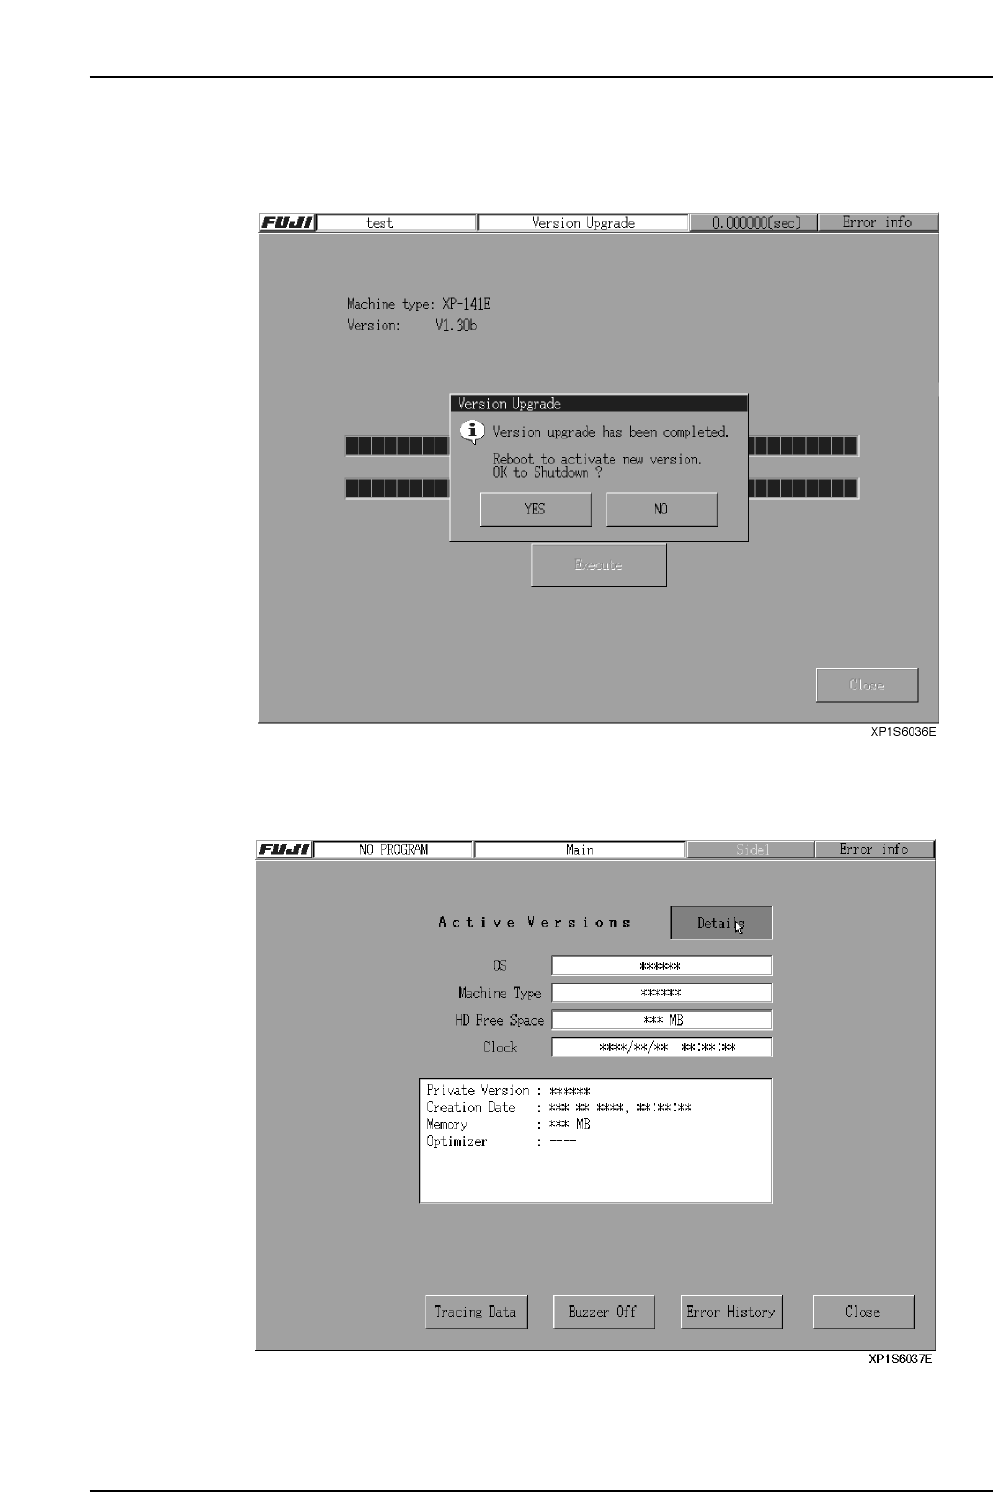
4. The following screen displays when the upgrade procedure is complete. Remove
the floppy disk from the disk drive and press [Yes]. You must reboot the machine
when this procedure is complete.
5. After restarting the machine, check the version number (Private Version).
Select the [FUJI] button at the top left of the screen, and then select the [Details]
button to display the “Private Version”.
Part 2 Chapter 8 System Administration
Edition 2.0 2-8-4 XP-142E System Reference
8.3 System Restoration Using the Recovery Disk
(ESR0603b)
If the machine fails to boot up due to a corrupted or damaged hard disk, etc., a floppy
disk can be used to boot up the machine and reinstall the system. If a data backup has
been performed on the XP machine, the recovery will restore all data up the point when
the backup occurred. (This is only possible if a backup has been performed at the
machine.)
The system recovery procedure using the recovery disk is shown below.
The mouse must be used for all screen operations during the recovery.
Disk Configuration
Notes: The number of application disks may vary, depending on the version number.
Version
Recovery boot-up disks
Application disks (Apl)
Application disk (Apl.sym)
Application disk (Data)
System data backup disk
V1.00
2 disks
4 disks
1 disk
2 disks
1 disk
XP2S2401Eb
Boot up the XP using the recovery boot-up disk
HDD format
Copy from application disk
Copy boot parameters
Reboot
Restore user backup data
XP1S6013Eb
Part 2 Chapter 8 System Administration
Edition 2.0 2-8-5 XP-142E System Reference
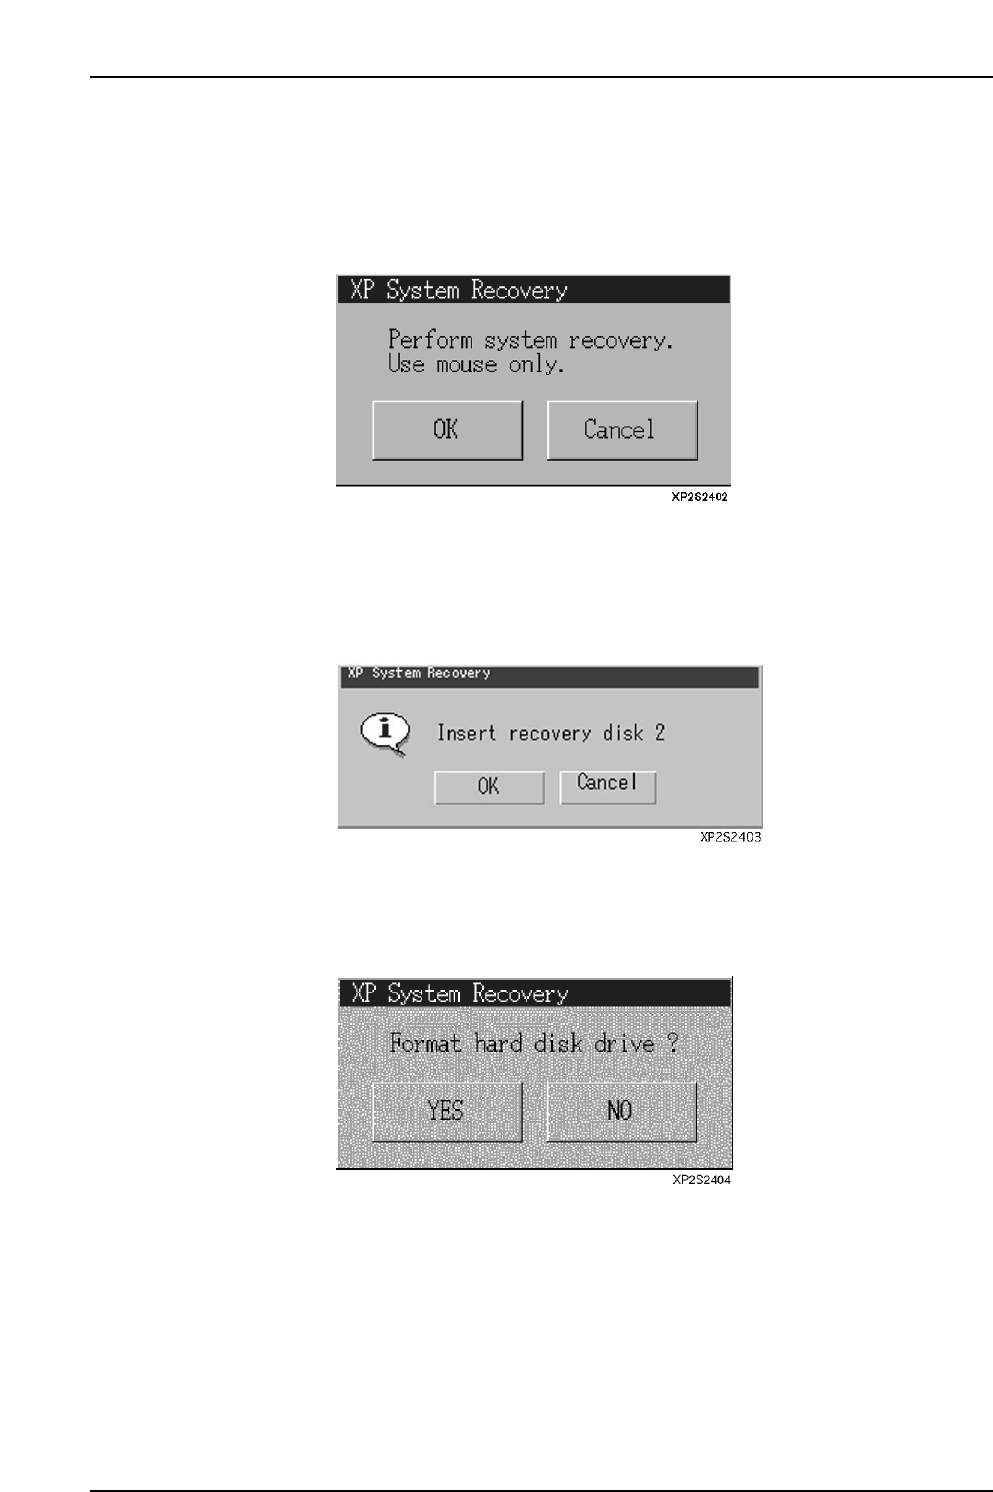
8.3.1 Booting Up the XP With the Recovery Boot-Up Disk
Procedure
1. Insert the recovery boot-up disk into the floppy drive, then turn the XP power on.
The following dialog box displays when the machine boots up.
2. Press [OK] to display the dialog box shown below, or Press [Cancel] to abort the
recovery operation and shut down the machine. When [OK] is pressed the
following dialog box displays. Insert “recovery boot-up disk 2” into the floppy
drive.
3. When [OK] is pressed, a progress dialog box displays, and the required files are
copied. To abort the recovery operation and shut down the machine, press
[Cancel]. Select whether or not the hard disk is to be formatted.
Part 2 Chapter 8 System Administration
Edition 2.0 2-8-6 XP-142E System Reference