XP-142E System Reference-SYS-XP142-2.0E.pdf.pdf - 第60页
3.3 Adjusting the Conveyor Width (ESR0217a) The XP is equipped with a motor-driven conveyor width adjustment system that adjusts the conveyor width in accordance with the data in the production program being used. Proced…
Part 2 Chapter 3 Changeover
Edition 2.0 2-3-5 XP-142E System Reference
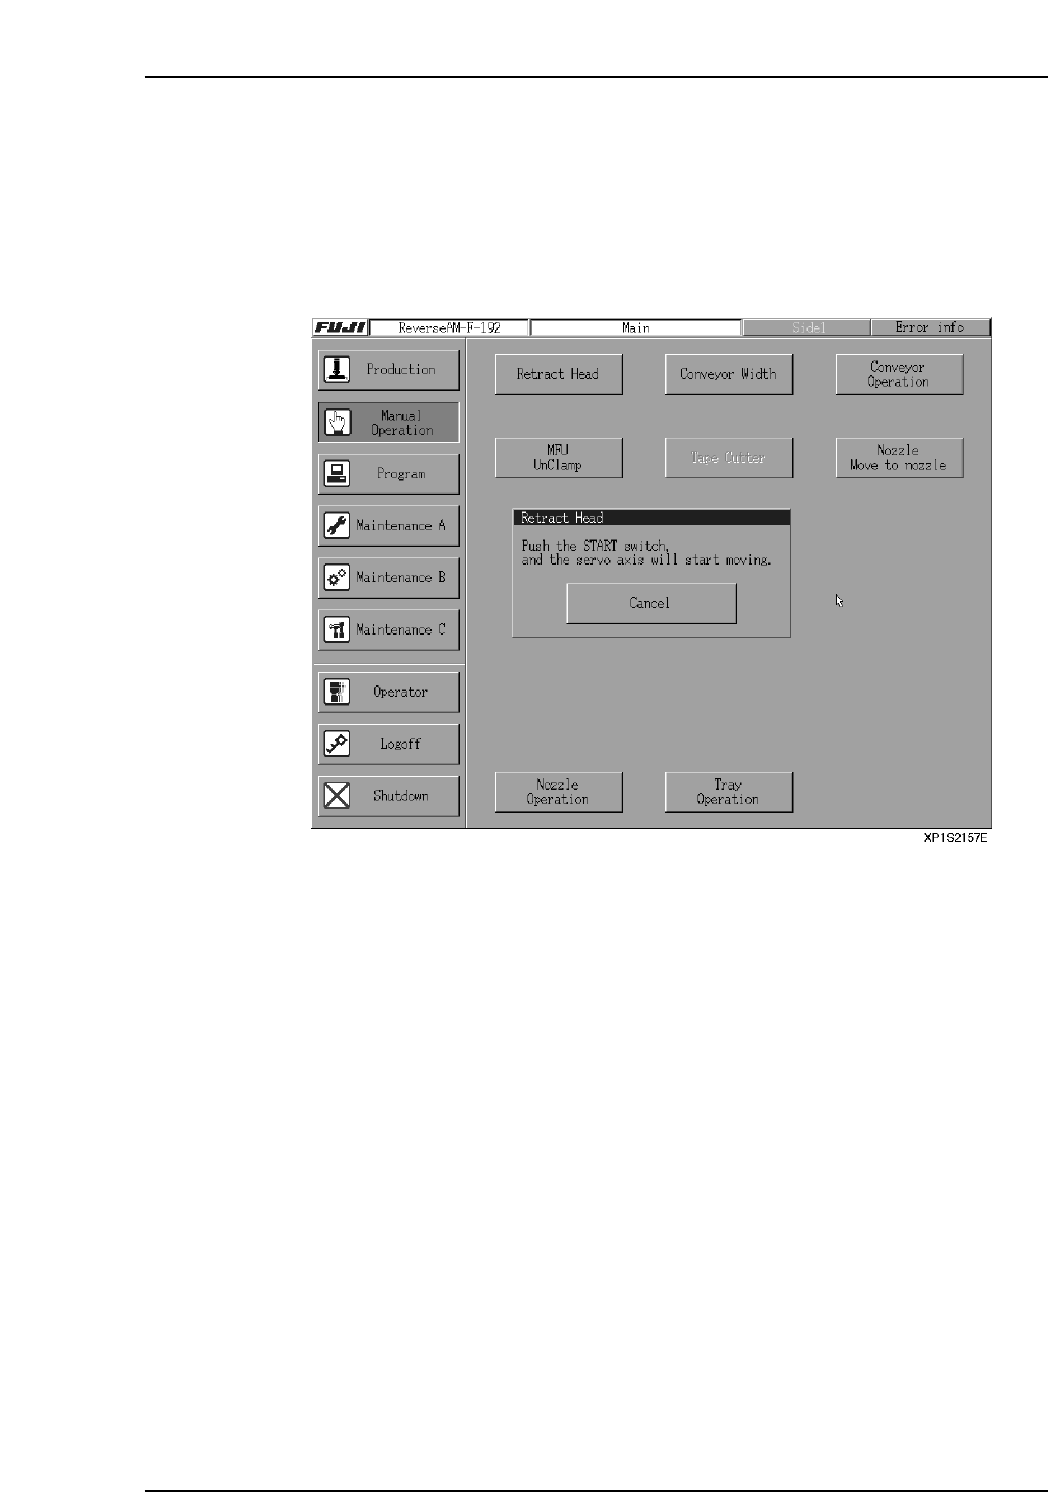
3.2 Retracting the Head
(ESR0216b)
The head can be retracted to its retract position using the procedure described below.
Procedure
1. At the [Main] screen, press [Manual Operation] then [Retract Head].
2. Press START to move the head to its retract position.
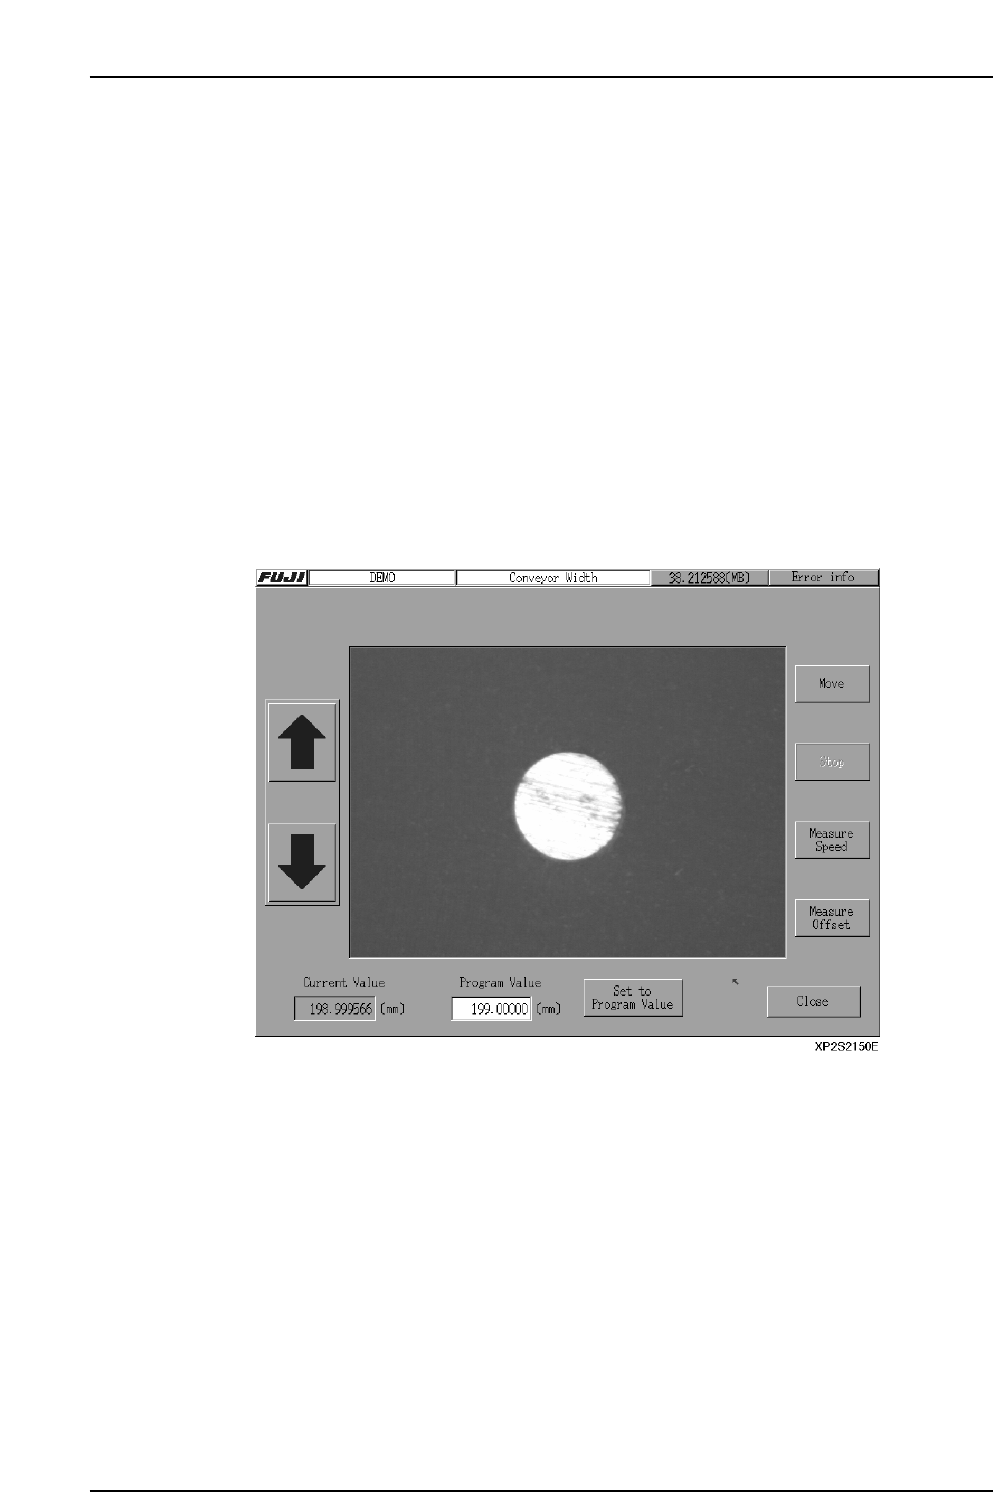
3.3 Adjusting the Conveyor Width
(ESR0217a)
The XP is equipped with a motor-driven conveyor width adjustment system that adjusts
the conveyor width in accordance with the data in the production program being used.
Procedure
1. At the [Main] screen, press [Manual Operation] then [Conveyor Width] to display
the [Conveyor Width] screen.
2. If a production program has already been read, the current conveyor width for
that program displays at the “Program Value” item. To change this value, select
the “Program Value” item to display a numeric keypad, then enter the desired
width value. To return to the production program width value, press [Set to
Program Value].
3. Press [Move] to display a start confirmation dialog box. Press [Start] to change the
conveyor width to the specified value.
4. Press [OK].
5. Press [Close] to return to the [Main] screen.
Note: Prior to performing conveyor width adjustment, ensure that the back-up pins are not located
in a position likely to result in interference with the conveyor. After adjusting the conveyor
width, ensure that the back-up pins are not located below the adjustable rail.
When performing conveyor width adjustment, ensure that no panels exist at any position
other than the In-station or Main-station panel arrival confirmation sensors.
3.3.1 Automatic Conveyor Width Start
The conveyor width is automatically adjusted when automatic operation begins if the
“_AutoConvWidth” Proper data item is set to “1”.
Start Conditions
1. The operation mode must be either “Production” or “Pass”.
2. The new conveyor width must differ by 0.3 mm or more from that specified in the
previous production program.
3. There must be no panels on the conveyor. (If a panel is present on the conveyor,
the width adjustment occurs after panel unloading.)
Part 2 Chapter 3 Changeover
Edition 2.0 2-3-6 XP-142E System Reference
Part 2 Chapter 3 Changeover
Edition 2.0 2-3-7 XP-142E System Reference
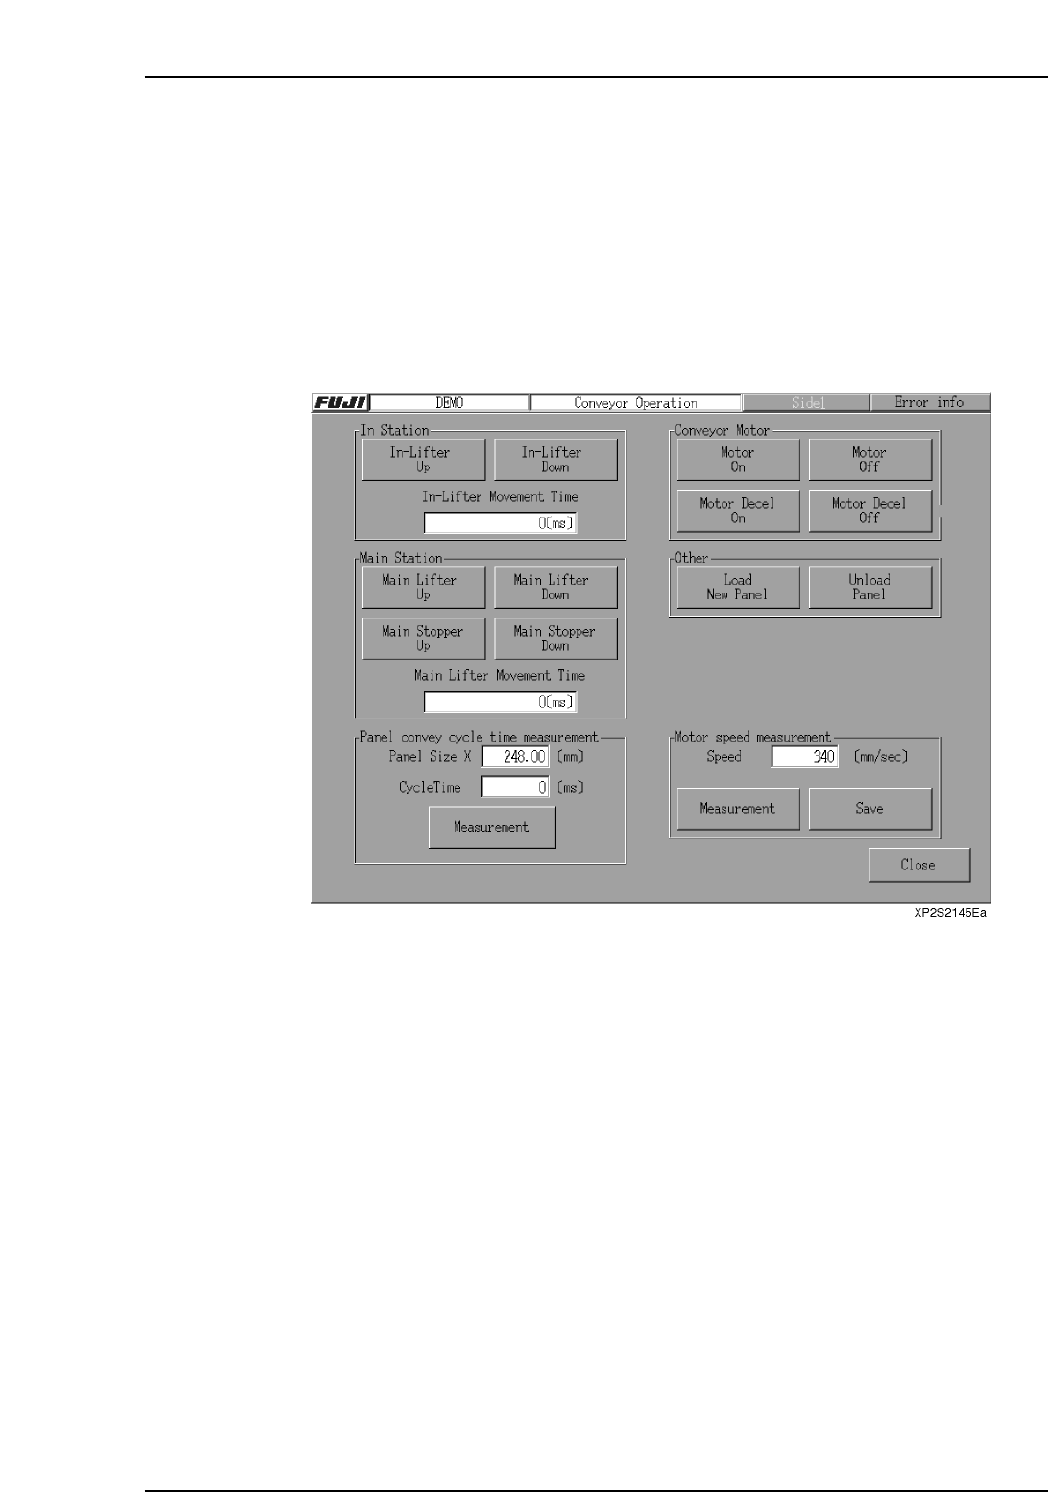
3.4 Loading and Unloading Boards
(ESR0218)
Boards are loaded into the machine automatically during operation, however it is also
possible to load or unload boards using commands at the machine. Manual loading or
unloading may be required in order to check the width of the conveyors, to check sensor
operation, or to unload a faulty board from the machine.
Procedure
1. Press [Manual Operation] then [Conveyor] at the [Main] screen. The [Conveyor]
screen displays.
2. To load a new panel, press [Load New Panel] in the [Other] section. To unload a
panel from the machine, press [Unload Panel]. For each of these actions, a start
confirmation dialog box displays. Press the START button to execute the loading
or unloading of a panel.