XP-142E System Reference-SYS-XP142-2.0E.pdf.pdf - 第86页
5.3.3 Setting the Mark Position Drag the calipers using the mouse in line with the outer edges of the mark, to set the center of the mark. The following table shows how the calipers should be aligned with each mark type.…
Part 2 Chapter 5 Stopping and Resuming Production
Edition 2.0 2-5-3 XP-142E System Reference
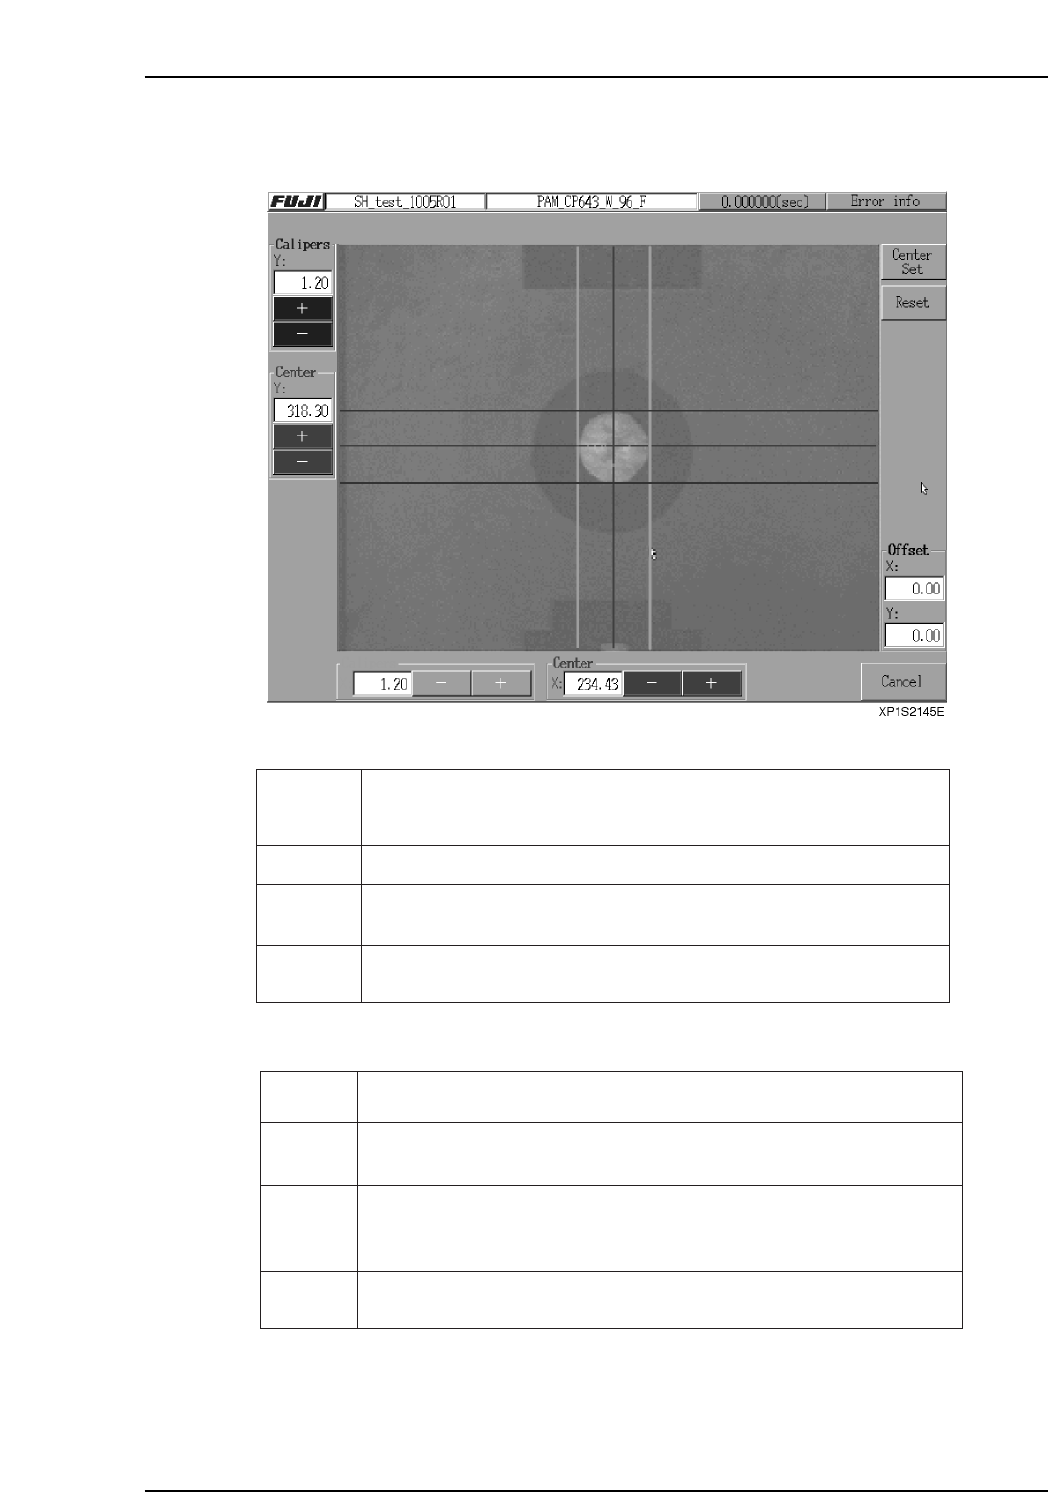
(2) Mark Editing Screen
The components of the mark editing screen are as follows.
Display:
Buttons:
*: The reset caliper widths are the previously measured values.
Center Set
Reset Press to reset* the position of the caliper lines, and the values at [Calipers],
[Center] and [Offset].
+, - Press the [+] and [-] buttons to adjust the values in increments of 0.01. Keep
the buttons pressed down to consecutively increase the values. Adjusting
these values moves the associated calipers on the screen.
Cancel Press to close the mark editor screen without saving the caliper measurement
data.
Press to set the measured offset and continue production.
XP1S2147E
Mark image
Calipers Indicates the width of the calipers. Units are in millimeters.
Center Indicates the center coordinates measured from the position of the calipers.
Units are in millimeters.
Offset Indicates the difference between the existing coordinates and measured
mark center position. Units are in millimeters.
Adjust the green (caliper width X), blue (caliper width Y) and the red (mark
center position) lines offset the current mark position setting. The [Calipers]
and [Center] buttons can also be used to adjust the lines.
XP1S2146Ea
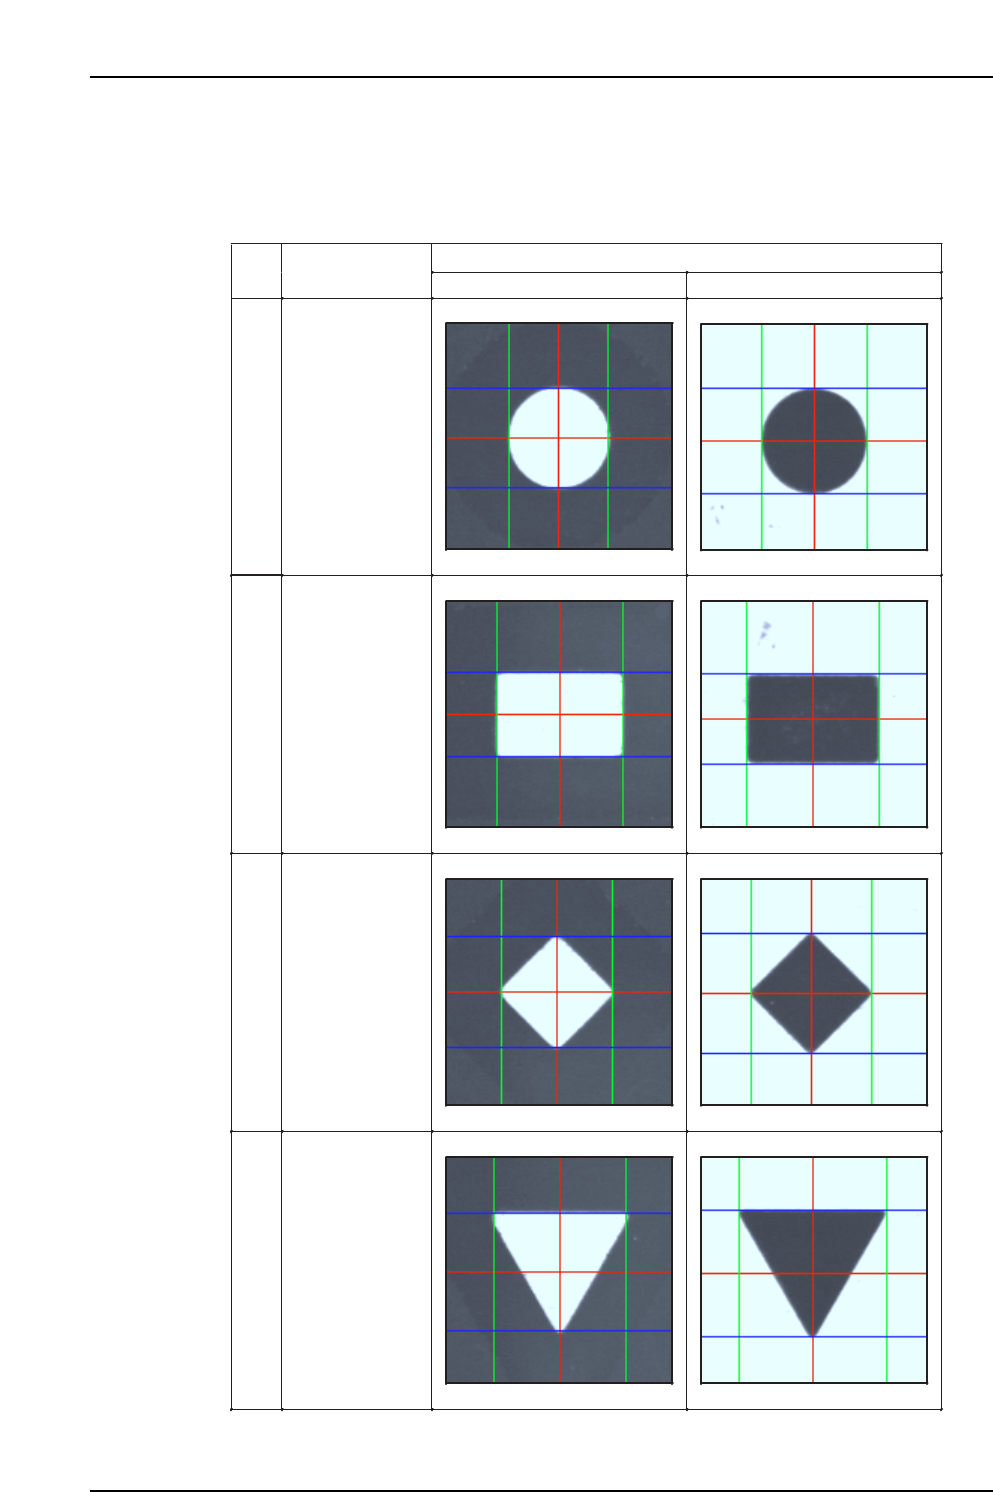
5.3.3 Setting the Mark Position
Drag the calipers using the mouse in line with the outer edges of the mark, to set the
center of the mark. The following table shows how the calipers should be aligned with
each mark type.
Mark
Ptn
Shape
White Black
0
Circular
1
Rectangular
2
Diamond
3
Downward
triangle
XP1S2151E
Part 2 Chapter 5 Stopping and Resuming Production
Edition 2.0 2-5-4 XP-142E System Reference
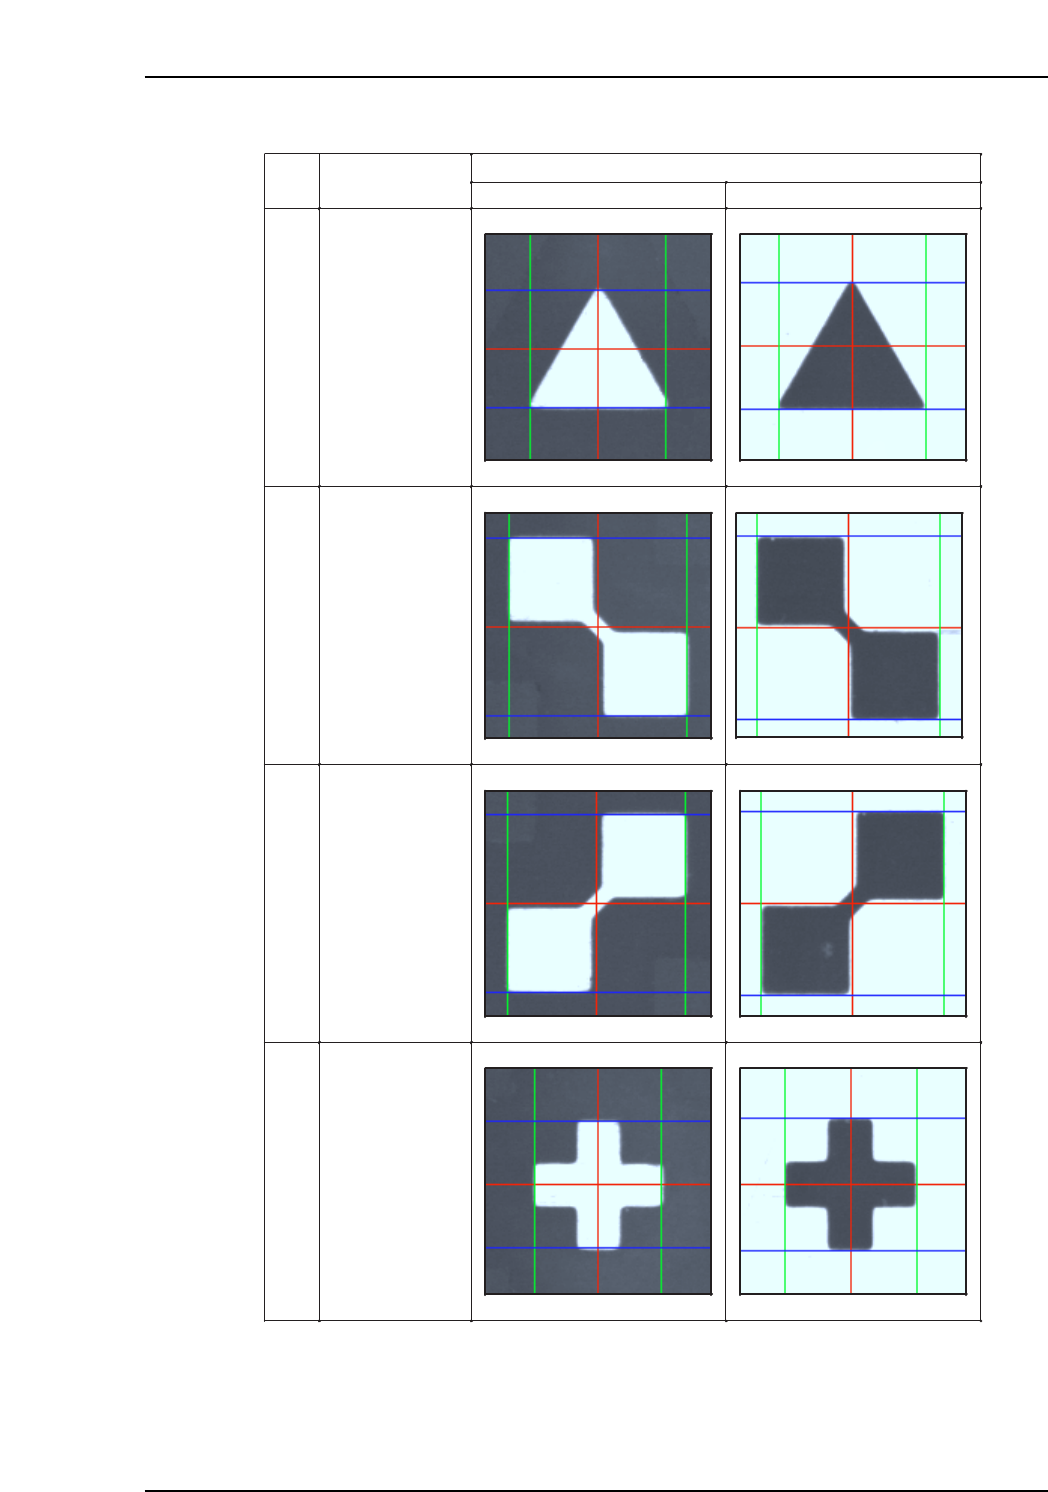
Mark
Ptn
Shape
White Black
4
Upward triangle
5
Intersecting
squares
(left side up)
6
Intersecting
squares
(right side up)
7
Cross
XP1S2152E
Part 2 Chapter 5 Stopping and Resuming Production
Edition 2.0 2-5-5 XP-142E System Reference