XP-142E System Reference-SYS-XP142-2.0E.pdf.pdf - 第148页
• Center When vision processing recognition is successful, this displays the object's center position. • CompleteCenter (This is not currently used.) 3. Select the [Close] button to apply the settings, which will be…
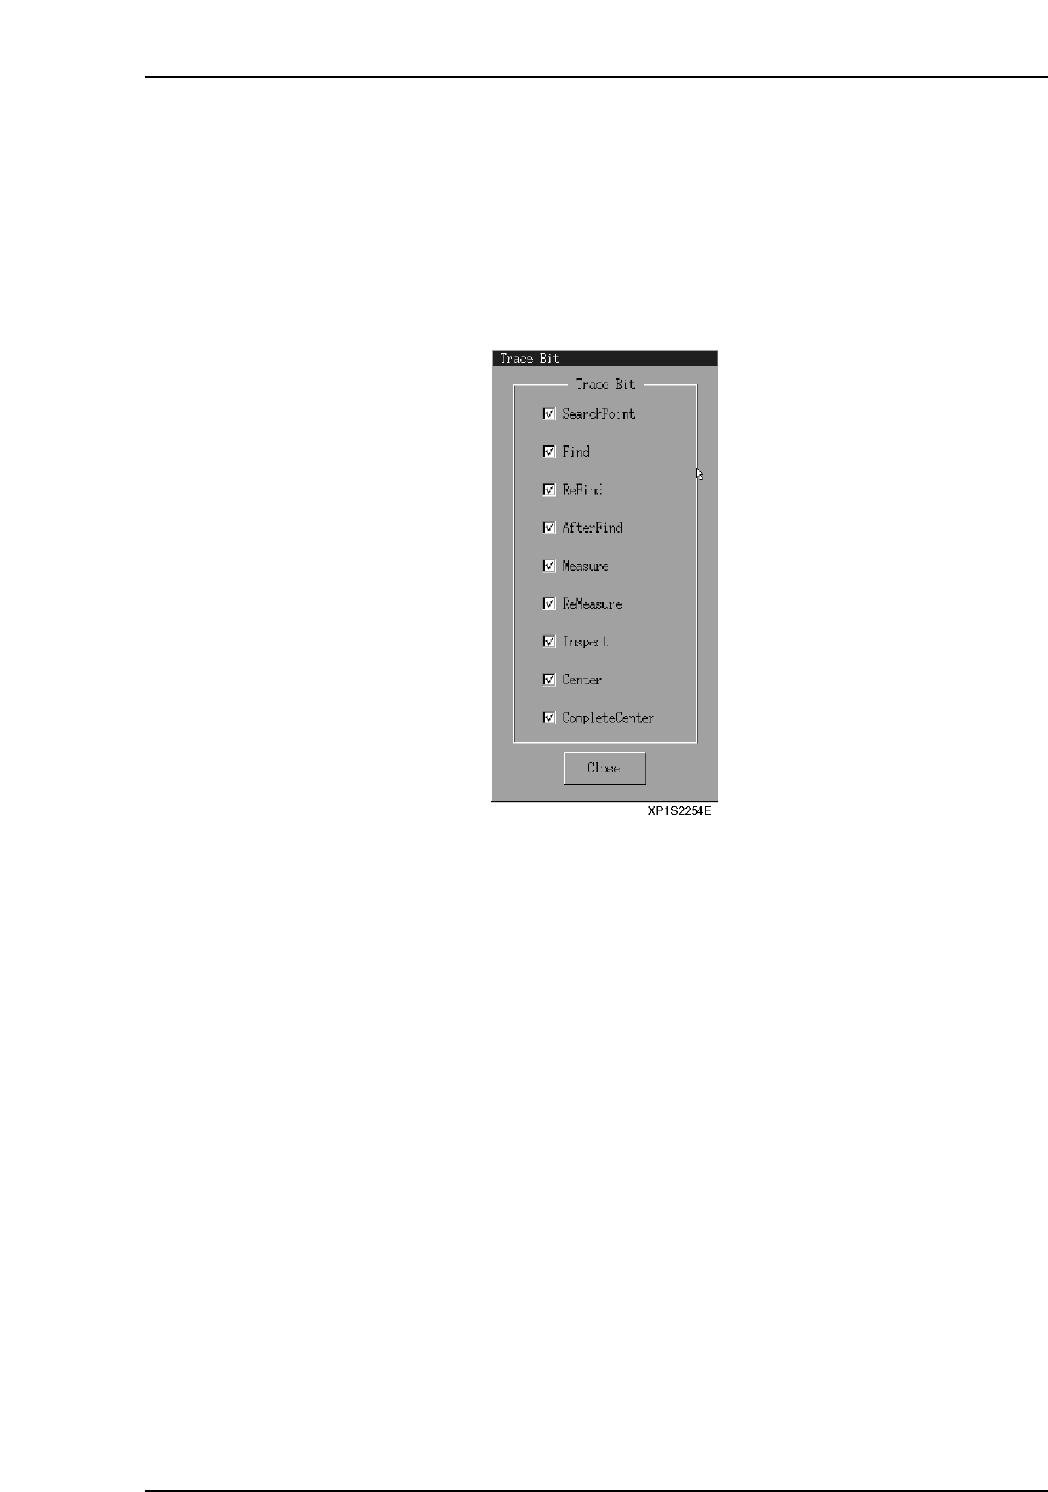
9.3 Trace Bit Settings
A trace can be used to display individual steps of the seeklines used by the MS
Algorithm vision processing results. The details of each step are explained separately in
the MS Algorithm Vision Processing Reference manual.
Procedure
1. At the [Main] screen, select [Maintenance A], then [Trace Bit] to display the
following dialog box.
2. Check the steps that you would like to display.
• SearchPoint
Displays SearchPoint with a red point.
• Find
Displays the Find step seeklines. Green indicates [OK], and red indicates
[NG].
• ReFind
Displays the ReFind step seeklines. Green indicates [OK], and red indicates
[NG].
• AfterFind
Displays the AfterFind step seeklines. Green indicates [OK], and red
indicates [NG].
• Measure
Displays the Measure step seeklines. Green indicates [OK], and red
indicates [NG].
• ReMeasure
Displays the ReMeasure step seeklines. Green and pink indicate [OK], and
red indicates [NG].
• Inspect
Displays the Inspect step seeklines. Green and pink indicate [OK], and red
indicates [NG].
Part 2 Chapter 9 Other Settings
Edition 2.0 2-9-3 XP-142E System Reference

• Center
When vision processing recognition is successful, this displays the object's
center position.
• CompleteCenter
(This is not currently used.)
3. Select the [Close] button to apply the settings, which will be reflected the next time
that vision processing is used.
Part 2 Chapter 9 Other Settings
Edition 2.0 2-9-4 XP-142E System Reference
10.When Trouble Occurs
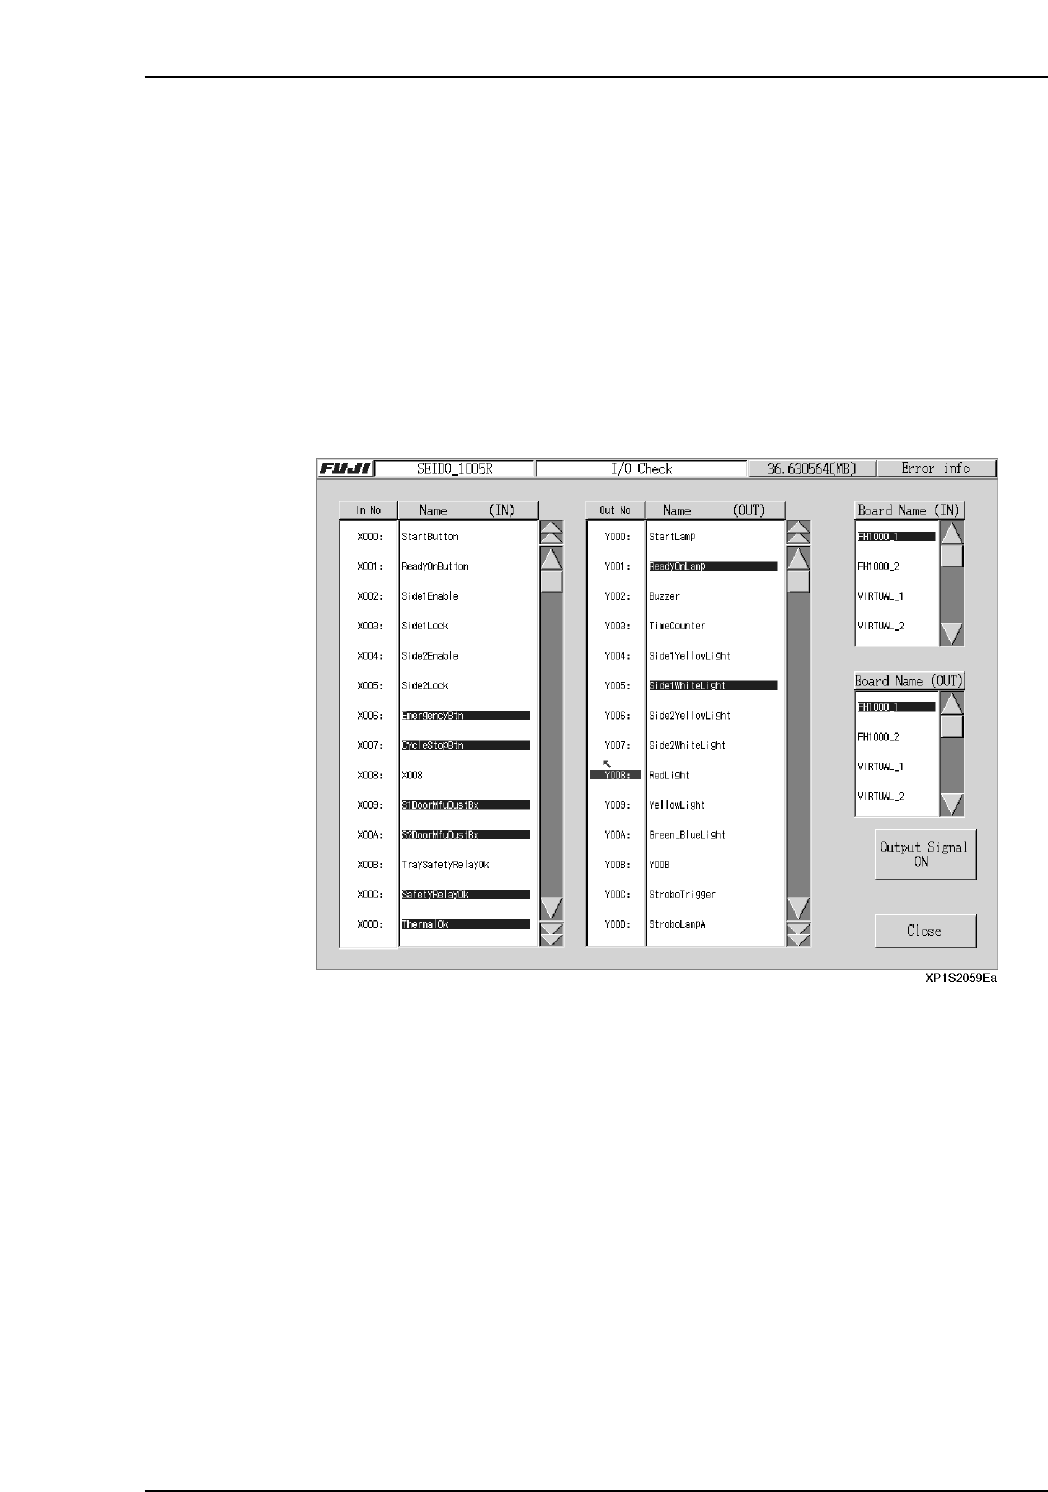
10.1 I/O Check
(ESR0228b)
The I/O Check screen is used to monitor input/output signal statuses. Lamps and air
cylinders, etc., can also be operated manually from this screen.
Procedure
1. At the [Main] screen, press [Maintenance A] then [I/O Check] to display the [I/O
Check] screen.
2. To perform manual operations at the output side, select an item in the “Out No.”
column (the item then displays in blue), then press [Output Signal ON]. To stop
an output signal, press [Output Signal OFF].
3. Press [Close] to return to the [Main] screen.
Part 2 Chapter 10 When Trouble Occurs
Edition 2.0 2-10-1 XP-142E System Reference