XP-142E System Reference-SYS-XP142-2.0E.pdf.pdf - 第87页
Mark Ptn Shape White Black 4 Upward triangle 5 Intersecting squares (left side up) 6 Intersecting squares (right side up) 7 Cross XP1S2152E Part 2 Chapter 5 Stopping and Resuming Production Edition 2.0 2-5-5 XP-142E Syst…
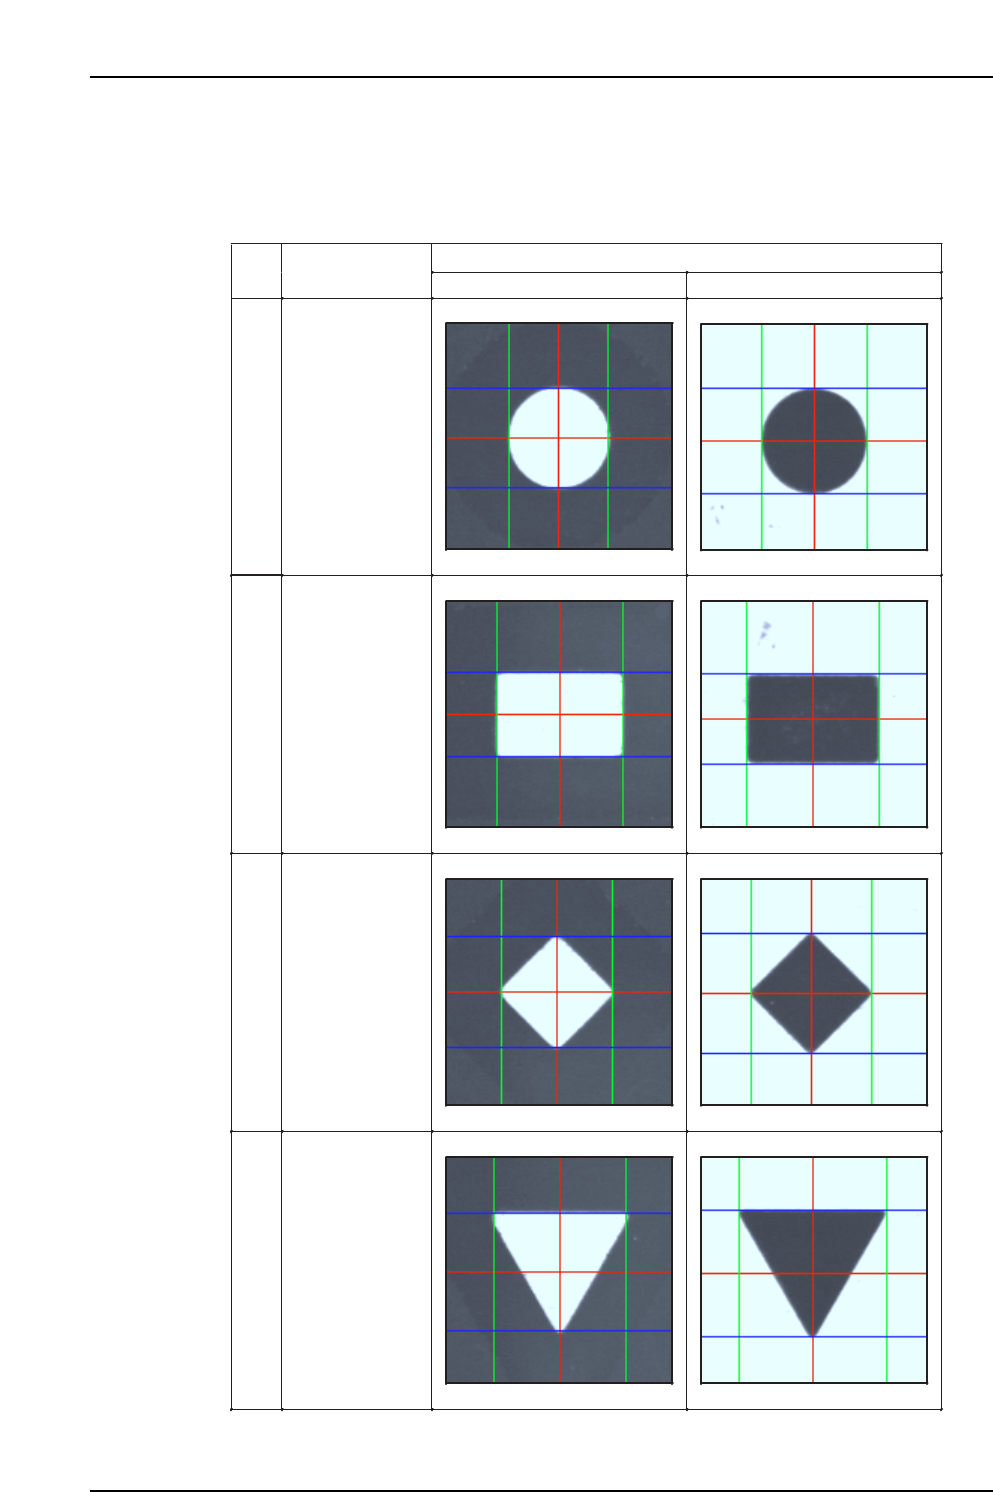
5.3.3 Setting the Mark Position
Drag the calipers using the mouse in line with the outer edges of the mark, to set the
center of the mark. The following table shows how the calipers should be aligned with
each mark type.
Mark
Ptn
Shape
White Black
0
Circular
1
Rectangular
2
Diamond
3
Downward
triangle
XP1S2151E
Part 2 Chapter 5 Stopping and Resuming Production
Edition 2.0 2-5-4 XP-142E System Reference
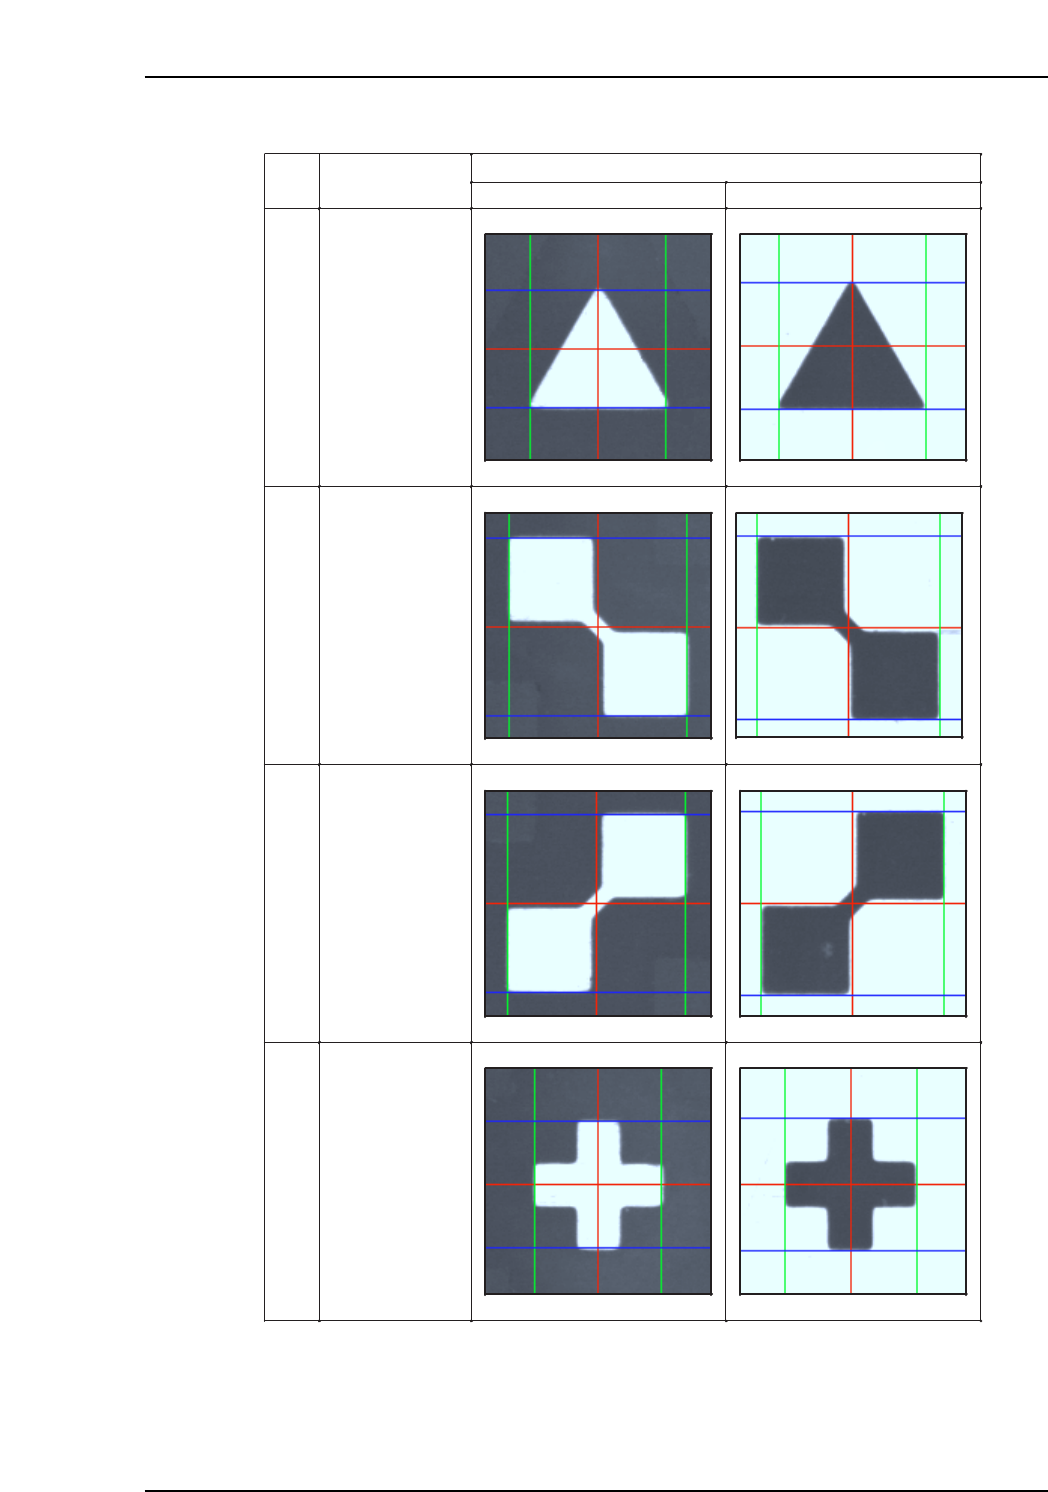
Mark
Ptn
Shape
White Black
4
Upward triangle
5
Intersecting
squares
(left side up)
6
Intersecting
squares
(right side up)
7
Cross
XP1S2152E
Part 2 Chapter 5 Stopping and Resuming Production
Edition 2.0 2-5-5 XP-142E System Reference
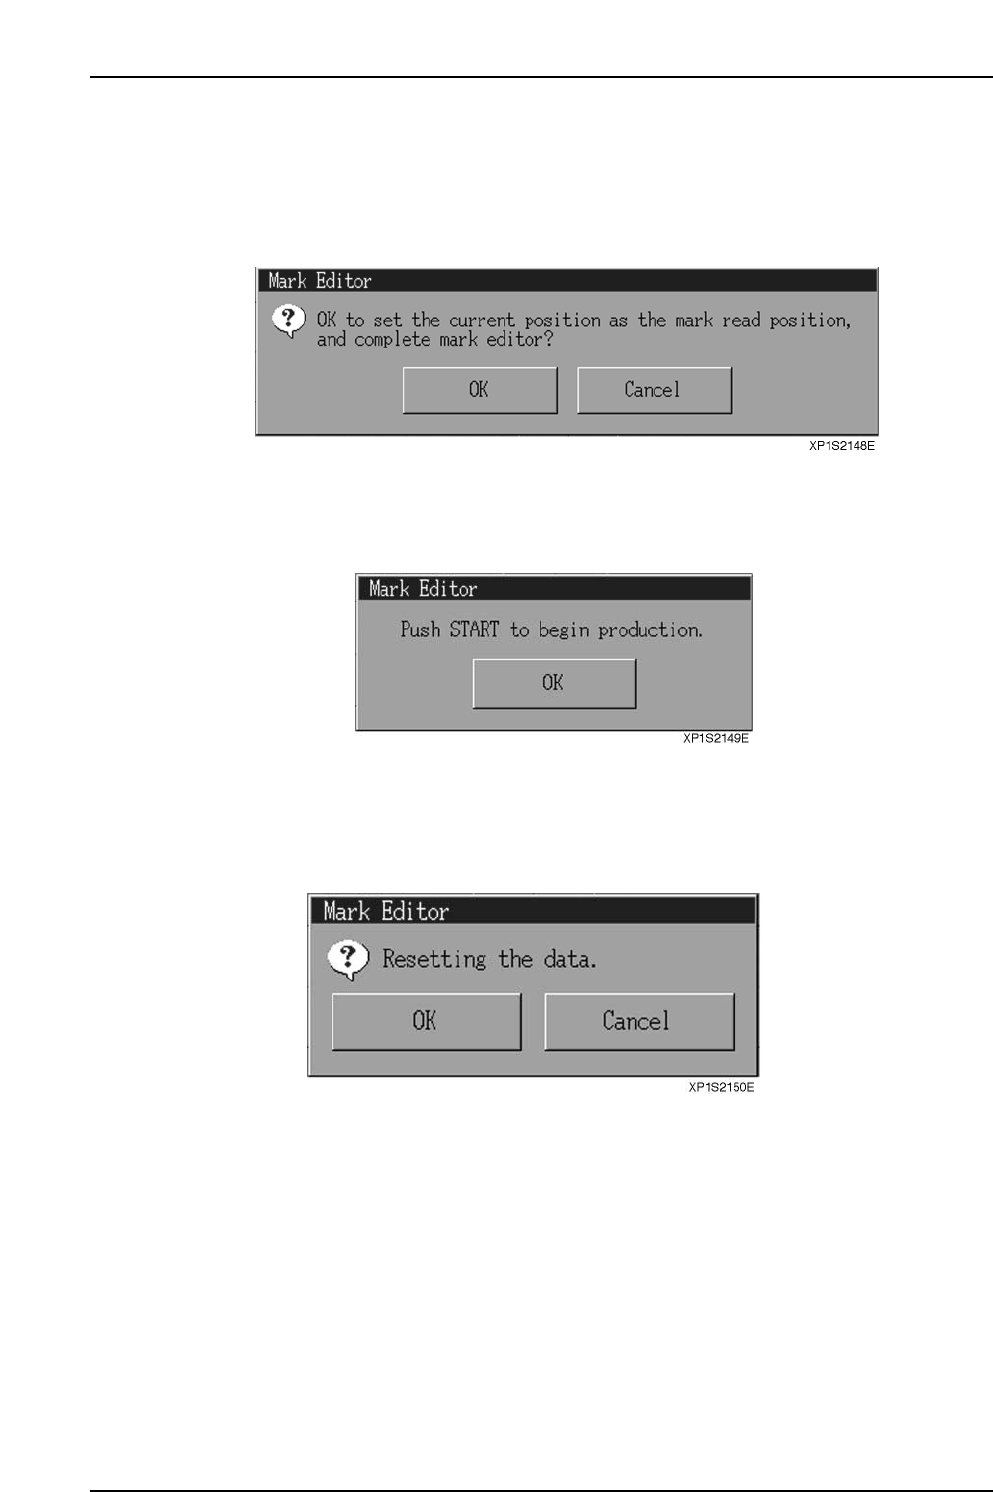
5.3.4 Using the Mark Editor Buttons
(1) Center Set Button
Press the [Center Set] button at the mark editing screen to display the following dialog
box. Press [OK] to set the mark position and end mark editing. Press [Cancel] to return
to the mark editing screen without setting the data.
The following dialog box displays when the data is set.
Press the [OK] button to return to the automatic operation screen. Press the START
switch to start production again.
(2) Reset Button
Press the [Reset] button at the mark editing screen to display the following dialog box.
Press [OK] to reset the caliper lines and the values at [Calipers], [Center] and [Offset].
Part 2 Chapter 5 Stopping and Resuming Production
Edition 2.0 2-5-6 XP-142E System Reference