XP-142E System Reference-SYS-XP142-2.0E.pdf.pdf - 第64页
Part 2 Chapter 3 Changeover Edition 2.0 2-3-10 XP-142E System Reference 3.5.2 Nozzle Editor Carry out the settings for the nozzles loaded on the machine. The Side 1 procedure is explained below, but the procedure is iden…
Nozzle Change Support Mode
This mode is restricted to operators who have Maintenance C access permission.
1. At the [Main] screen, select [Production], then [Nozzle Editor] to display the
[Nozzle Editor] screen. Select the [Nozzle change support] button.
2. The [Check maintenance key] confirmation dialog box appears, so open the safety
cover and turn the maintenance key ON. Close the error information screen that
appears when the cover is opened.
3. Select one of the 12 nozzles in the [Machine nozzles] area and specify the nozzle
change position (Stage and Slot No.).
4. Select the [Nozzle change support] button.
5. Push and hold the START button. The button must be held down until the servo
motion is complete.
6. The head moves to the nozzle change position, and the specified nozzle is
lowered. Replace the nozzle. To replace another nozzle, select that nozzle in the
[Machine nozzles] area and repeat the process.
7. When finished changing nozzles, select the [Close] button.
Part 2 Chapter 3 Changeover
Edition 2.0 2-3-9 XP-142E System Reference

Part 2 Chapter 3 Changeover
Edition 2.0 2-3-10 XP-142E System Reference
3.5.2 Nozzle Editor
Carry out the settings for the nozzles loaded on the machine.
The Side 1 procedure is explained below, but the procedure is identical for Side 2.
Procedure
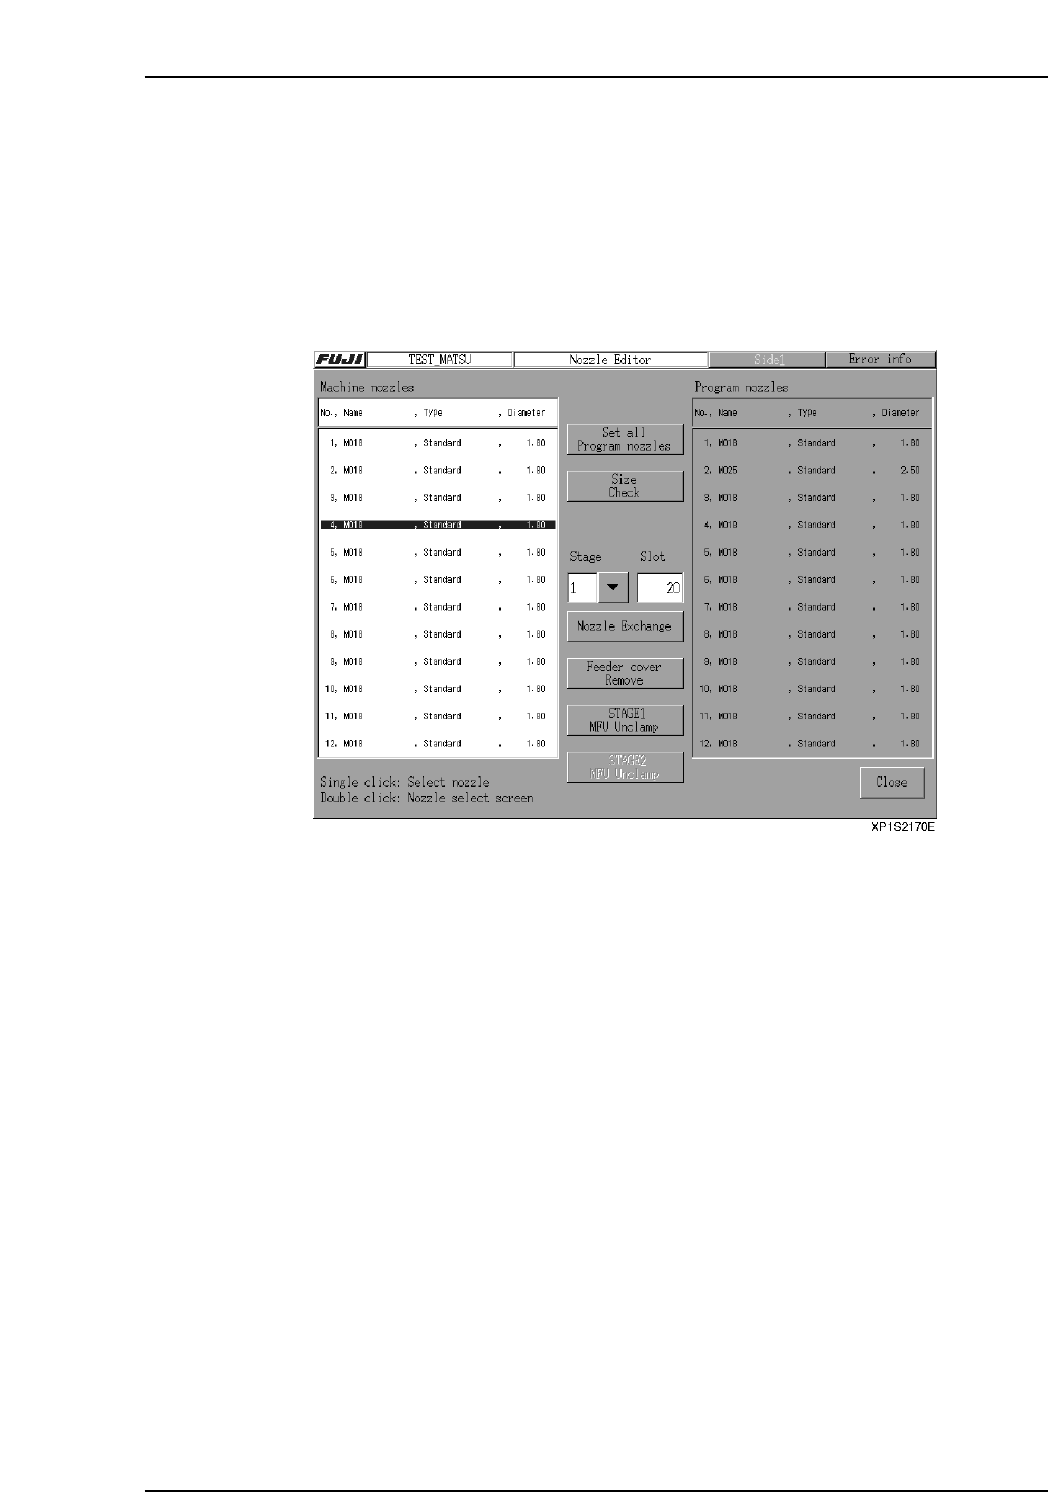
1. At the [Main] screen, press [Production] then [Nozzle Editor] to display the
[Nozzle Editor] screen. This screen contains lists of “machine nozzles” and
“program nozzles”. The “machine nozzles” list shows nozzles which are on the
machine, and the “program nozzles” list shows nozzles which the program
requires.
2. Display the nozzle list by pressing the machine nozzle column, and then select the
nozzles to be exchanged. The machine nozzle information is updated along with
the settings for the new nozzles. Or, press [Set all Program nozzles] to change all
to the program nozzles.
3. Exchange the nozzles on the machine in accordance with the [Machine nozzles]
list.
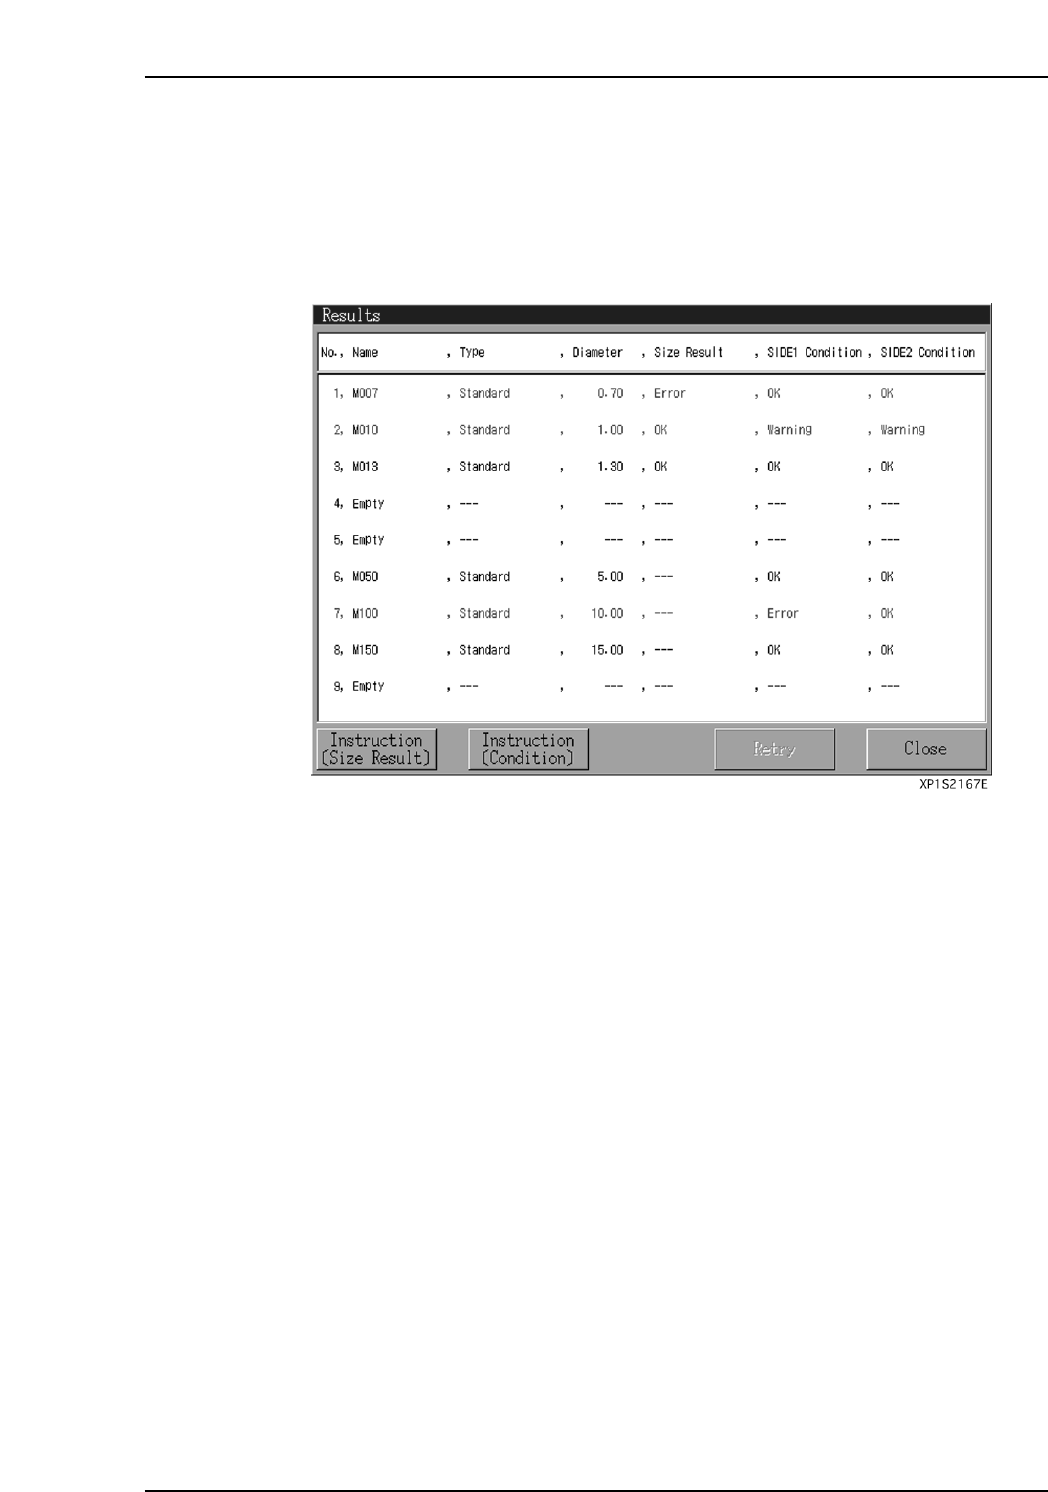
4. After the nozzle change, press the [Size Check] button.
The following items are checked:
• Nozzle size (Size Result)
• Nozzle brightness (Condition)
After the above items have been checked, the “Results” dialog box displays.
5. Verify that no warning or error conditions exist at the “Size Result” and
“Condition” items. If an error exists, check the nozzle, etc., in accordance with the
“Size Result” and “Condition” instructions, and correct the error cause.
Perform another “Size Check” and verify that there are no errors.
Note: As the nozzle brightness measurement result is applied to vision processing during
production, be sure that there is no error.
Part 2 Chapter 3 Changeover
Edition 2.0 2-3-11 XP-142E System Reference