XP-142E System Reference-SYS-XP142-2.0E.pdf.pdf - 第159页
Main Mark No. Specifies the mark number which serves as the main reference for the part to be placed. (1 ~ 255) Sub-Mark No. Specifies the mark number which serves as the sub-reference for the part to be placed. (1 ~ 255…

Setting Item Explanations
Selection area (sequence No.)
Display the sequence number.
Board No. (0 ~ 255)
This is the ID number of each board in cases where a single panel (PCB) contains a
number of same-pattern boards. This item should be set to “0” when producing panels
which do not contain multiple boards. When producing a multi-board panel, the
necessary sequence data is created in one of the following ways:
• A board No. of “1” is specified for a given board, and the sequence data is entered
manually for that board only. The machine then subjects this data to expander
processing to automatically generate the sequence data for the number of boards
being produced.
• The board Nos. and sequence data for all the boards are entered manually.
Sequence Type
Select the sequence type from the following.
B: Board skip mark reading sequence
D: Placement sequence
F: Fiducial mark reading sequence
X-coordinate
Enter the panel’s X-direction coordinate.
If a coordinate is entered relative to a reference point other than the Fuji program’s origin
point (-5 mm in X-direction, or 5 mm in Y-direction, measured from panel’s bottom right
corner), an X-offset value must be entered in the panel data as an “origin offset X”
setting. (-650.00 mm ~ 650.00 mm)
Y-coordinate
Enter the panel’s Y-direction coordinate.
If a coordinate is entered relative to a reference point other than the Fuji program’s origin
point (-5 mm in X-direction, or 5 mm in Y-direction, measured from panel’s bottom right
corner), an Y-offset value must be entered in the panel data as an “origin offset Y”
setting. (-650.00 mm ~ 650.00 mm)
Angle
Enter the angle of the part to be placed. Use the part angle viewed when editing the part,
as a reference.
Stage No.
Each of the machine sides where MFU part supply units are set is referred to as a
“stage”. On XP series machines, the front side is “stage 1”, and the rear side is “stage 2”.
Enter stage numbers which correspond to the sides where parts are being supplied.
(1, 2)
Slot No.
Slots are defined as the location of tape feeders loaded on the part supply units.
Enter a slot no. in which a part can be loaded. (1 ~ 50)
Mark No.
Specifies the mark number. Any number may be entered, provided that it does not
duplicate an existing number. Mark numbers can only be specified at the mark reading
sequence. (1 ~ 255)
Part 3 Chapter 3 Editor
Edition 2.0 3-3-3 XP-142E System Reference
Main Mark No.
Specifies the mark number which serves as the main reference for the part to be placed.
(1 ~ 255)
Sub-Mark No.
Specifies the mark number which serves as the sub-reference for the part to be placed.
(1 ~ 255)
Mark Name
Enter the name of the mark to be read. Be sure and enter the mark name when multiple
mark types exist. Valid only at the mark reading sequence. (Max. 23 characters)
Board Skip
Set this item to “1” when no parts are to be placed on a given board.
0: Not skipped 1: Execute board skip
Feeder Skip
Set this item to “1” when no parts are to be placed from a given feeder. When a feeder
skip is specified, all the relevant sequences are skipped if a skip is specified for any one
sequence at the slot in question.
0: Not skipped 1: Execute feeder skip
Sequence Skip
Select “1” when the sequence in question must be skipped.
0: Not skipped 1: Execute sequence skip
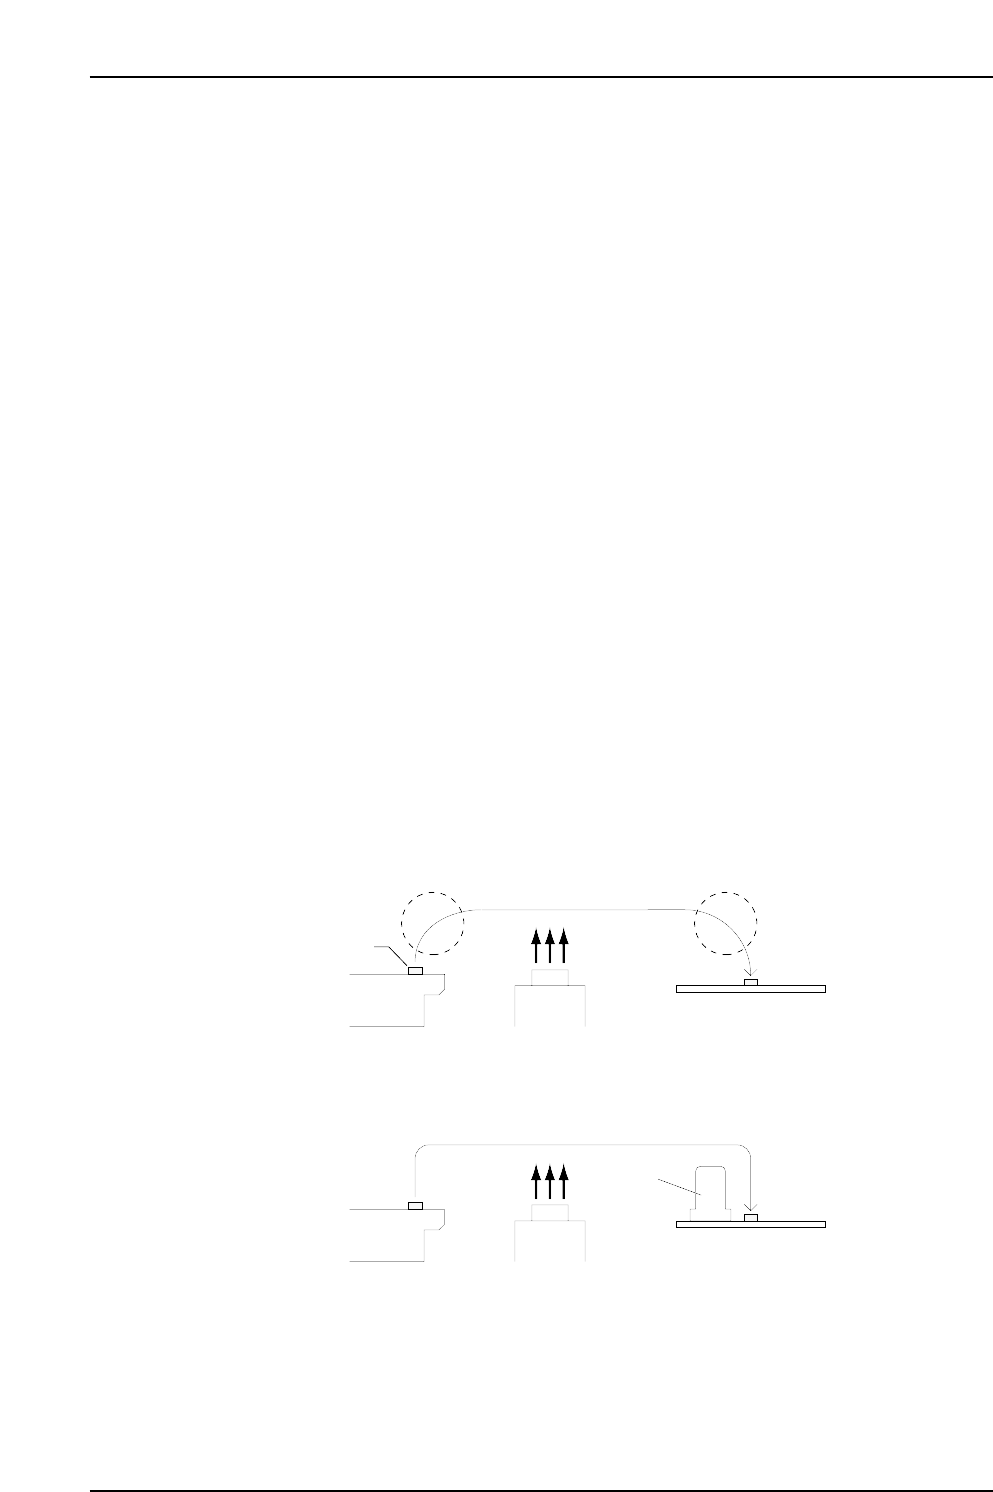
Transport Mode
With reference to the illustration below, select the axis motion desired when placing the
part. (Select a setting of “1” to decrease the chance of interference in placing sequences
where tall or large parts have been placed in advance.)
0: Arch motion 1: Gate motion
When "0" is input
When "1" is input
Part
Feeder
Camera
Panel
Feeder
Camera
Panel
Tall part
MCSX312Ec
Part 3 Chapter 3 Editor
Edition 2.0 3-3-4 XP-142E System Reference
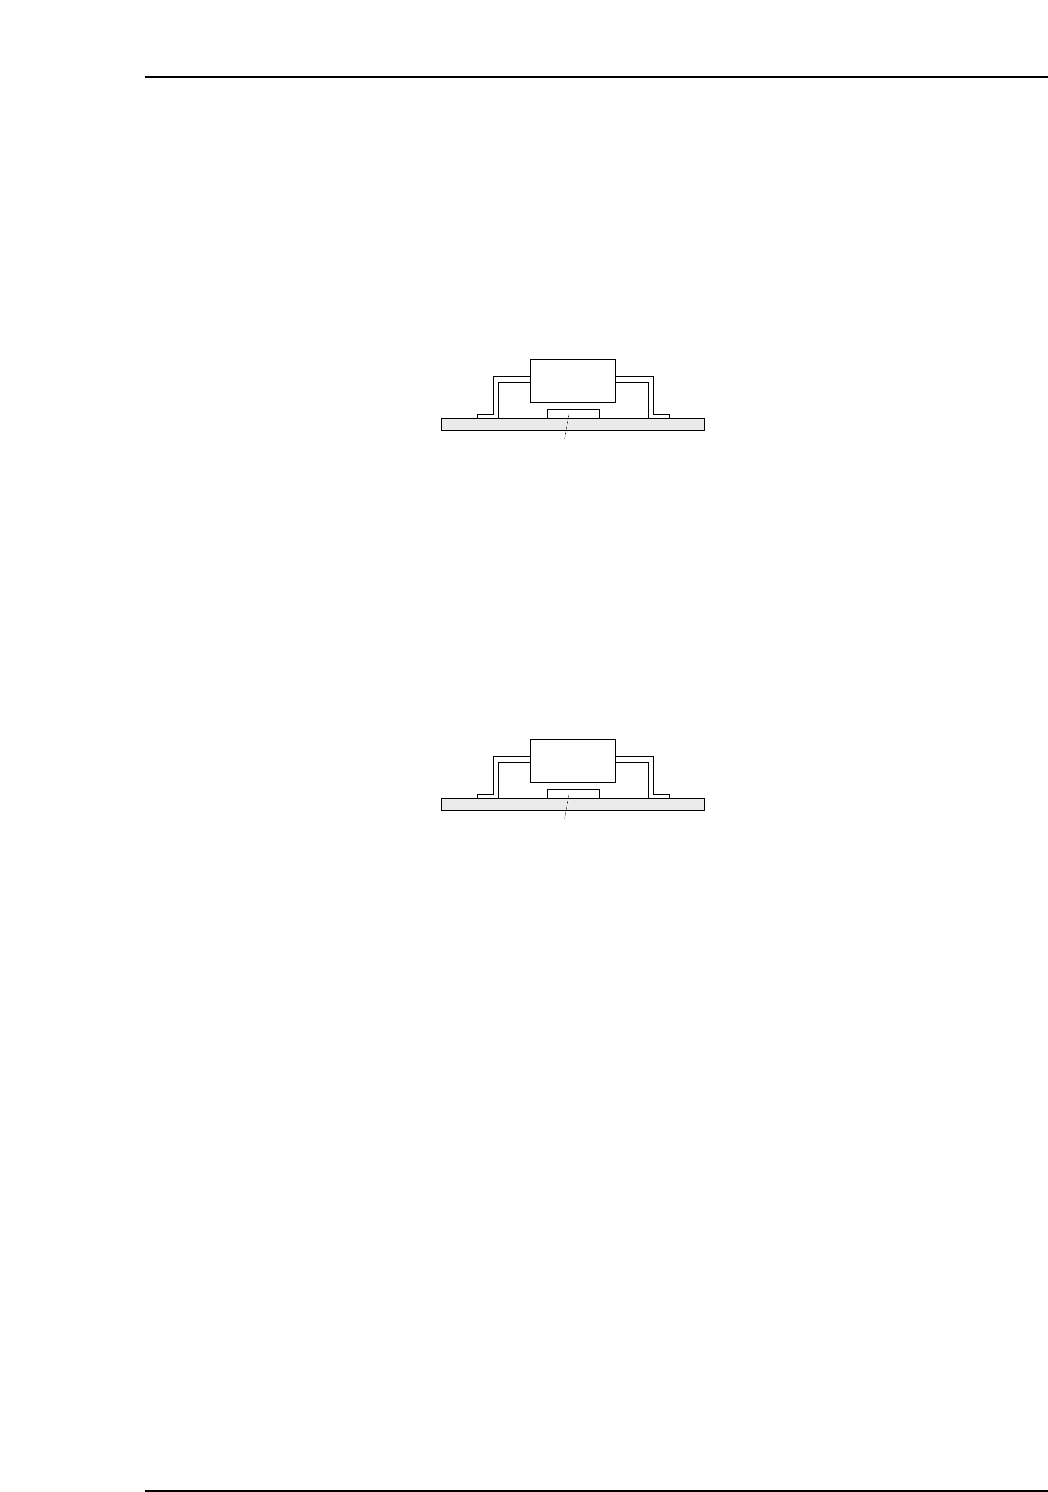
Terminate (Presently not supported)
In cases where part placement is occurring as shown in the illustration below, a 3216 part
placing error occurs, and the 3216 part cannot be placed if the SOIC part is placed first.
To avoid this problem, set the “Terminate” item of the SOIC placing sequence to “1”
(terminate sequence enabled) so that the SOIC part will not be placed until all other
placing sequences are completed.
As a result, even when an error occurs at the previous sequence, the part for the next
sequence will not be placed.
0: No terminate sequence 1: Execute terminate sequence
Place Before
Enter the comment for the placement sequence which is to occur later (max. 256
characters). If an error occurs at the 3216 part placement when placing parts as shown in
the illustration below, it will no longer be possible to place the 3216 part if the SOIC part
is placed first. Entering the SOIC sequence comment in this 3216 placement sequence
textbox ensures that the SOIC part will not be placed until after the 3216 part has been
placed.
Comment
Up to 256 characters can be used for the sequence comment input. In order to specify a
“Place Before” sequence comment, unique sequence comments must be specified for
each board. When a “Place Before” entry is made, there must be other parts with the
same sequence comment on that board.
Panel
SOIC
3216
MCSX313E
Panel
SOIC
3216
MCSX313E
Part 3 Chapter 3 Editor
Edition 2.0 3-3-5 XP-142E System Reference