KE2010.Instruction Manual.Ver.2.01,Rev.08.pdf - 第220页
4 – 1 13 4.8.2.1 Ent ering tape component dat a/bulk component dat a W hen y ou select “T ape” or “Bulk ” as the com ponent pack age, t he following item s do not req uire data entr y: − The "Pack aging st yle"…
4 – 112
Moving to the beginning or end of the line
The HOME key accesses the left-hand half screen of the listing and moves the input
field to a cell.
The END key accesses the right-hand half screen of the listing and moves the input
field to the “Use” cell.
Mutually exclusive entry
Move the cursor over a filed at which you want to enter data, then press the right
button of a mouse or the F2 key of a keyboard. The pop-up menu appears on the
screen. Select the desired value from this pop-up menu.
Moving to the filed which does not require any data
An asterisk mark (*) is displayed in the item which does not require any data to be
entered. You can move the input focus into such a field, but cannot enter any value
in it. Whether data can be entered depends on the package you selected.
Note If any production program file created with another type of machine is loaded
to the system, the system may recalculate the component pick-up coordinates
saved in the Pick data since the reference coordinates are unique to each type
of machine. Therefore, be sure to check the component pick-up coordinates
when you load a production program created with another type of machine.
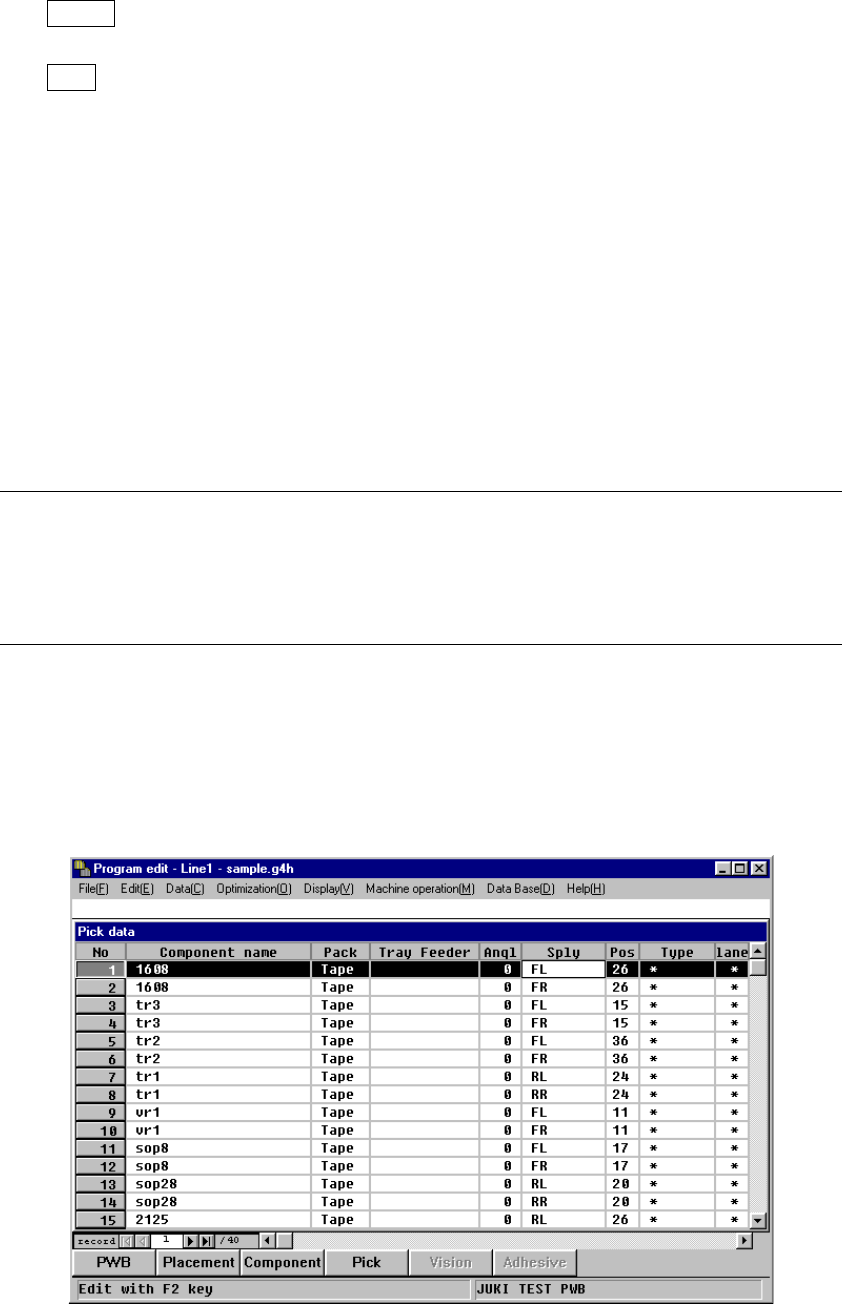
4.8.2 How to enter data
In the fields “Component name”, “Pack.”, “Tray Feeder” and “Angle”, values you
entered on the PWB data screen and Component data screen appear.
The input focus is positioned in the “Sply” field of the first component.
The fields in which an asterisk mark "*" is displayed require no data entry, and you
cannot enter any data.
)
4 – 113
4.8.2.1 Entering tape component data/bulk component data
When you select “Tape” or “Bulk” as the component package, the following items do
not require data entry:
− The "Packaging style" shows the setting of Component data.
You cannot change this setting, so if necessary, change the corresponding
Component data.
Tape/bulk feeder types and the number of occupied holes which are used for
mounting each tape/bulk feeder
Tape/bulk feeder type Number of occupied holes
8 mm 2
12 mm 3
16 mm 3
24 mm 4
32 mm 5
Bulk feeder 2
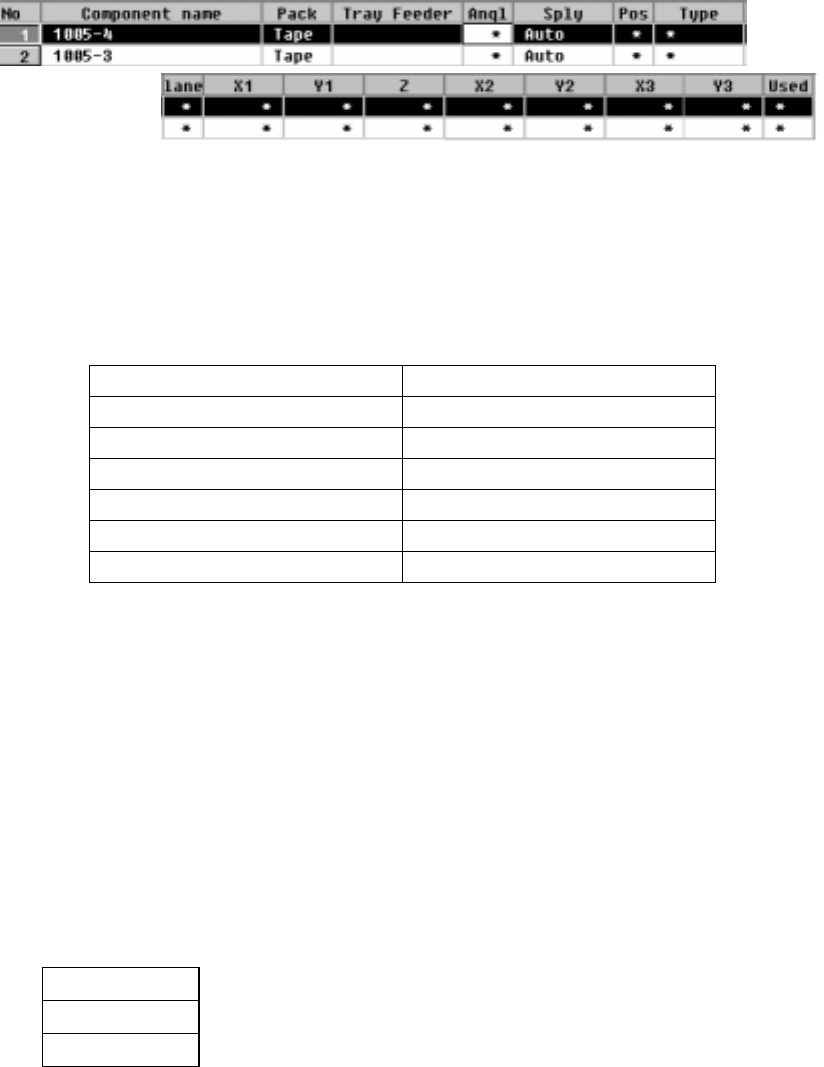
① Sply (Supply)
This parameter determines whether the tape feeders or bulk feeders are
mounted on the front or rear side of the machine. When you select “Auto”, the
Optimization utility automatically assigns the feeders to the machine, so you do
not have to enter any data to another items.
• When the Optimization utility is executed, the parameters at which an
asterisk mark is displayed (excluding the "Type" and "Lane" parameters) are
automatically set.
• When you select "Front" or "Rear", you can set the parameters at which an
asterisk mark is displayed (excluding the "Type" and "Lane" parameters).
AUTO
The Optimization utility assigns the feeders to the machine.
Front
The front side feeds components.
Rear
The rear side feeds components.
4 – 114
− Enter the "Sply" parameter with considering the number of the occupied
feeder mounting holes.
If you want to select two or more components data records, then change
them simultaneously, you can change them to “Auto” only.
② Angl (Angle)
This parameter specifies the component pick-up angle.bar.
− The angle set in Component data appears here as the default setting.
To change it, move the input focus to this "Angle" parameter.
• When Pick data is created, the component feeding angle set in Component
data is set as the default setting.
• When you call Component data from the permanent information to create it,
the direction specified as the permanent information is set to Pick data also
as the default setting.
• When you call Component data from database to create it, the component
feeding angle set in Component data is set as the default setting when you
create Pick data.
• Even though you enter the angle to Pick data, each angle set in Component
data, permanent information and database will not be changed.
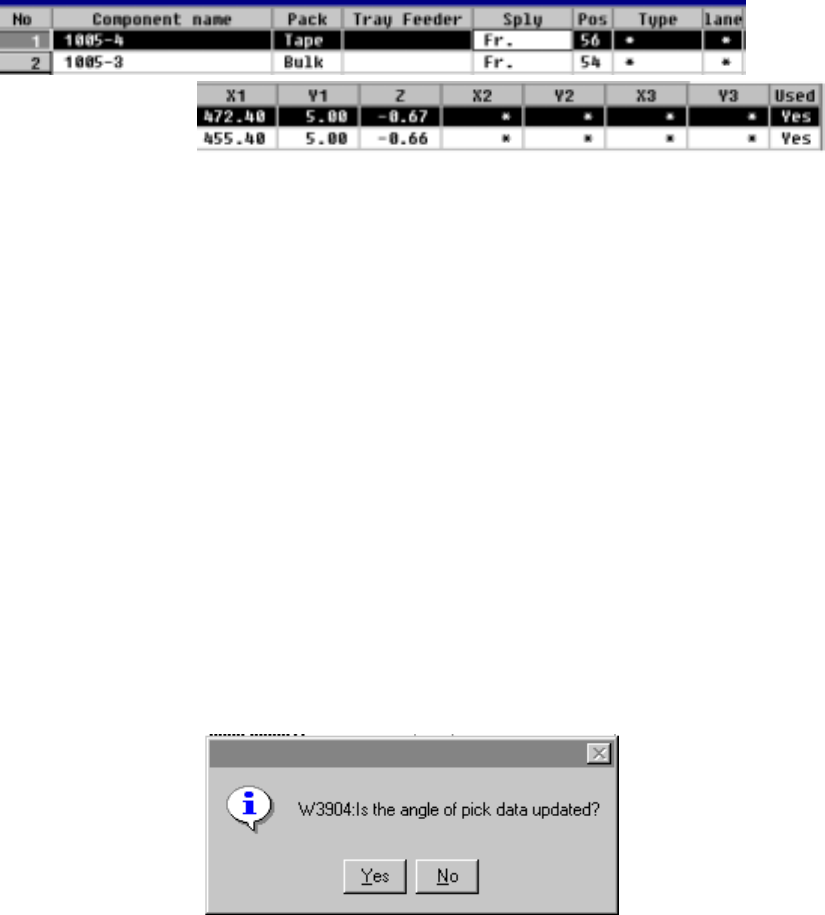
• When you are to change the angle of Component data only, the dialog box
shown below appears on the screen to ask you whether to change the angle
of Pick data also.
When you select "Yes" on this dialog box, the pick-up angle is updated.
• When you select "No", the angle set as Pick data is updated.
• When you select the [Call list] command, the system asks you if Pick data is
to be updated.
)