KE2010.Instruction Manual.Ver.2.01,Rev.08.pdf - 第507页
6 − 131 − Range of verification Check this check box if you want to check t he components whose numbers are specif ied by you. − W hen y ou check t his check box, you can specif y the following item s: Figure 6.7.1.4. 3 …
6 − 130
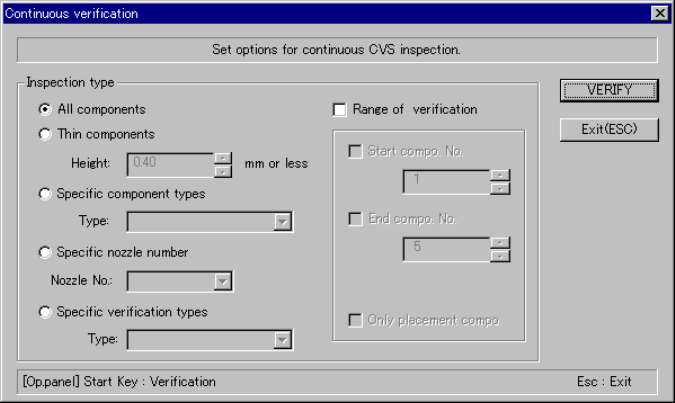
6.7.1.4 Continuous verification check
6.7.1.4.1 “Continuous verification” dialog box
When you click the [Tool] command from the menu bar, the [Check] command on
the “Tool” menu, and then [Continuous verification] command on the “Production”
menu, the following dialog box appears on the screen.
− Set the requirements for checking a component on this dialog box.
Figure 6.7.1.4.1 “Continuous verification” dialog box
− Inspection type
Specify whether to check only components
that satisfy a certain requirement among
components whose data is stored in
Component data.
①
All components
The system checks all components whose
data is specified in Component data.
②
Thin components
The system checks only components whose
height is specified in the Edit box or lower.
③
Specific component type
The system checks only components
selected in the combo box.
④
Specific nozzle number
The system checks only components that
use a nozzle specified in the combo box.
⑤
Specific verification types
The system checks only components whose
verification type is specified in the “Type”
combo box.
6 − 131
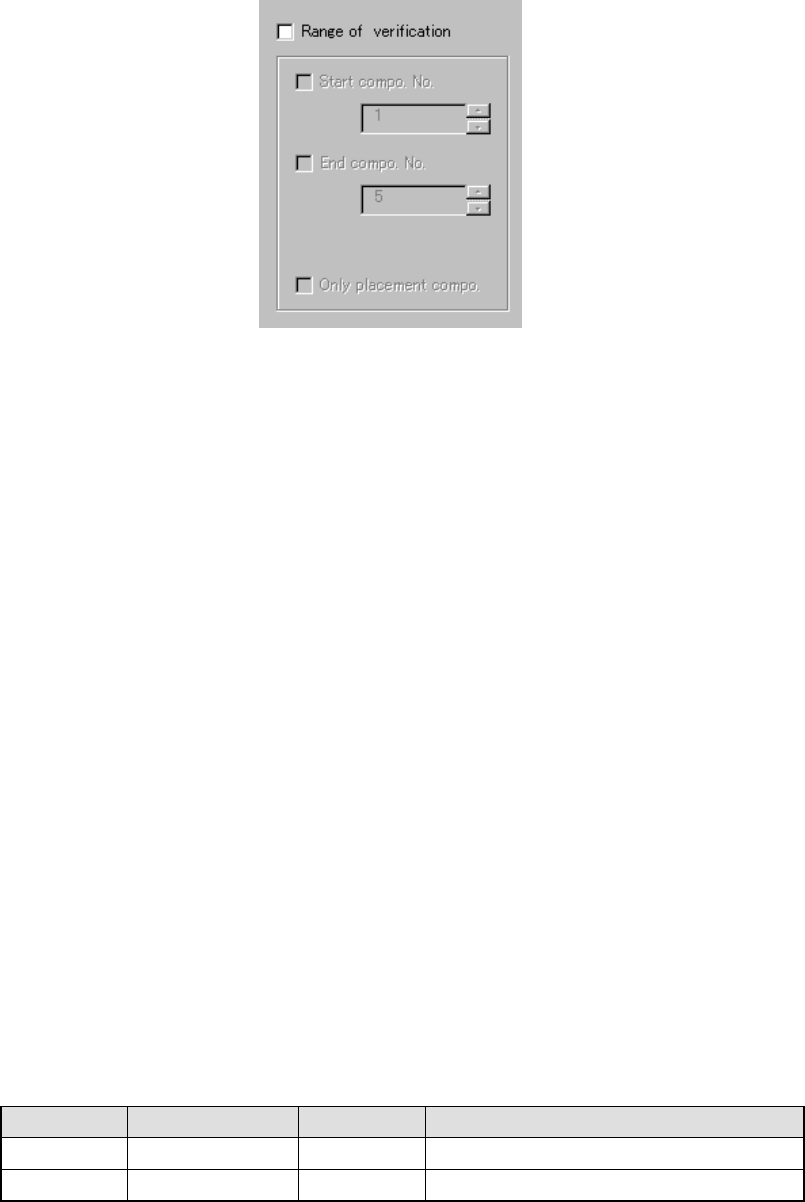
− Range of verification
Check this check box if you want to check the components whose numbers
are specified by you.
− When you check this check box, you can specify the following items:
Figure 6.7.1.4.3 Range of verification
①
Start compo. No.
Check this check box if you are to specify the number of the first component to
be checked. After checking this check box, enter the first component number
in the edit box.
②
End compo. No.
Check this check box if you are to specify the number of the last component to
be checked. After checking this check box, enter the last component number
in the edit box.
③
Only placement compo.
Check this check box to check only components whose data is stored in
Placement data.
− <VERIFY> button
Starts the continuous verification check.
− <Exit> button
Returns to the pervious screen displayed before you invoke this dialog box.
− Shortcut keys
On the “Continuous verification” dialog box, the following shortcut keys are
available.
Table 7.7.4.4.1 Shortcut keys
Keyboard Operation panel HOD key Action
START Starts the continuous verification check.
ESC Returns to the previous screen.
6 − 132
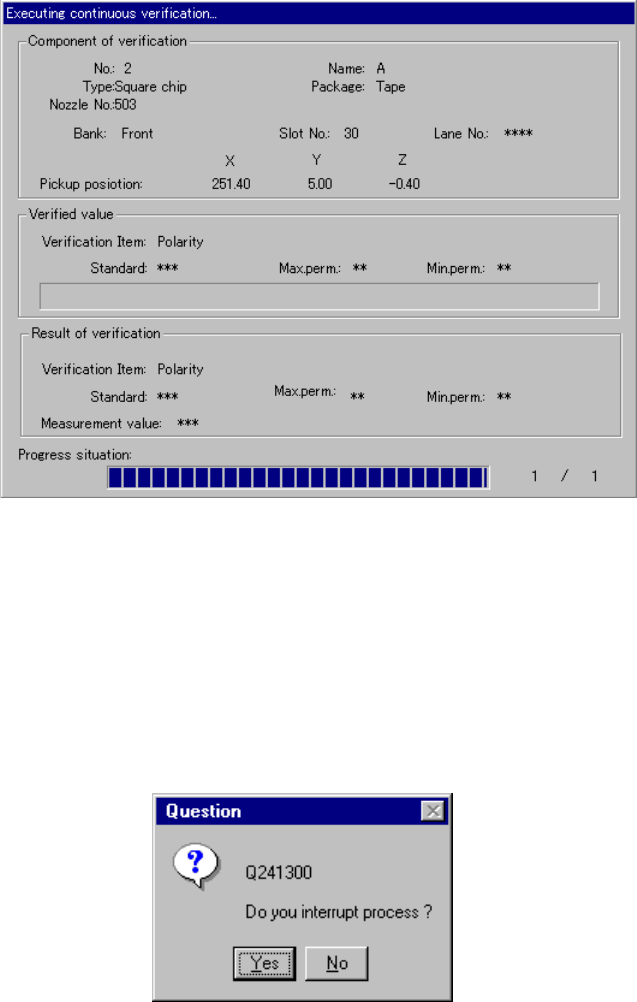
6.7.1.4.2 “Executing continuous verification…” dialog box
While the system is performing a verification check continuously, the following
dialog box appears on the screen.
− On this dialog box, the system displays the data on a component being
checked, how far the check progresses, and the check result.
Figure 6.7.1.4.4 “Executing continuous verification…” dialog box
6.7.1.4.3 Interruption dialog box
To interrupt the inspection being executed forcibly, press the <STOP> button.
The following dialog box appears on the screen.
− Select whether to stop the inspection or not.
Figure 6.7.1.4.5 “Question” dialog box for interrupting the current inspection