KE2010.Instruction Manual.Ver.2.01,Rev.08.pdf - 第362页
5 − 9 Mov e around the t op, lef t, bot tom, and right of t he window fr ame using t he axis drive key for X- and Y- axes. Mov e to t he top and lef t f irst, and pr ess the ENTER k ey . Next, move to the bot tom and rig…
5 − 8
5.3.2 Teaching X/Y-axis
The X and Y axes (coordinates of the X- and Y- axes) can be taught by using each
nozzle of the head, the bad mark sensor, or the camera. The operator can select the
device according to his/her need.
Note, however, that some device may not be selected depending on the teaching
conditions.
The following explains the teaching procedure used for each of the three different
methods.
(1) Teaching by the nozzle of each head or bad marks
For teaching by the head, select the device which is to be taught with the HOD
first.
(2) Teaching by the camera
For teaching by the camera, select the camera as the device which is to be
taught with the HOD first.
It is also necessary for the teaching by the camera to select the number of the
input points (select with 1, 2, or 3 POINT key). Determine the position for the
number of times corresponding to the number of the teaching points, and enter
them. For teaching of 2 POINTS and 3 POINTS, move the device and press the
ENTER key on the HOD the same times as the number of input points to enter
the data (for 2 POINTs, move the device, press the ENTER key, move the device,
then press the ENTER key again)
For teaching by the camera, obtain the coordinates at the center (cross point) of
the crosshair cursor for each point, or move along each edge of the box window
and obtain its center as the coordinates.
Normally, use the crosshair cursor for point-by-point teaching, and use the axis
drive key for X- and Y-axes to move the crosshair cursor.
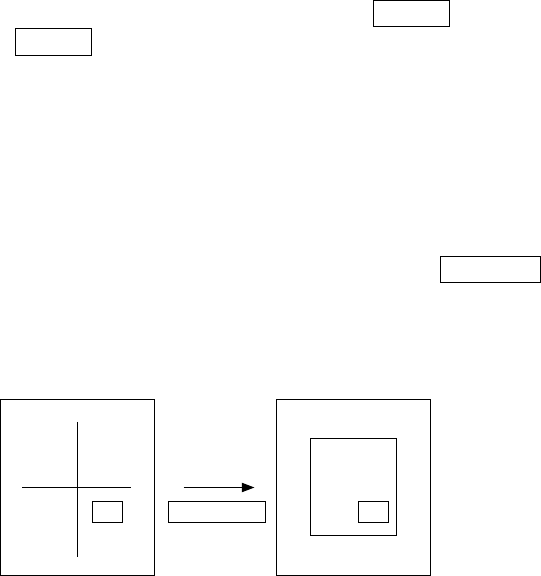
To obtain the coordinates using the box window, press the WINDOW key on the
HOD. The cursor on the screen then changes from the crosshair to window.
WINDOW
key
Normally, the crosshair
cursor appears
Window cursor
5 − 9
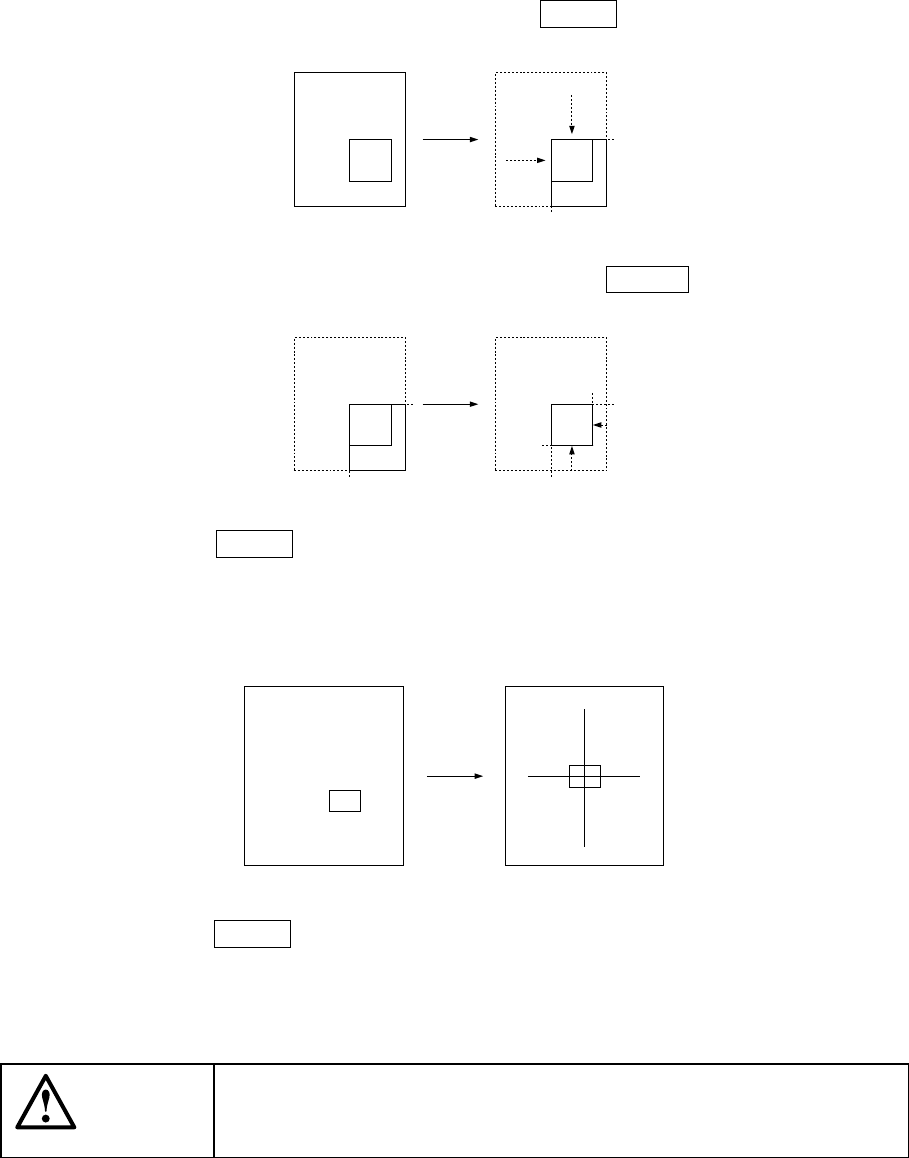
Move around the top, left, bottom, and right of the window frame using the axis
drive key for X- and Y-axes.
Move to the top and left first, and press the ENTER key.
Next, move to the bottom and right, and press the ENTER key.
When the ENTER key is pressed after moving to the bottom and right, the
camera moves so that the center of the window box is placed at the center of the
previous crosshair cursor. The window box is then changed to the crosshair
cursor.
Press the ENTER key here, to obtain the coordinates.
For 2- or 3-point teaching, perform as follows:
CAUTION
To avoid a risk of injury, do not place your hand in the machine, nor
move your face or head close to the machine while you are operating
the HOD.

5 − 10
①
2-point teaching
A
BC
PWB pad
Enter points A and B. The coordinates of point C, which is the center between
points A and B, is then computed and taught.
②
3-point teaching
A
B
D
C
C
A
D
B
Enter points A, B, and C. The coordinates of point D is then computed and
taught.
(Coordinate X of the point D is obtained as the center point between points A or B
and C; coordinate Y of the point D is obtained as the center point between points
A and B.)
Note that teaching of three points is effective only when the placement angle of a
component is 0, 90, 180, or 270 degrees.
D1