KE2010.Instruction Manual.Ver.2.01,Rev.08.pdf - 第492页
6 − 1 16 CA UTION After trial run, tr acking by the camera continues. To avoid a risk of injury, do not place y our hand in the machine, nor move your face or head close to the machine during operation of the machine. ① …
6 − 115
⑤
Tracking Station
Select which station is to be used for tracking a placement operation.
⑥
Placement ofs.
If the boards of a certain lot have a specific offset (during printing process and
reference hole making process), enter here X and Y offsets to apply the
entered offset of the placement positions to the board.
⑦
Place tracking
Using the radio button, set whether or not to perform placement tracking after
trial run by the camera, and also the types of tracking.
⑧
Pick tracking
Using the radio button, set whether or not to perform pickup tracking before
trial run by the camera, and also the types of tracking.
⑨
Automatic interval
Enter the time interval of automatic run in the edition box. (Input value: 1 to
500)
6.5.1 Starting the trial run
To start the trial run, press the <START> switch after setting the trial run conditions.
The green signal lamp lights to indicate that the production is in progress.
6.5.2 Display of the production status
When the <START> switch is pressed and production starts, the status of the
production (the same as that of the board production) appears on the screen.
For details, see section "Display of the production status" of the "PWB production".
The Operations of the Pause, Stop, and Exit commands in the execution of the test
production are the same as those of the board production.
6.5.3 Monitoring by camera
(1) Automatic run
When "Automatic" is selected in the "Place tracking" field, the placement monitor
camera moves over a trial placement position after trial run, shoots the
component placed circuit and outputs the result to the monitor screen.
The camera stops over the point for a time period set by the item "Automatic
interval", then goes to the next point of placement to be monitored.
For a part whose length or width is specified longer than 5.00 mm in component
data, the camera moves to the four corners of the component.
6 − 116
CAUTION
After trial run, tracking by the camera continues. To avoid a risk of
injury, do not place your hand in the machine, nor move your face or
head close to the machine during operation of the machine.
①
To stop the camera
To temporarily stop the camera, press the PAUSE key (on the HOD). The
camera pauses at the next point of placement when the camera is moving, or
stops at the current position when the camera pauses there.
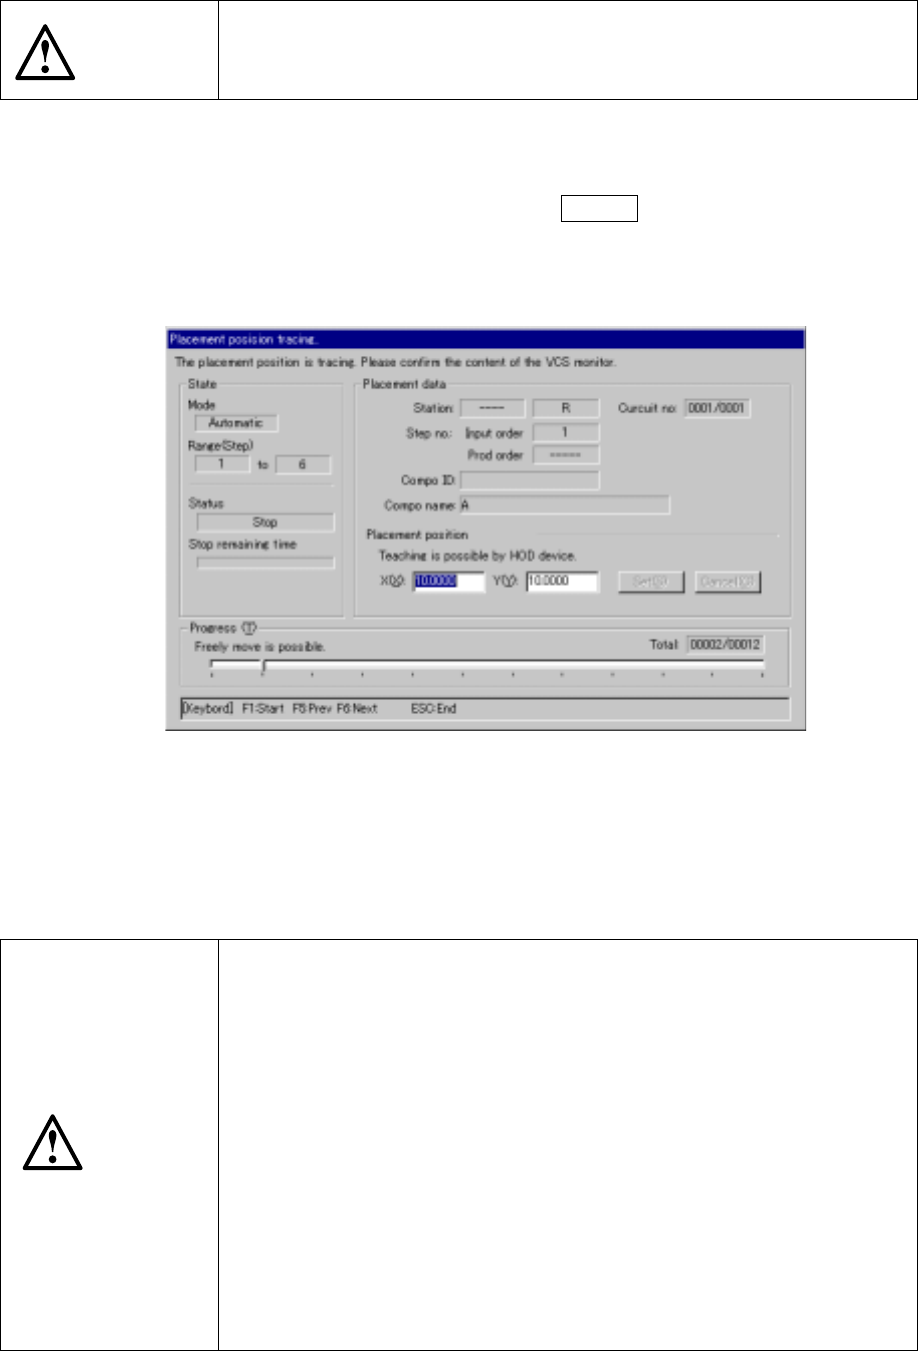
Figure 6.5.3.1 shows the “Place camera tracking” dialog box.
Figure 6.5.3.1 Place camera tracking dialog box
To cancel the pause status, press the <START> switch to restart operation,
and press the <STOP> to terminate operation. When you press the <STOP>
switch, the confirmation dialog box appears on the screen.
CAUTION
The head starts to move immediately after the <START> switch is
pressed, and then tracking restarts.
To avoid a risk of injury, do not place your hand in the machine, nor
move your face or head close to the machine during operation.
Before pressing the <START> switch, check that there is no one who is
working in the machine.
Before pressing the <START> switch, check that there is no one who
can be injured when the head starts to move.
Before pressing the <START> switch, check that there are no obstacles
(tools and jigs) attached or left in the machine.
Even when the <STOP> switch is pressed to stop tracking, X and Y
axes and the head continue to move to replace nozzles.
To avoid a risk of injury, do not place your hand in the machine, nor
move your face or head close to the machine even after stopping
tracking.
6 − 117
② Changing points of placement
In the stop status, the point of placement can be taught by the CAMERA key
of the HOD.
It is also possible to change the point of placement directly by numeric keys
on the ten-key pad.
Value correction can be made manually. The input range is limited within the
software range. After a new value is entered, note that the head moves
when the setting button is pressed.
CAUTION
To avoid a risk of injury, do not place your hand in the machine, nor
move your face or head close to the machine during operation of the
HOD. Note that the head moves to the X and Y coordinates you
entered when the cursor is moved.
③ Returning to the previous point of placement
In the stop status, you can return to the previous point of placement by
pressing the PREVIOUS key of the HOD.
The stop status is still held even after the camera returns to the previous point
of placement.
CAUTION
The head starts to move immediately after the PREVIOUS key is
pressed.
To avoid a risk of injury, do not place your hand in the machine, nor
move your face or head close to the machine during operation of the
HOD.
Before pressing the PREVIOUS key, check that there is no one who is
working in the machine.
Before pressing the PREVIOUS key, check that there is no one who
can be injured when the head starts to move.
Before pressing the PREVIOUS key, check that there are no obstacles
(tools and jigs) attached or left in the machine.
④ Going to the next point of placement
In the pause status, you can go to the next point of placement by pressing the
NEXT key of the HOD.
The stop status is still held even after the camera goes to the next point of
placement.
CAUTION
The head starts to move immediately after the NEXT key is pressed.
To avoid a risk of injury, do not place your hand in the machine, nor
move your face or head close to the machine during operation of the
HOD.
Before pressing the NEXT key, check that there is no one who is
working in the machine.