KE2010.Instruction Manual.Ver.2.01,Rev.08.pdf - 第542页
7 − 5 7.2 Menu 7.2.1 File See Sections 3.6 "File O perations" and 4. 2 "File" f or t he basic operations. 7.2.1.1 Regi stered nzl. no t able W hen y ou select t he [Register ed nzl. no table] com mand…
7 − 4
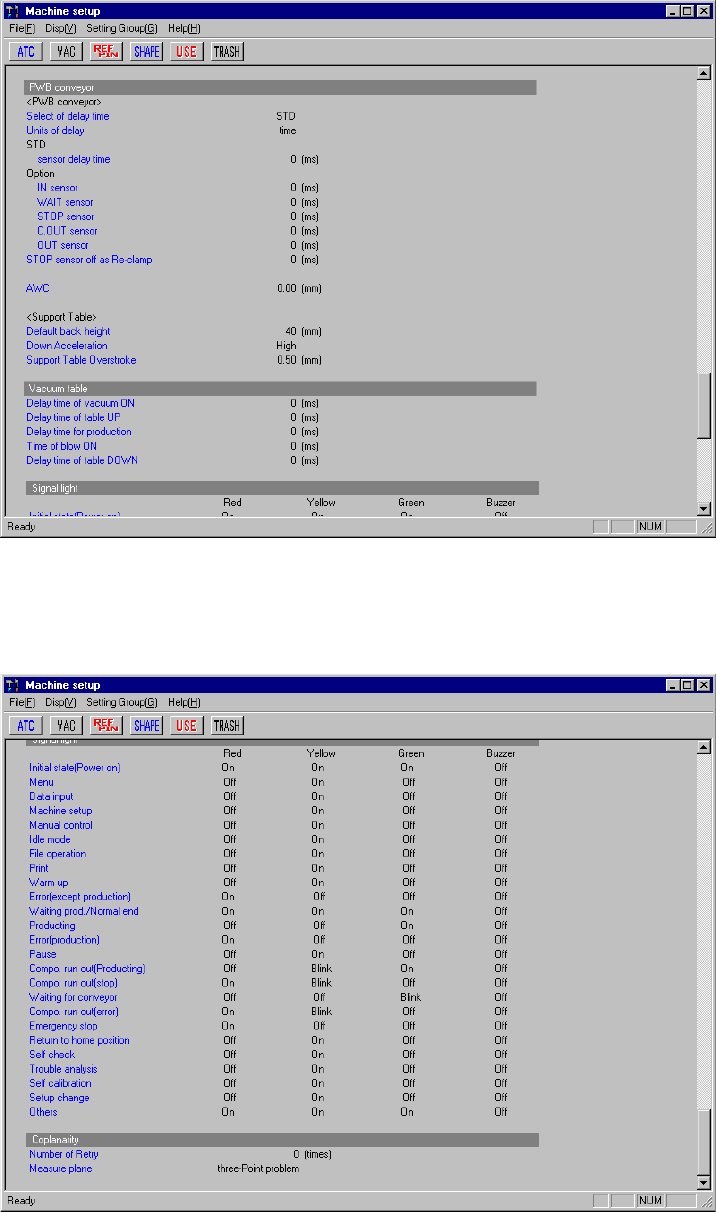
Current settings of the menu items "Vacuum table" and "Signal light".
Figure 7.1.1.5 Machine setup initial screen 5
Current settings of the menu item "Signal light" and "Coplanarity"..
Figure 7.1.1.6 Machine setup initial screen 6
− To change the setting of each item select [Setting Group] of the menu bar.
− When you select an item on the Set up group menu, and set the appropriate
parameter, the Machine setup initial screen reappears.
7 − 5
7.2 Menu
7.2.1 File
See Sections 3.6 "File Operations" and 4.2 "File" for the basic operations.
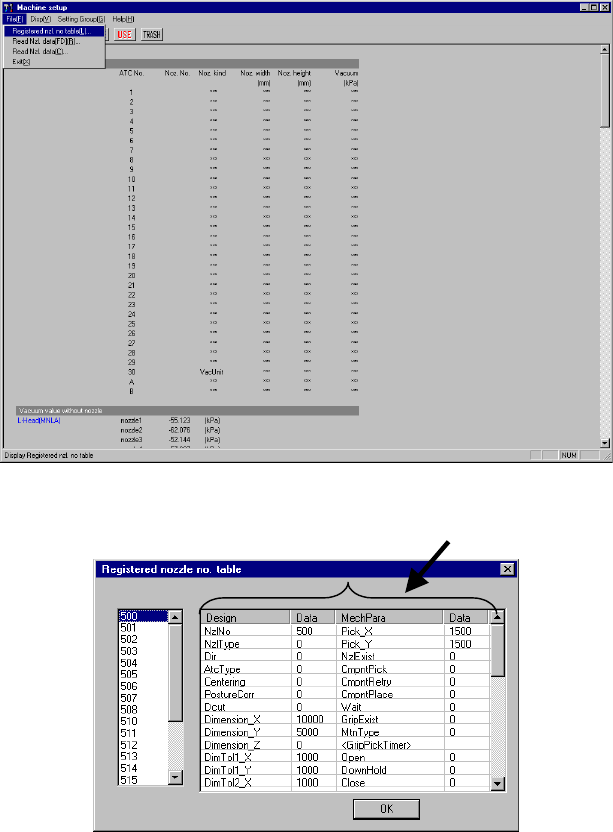
7.2.1.1 Registered nzl. no table
When you select the [Registered nzl. no table] command from the [File] menu,
which is invoked from the menu bar, the “Registered nozzle no. table” dialog box
appears (see Figure 7.2.1.1.2) on the screen.
The left list box of this dialog box lists the nozzle numbers registered in the nozzle
information.
− If the customized nozzle is not registered, only the standard nozzles (whose
number is 500 to 508, or 510 to 517) are displayed on this dialog box.
− Data corresponding to the nozzle number that is displayed on the “Registered
nozzle no. table” appears on the right-side nozzle information area.
The left side indicates the values designed for nozzles (Design), while the right
side indicates the mechanical parameter information (MechPara). Those data
matches each entry name stored in a file (NZL*.INI) loaded when the machine
reads the nozzle information. (because the system can read data from a
medium other than a floppy disk)
Figure 7.2.1.1.1 “Registered nzl. no. table” menu command
(Screen example when a KE-2020 is used)
Figure 7.2.1.1.2 “Registered nozzle no. table” dialog box
Nozzle information window

7 − 6
7.2.1.1.1 Nozzle information editing function
Caution Only a user whose level is “service man” or higher is allowed to use the
“nozzle information editing” function. (If you do not handle this function
correctly, it may cause a production error.)
<Contact your distributor or us directly for details.>
<Version 1.12 or higher>
Step 1.
Press the F3 or F4 key when the Nozzle information window is activated (its line
is highlighted). This allows you to edit “Design” data or “MechPara” data on
the highlighted line.
Double-clicking of the data column also allows you to edit data in the same way.
Note that you cannot edit the nozzle number (NzlNo) or data displayed on the
non-editable field (data column in which any data is not displayed).
Step 2.
When you press the <Return> key after editing data, the displayed data is
updated as you edited.
If a parameter error occurs when you press the <Return> key, the machine
displays the original data again.
If you click the nozzle information window or vertical scroll bar with a mouse
during editing, the current editing process is aborted.
Step 3.
When you edit any of data, the <Abort> button appears on the screen.
When you click the <Abort> button, all of your editing is canceled.
If an input range over error occurs when you click the <OK> button, all of your
editing is canceled too.
7.2.1.1.2 Special key operations
If you press the Ctrl key and down arrow key or the Ctrl key and up arrow key at the
same time when the nozzle information window is activated (its data line is
highlighted), it allows you to select another nozzle number on the nozzle number list.
The machine displays the corresponding data of the nozzle number newly selected
dynamically.
7.2.1.1.3 Saving the nozzle data
When you edit the nozzle information and click the <OK> button, the data you edited
is automatically saved although any saving data confirmation screen does not appear
when you quit the Machine Setup menu.