KE2010.Instruction Manual.Ver.2.01,Rev.08.pdf - 第598页
8 − 9 5) Blow cont. Sets t he blow of the selected head t o ON or OFF . 6) Light ing cont. Turns ON and OFF the lig ht of the OCC. 7) Pol arity cont. Sets the po larity of the OCC to positi ve (+) or n egativ e (-). 8) S…
8 − 8
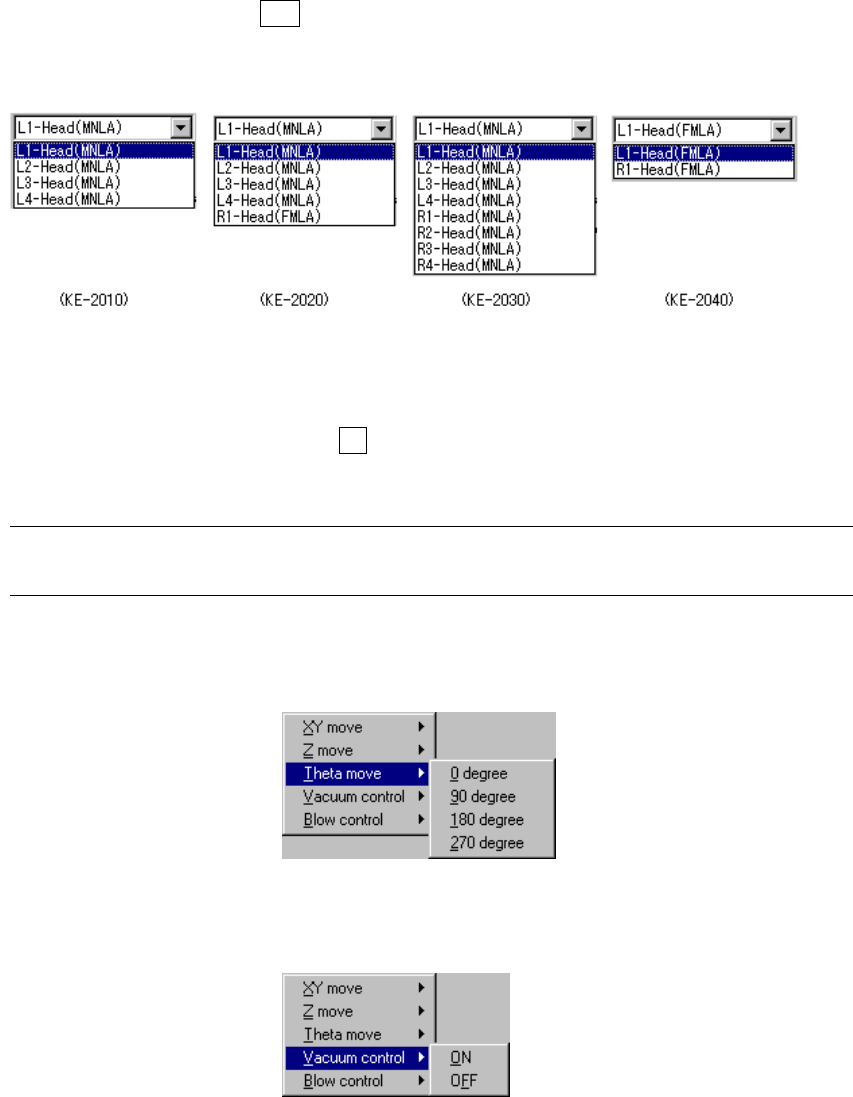
Select the unit to be controlled from the combo box.
This selection does not modify the settings on the “Device enable” menu invoked
from the Machine Setup menu: you can select a not-checked (not used) unit.
When you press the ALT key while holding the down arrow key, the following list
appears on the screen.
Enter the coordinates to which you want the head to move, and click the
<EXEC> button or press the F3 key. The selected head moves to the specified
coordinates.
Note: Before moving the head, check to see if there is no substance which interferes
with the head at the coordinates you entered in the “Moving” field
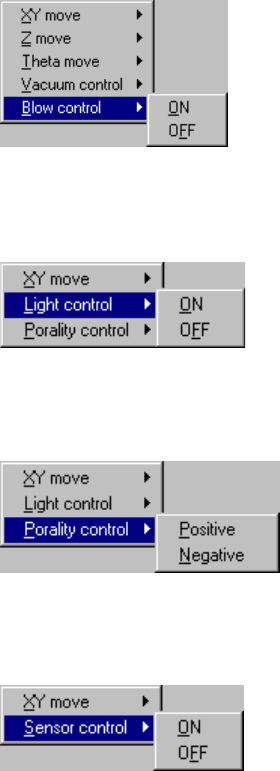
3) Theta move
Moves the selected head to the selected position.
4) Vacuum cont.
Sets the vacuum of the selected head to ON or OFF.
8 − 9
5) Blow cont.
Sets the blow of the selected head to ON or OFF.
6) Lighting cont.
Turns ON and OFF the light of the OCC.
7) Polarity cont.
Sets the polarity of the OCC to positive (+) or negative (-).
8) Sensor cont.
Sets the selector sensor to ON or OFF.

8 − 10
8.2 Head-Related Control
8.2.1 Head control
When you select the [Head] command on the [Ctrl] menu, then the [Head control]
command, the following Head control dialog box appears on the screen.
Figure 8.2.1 Head control dialog box
(1) Control unit
Select the unit to be controlled from the combo box.
This setting does not affect the setting of the “Device enable” menu invoked
from the Machine Setup menu. (This means that the units without check mark,
that is not to be used, can be selected.)
The following list appears when you press the ALT key and ↓ key at the
same time.