Omron V-TS Teaching Manual.pdf.pdf - 第216页
2.16 M anaging PC B Im ages 2- 189 2.16.2 Deleting a PCB I mage This section explains the procedure to d elete bare PC B and inspection P C B images, which are not required for teach ing. 1. Select the image t ype (bare …
Chapter 2 Inspection Programming
2-188
3.
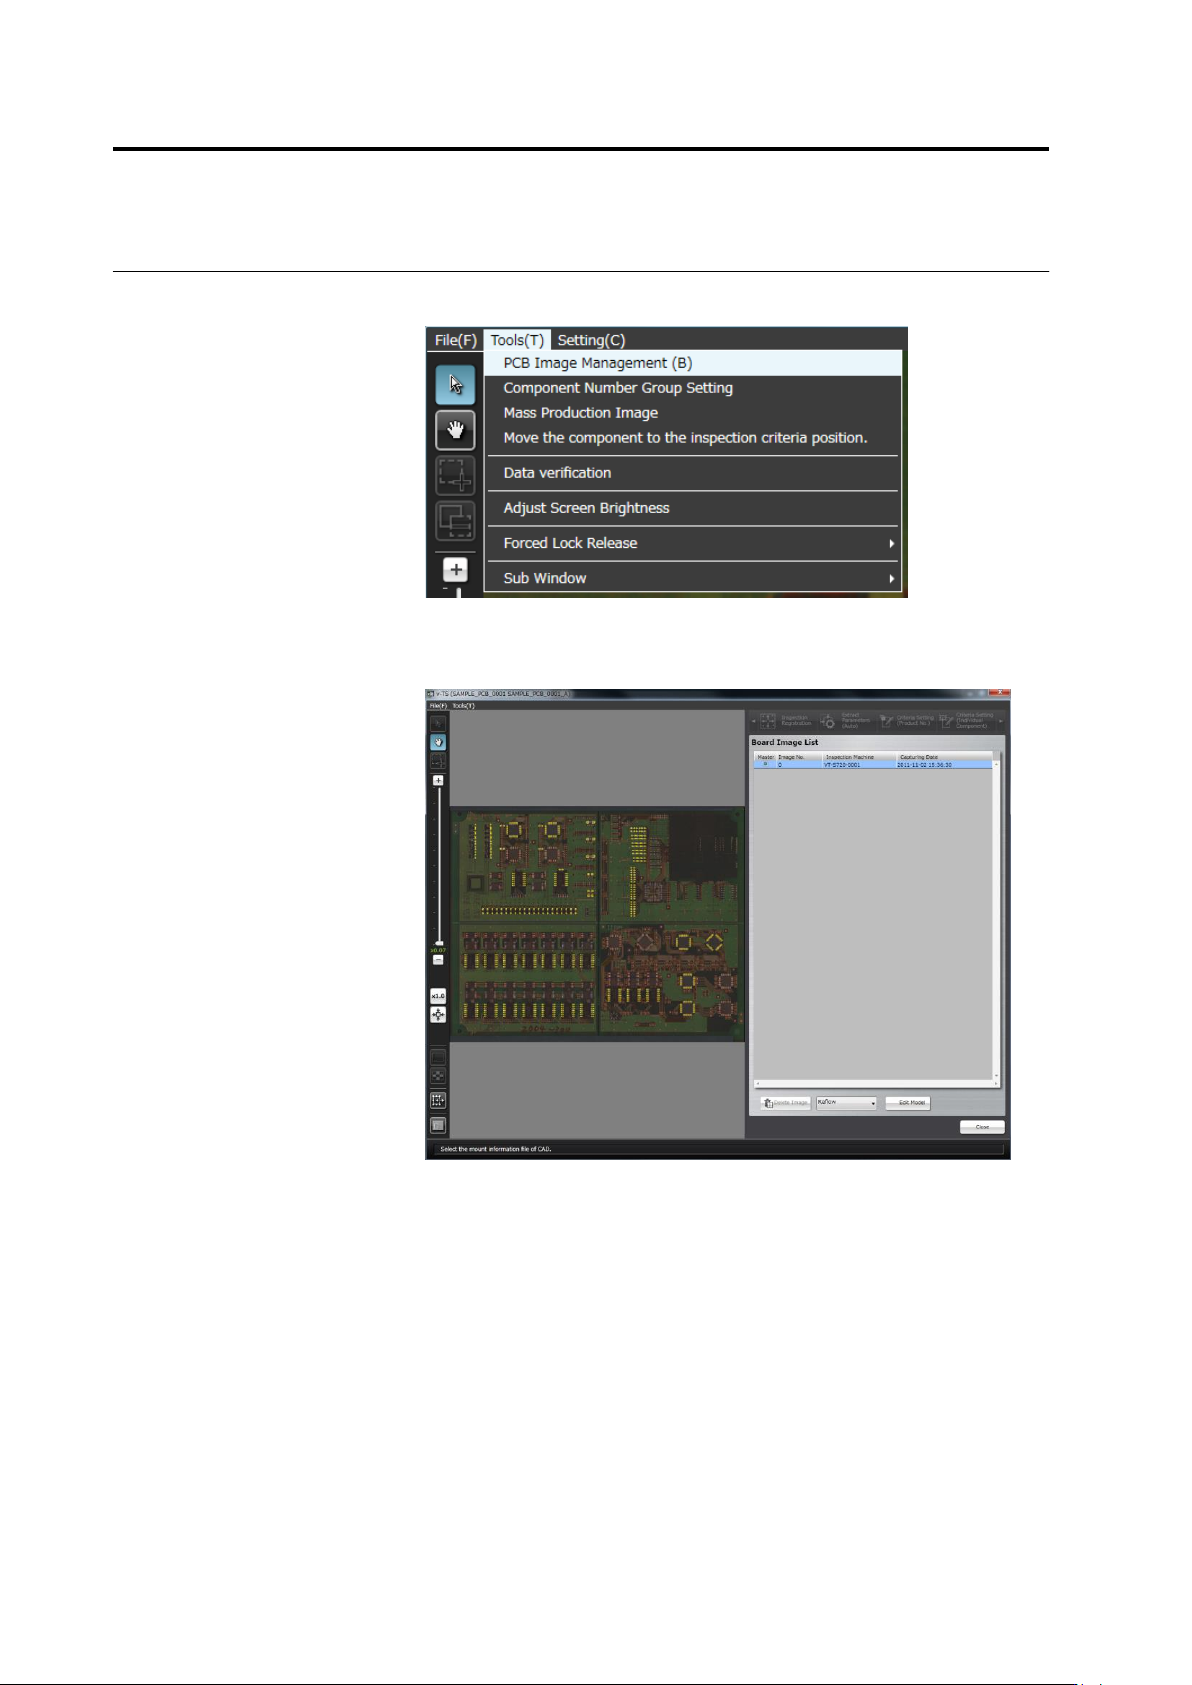
Select [Tool] - [PCB Image Management] in the editing screen
menu bar.
The PCB Image Management screen is displayed.
Click [Close] to close the PCB image management screen and
return to the inspection program edit screen.
2.16 Managing PCB Images
2-189
2.16.2 Deleting a PCB Image
This section explains the procedure to delete bare PCB and inspection PCB images, which are
not required for teaching.
1.
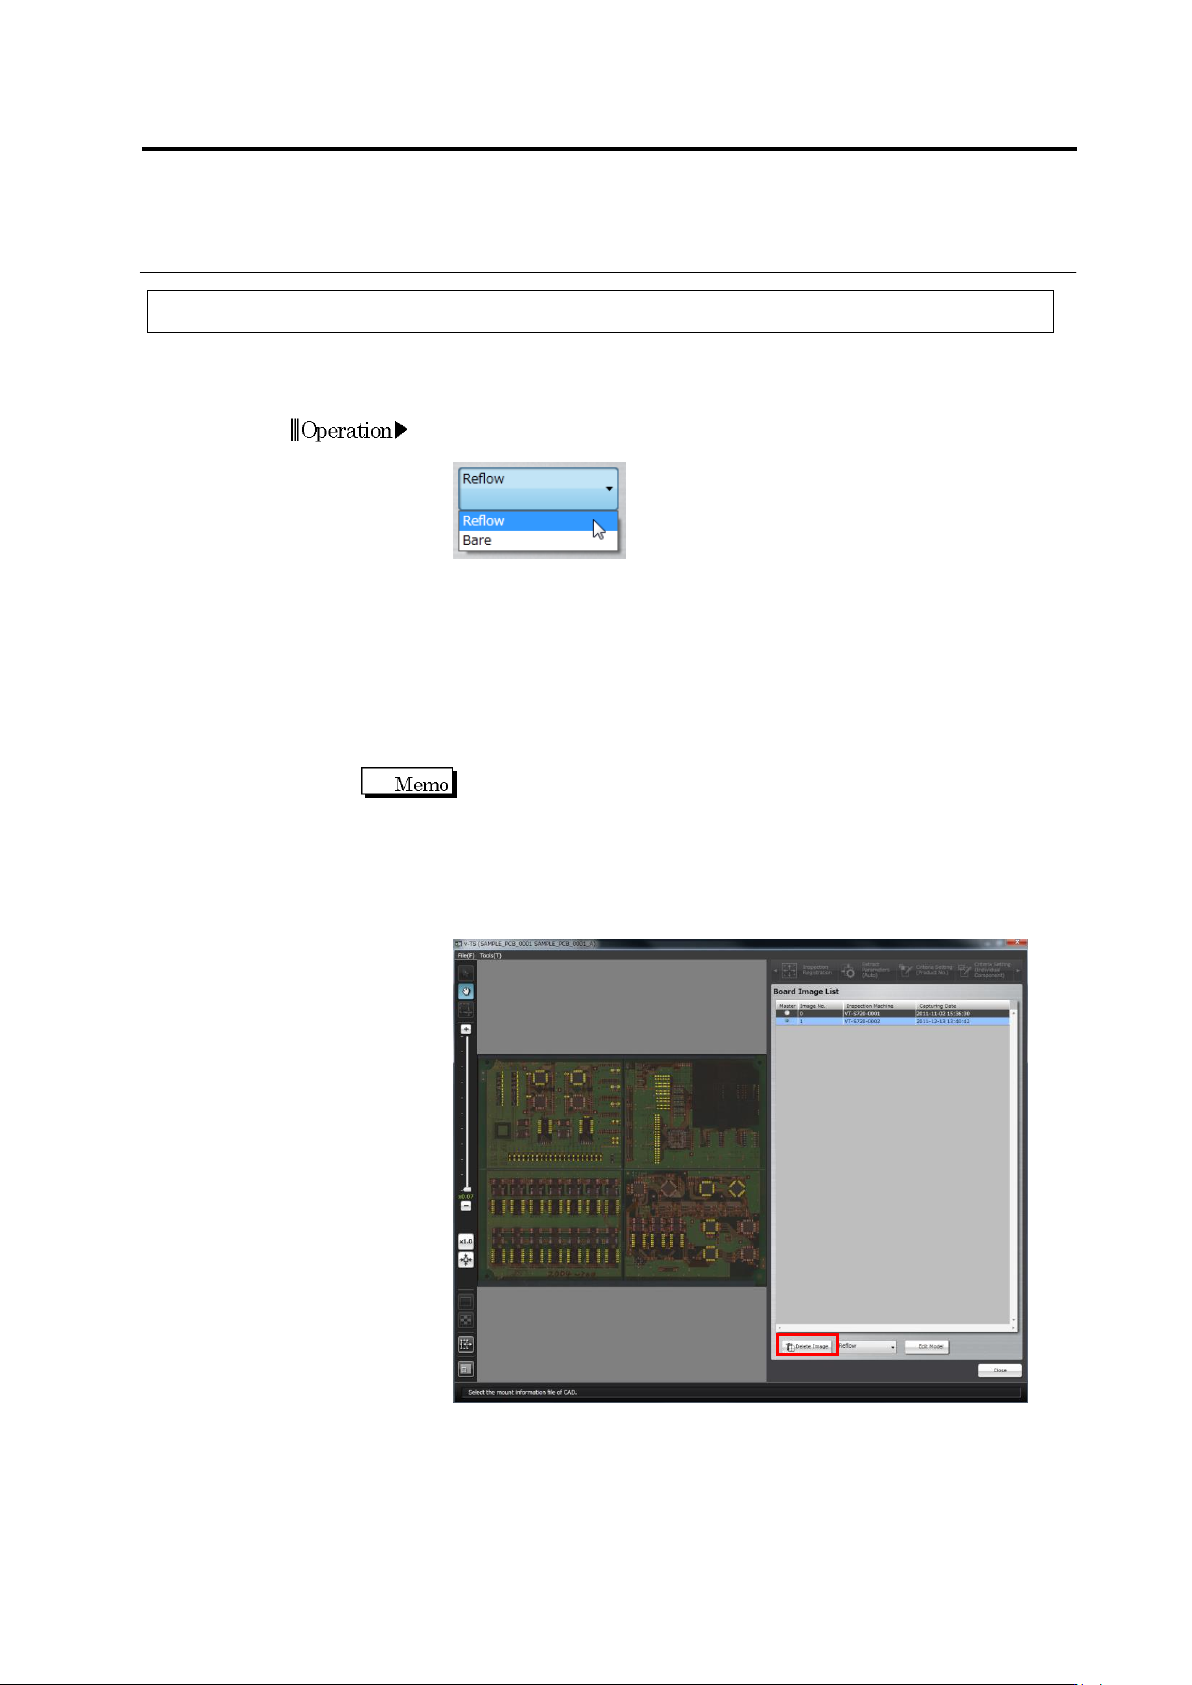
Select the image type (bare PCB image or inspection PCB image)
to display in the PCB Image Management screen from the list.
2.
Click to select the image to delete in the Board Image List, and click
[Delete Image]. More than one images can be selected. The
method to select them is as follows:
1) Ctrl Key + Select an image: Selection of the image corresponding
to the key pression can be set ON/OFF.
2) Shift Key + Select an image: The entire area from the start point
to end point of key pression can be selected.
All the images can also be selected by pressing Ctrl Key + A Key.
However, it is necessary to leave at least one image in the raw
PCB list and the inspection PCB list from the PCB image list,
respectively. If only one image is left in the raw PCB list or the
inspection PCB list from the PCB image list, the [Delete Image]
button is not enabled.
Operation
Chapter 2 Inspection Programming
2-190
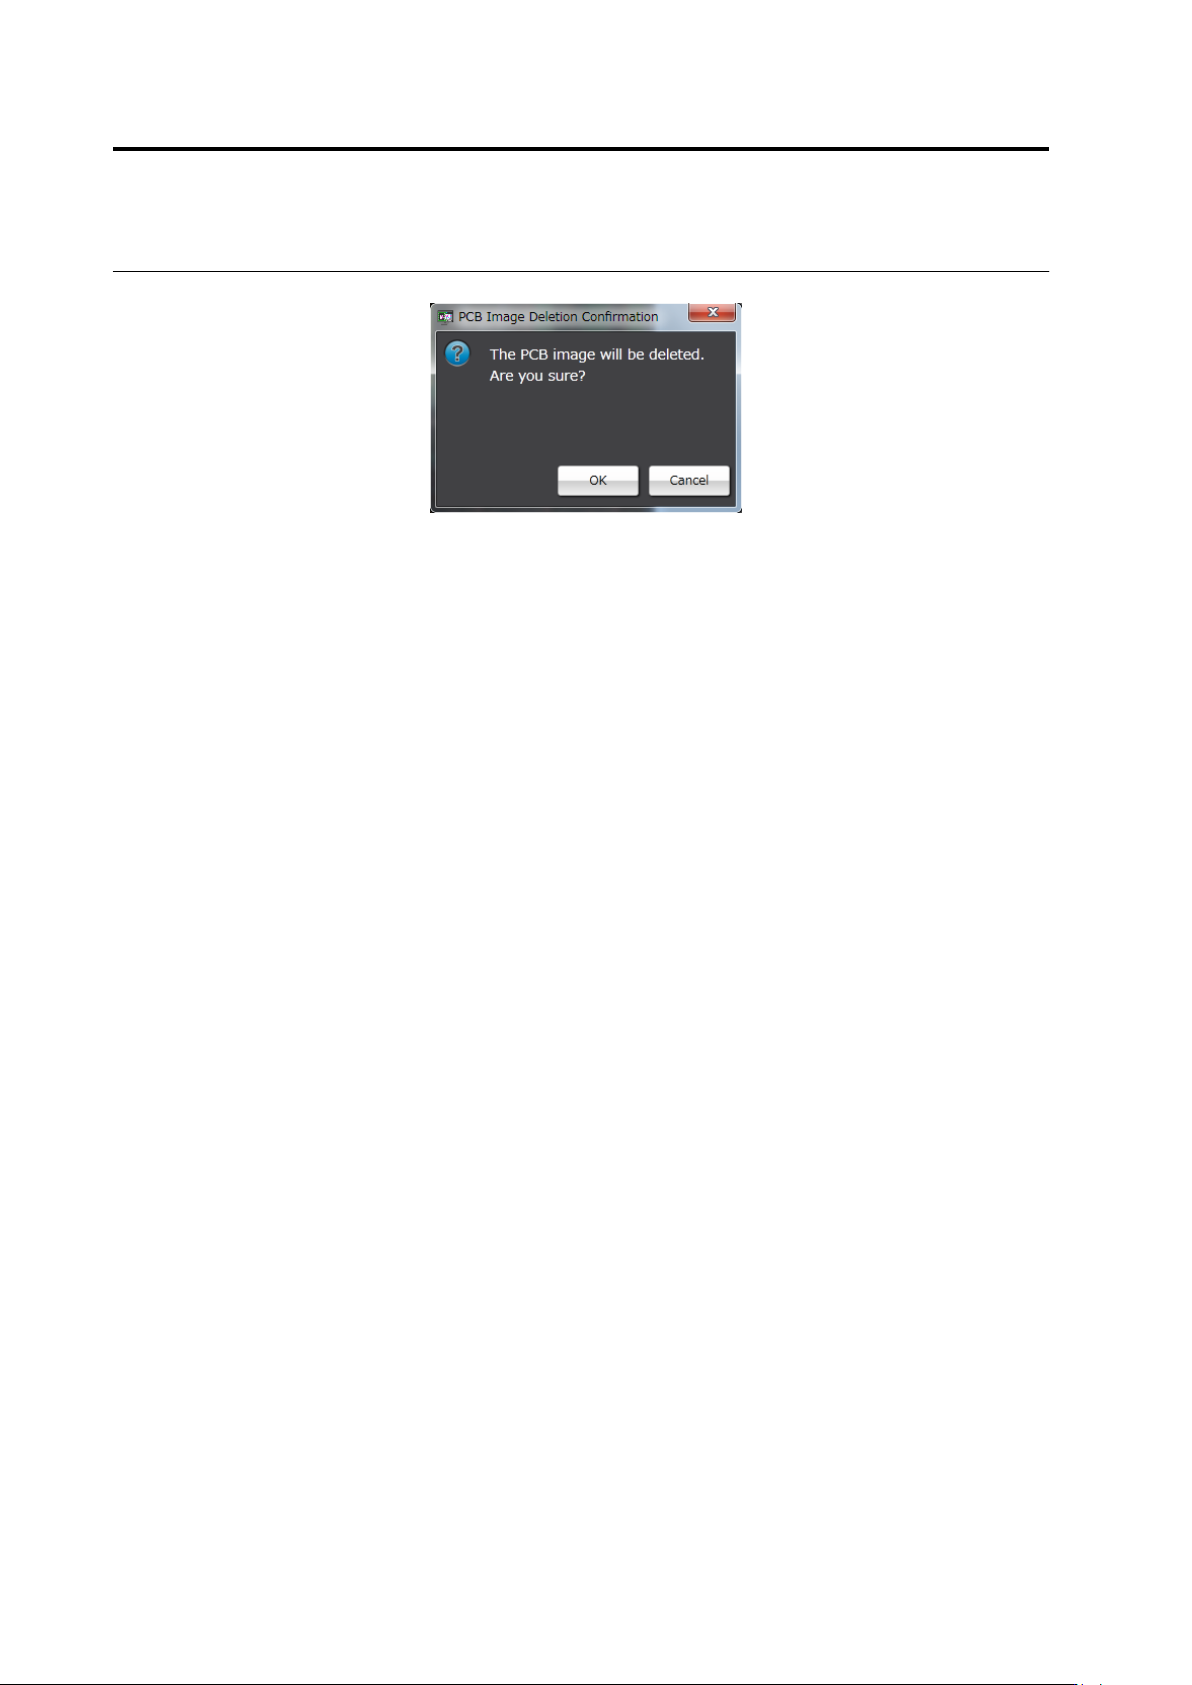
3.
The deletion confirmation dialog appears. Click [OK].
・Click [Cancel] to return to the PCB image management screen
without deleting the PCB image.