Omron V-TS Teaching Manual.pdf.pdf - 第83页
Chapter 2 Inspecti on Programm ing 2- 56 Crea te Mask W indow Button If a PCB is inside the component body window, add a minus w i ndow. Ri gh t-clicking on a p lus/minus window disp lays the context menu. W hen selectin…
2.4 Registering for Inspection
2-55
(e.g.) Configuring a group of chip capacitor (white/gray) with the
same shape and size.
Move the mouse cursor on the component number
group thumbnail, the component number group preview window
appears on the image. When a component number is added to the
component number group, the setting of the component number is
synchronized with the component number group. While creating a
new component number group, saving/loading an inspection
program before component registration (automatic) shows a dark
preview image. After performing component registration (automatic),
the image appears.
4.
Draw a Component Body Window in the image display area.
Magnify the display area to draw a window for more precise
window positioning.
Refer to "2.1.3 Image Display Area Operation" for the image
display area operation.
The "+" mark moves to the center of the window after the
component window is formed.
If you cannot configure a component outline shape using a
rectangular frame for an odd-shaped component after
configuring the component body window, add a window to
complement the component body window.
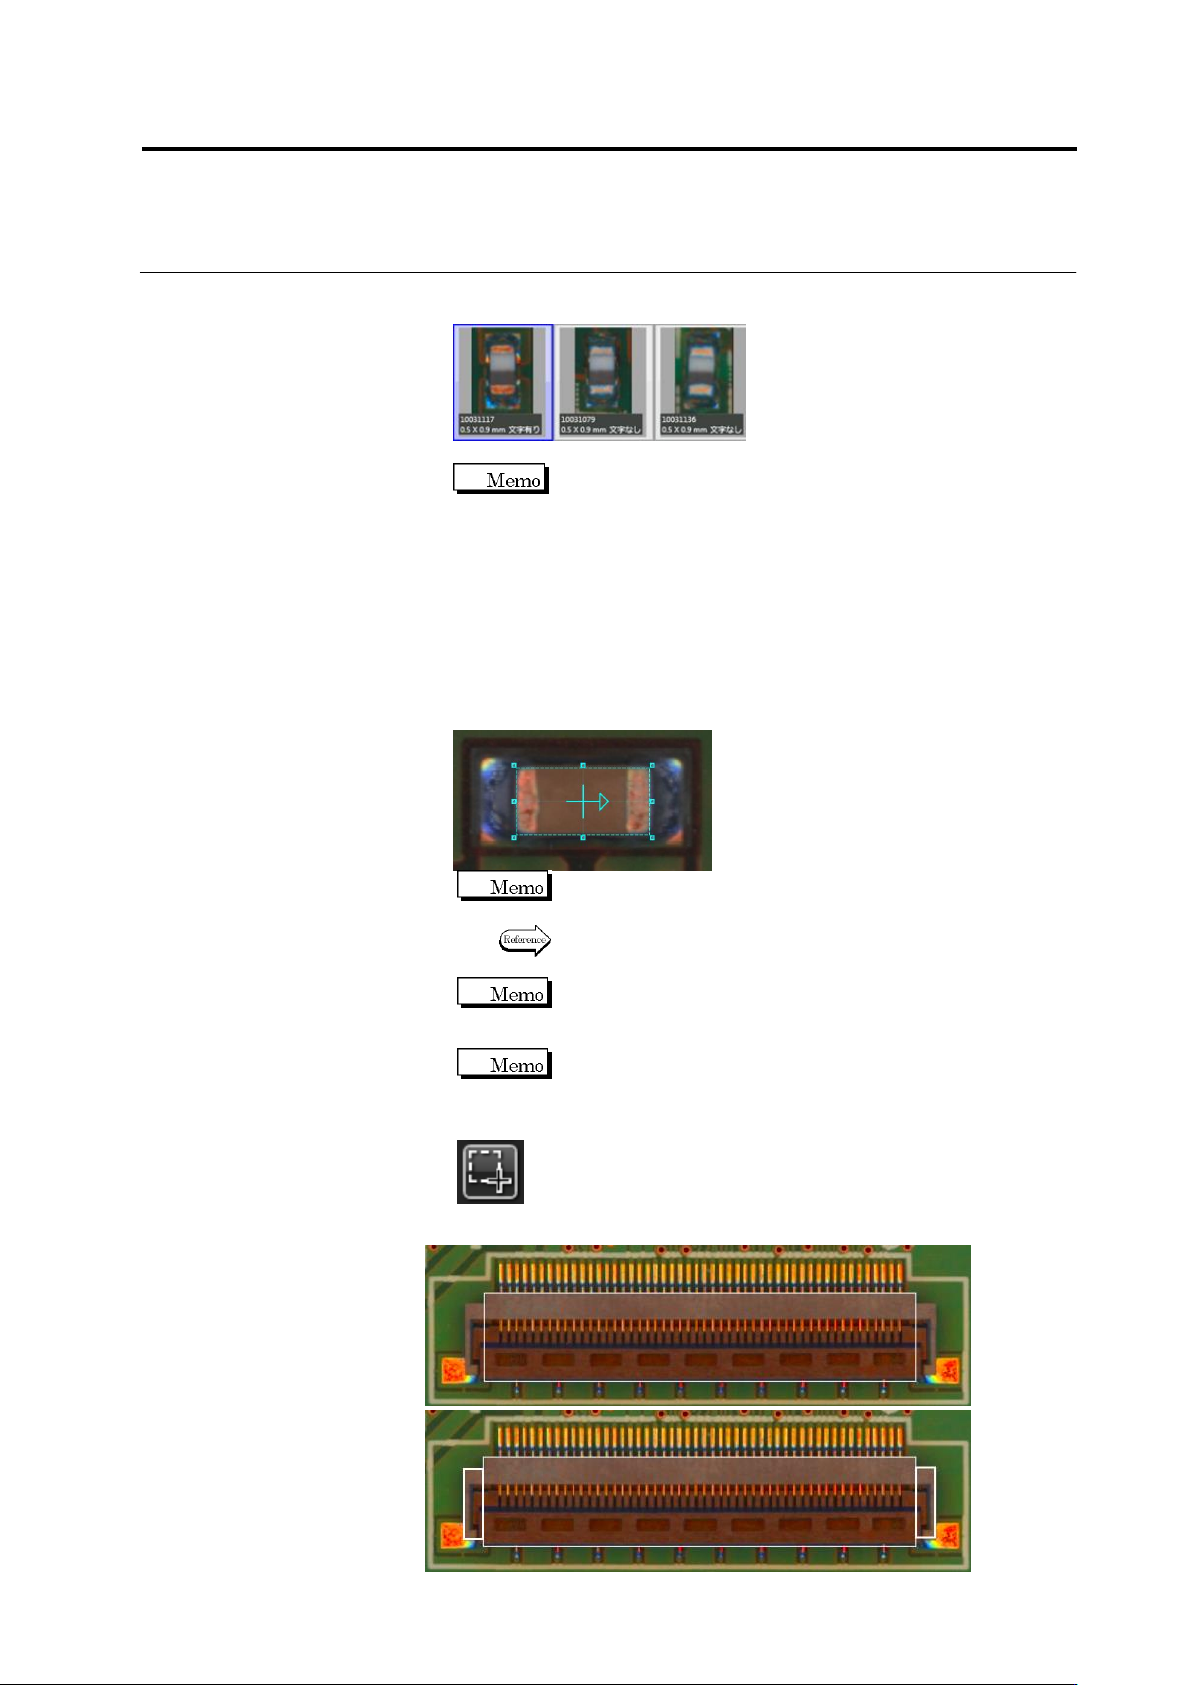
Create Window Button
If a component outline is out of the component body window, add a plus
window.
Chapter 2 Inspection Programming
2-56
Create Mask Window Button
If a PCB is inside the component body window, add a minus window.
Right-clicking on a plus/minus window displays the
context menu.
When selecting [Copy on 2 Sides], the window can be
copied as rotated by 180 degrees around the component.
When selecting [Copy on 4 Sides], the window can be
copied as rotated by 90, 180, and 270 degrees around
the component.
Selecting [Delete] allows you to delete the window.
By pressing the [R] key as holding the [Ctrl] key on the
keyboard, the plus or minus window being selected can
be rotated by 45 degrees clockwise.
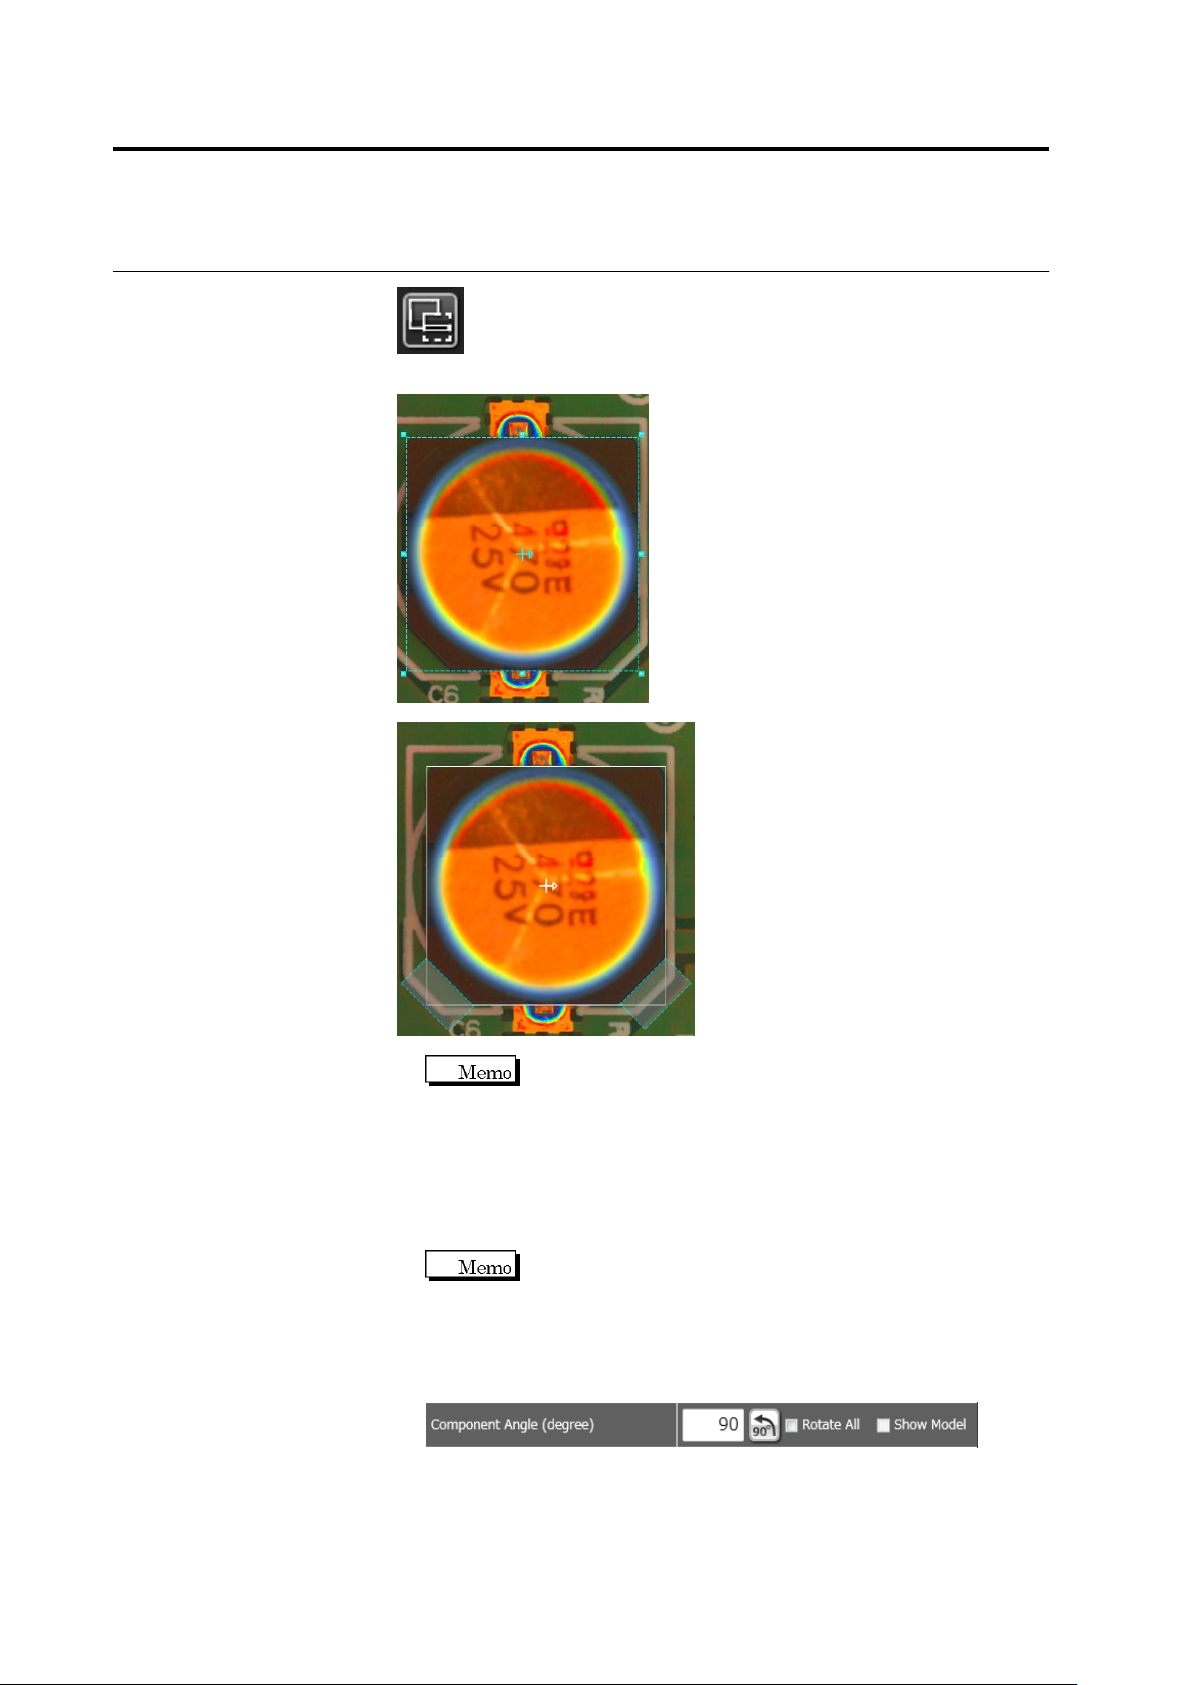
5.
Check that the degree is correct if the component number
registered in the library is used.
Select the [Show Model] checkbox. A model image corresponding to
the currently specified degree is displayed. Check the mounting
position including the direction of the polarity.
2.4 Registering for Inspection
2-57
To correct the angle, click several times. To rotate all the
components of the same component number at the same time, use
the [Rotate All] checkbox, then specify the degrees.
To perform fine adjustment of the angle, directly enter the angle
value.
The [Show Model] checkbox is disabled for a new component
number.
Enter an angle from 0 to 359.9 degrees.
If [Rotate All] is selected, angle adjustment by a direct entry is
effective for only the displayed components.
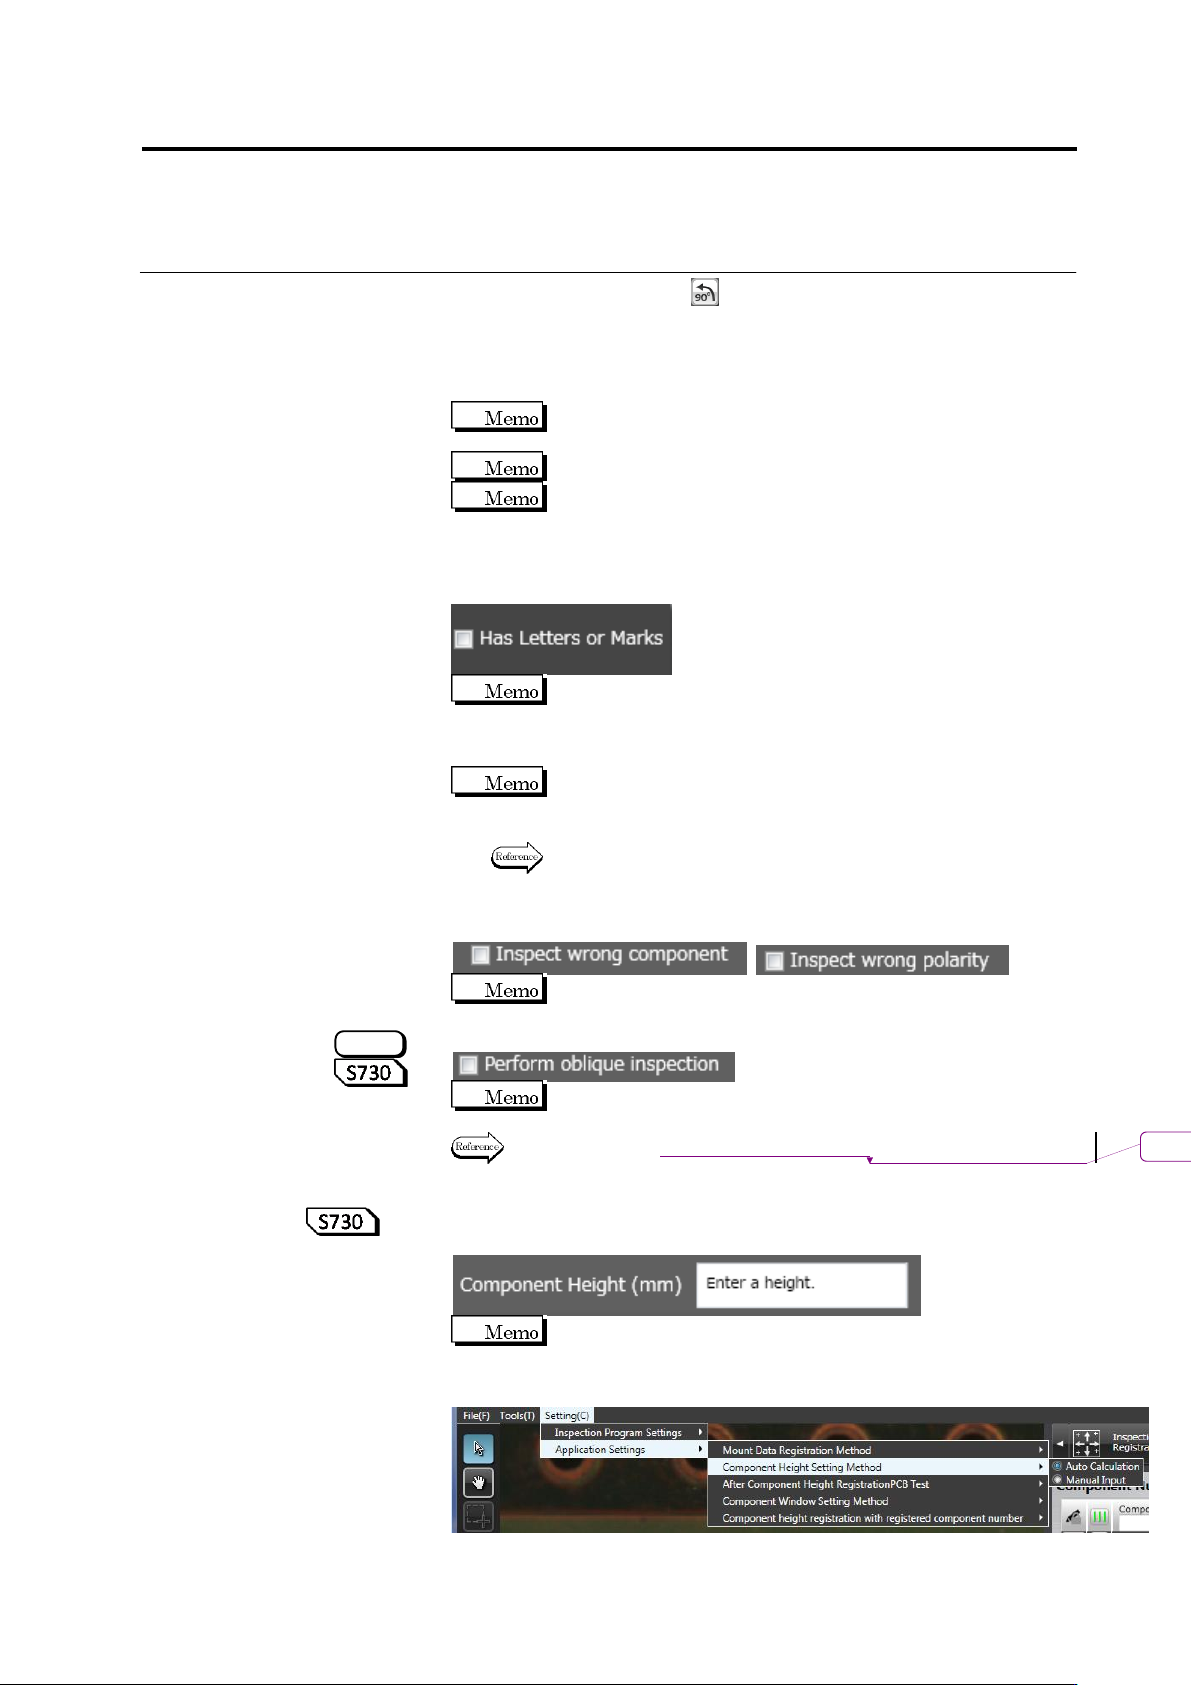
6.
Specify if the component has the letter or symbol marking in the
check box.
The letters or symbol marks refer to the color and shape of the
letters or marks attached to the component/polarity, and
different inspection logic is required for those with the letter or
symbol marks.
For a chip resistor with a size of 1005 or less, a Component
Window is created without character/symbol mark
automatically.
Refer to the Inspection Logic Manual, "3.2 Right Component" for
details on the inspection for a right component.
7.
Specify options for component difference inspection, and polarity
difference inspection in the check boxes.
No check box is selected by default for all component types.
8.
Specify if oblique inspection is performed in the check box.
Oblique inspection cannot be specified to "Yes", if "BGA/CSP" or
"Others (Bottom Electrode)" is selected for the component type.
Refer to "2.9 Setting Oblique Inspection" for the details of
oblique inspection.
9.
Specify a component height. Enter a component height in a
numeric value or 0.1mm or larger.
To automatically calculate a component height upon learning
instead of manual input, select Setting (C) - Component Height
Setting Type - Automatic Calculation.
S720A
削除
: Setting Oblique Inspection