Omron V-TS Teaching Manual.pdf.pdf - 第50页
2.1 Bas ics of Teaching 2- 23 <Select in W indow Composition L ist> 1. Open the [Criteria Sett ing] scr een. 2. Right-click the [Com ponent Num ber] row in the win dow com position list. To select electrode group w…
Chapter 2 Inspection Programming
2-22
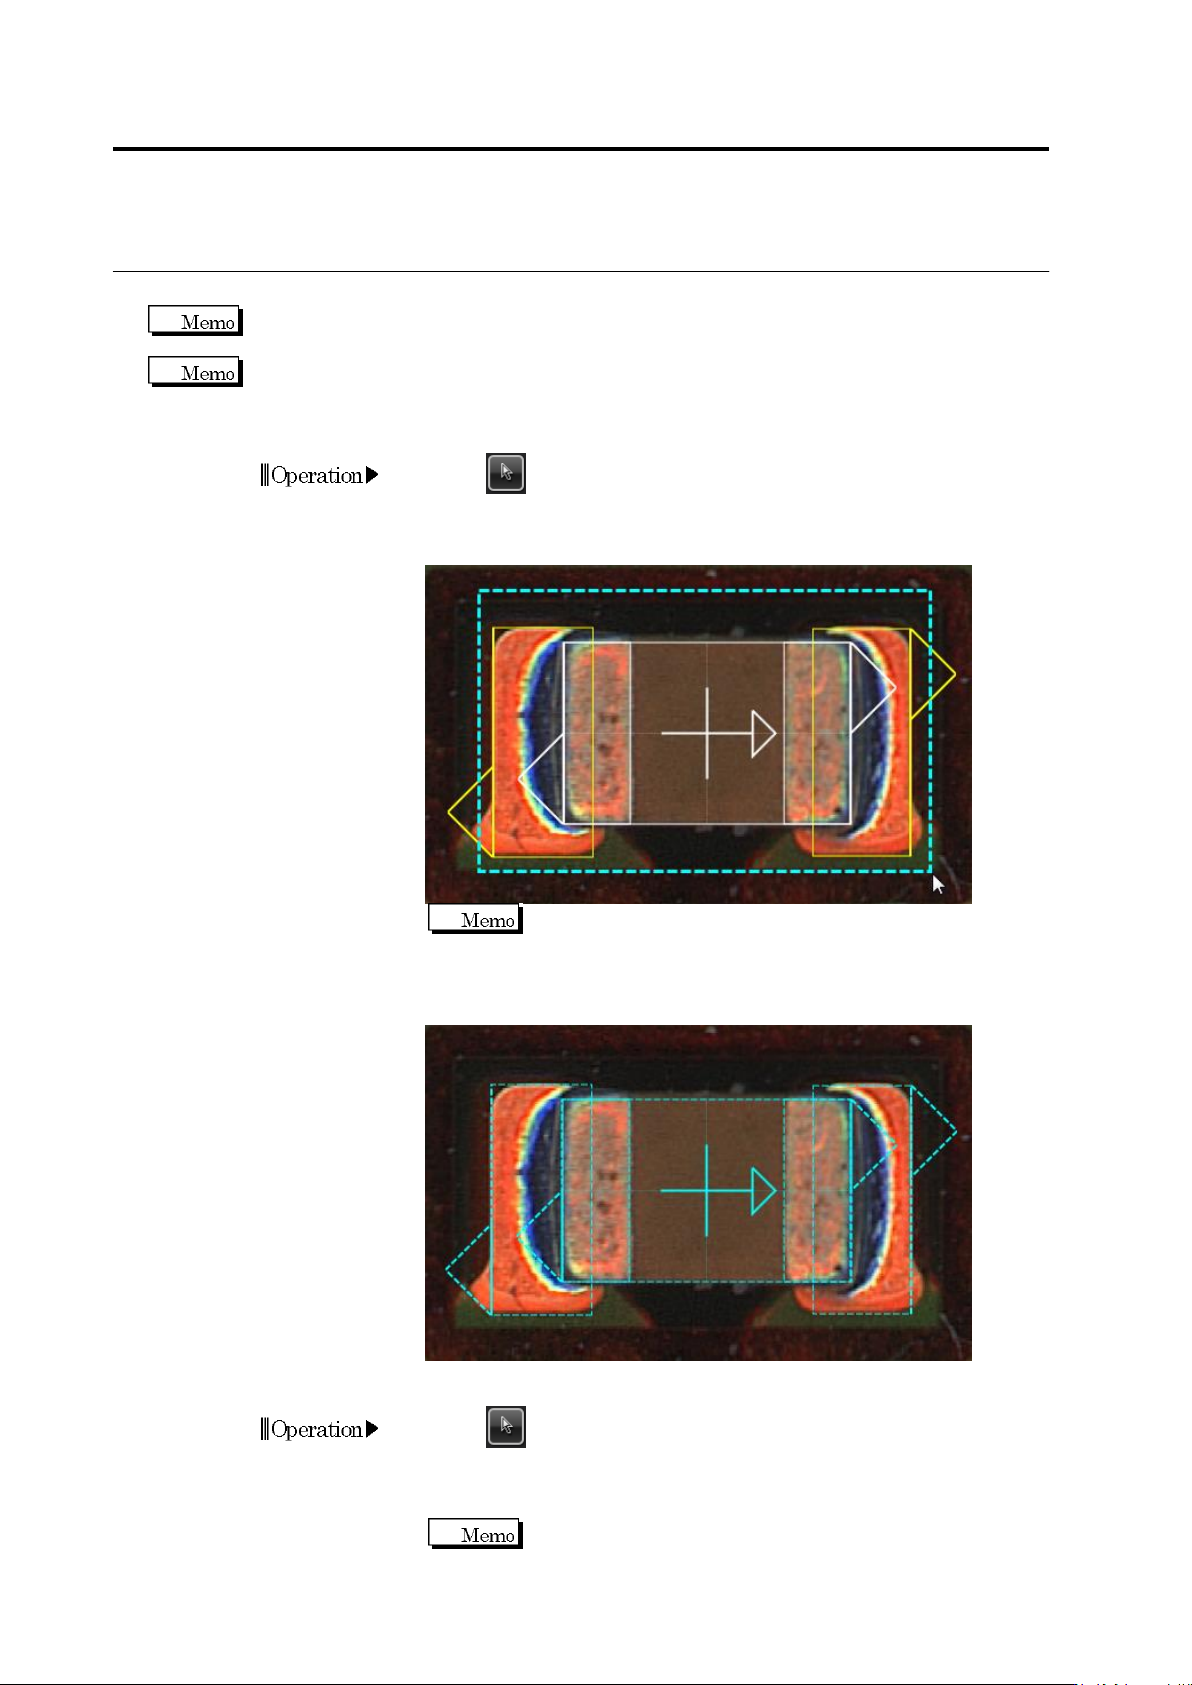
Select Multiple Windows
The Component Body Window and electrode windows are selected as a set except for individual
setting of the component or electrodes.
For land setting, multiple selection is applied to the land window only. For electrode group,
multiple selection is applied to the electrode window only.
<Select Adjacent Windows>
1.
Click (Select Window) button in the Image Operation tool bar.
2.
Drag the mouse cursor to surround multiple windows in the image
display area.
No need to include the direction marks (
△
) on the windows in
the dragging.
3.
Drop the cursor. The windows in the dragged area are now
selected.
<Select Distant Windows>
1.
Click (Select Window) button in the Image Operation tool bar.
2.
Click the individual windows to select while holding down the [Ctrl]
key on the keyboard.
To cancel a selected window, click the same window again
while holding down the [Ctrl] key.
Operation
Operation
2.1 Basics of Teaching
2-23
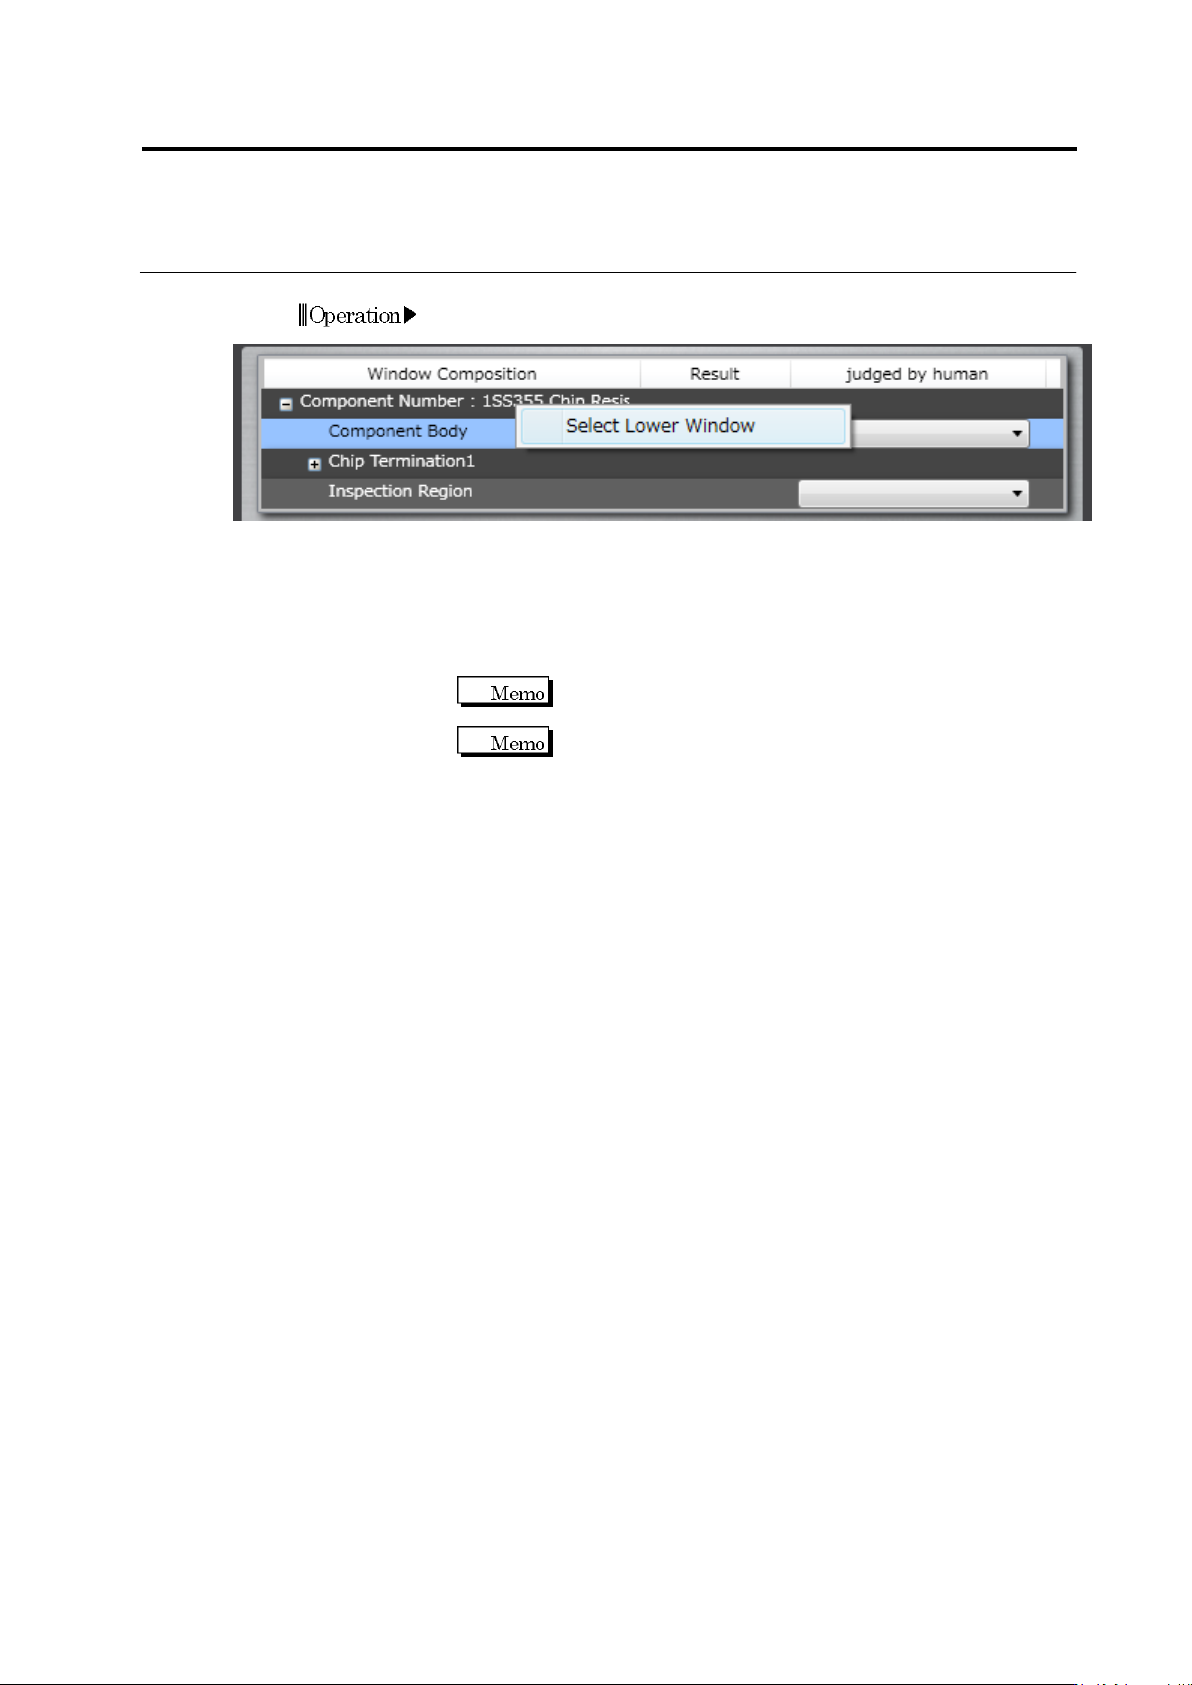
<Select in Window Composition List>
1.
Open the [Criteria Setting] screen.
2.
Right-click the [Component Number] row in the window composition
list. To select electrode group windows, right-click the [Electrode
Group] row.
3.
Clicking [Select Lower Window] can select all the windows at lower
levels.
Specific windows can be deselected or added to selection by
clicking them while holding down the [Ctrl] key.
To select consecutive windows simultaneously, click the first
window and then the last one while holding down the [Shift]
key.
Chapter 2 Inspection Programming
2-24
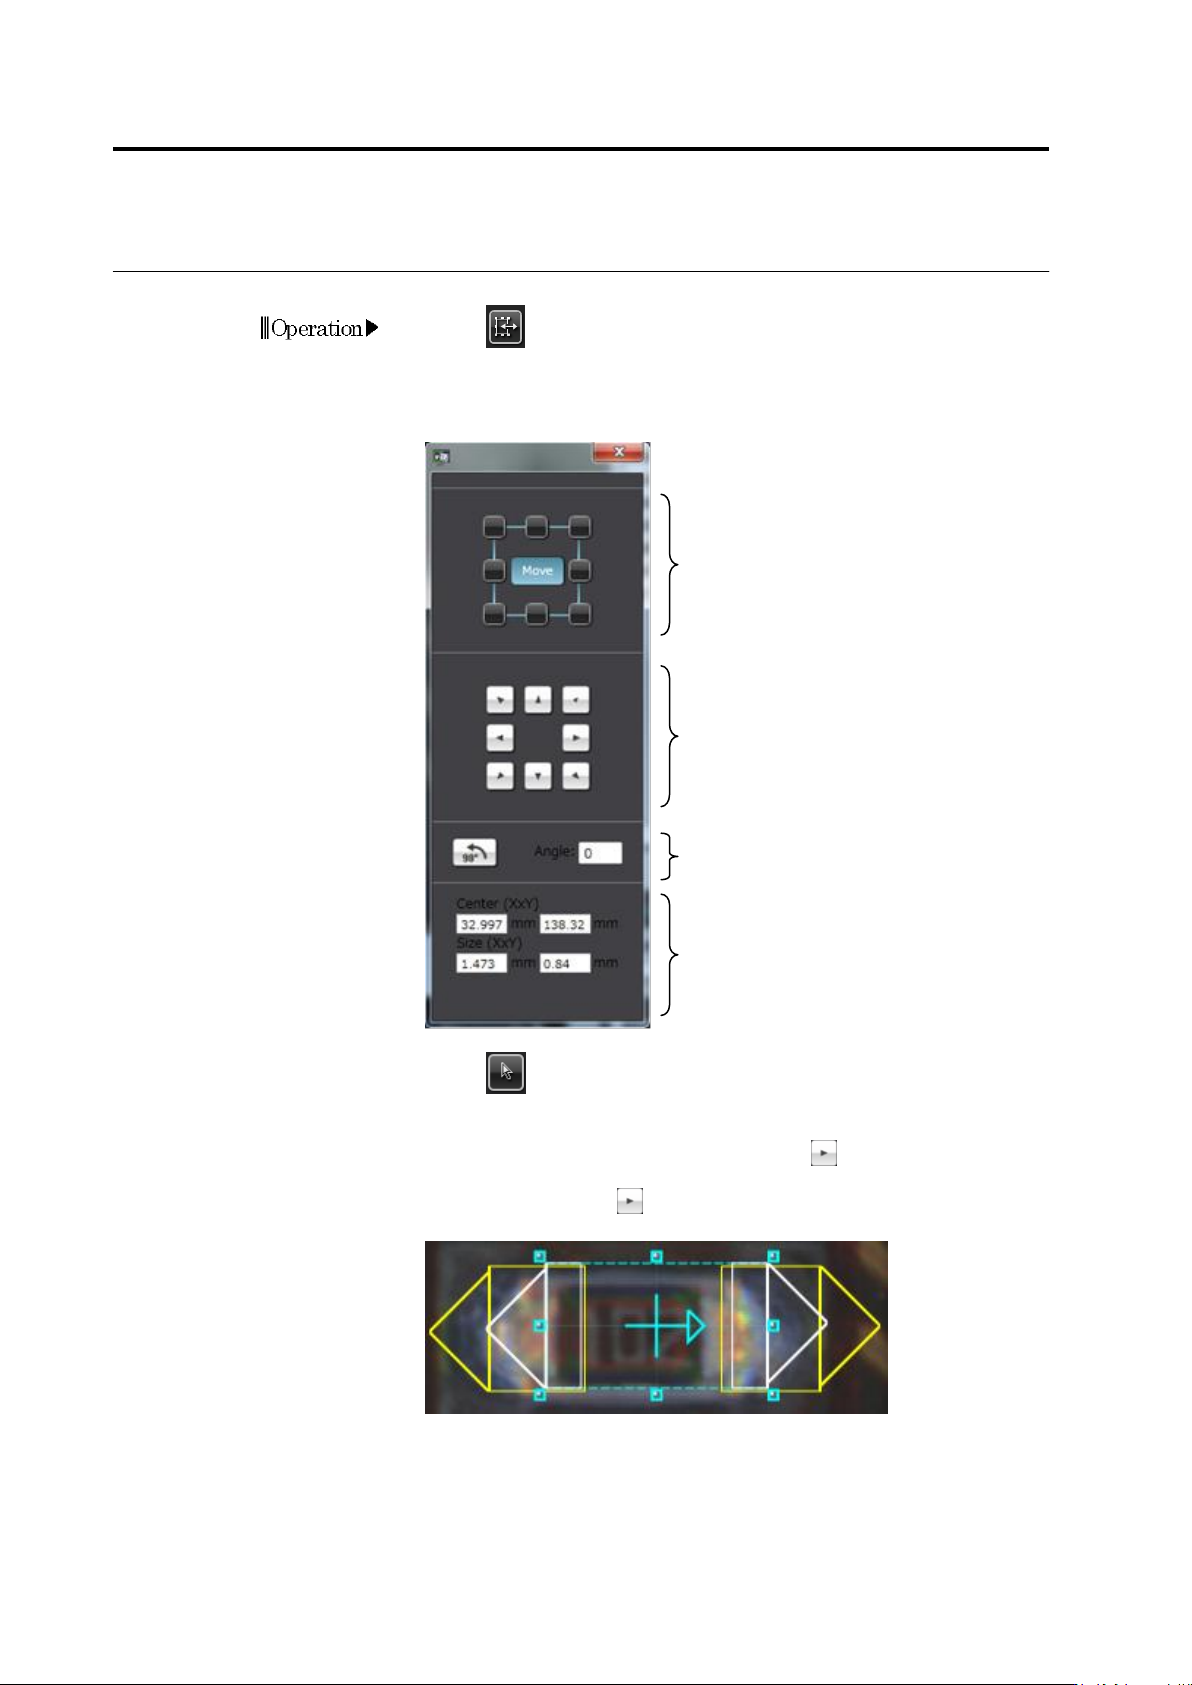
Window Adjustment Dialog
1.
Click (Window Adjustment Dialog) button in the Image
Operation tool bar. (User operations become effective when a
window on the image is selected.)
2.
The window adjustment dialog appears.
3.
Click (Select Window) button in the Image Operation tool bar
and click to select the window to adjust.
4.
Click [Move] and the direction button (e.g. ) to move the window.
To resize the window, click the operating point square and the
direction button (e.g. ) corresponding to the direction in which the
window is resized.
Select the window adjustment mode.
[Move]…Select the Move mode.
Any Square…Select the operating point
to resize the window.
Move or resize the window in the
arrow direction.
For window resizing, only enabled
buttons determined by the selected
operating point can be used.
The center coordinates and size
of the window are displayed.
Rotate the window counterclockwise by
90 degree increment or the specified
degrees.
Operation