Omron V-TS Teaching Manual.pdf.pdf - 第264页
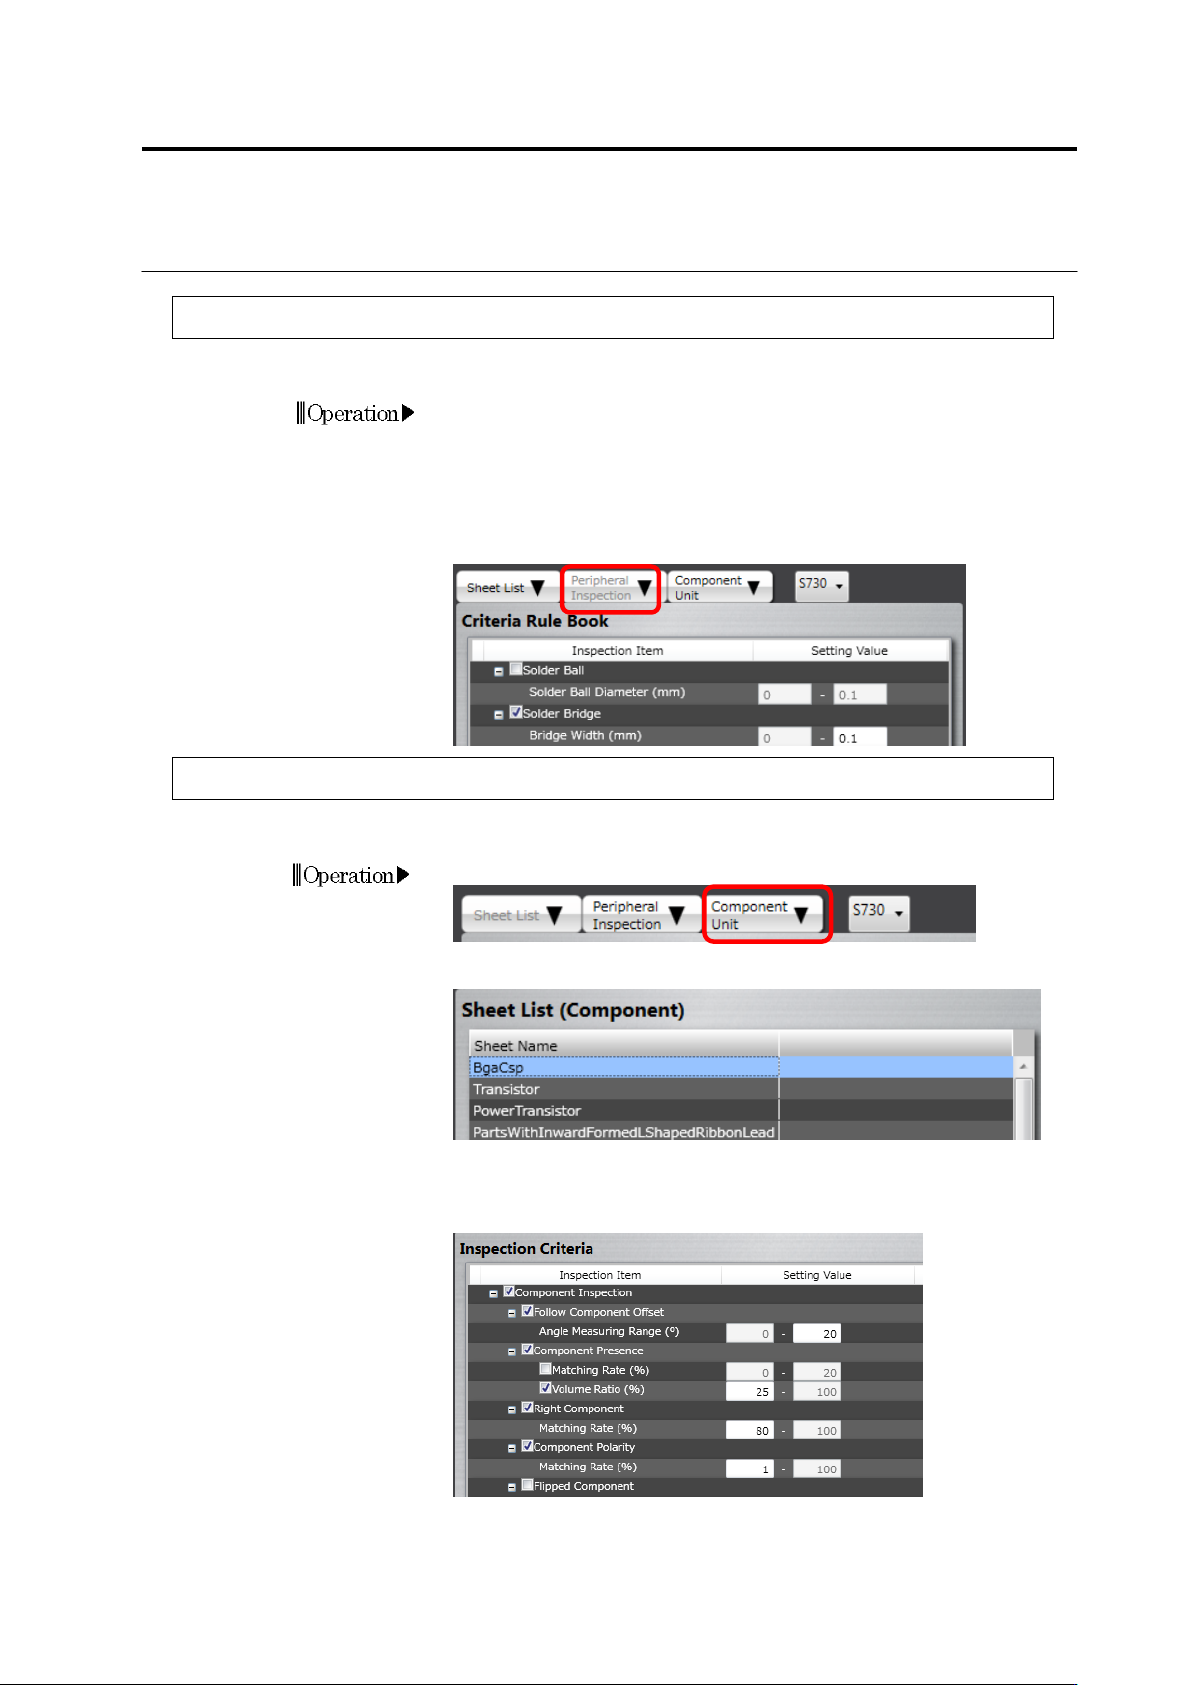
3.3 Configuring Qu ality Criteria Setting 3-9 3.3.4 Configuring Peri pheral Inspecti on Criteria Initial settin gs of periphera l inspect i on are done in this section. 1. Click the [Periphera l Inspection] tab. 2. Edit …
Chapter 3 Management Menu
3-8
3.
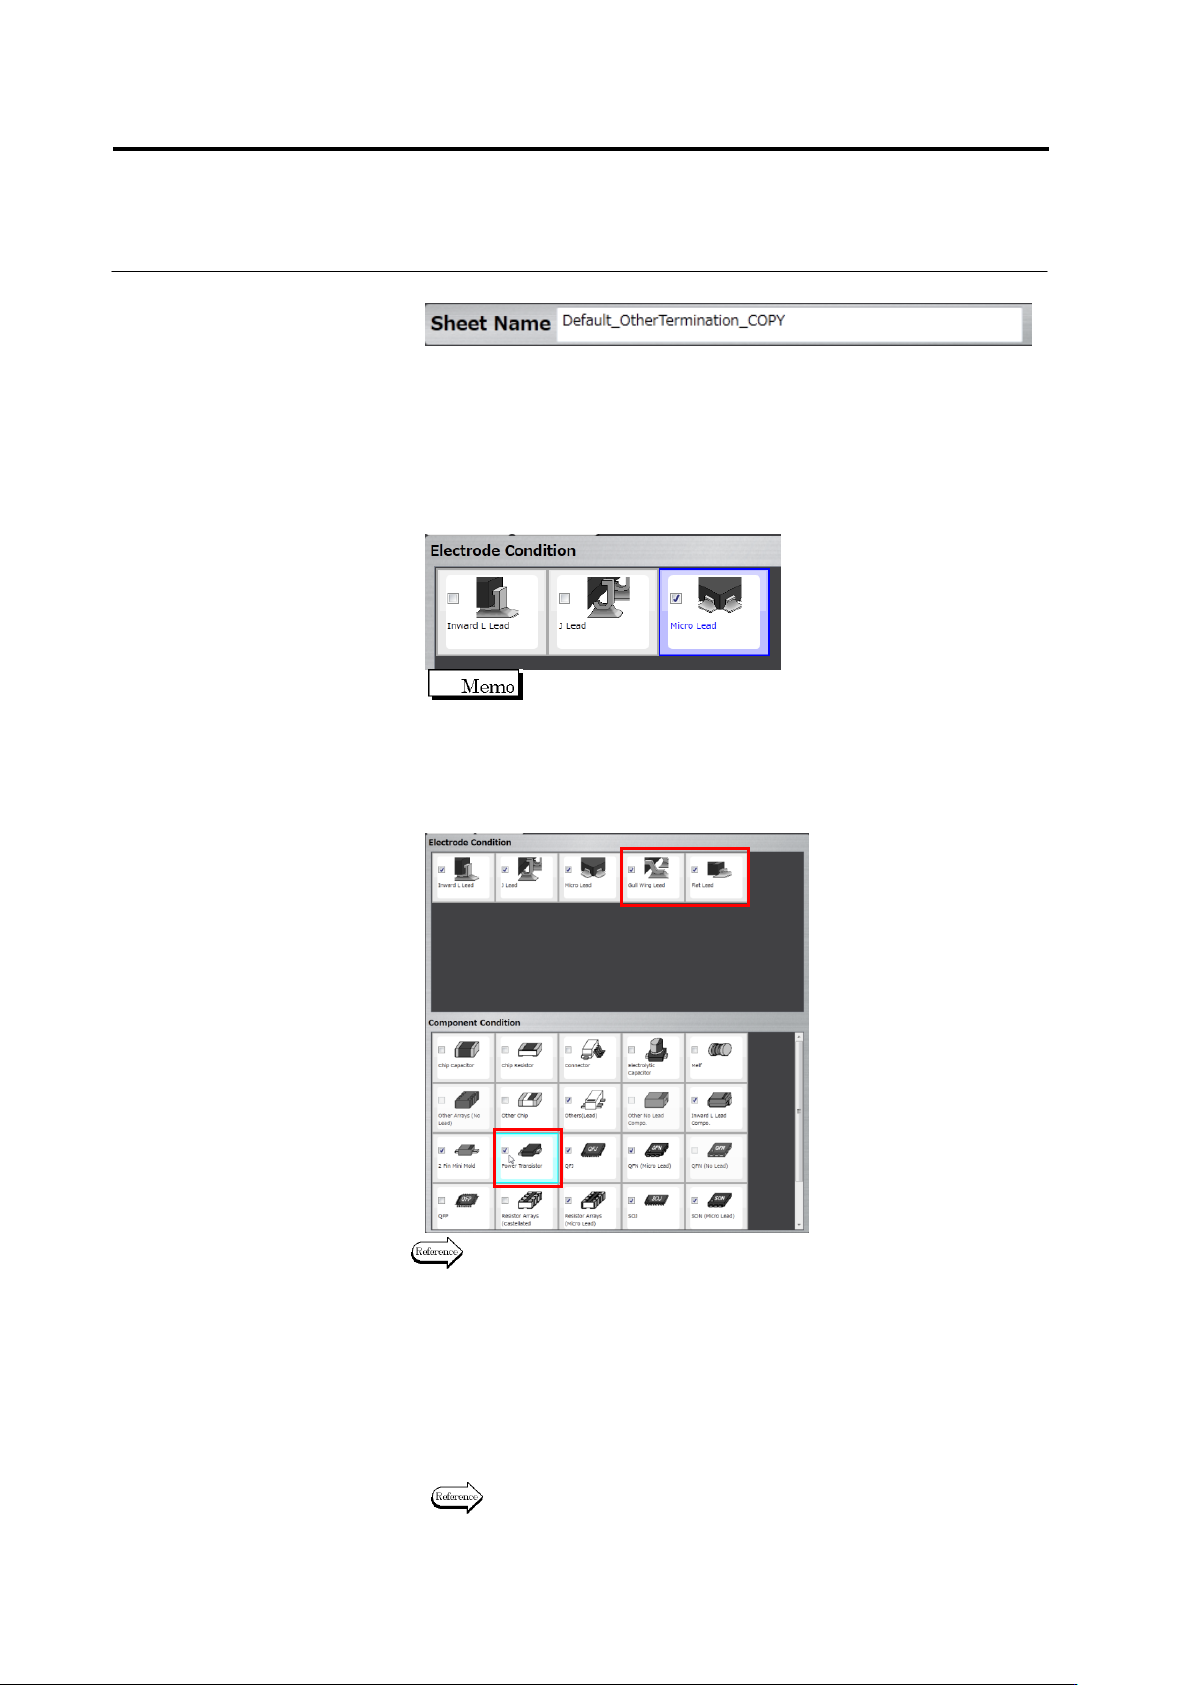
Click the text box of [Sheet Name] to edit the sheet name.
4.
If an electrode condition is not displayed, click the [Electrode
Condition] tab.
5.
Set an electrode type for which you want to enable the inspection
criteria of this sheet.
Click a check box for each electrode type in the electrode condition.
Select the box to enable, or unselect it to disable.
On the component conditions, the check box is displayed as
being selected for a component type corresponding to the
enabled electrode type.
To add other electrode type than those displayed, select the check
box of a component type corresponding to the electrode type in the
component conditions.
For component types and the corresponding electrode types, see P2-7
“Component Types” and P2-8 “Electrode Types.”
6.
Click the [Inspection Criteria] tab to display the inspection criteria.
7.
Edit the initial setting of the inspection criteria.
If the check box is being selected, inspection for the item will be
performed. If not, it will not be performed.
For an inspection item with its check box being selected, set a
reference value for OK judgment.
For details of inspection items, refer to the inspection logic manual.
Add
3.3 Configuring Quality Criteria Setting
3-9
3.3.4 Configuring Peripheral Inspection Criteria
Initial settings of peripheral inspection are done in this section.
1.
Click the [Peripheral Inspection] tab.
2.
Edit the initial setting of the peripheral inspection criteria.
If the check box is being selected, inspection for the item will be
performed. If not, it will not be performed.
For an inspection item with its check box being selected, set a
reference value for OK judgment.
3.3.5 Configuring Component Unit Inspection Criteria
The inspection criterion values for component body inspection can be changed.
1.
Click the [Component Unit] tab.
2.
Click the sheet to be changed on the sheet list.
3.
On the right-hand inspection criterion list, the inspection criteria of
the applicable sheet are displayed.
Correct the items as needed.
The meaning of Setting ON/OFF the checkboxes is the same as that
of the peripheral inspection above.
Chapter 3 Management Menu
3-10
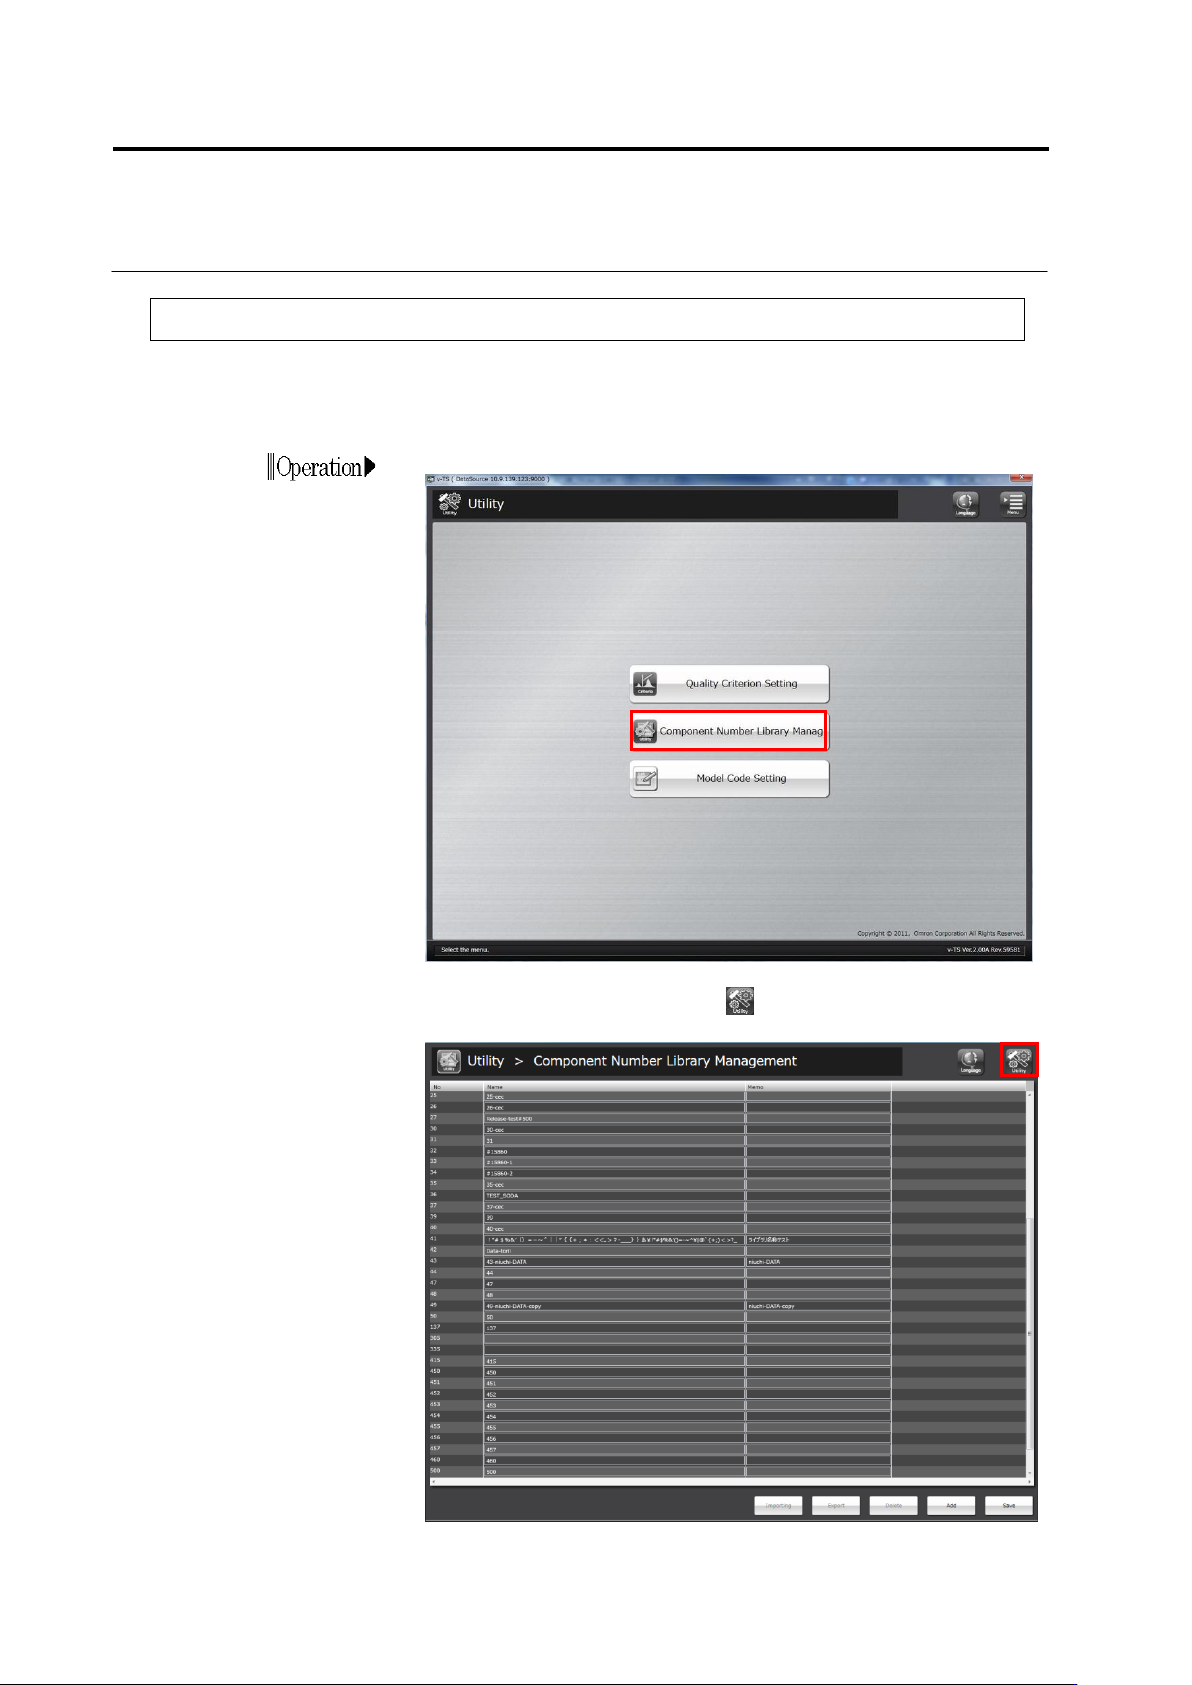
3.4 Managing Component Number Libraries
3.4.1 Adding/Deleting Component Number Libraries
You can specify the component number library to use for each inspection project.
Utilizing multiple component number libraries materializes separate management of required
quality and component numbers.
1.
Click [Component Number Library Manag] on the utility menu.
2.
The component number library management screen appears.
To return to the utility menu, click button on the top-right screen.