Omron V-TS Teaching Manual.pdf.pdf - 第52页
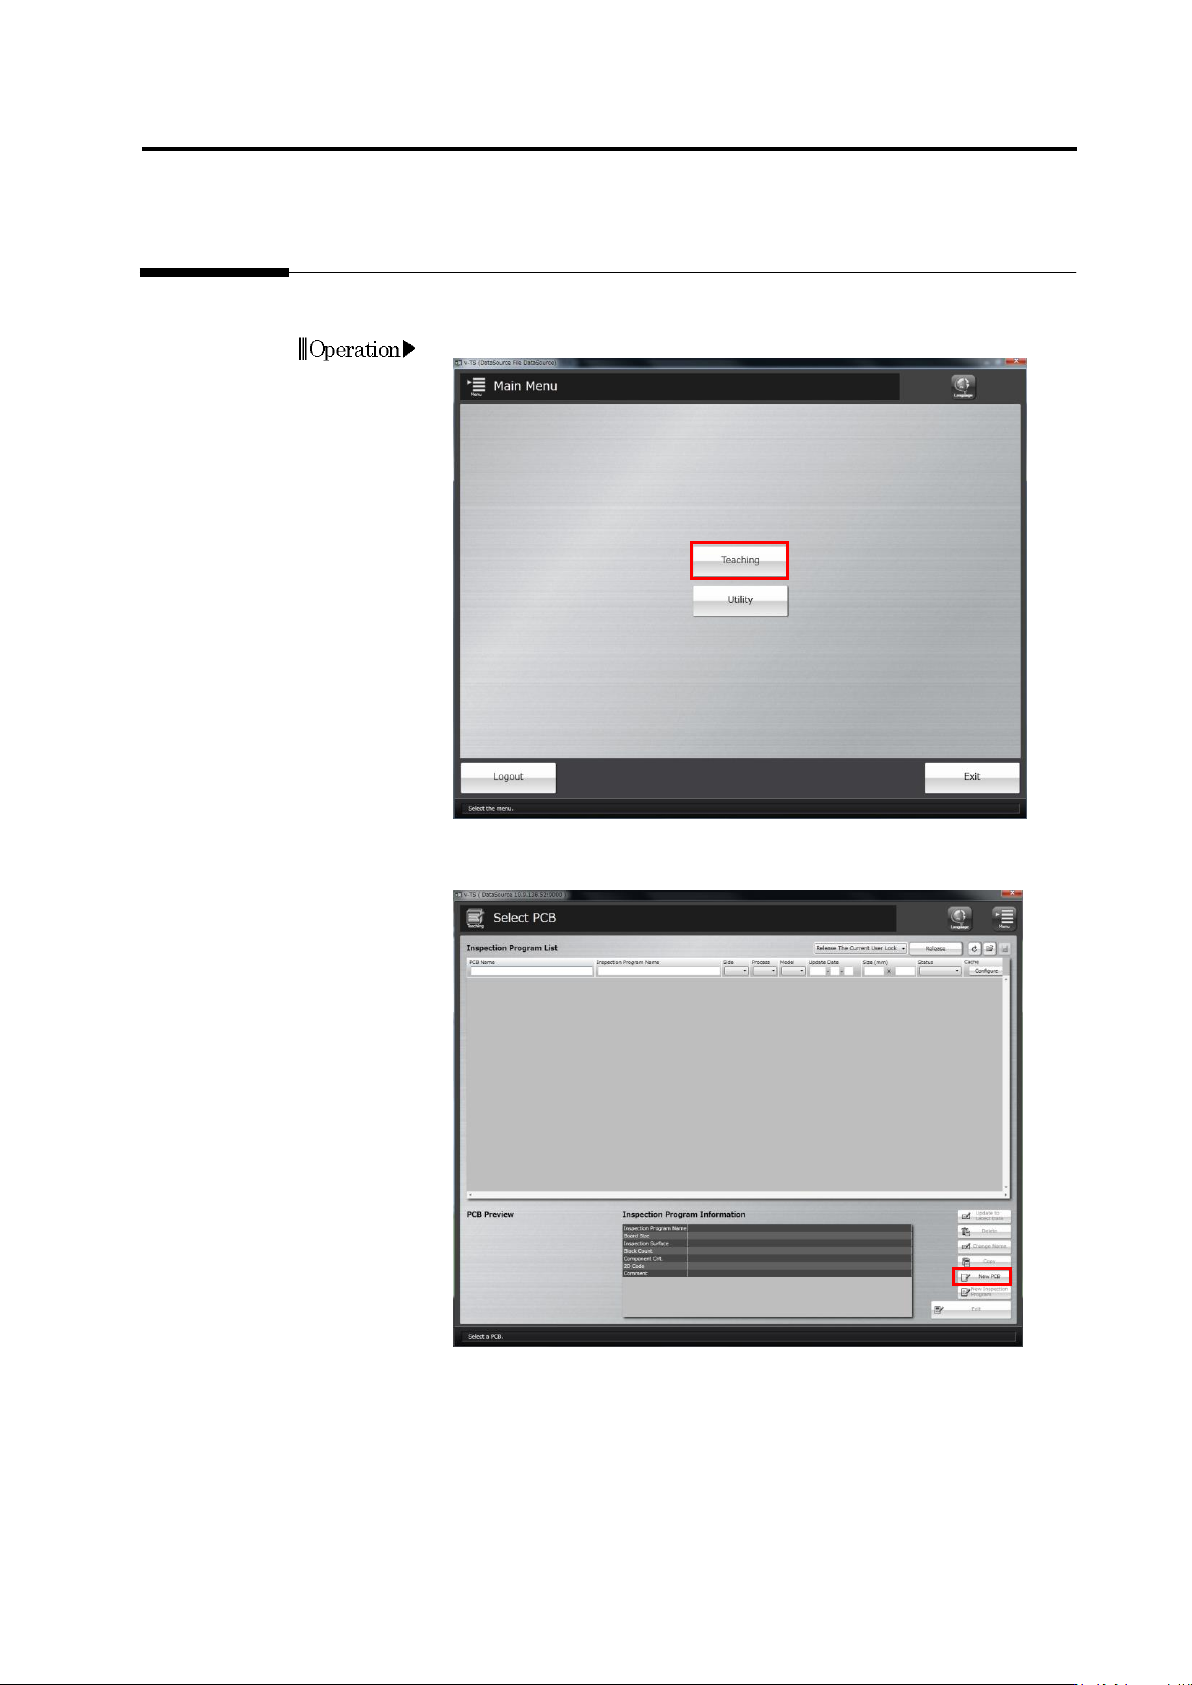
2.2 Creat ing a N ew Inspec tion Progra m 2- 25 2.2 Creating a New Inspec tion Program This section describes the procedure to create a new i nspection program . 1. Click [T eaching] in the main m enu. 2. The Select PCB …
Chapter 2 Inspection Programming
2-24
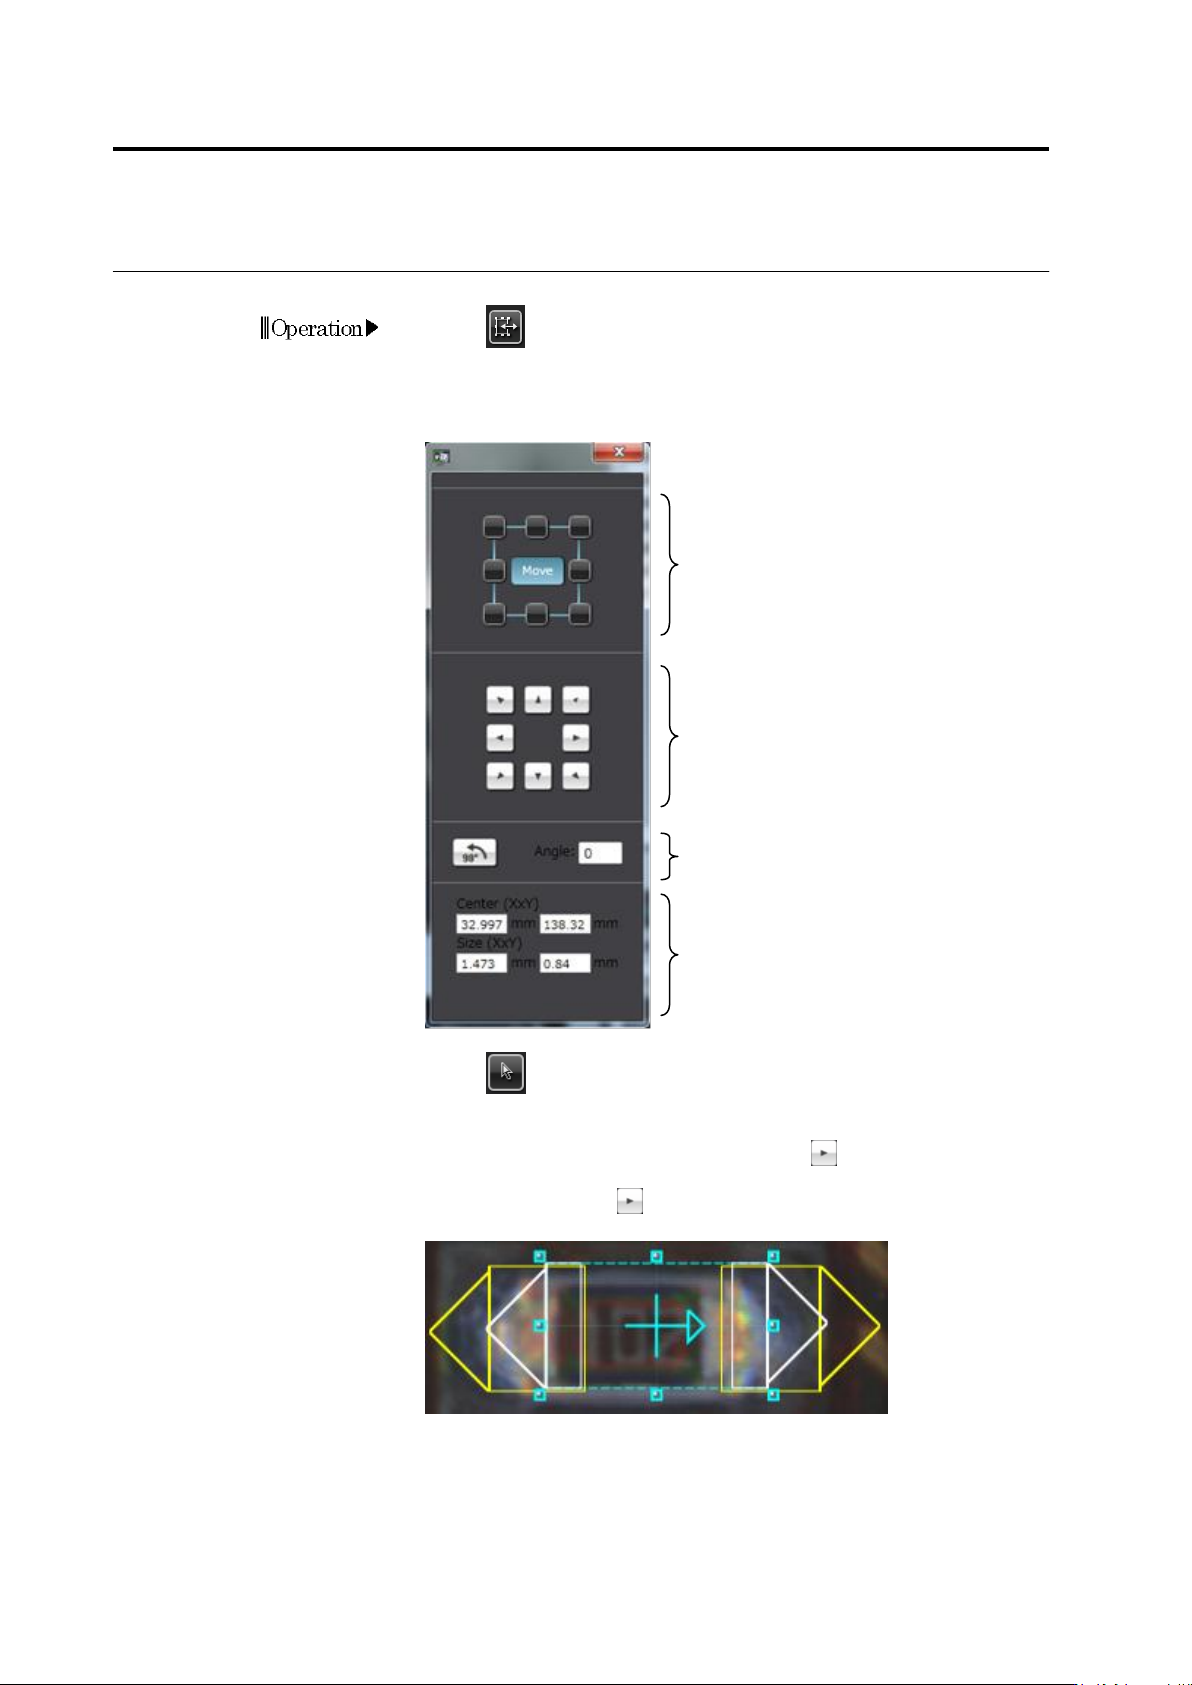
Window Adjustment Dialog
1.
Click (Window Adjustment Dialog) button in the Image
Operation tool bar. (User operations become effective when a
window on the image is selected.)
2.
The window adjustment dialog appears.
3.
Click (Select Window) button in the Image Operation tool bar
and click to select the window to adjust.
4.
Click [Move] and the direction button (e.g. ) to move the window.
To resize the window, click the operating point square and the
direction button (e.g. ) corresponding to the direction in which the
window is resized.
Select the window adjustment mode.
[Move]…Select the Move mode.
Any Square…Select the operating point
to resize the window.
Move or resize the window in the
arrow direction.
For window resizing, only enabled
buttons determined by the selected
operating point can be used.
The center coordinates and size
of the window are displayed.
Rotate the window counterclockwise by
90 degree increment or the specified
degrees.
Operation
2.2 Creating a New Inspection Program
2-25
2.2 Creating a New Inspection Program
This section describes the procedure to create a new inspection program.
1.
Click [Teaching] in the main menu.
2.
The Select PCB screen appears.
To create an inspection program for a new PCB, click [New PCB].
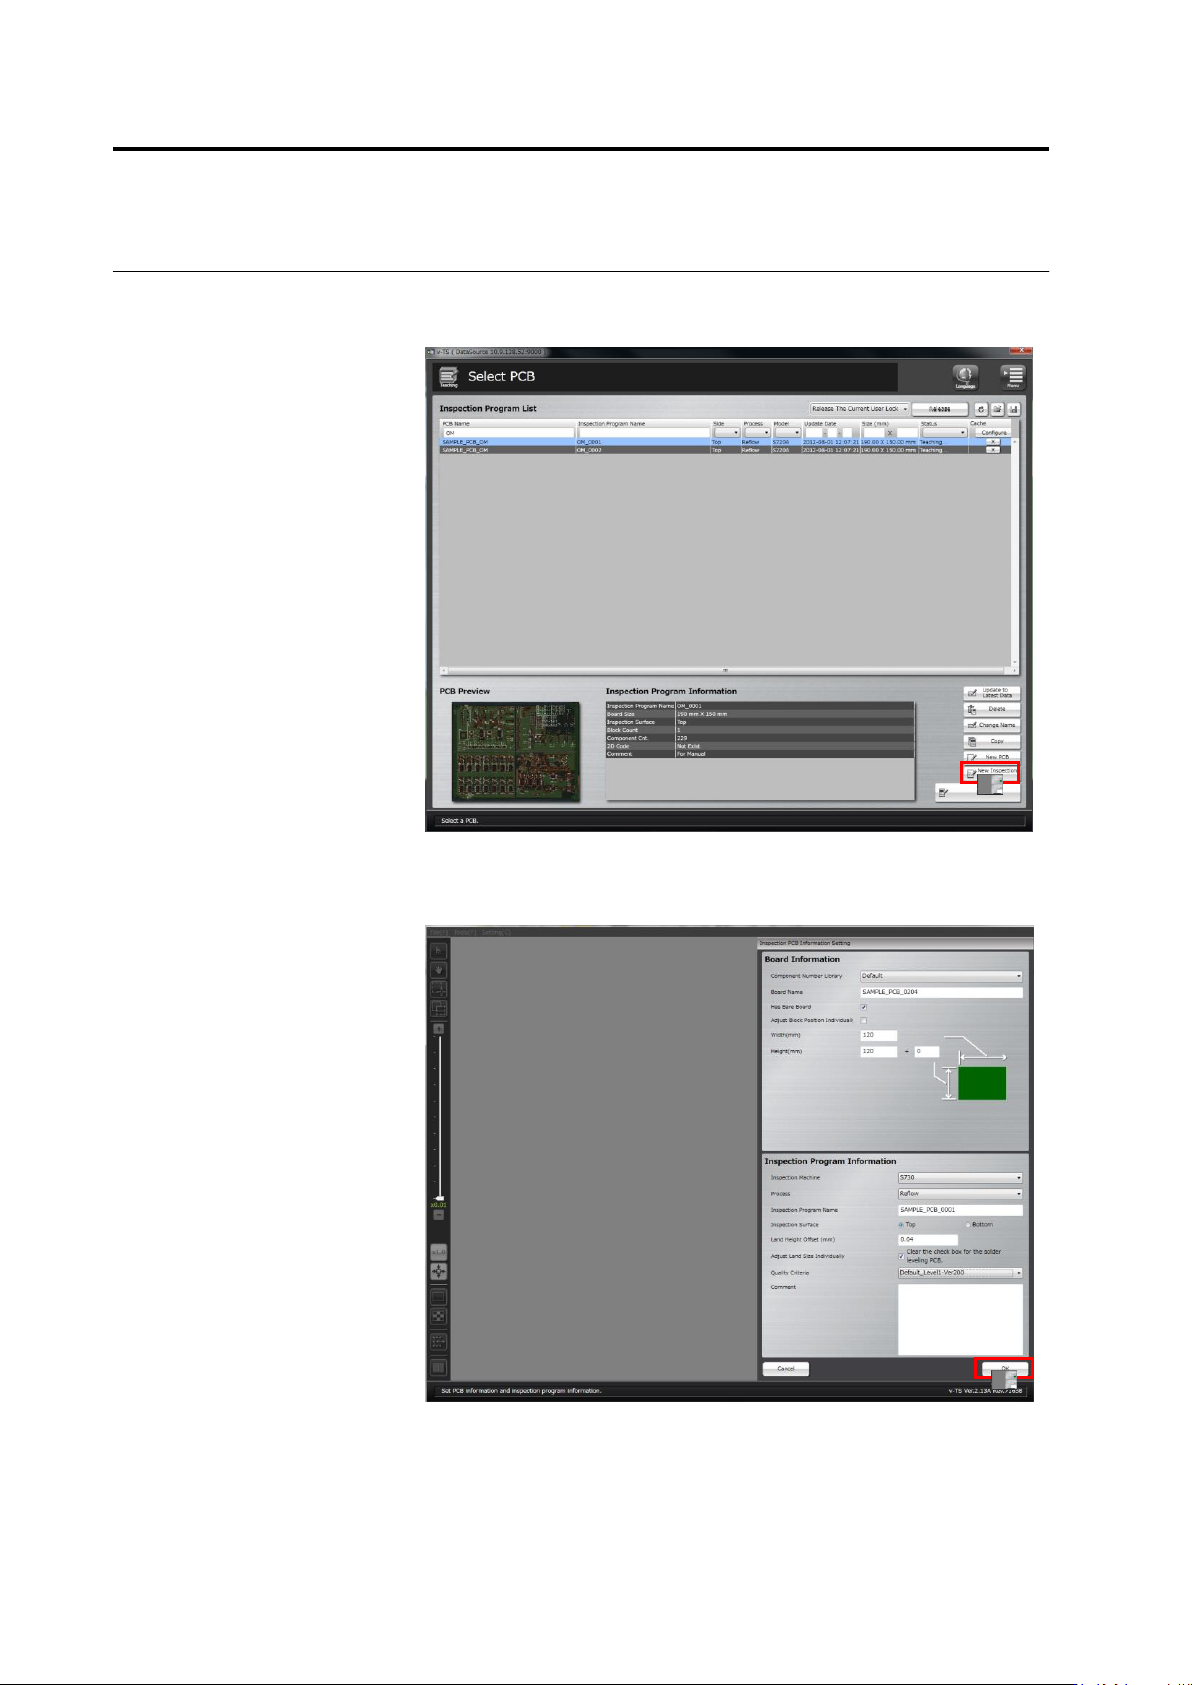
Chapter 2 Inspection Programming
2-26
Click [New Inspection Program] to add a new inspection program for
an existing PCB after selecting the PCB in the Inspection Program
List.
3.
The PCB Information Setting screen appears.
Enter the PCB and inspection program information and click [OK].
Click [Cancel] to abort the setting and return to the Select PCB
screen.