Omron V-TS Teaching Manual.pdf.pdf - 第313页
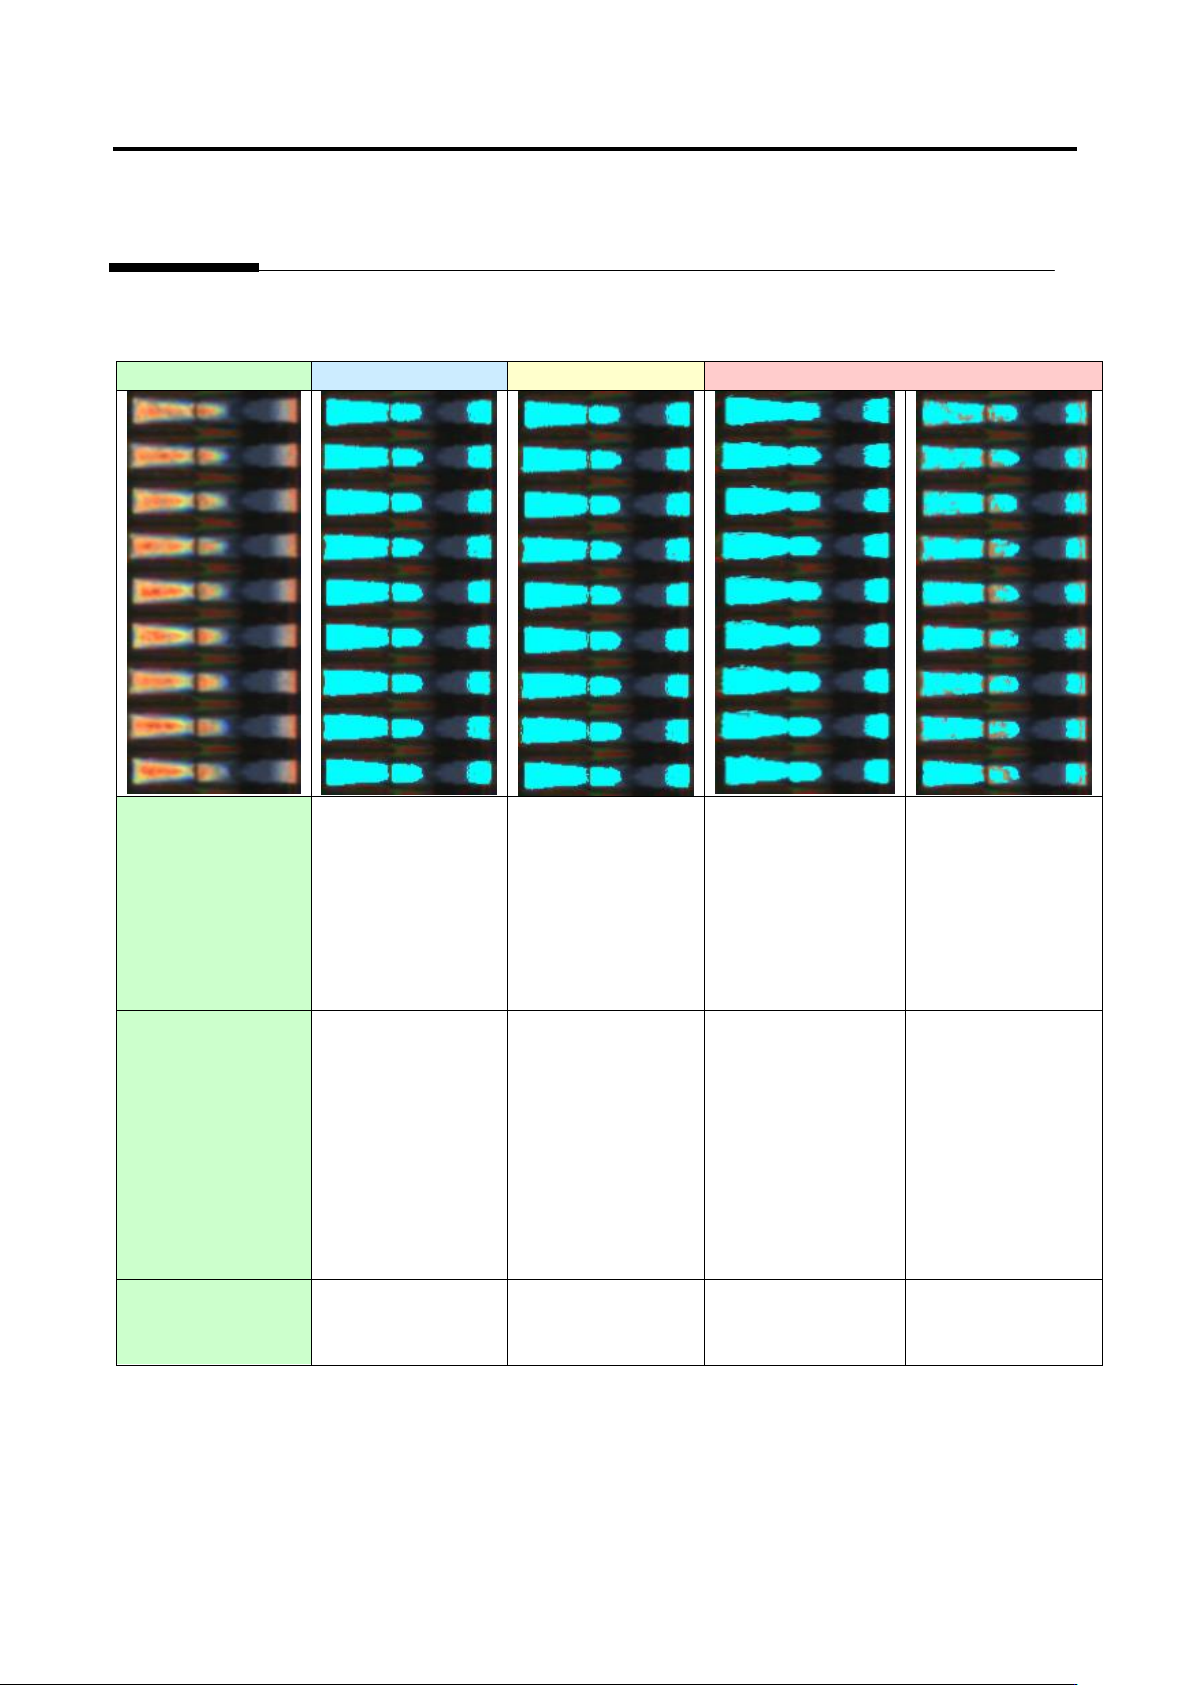
Appendix 7. Positio n Correction/Extractio n a- 36 Example 5. Capture image Good Acceptable Unacceptable (1) Electrode bi narization ○ ○ ○ × Electrode tip extraction fails because the electrode is not binarized. (2) Sold…
Appendix 7. Position Correction/Extraction
a-35
Example 4.
Capture image
Good
Acceptable
Unacceptable
(1) Electrode
binarization
○
○
○
×
Electrode tip
extraction fails
because the
electrode is not
binarized.
(2) Solder
binarization
○
△
Electrode tip
extraction may fail
in the future
because the
electrode and
solder are partly
connected.
×
Electrode tip
extraction fails
because the
electrode and
solder are
connected.
○
Availability of
electrode tip
extraction
○
○
×
×
Appendix 7. Position Correction/Extraction
a-36
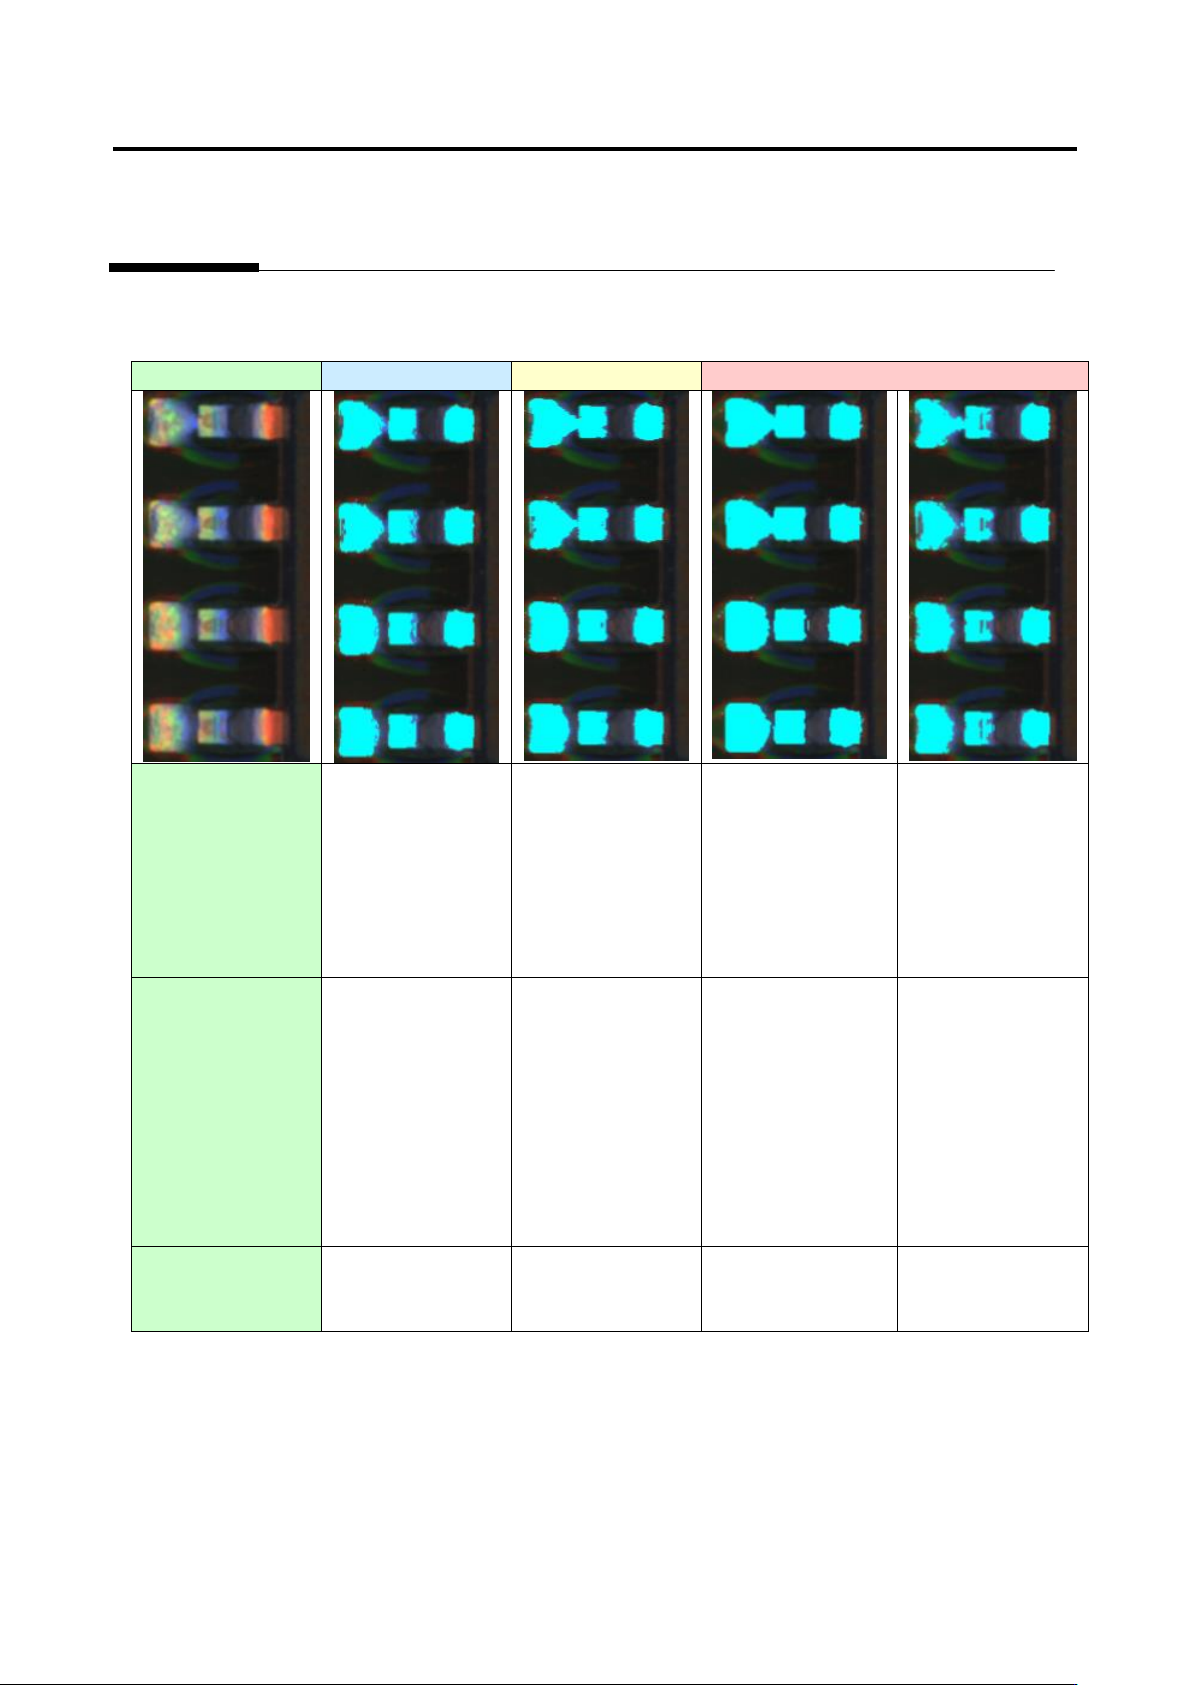
Example 5.
Capture image
Good
Acceptable
Unacceptable
(1) Electrode
binarization
○
○
○
×
Electrode tip
extraction fails
because the
electrode is not
binarized.
(2) Solder
binarization
○
△
Electrode tip
extraction may fail
in the future
because the
electrode and
solder are partly
connected.
×
Electrode tip
extraction fails
because the
electrode and
solder are
connected.
○
Availability of
electrode tip
extraction
○
○
×
×
Appendix 8. Height Information Setting
a-37
Appendix 8. Height Information Setting
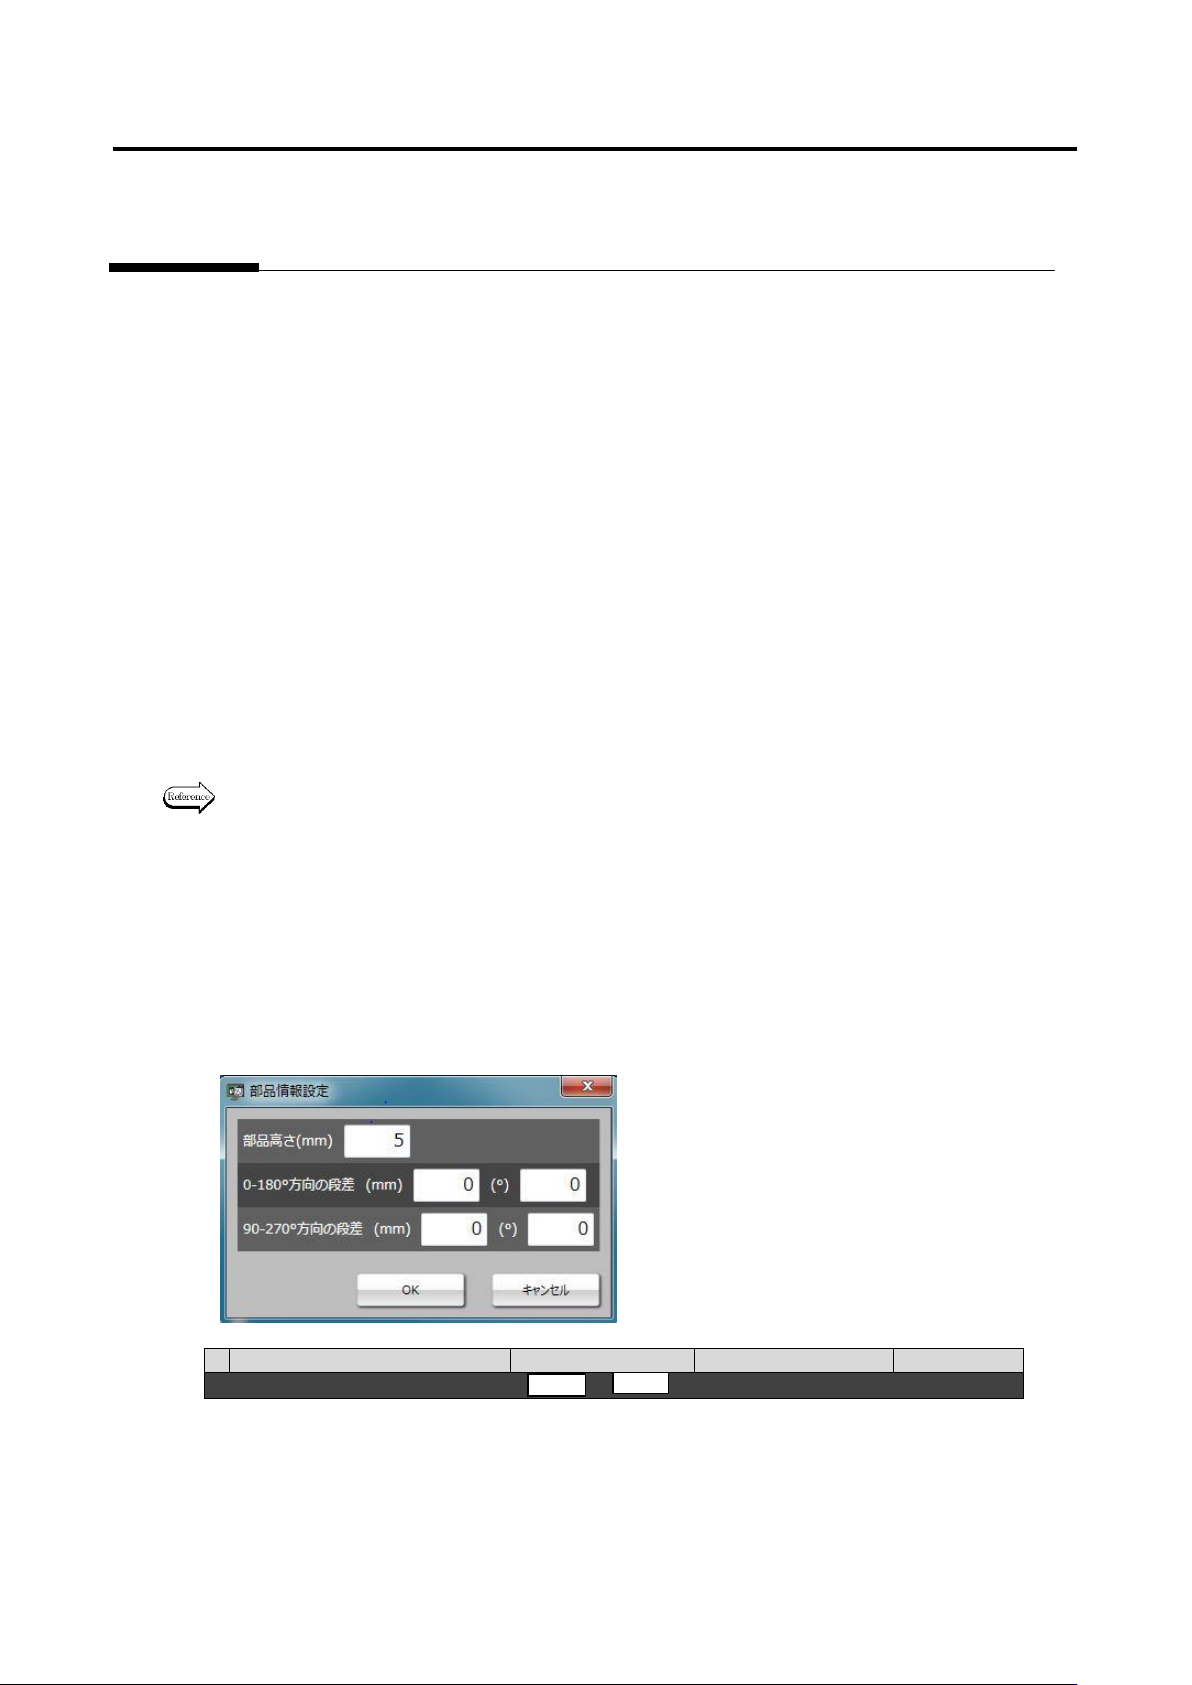
1. Component height setting procedure
1
.
Move to the “Criteria Setting (Component Number)” tab.
2
.
Select the “Component Height” inspection item, and confirm the measured value of the inspection
result of OK component on the “Model Editing” screen.
3
.
Click the [Component Information] button at the screen bottom, and confirm the entered value of
“Component Height.”
4
.
If the entered value of component height is different from the confirmed measured value of
component height, change the entered value to the correctly measured value.
5
.
If false call or overlooking occurs, confirm if component height is measured correctly based on the
resultant component height on the “Model Editing” screen again, and adjust the lifted window on
the component image.
6
.
If component height is no problem, confirm adjustment of lifted/tilted components continuously.
(Refer to 2. “Details of gap setting for component tilt” below.)
2. Details of gap setting for component tilt
Some capacitors and connectors are still judged as false call or overlooking when component tilt is
0-180° or 90-270°. This is because there is a case in which a gap is generated in the area where the
lifting window is set and the gap is measured as component tilt by mistake. So, it is necessary to set
component gap.
For details of gap setting, refer to P3-13 Section 3.8 “Lifted Component” of the inspection logic
manual.
The adjustment procedure is described hereafter.
Operation procedure
1. First, on the criteria setting (component number) screen, compare 1) set value of component
height with 2) measured value of component height. If component height is different, change the
set value of 1) according to the measured value of 2) of OK product.
1) Set value
2) Measured value
Inspection item
Setting
Measured value
Judgment
■ Component height
-
5.01
2. When the measured value of 2) component height is not correct, if the component is an electrolytic
capacitor, adjust positions of the lifted windows at four corners tilted at 45° (framed in red), and set
them on the base. (Refer to [OK sample] below.) Adjust positions for each component, and change
the measured value of 2) component height.