Omron V-TS Teaching Manual.pdf.pdf - 第234页
2.16 Managing PCB Im ages 2- 207 削除 : M a n a g i n g PCB I m a g e s 2.16.8 Deleting Cache This section describes the procedure to delete PCB im ages saved in the local. 1. Click of the target i nspection program on the…
Chapter 2 Inspection Programming
2-206
2.16.7 Cache Setting
The response with v-TS will be improved by saving the PCB image data on the network into a
computer.
1.
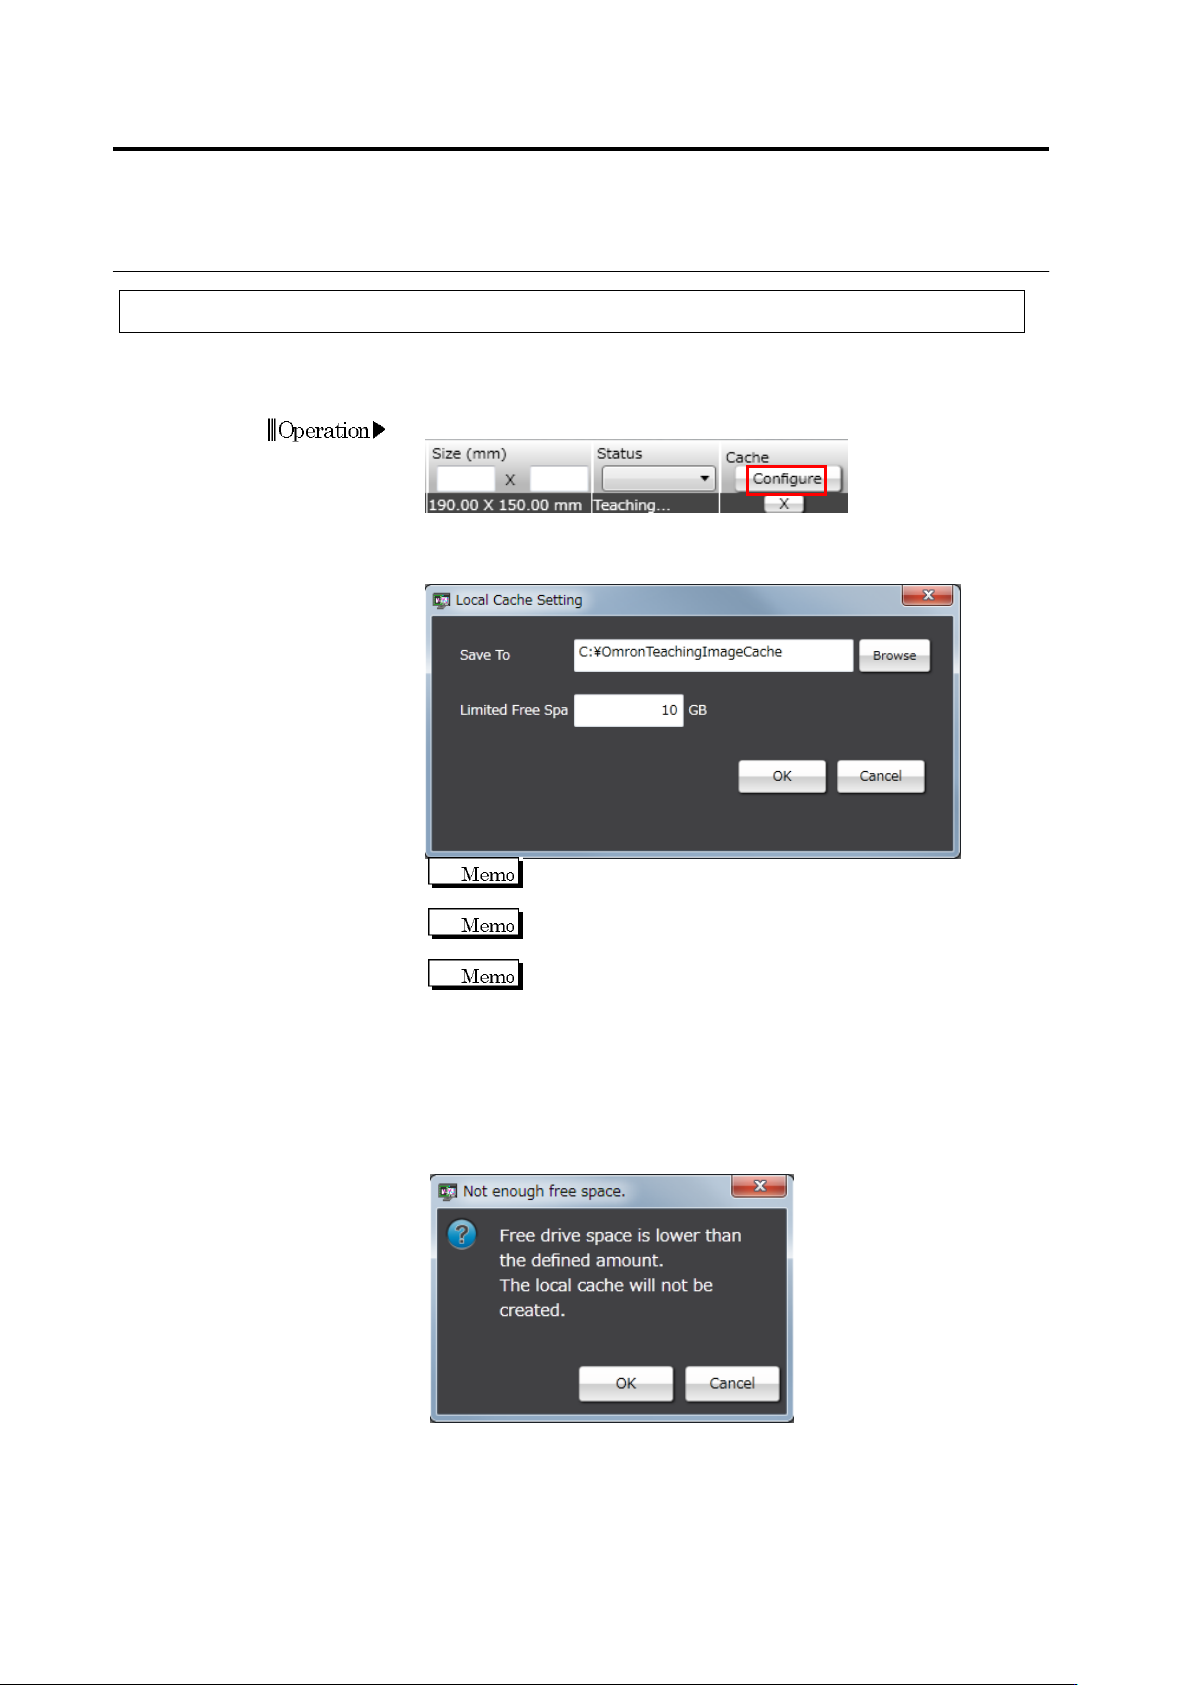
On the PCB selection screen, click [Configure] for Cache.
2.
The local cache setting dialog appears.
Set the saving destination and free space limit, and then click [OK].
The saving destination has been set to
"C:¥OmronTeachingImageCache" as default.
A folder is automatically created, under the specified folder,
with a folder name as the IP address of the server to connect.
Set the free space limit between 10GB to 999GB.
While the local computer’s free space is larger than the set value,
PCB images will be saved into the local at the timing when the
inspection program is opened.
When the local computer’s free space becomes lower than the set
value, the dialog shown below is displayed after the [Edit] button is
clicked.
Clicking [OK] opens the inspection program without saving images
into the local.
Clicking [Cancel] closes the dialog without opening the inspection
program.
2.16 Managing PCB Images
2-207
削除: Managing PCB Images
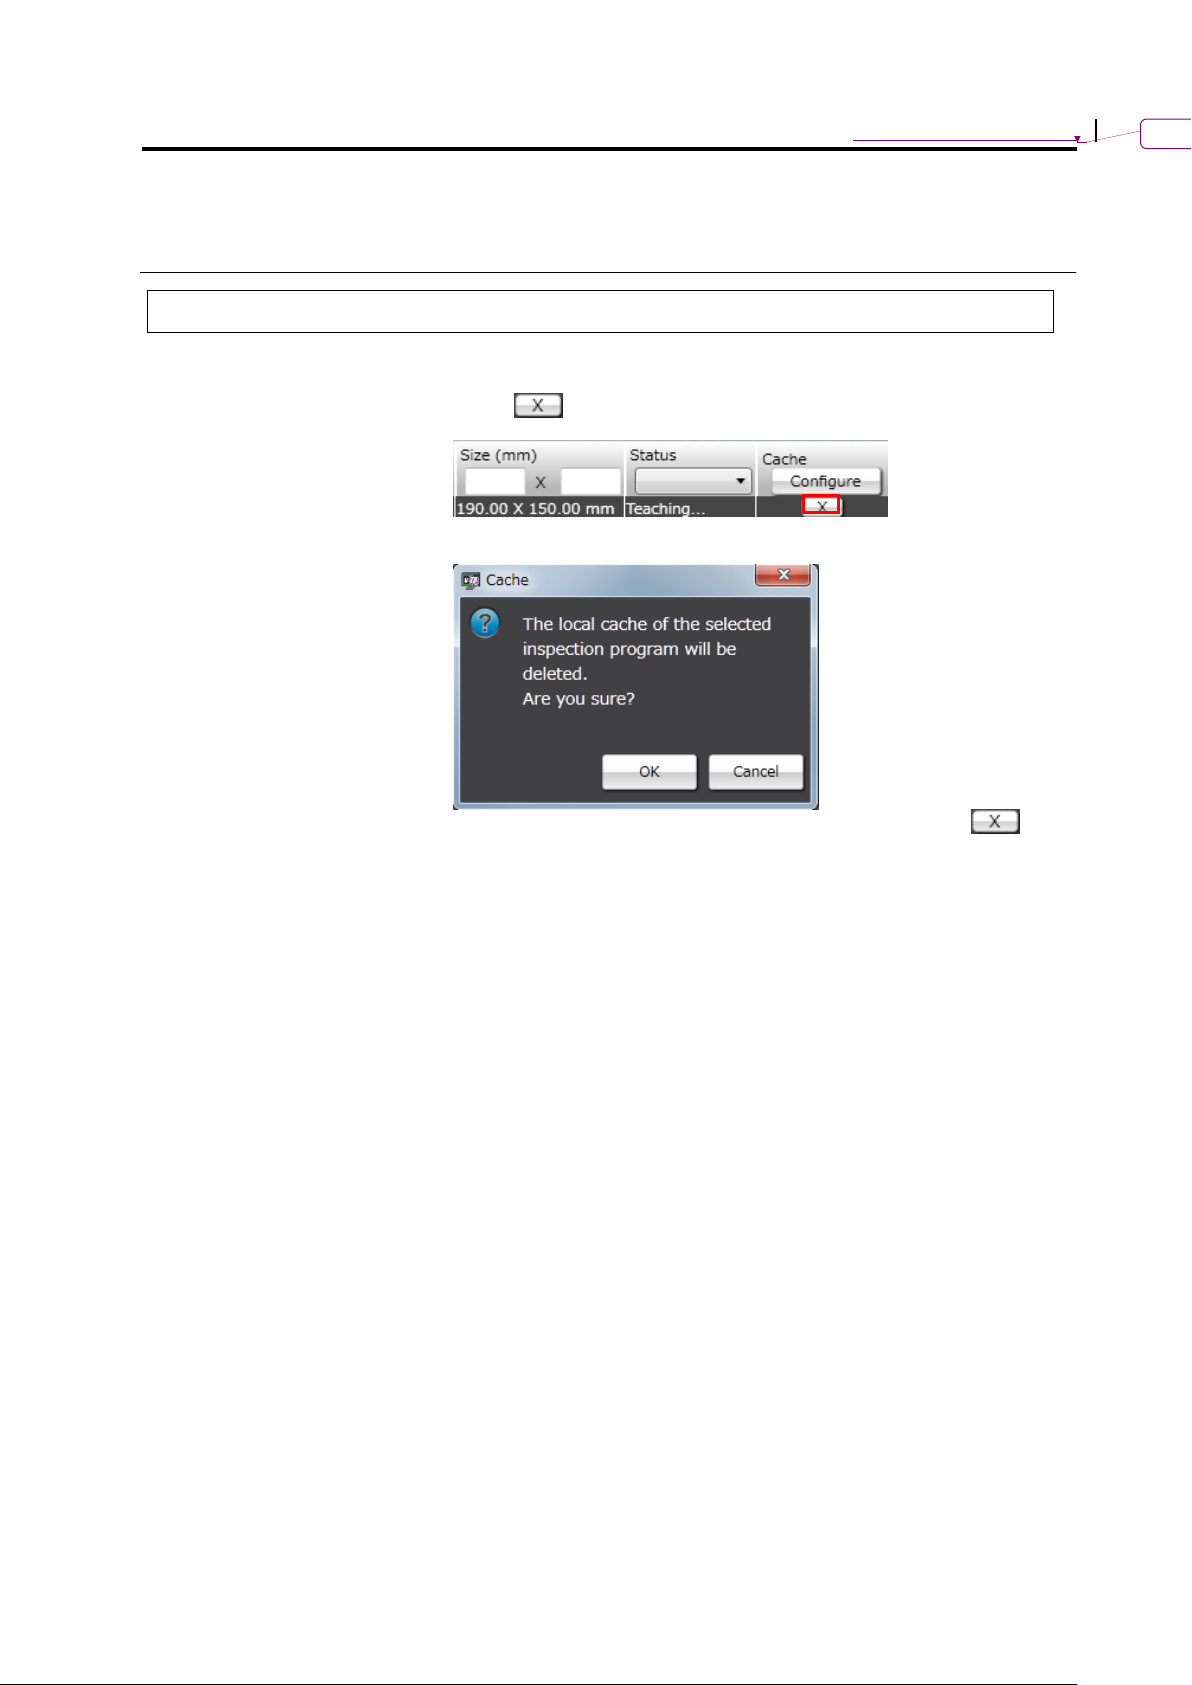
2.16.8 Deleting Cache
This section describes the procedure to delete PCB images saved in the local.
1.
Click of the target inspection program on the PCB selection
screen.
2.
The deletion confirmation dialog appears.
Clicking [OK] delete the image saved in the local, and the
button will disappear from the inspection program list.
Chapter 2 Inspection Programming
2-208
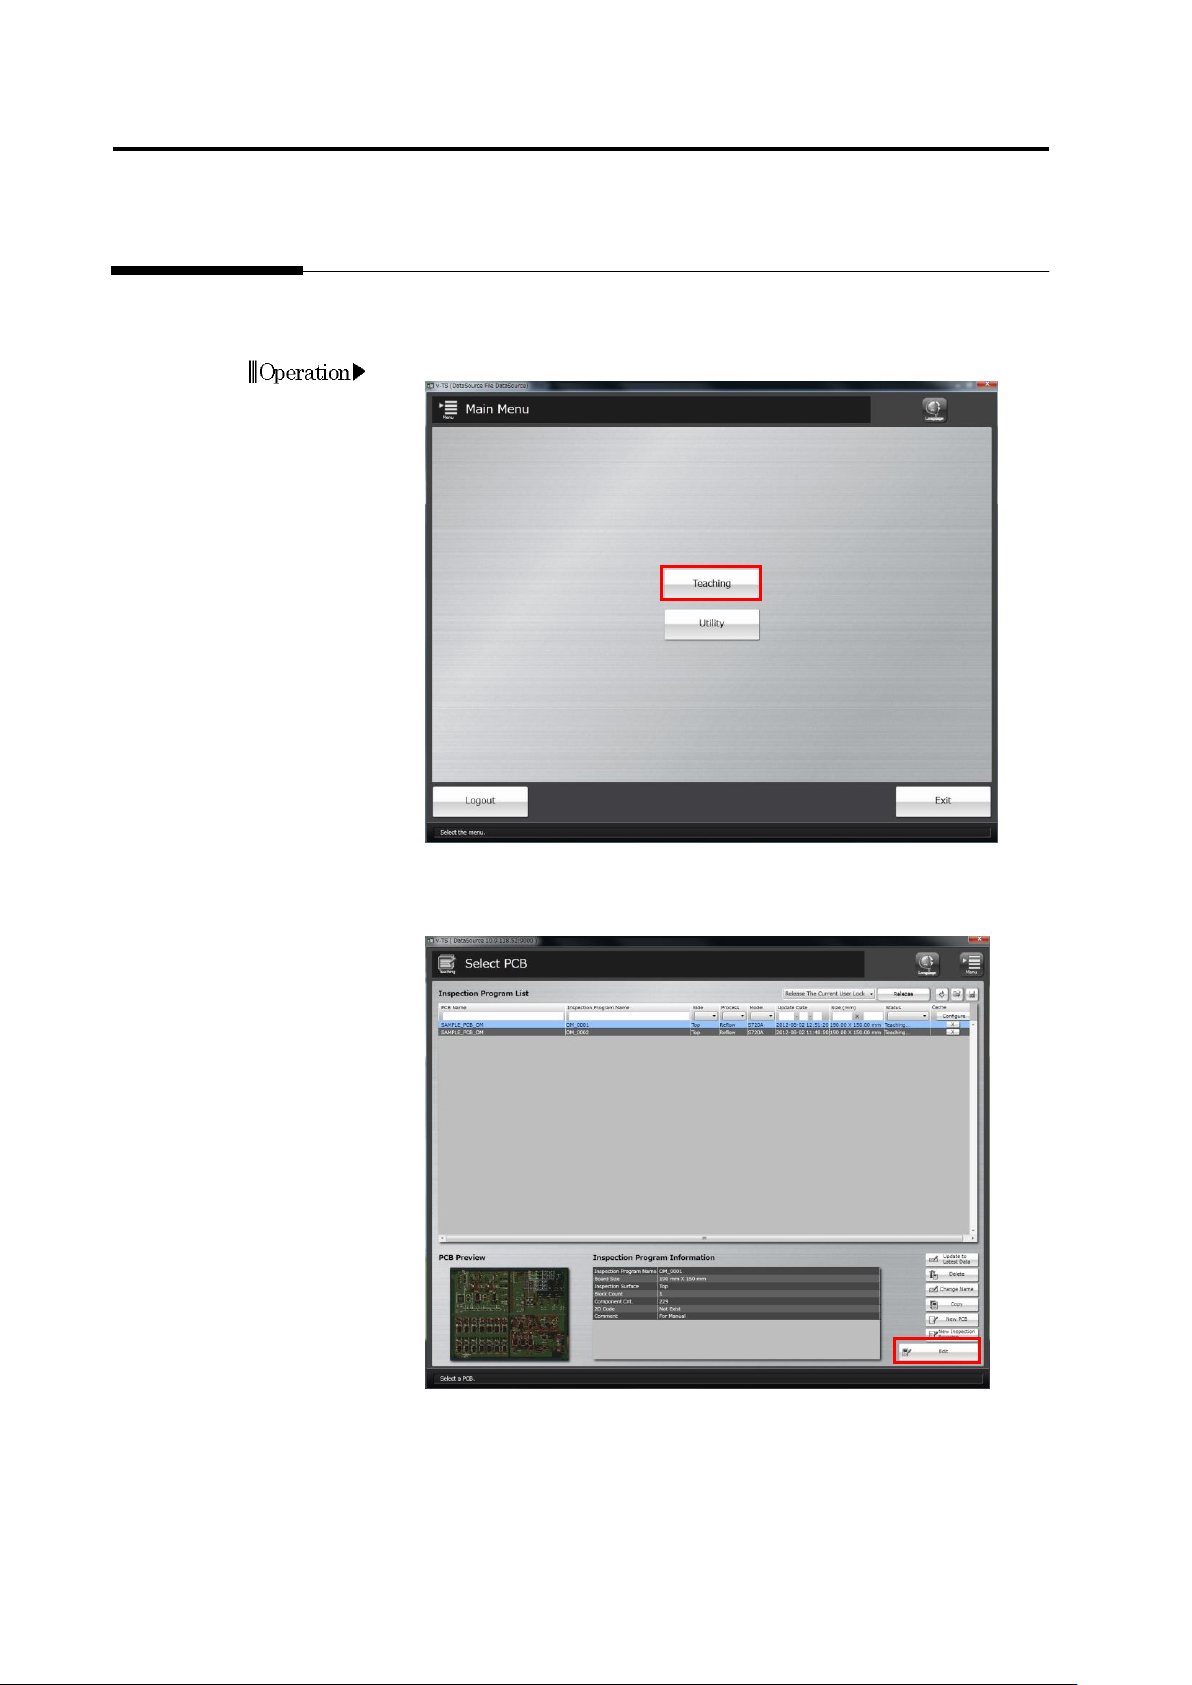
2.17 Mass-Produced PCB Image
A mass-produced PCB image specified by Q-upNavi or the specified product image saving
function can be acquired and registered in the library.
1.
Click [Teaching] in the main menu.
2.
The Select PCB screen appears.
Click to select the inspection program whose mass-produced PCB
image to acquire in the Inspection Program List, and click [Edit].
Operation