Omron V-TS Teaching Manual.pdf.pdf - 第79页
Chapter 2 Inspecti on Programm ing 2- 52 Click t he added component number to edit its description (name). 4. Click [OK] to clos e the dialog. Disp lay the component t o add in the image displa y area and click the cente…
2.4 Registering for Inspection
2-51
1.
Check that the components to inspect and their mount positions are
available and ready for registration by moving the field of vision on
the image display area or selecting the components in the
Inspection List.
Refer to "2.1.2 Configuration of the Editing Screen" for the image
display area operation.
2.
Delete, add or rename the components for inspection as required.
Delete Components from the Inspection List
Select the component to delete in the Inspection List and click
[Delete].The "+" mark of the deleted component is not displayed in
the image display area any more.
A component can also be selected by switching the image
display area to the Select Window mode and clicking the "+"
mark with the mouse directly.
Refer to "2.1.2 Configuration of the Editing Screen" for the
image display area operation.
Add Components to the Inspection List
Copy an Existing Component
1. Select the component to copy in the Inspection List and click
[Copy Inspection].
2. Click the center of the copy destination component in the
image display area.
3. After completing copying, click [Copy Inspection] to exit.
The inspection windows are copied in the same sizes as the
original. However, the inspection criteria common to the
component number is specified, if the original component is
individually set to specific criteria.
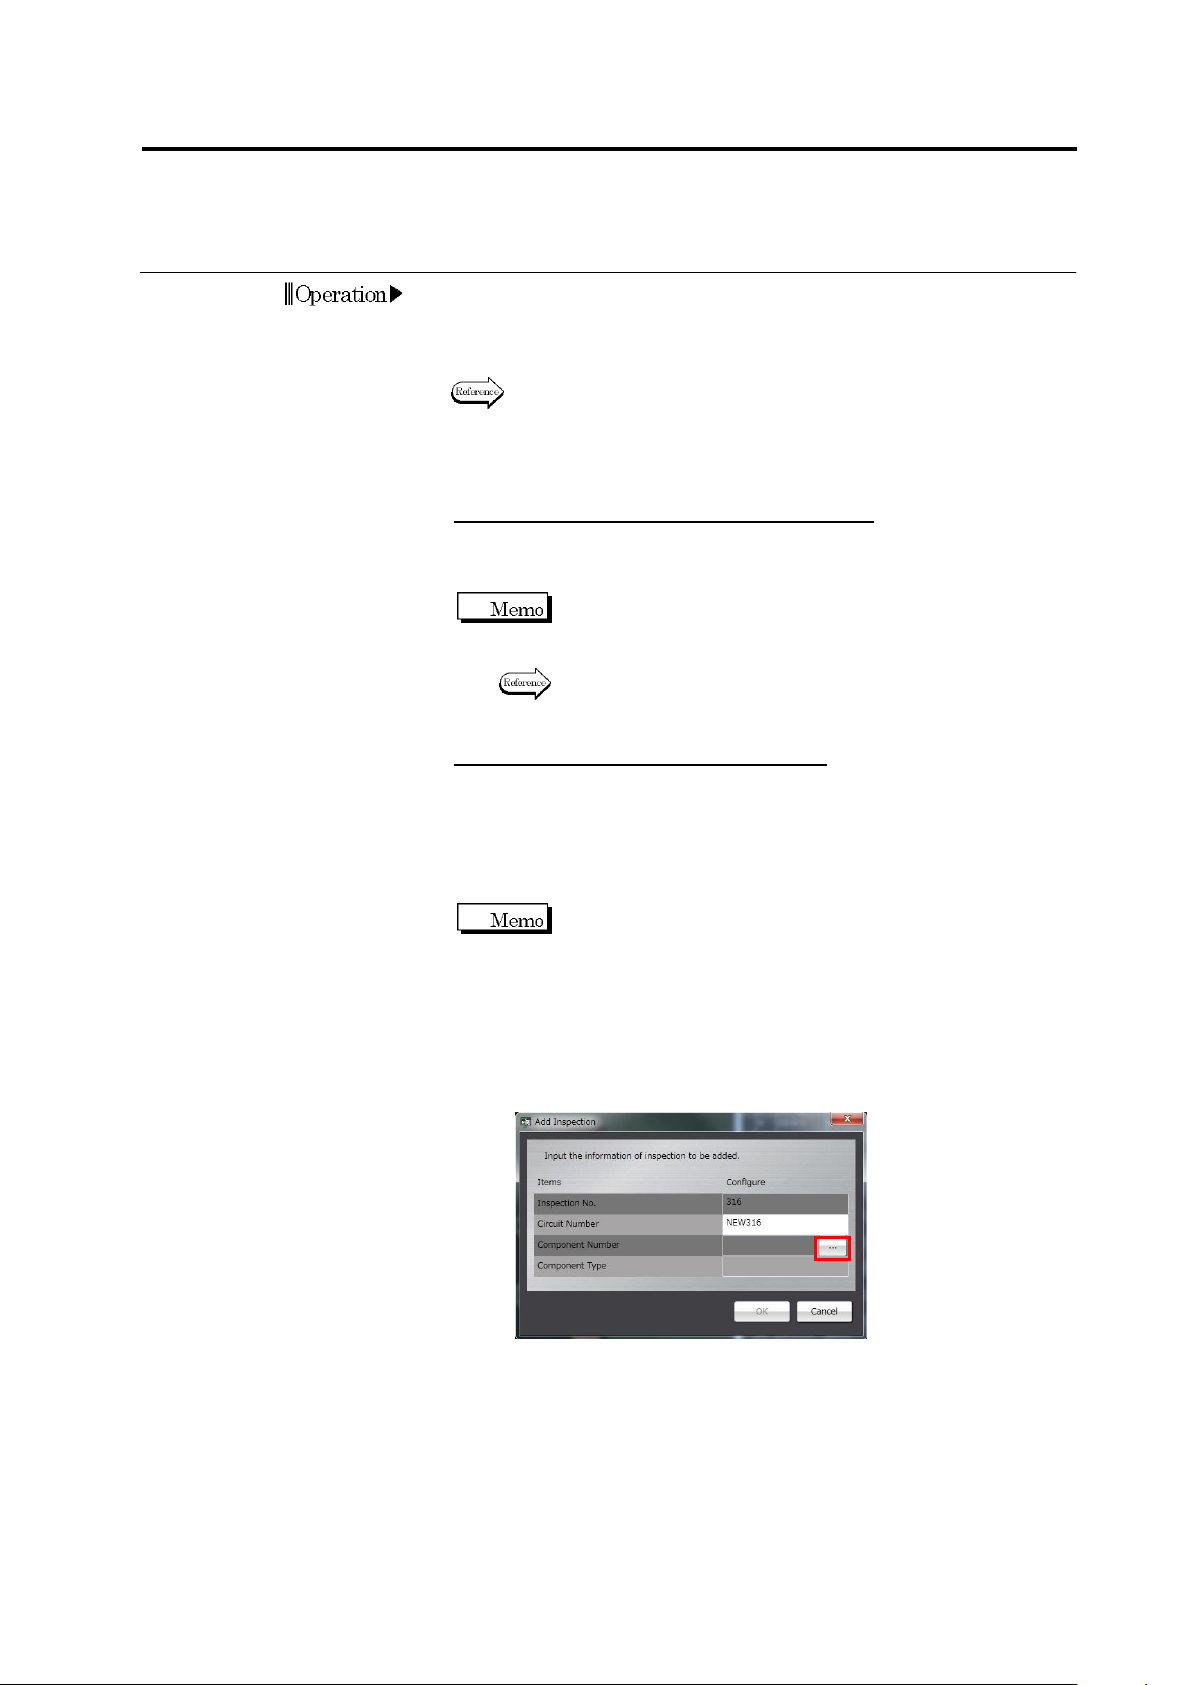
Specify the Component Number
1. Click [Add Inspection].
2. Enter the circuit number and click […] to select the
component number.
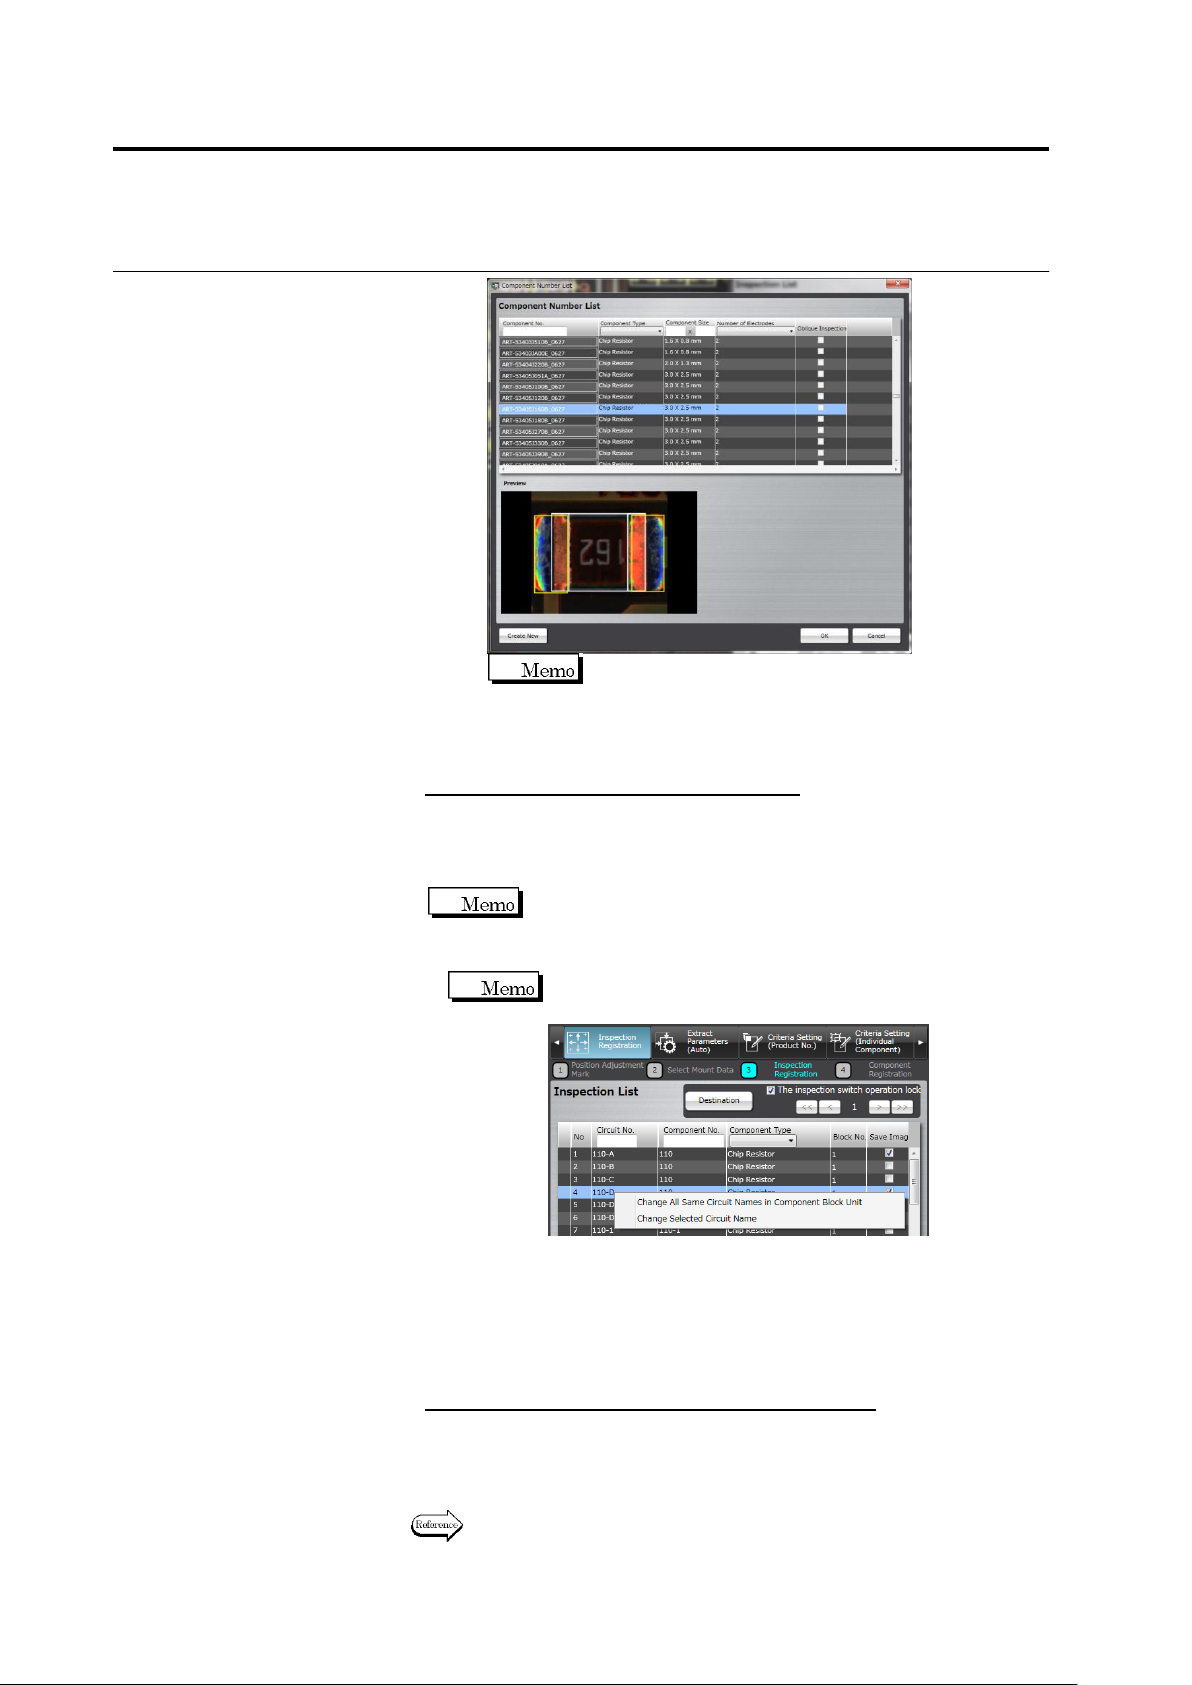
3. The Component Number List is displayed.
To add a new component number, click [Create New].
The new component number is added at the last row of the
Component Number List.
Select the component number to add for inspection and click
[OK].
Chapter 2 Inspection Programming
2-52
Click the added component number to edit its
description (name).
4. Click [OK] to close the dialog. Display the component to add
in the image display area and click the center of it.
Change the Circuit Number Description
Select the component in the inspection list, and click the circuit
number.
The textbox becomes editable. Enter the new name.
A circuit number can be described within 16 single-byte characters.
Lowercase alphabet characters are changed to
uppercase when entering.
Allowed symbols ! # $ % & ' ( ) - = ^ ~ @` [ { ;+ } ] ,._␣
To change a circuit name with a customer-specific inspection
program, you can select a target as shown below
.
①
Changing all circuit names that are the same in a
component block unit
You can change all circuit number names that are the same
in one component block unit.
②
Changing a selected circuit name
You can change a circuit name being selected.
To save the images of the specified component
On the inspection list, set ON the checkbox on the [Save image]
column of the component saved.
3.
Click [Next] to proceed to the Component Registration screen.
Refer to the next section for the component registration procedure.
2.4 Registering for Inspection
2-53
2.4.5 Component Registration
Position the Component Body Window, land windows and electrode windows on a sample
component of individual component numbers and set the component and electrode information
for them.
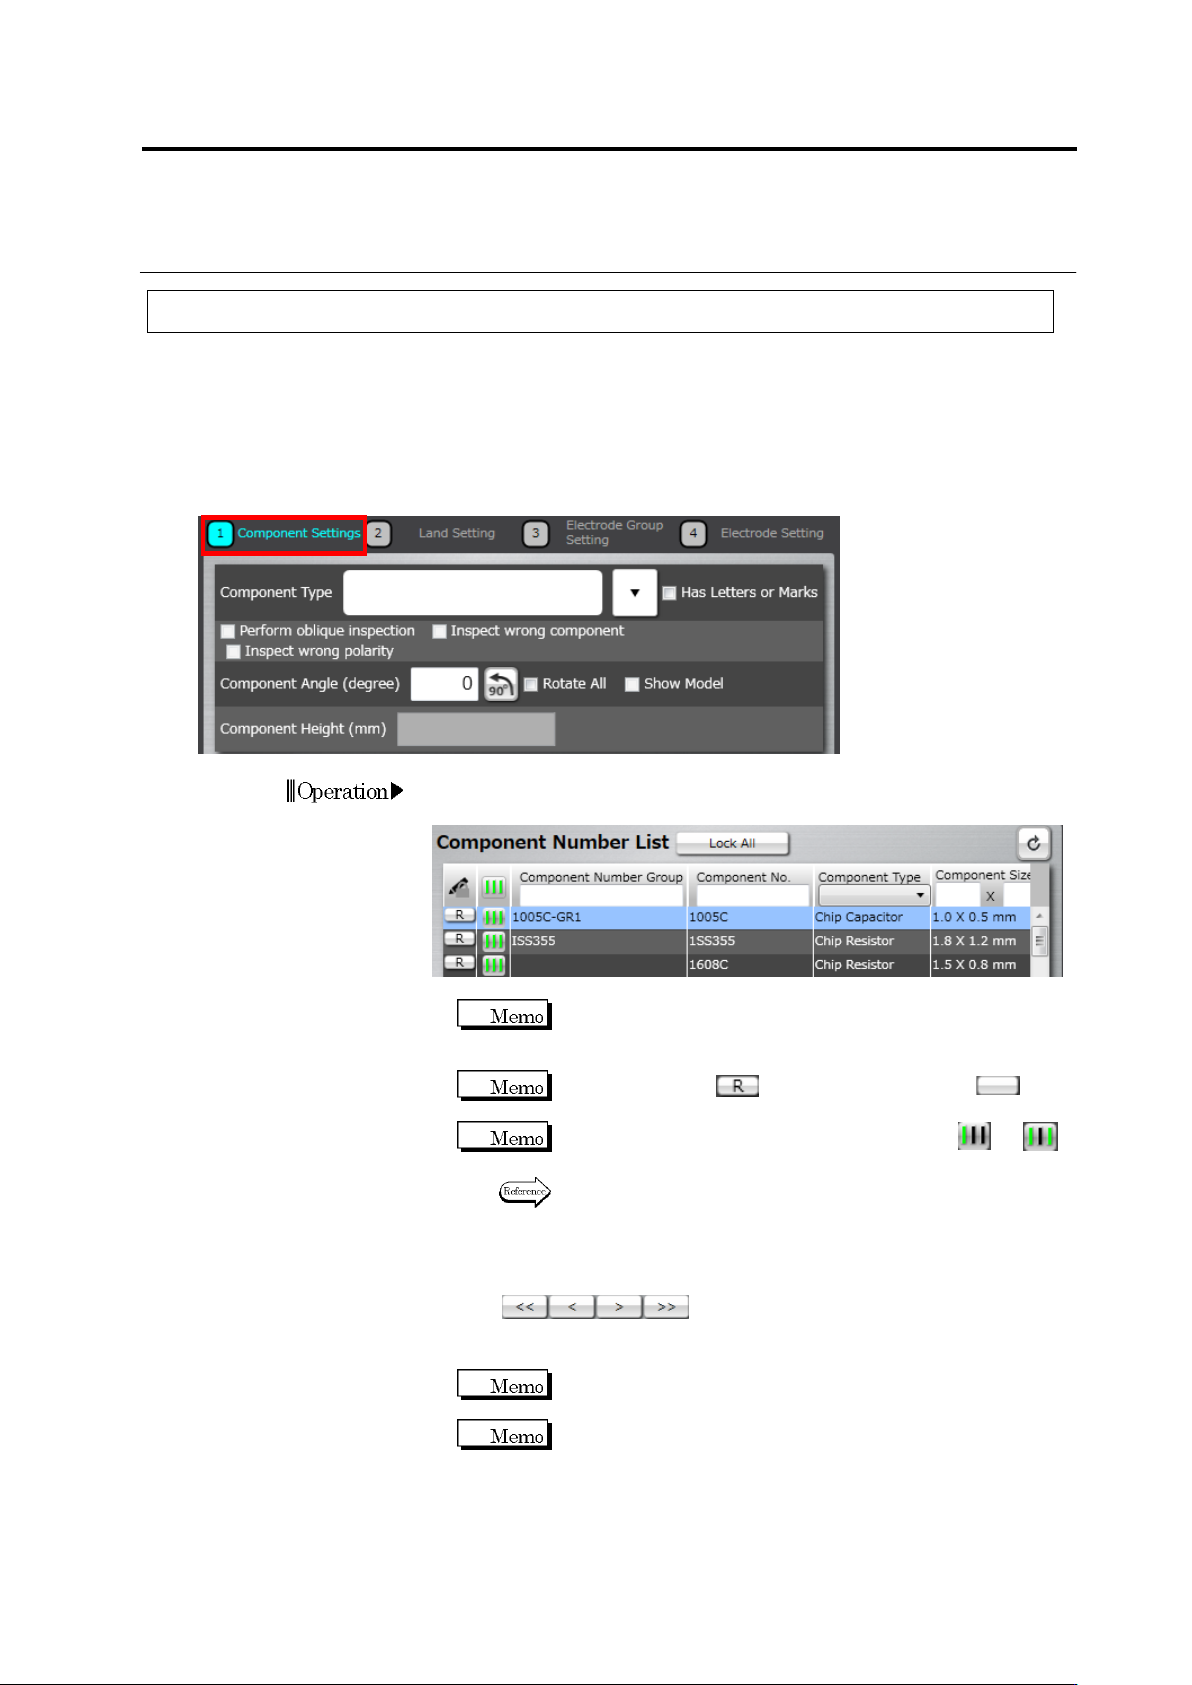
2.4.5.1 Component Setting
Set the component information for each component number.
1.
Select the component number for the setting in the Component
Number List.
If the component number is registered in the library and the
component information obtained from the library is used, this
setting is not necessary.
When the status is (locked), click it to unlock (not
locked) the component number.
If the teaching status of the component number is or ,
perform automatic window adjustment.
Refer to (5) Information Display Area on “2.1.2 Configuration of
the Editing Screen” for details on the status display of the
component number and auto adjustment procedure.
If there are multiple components with the same component number,
click below the Component Number List to
switch the component displayed in the image display area. Select
the sample component.
Click [<<] to display the top component and [>>], the last
component.
Select a component image rendered in clear colors, without
noise such as shadow, as the sample component, which can
enhance the accuracy of auto component window positioning
for the same component number.
Operation