MR8740、MR8741_user_manual_eng_20191016H.pdf - 第120页
4.4 Managing Files 108 You can copy a file into a specified folder. 4.4.7 Copying a File Into a S pecified Folder Procedure To open the screen: Right-click and select [FILE] File sc reen To change the media: (p.84) 2 …
4.4 Managing Files
107
4
Chapter 4 Saving/Loading Data & Managing Files
Sort files in the file list into a specified order.
Rename a file or folder.
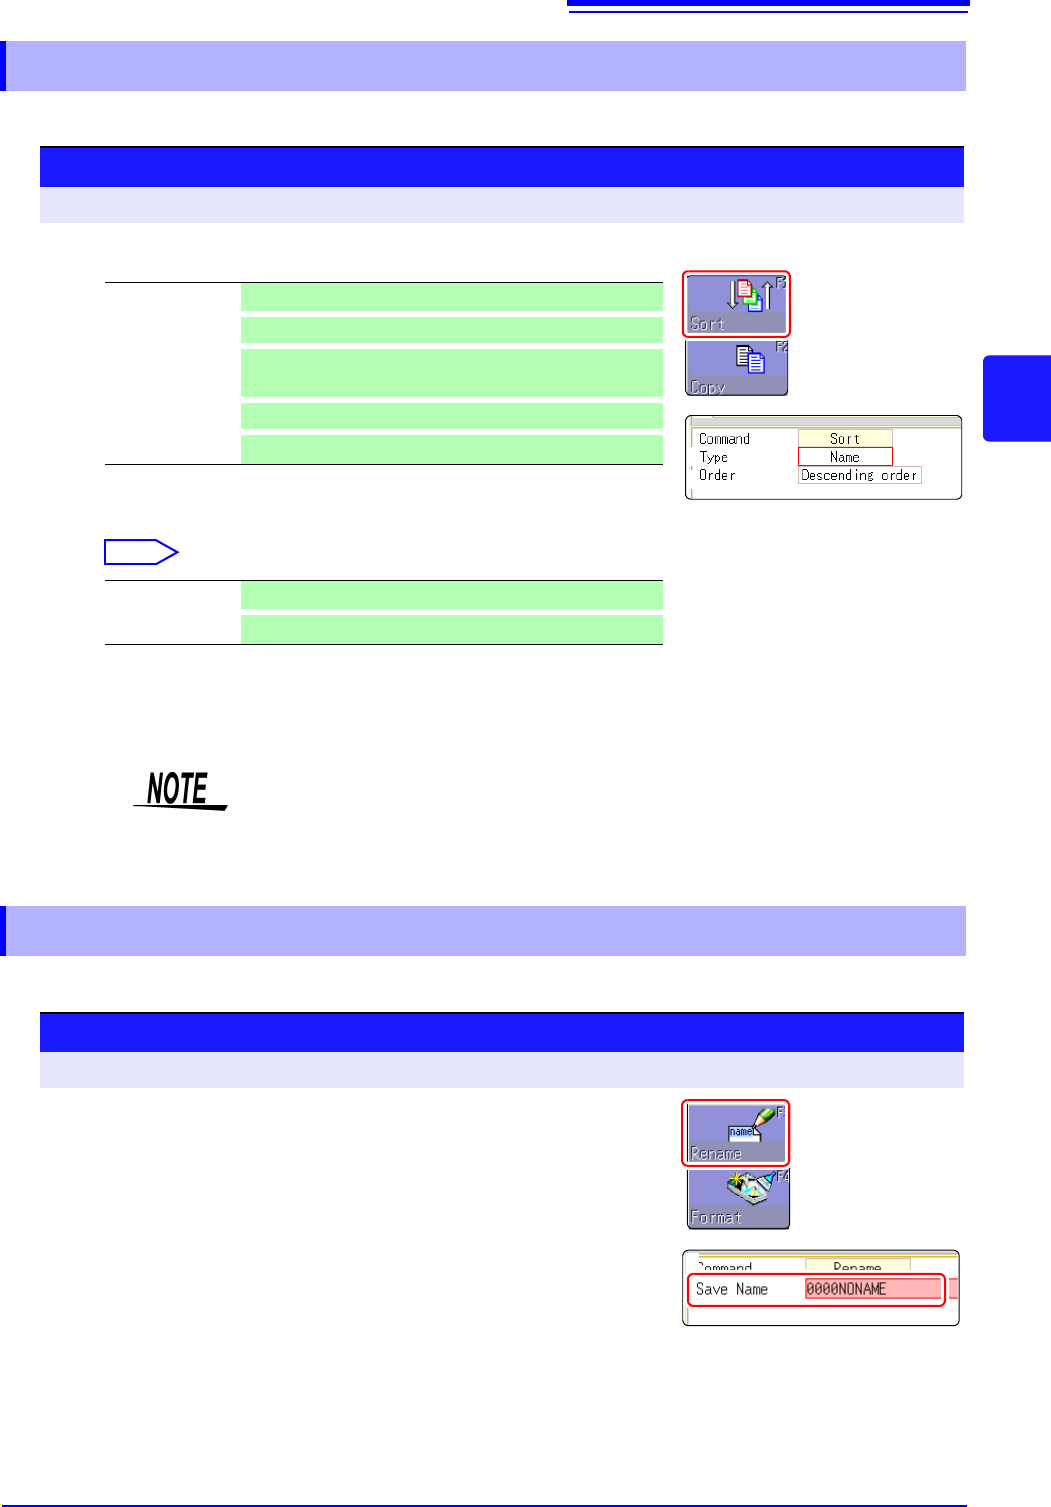
4.4.5 Sorting Files
Procedure
To open the screen: Right-click and select [FILE] File screen To change the media: (p.84)
1
2
1
Select [Sort], and select [Type].
Folders/files are sorted by specified item.
2
Move the flashing cursor to the [Order].
Select
Folders/files are sorted in specified order.
3
Select [OK].
The sort screen closes.
You can also sort files by clicking an item name in the file list with the mouse.
Off No sorting.
Name
Sorts files by file name characters.
Type Sorts files by type (file format) of data (settings, MEM
waveforms, etc.)
Date
Sorts files by time and date of creation.
Size
Sorts files by size.
Ascending order A Z , Old New, Small Large
Descending order
Reverse sort order
1. Select
The order format will be displayed in the file list (with : Ascending order :
Descending order mark) and marked by the GUI.
When there are both files and folders, folders are listed at the top and files at the
bottom.
4.4.6 Renaming Files & Folders
Procedure
To open the screen: Right-click and select [FILE] File screen To change the media: (p.84)
3
1
Select the file or folder you want to rename.
2
Select [Rename].
3
Select [Enter Char], and enter [Save Name].
See: "7.1 Adding Comments" (p.138)
4
Select [Exec].
The file or folder is renamed.
To cancel renaming:
Select [Cancel].
2. Select
4.4 Managing Files
108
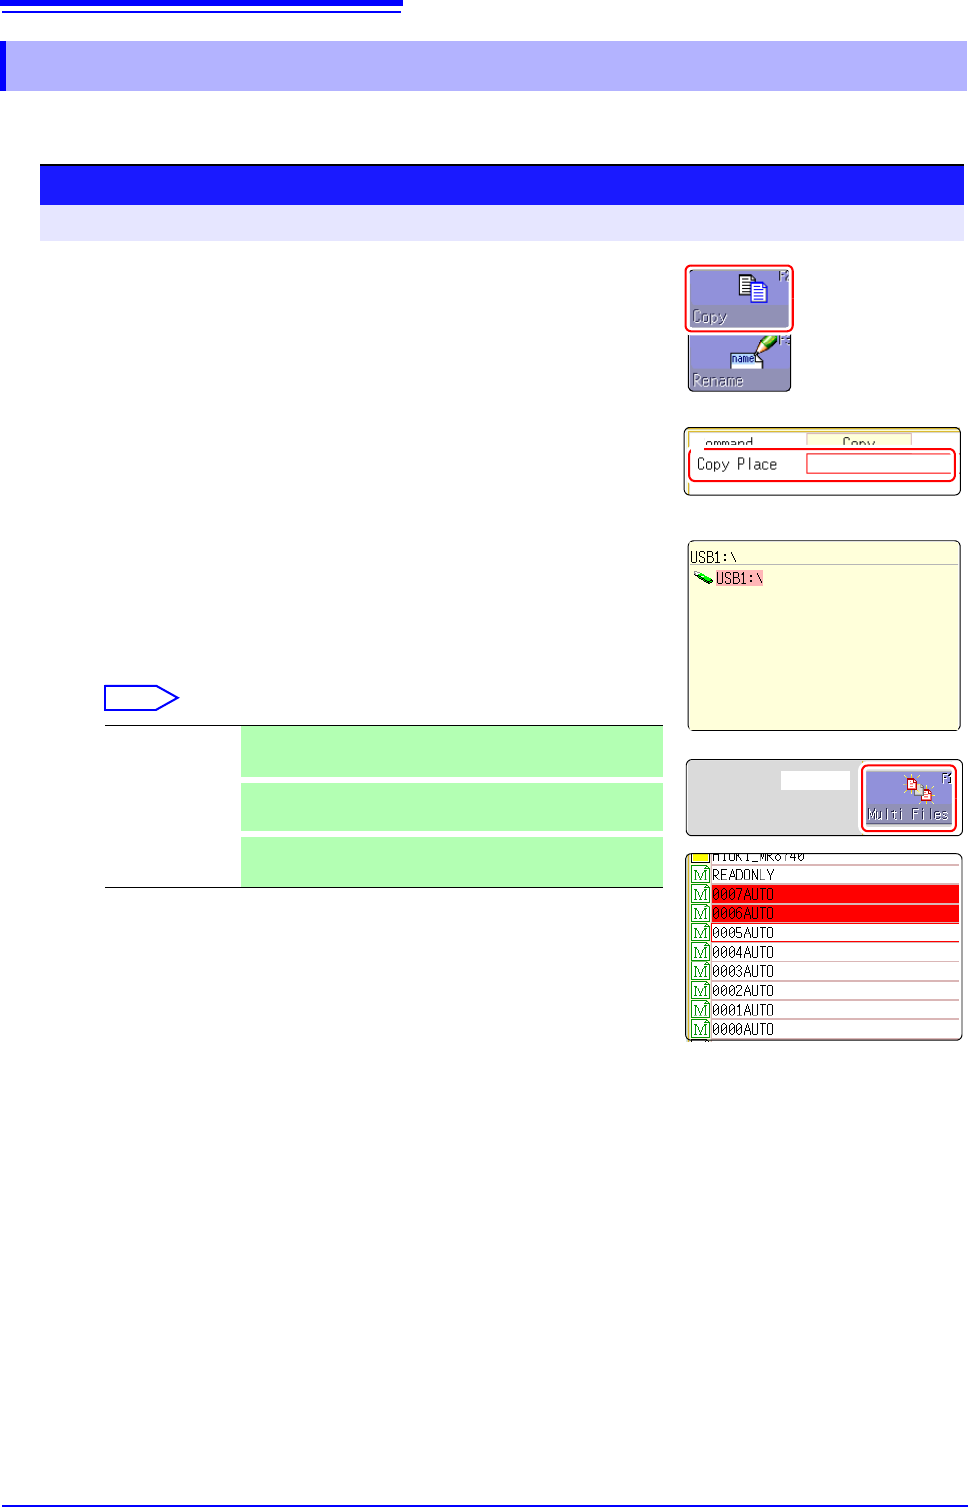
You can copy a file into a specified folder.
4.4.7 Copying a File Into a Specified Folder
Procedure
To open the screen: Right-click and select [FILE] File screen To change the media: (p.84)
2
1
Move the flashing cursor to the file you want to copy.
2
Select [Copy].
Move the flashing cursor to the [Copy Place] item.
3
Select [Edit].
The Browse folders dialog box appears (at bottom right).
4
Move the flashing cursor to the copy target folder and confirm
the setting with [Confirm].
5
(When there are multiple copy targets)
Select [Multi Files].
Select
Selected files or folders are shown in red (see illustration at right).
Select [Select End].
6
Select [Exec].
The file is copied to the specified target location.
To cancel copying:
Select [Cancel].
Slct/Deslct Select the individual file or folder at the cursor.
If something is currently selected, the selection is cleared.
Slct/Deslct All
Select all files or folders. If something is currently selected,
the selection is cleared.
Rev Slct
Currently selected files or folders are deselected, and cur-
rently not selected files or folders are selected.
2. Select
5. Select
109
6
Chapter 5 Printing
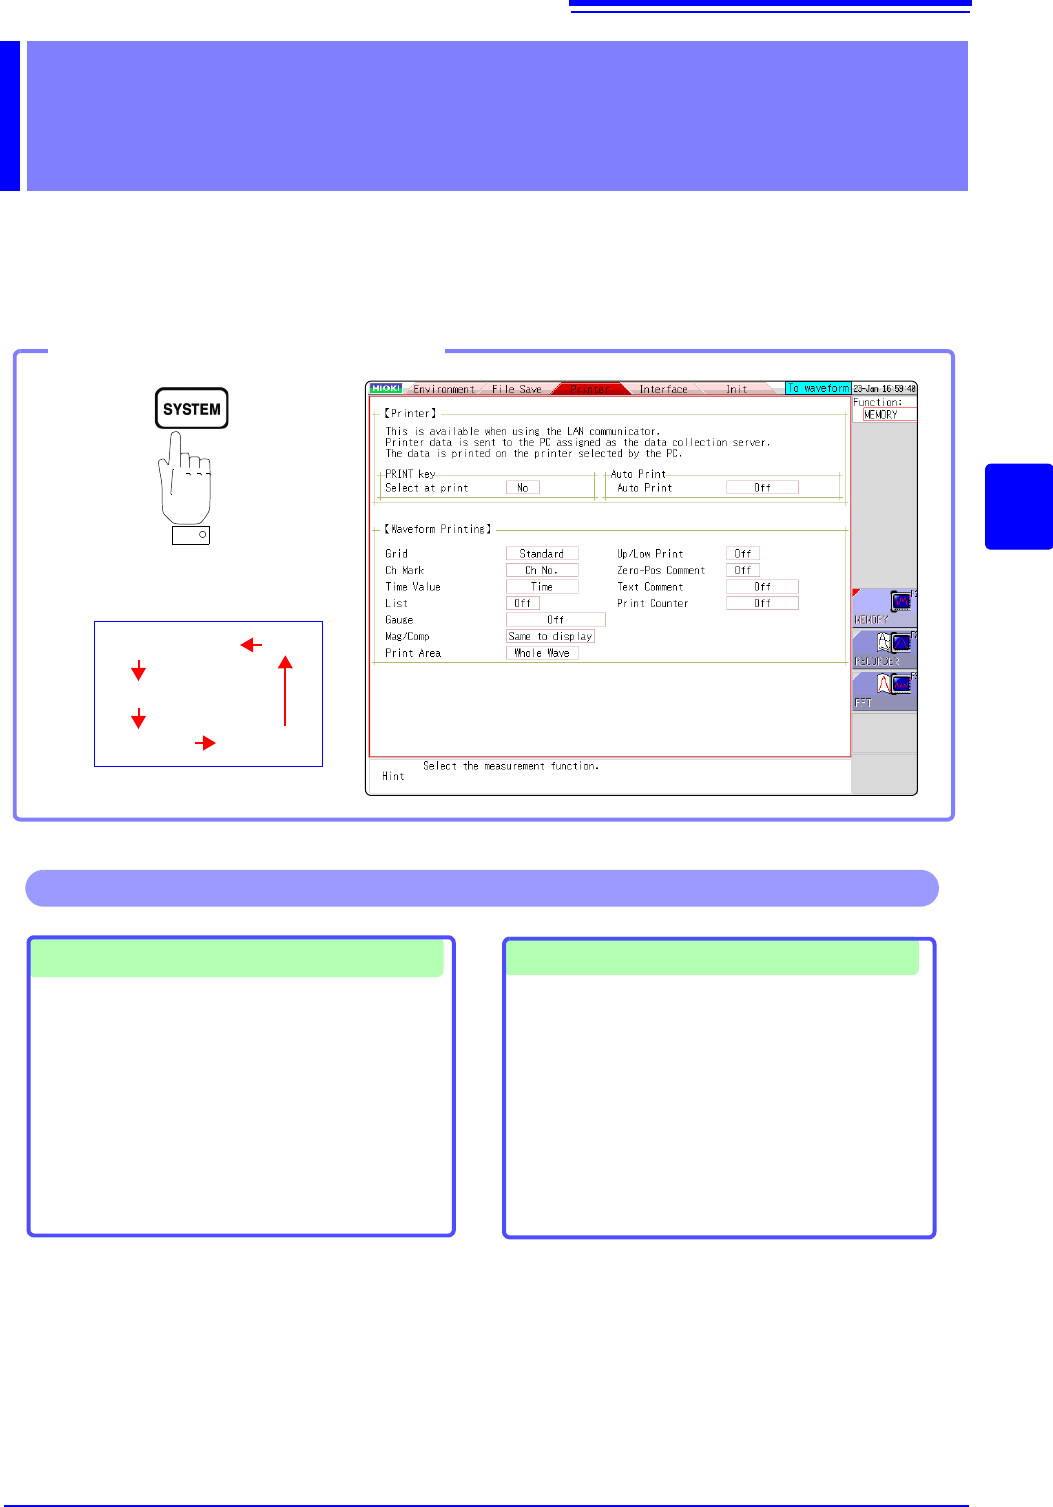
5
The [Printer] sheet lets you specify the print method and make other printing related settings. The
data to be printed are transferred to the PC connected via LAN and printed by using the printer con-
nected to the PC.
Printing Chapter 5
Opening the [Printer] sheet
Pressing this key repeatedly displays
the various sheets.
[Environment]
[File Save]
[Printer]
[Init]
[Interface]
Making printer settings
• Grid Type ( p.113)
• Channel Marker Type ( p.113)
• List ( p.114)
• Gauge ( p.114)
• Horizontal axis (Time axis) Zoom (Mag/Comp)
( p.114)
• Upper/Lower Limit Print ( p.115)
• Zero Position Comment Print ( p.115)
• Print Counter ( p.115)
Selecting the print method
See: "5.1 Printing Type and Workflow" ( p.110)
• Auto Print ( p.111)
• Manual Print ( p.112)
See: "5.5.1 Screen Hard Copy" ( p.116)
See: "5.5.2 Report Print (A4 Size Print)" ( p.116)
See: "5.5.3 List Print" ( p.117)
See: "5.5.4 Text Comment Printing" ( p.117)
Operations available from the [Printer] sheet