MR8740、MR8741_user_manual_eng_20191016H.pdf - 第215页
8.7 Applying an External Trigger (MR8741 Only) 203 7 Chapter 8 T rigger Settings 8 An external signal applied to the External Control terminal can serve as a trigger source (Exter nal Trigger). It can also be used to syn…

8.6 Synchronizing Between Blocks (MR8740 Only)
202
The input signal from another block can be used as a trigger source.
Use this to synchronize between block I and block II of MR8740 Memory HiCorder.
8.6 Synchronizing Between Blocks
(MR8740 Only)
Procedure
To open the screen: Right-click and select [DISP] Waveform screen Right-click and select [TRIG.SET]
Trigger settings window
1
Enable synchronization between blocks.
Move the flashing cursor to the [Sync blocks] item.
Select
Off Synchronization between blocks is not performed.
(default setting)
On
Synchronization between blocks is performed.
• To synchronize block I and block II, trigger synchronization needs to be set for
both blocks.
• The sampling offset between blocks is within 3 samples or 1 us.
If the sampling differs between both blocks, the offset will be for the slow sam-
pling side.
• Synchronizing between blocks of the U8793, MR8790, or MR8791 cannot be
enabled.
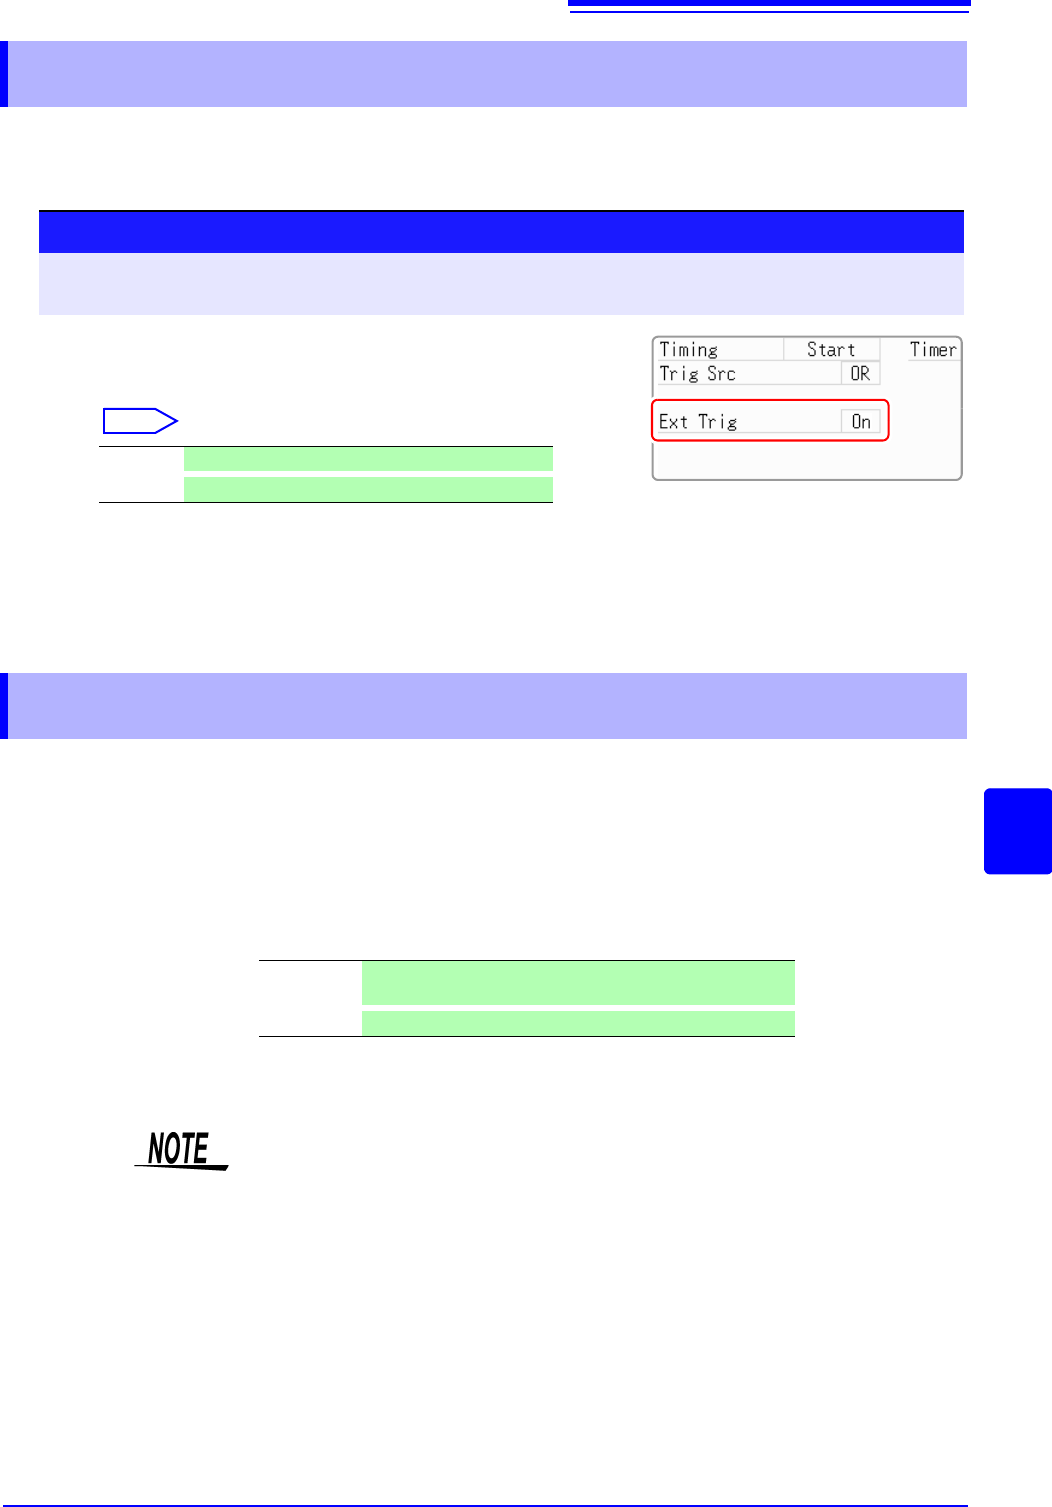
8.7 Applying an External Trigger (MR8741 Only)
203
7
Chapter 8 Trigger Settings
8
An external signal applied to the External Control terminal can serve as a trigger source (External
Trigger). It can also be used to synchronously drive parallel triggering of multiple MR8741s.
8.7 Applying an External Trigger (MR8741 Only)
Procedure
To open the screen: Right-click and select [DISP] Waveform screen Right-click and select [TRIG.SET] Trig-
ger settings window
1
Enable external triggering.
Move the flashing cursor to the [Ext Trig] item.
Select
2
Apply the input signal to the external trigger (EXT.TRIG)
terminal.
See: "16.2.5 External Trigger terminal (EXT.TRIG)" (p.342)
Off Disables external triggering.(default setting)
On
Enables external triggering.
8.8 Triggering Manually (Manual Trigger)
Triggers can be applied manually by clicking [MANUAL TRIG] in the right-click
menu. Manual triggering takes priority over all other trigger sources, regardless
of settings.
To stop recording:
Click [STOP] in the right-click menu.
Click once Recording is carried out for one recording length and then
stops.
Click twice
Recording stops when [STOP] is clicked.
As for other trigger types, triggering does not occur during pre-trigger standby.
Set the trigger priority function to
[On].
See: "8.9.2 Setting Trigger Acceptance (Trigger Priority)" (p.206)
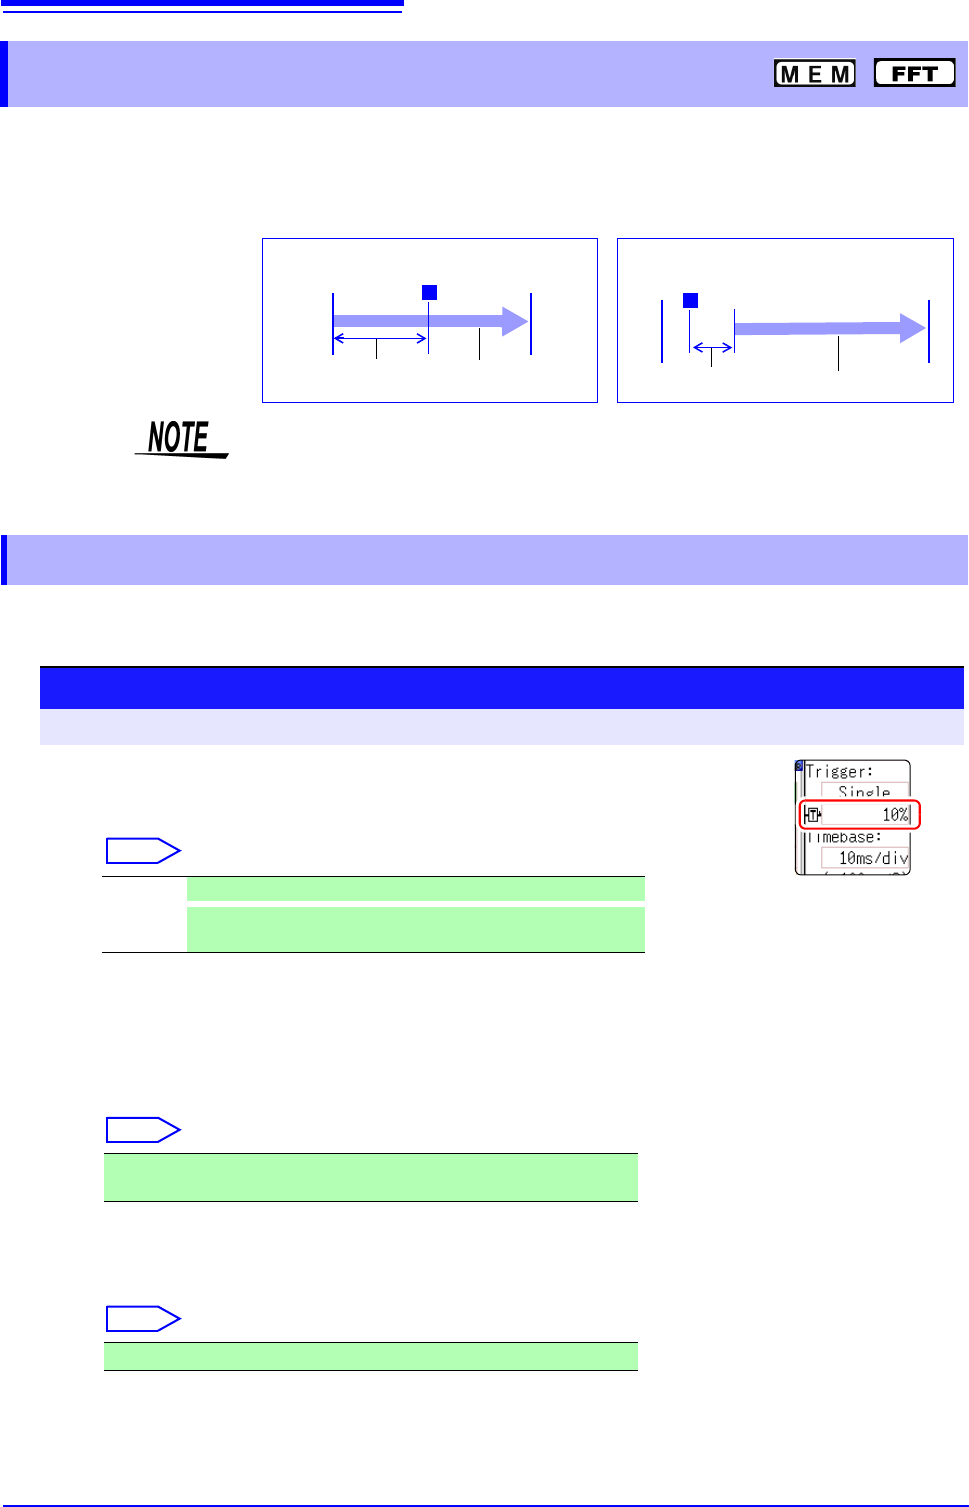
8.9 Pre-Trigger Settings
204
[
This applies to the Memory function, and FFT function only.
By setting a portion (number of divisions or percentage) of the recording length to occur before trig-
gering, the waveform is recorded before as well as after the trigger point.
You can also set the duration of a waveform to be recorded after a trigger point.
Set the position of the trigger point relative to the specified recording length.
There are two setting methods. (Setting by percent and setting by div)
8.9 Pre-Trigger Settings
T
Pre-Trigger Setting
Amount
Recording
Length
T
Pre-Trigger Setting
Amount
Recording Length
Recording Before Triggering
Recording for a Specified Duration
After Triggering
• When all trigger sources (analog, timer trigger, etc.) are disabled (Off), pre-trig-
ger settings are ignored.
• Pre-triggers cannot be set by div with the FFT function.
8.9.1 Setting the Trigger Start Point (Pre-Trigger)
Procedure
To open the screen: Right-click and select [DISP] Waveform screen
1
Select the unit to set the pre-trigger.
Move the flashing cursor to the Pre-trigger.
Select
2
Enter the numerical value.
(When [%] is selected)
With the recording start point as 0% and the recording end point as
100%, set the % for the trigger point.
Select
(When [div] is selected)
With the recording start point as 0div and the recording end point as
the set recording length, set the number of div for the trigger point.
Select
% Settings are by percent. (default setting)
div
Settings are by number of div. For external sampling, set by
number of samples.
-95%, 100%, 95%, 90%, 80%, 70%, 60%, 50%, 40%, 30%, 20%, 10%, 5%,
2%, 0%
-Recording length (div) to +Recording length (div)