MR8740、MR8741_user_manual_eng_20191016H.pdf - 第342页
15.3 Accessing the Files on the Instrument F rom a Computer (Using FTP) 330 Select the file to download from th e folder list and drag and dr op* it on the down- load destination (the desktop or a folder outside the Inte…
15.3 Accessing the Files on the Instrument From a Computer (Using FTP)
329
12
Chapter 15 Connection to a Computer
14
15
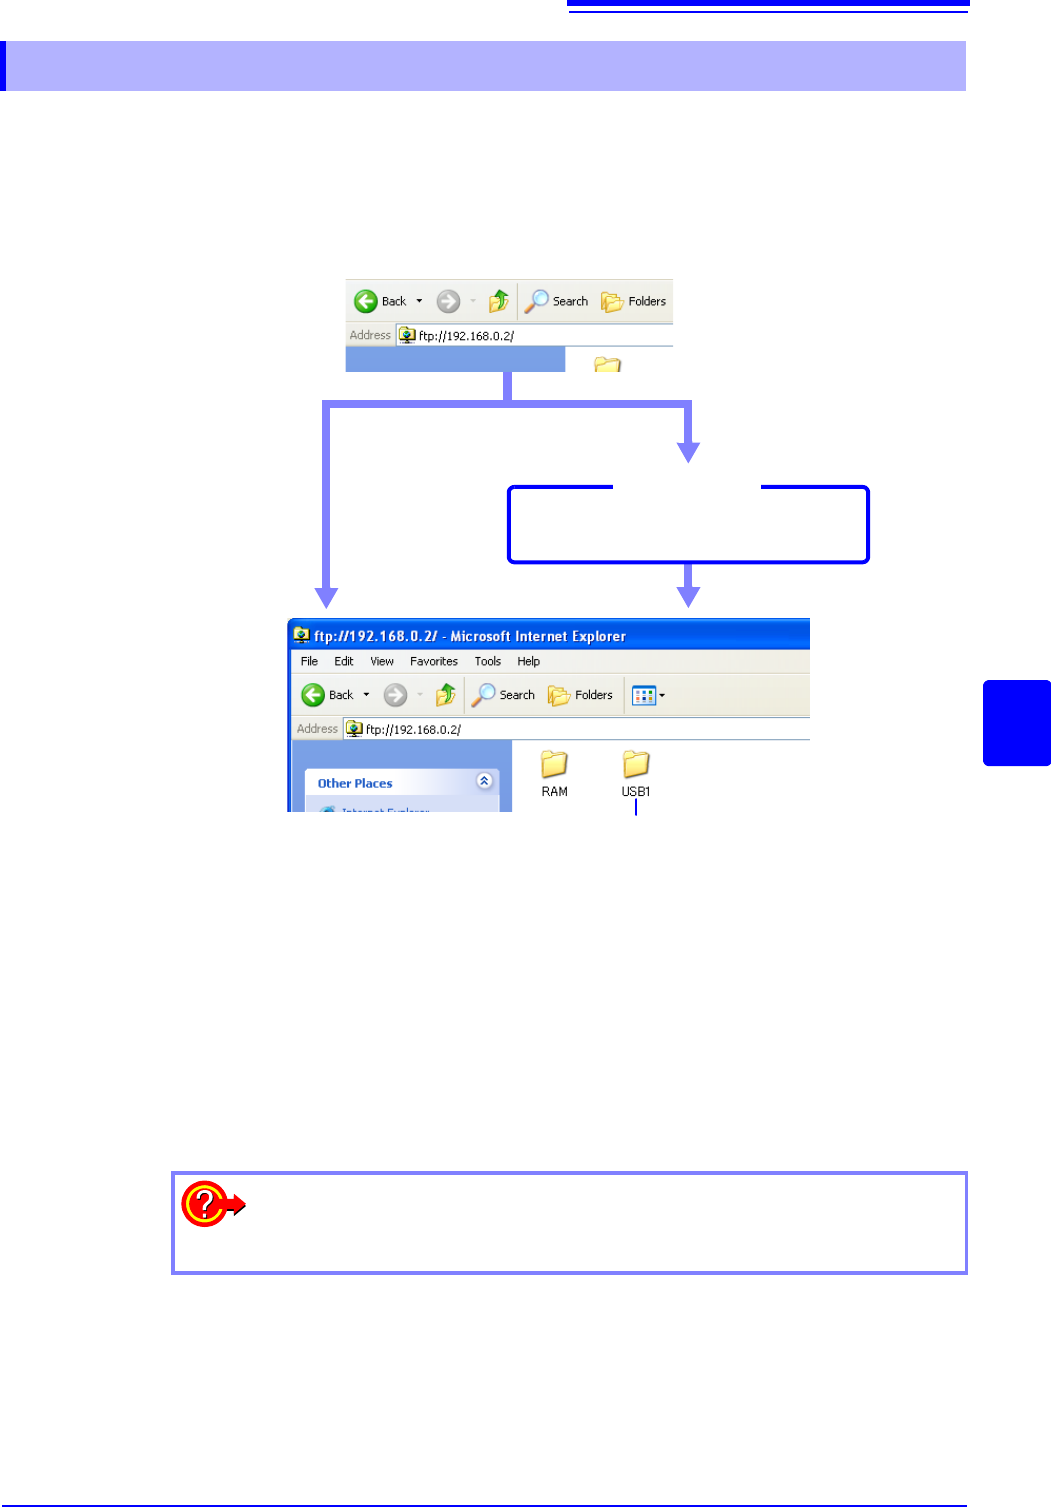
The following example shows how to use the Internet Explorer
browser on Windows 7.
Launch Internet Explorer
on the PC and enter "ftp://" plus the IP address of the
instrument in the address bar.
If the IP address of the instrument is "192.168.0.2":
* An authorization user name and password have been set in the System screen
- [Interface] sheet.
See:"15.3.1 Making FTP Settings at the Instrument" (p.328)
You can also enter the user name and password, delimited by ':' and '@', in front
of the normal IP address.
[ftp:// Username:Password@ instrument IP address]
Example: When the user name is "hioki" and the password is "1234":
Enter [ftp://hioki:1234@192.168.0.2].
15.3.2 Using FTP to Connect to the Instrument
USB memory stick
Click to display the file stored on the media.
Authorization
required*
Login by entering a user name and
password.
Connect
Login screen
The storage media of the instrument
appear.
authorization
setting
If the connection fails
Check the communications settings of the instrument.
See: " LAN Setup Workflow" (p.317)
15.3 Accessing the Files on the Instrument From a Computer (Using FTP)
330
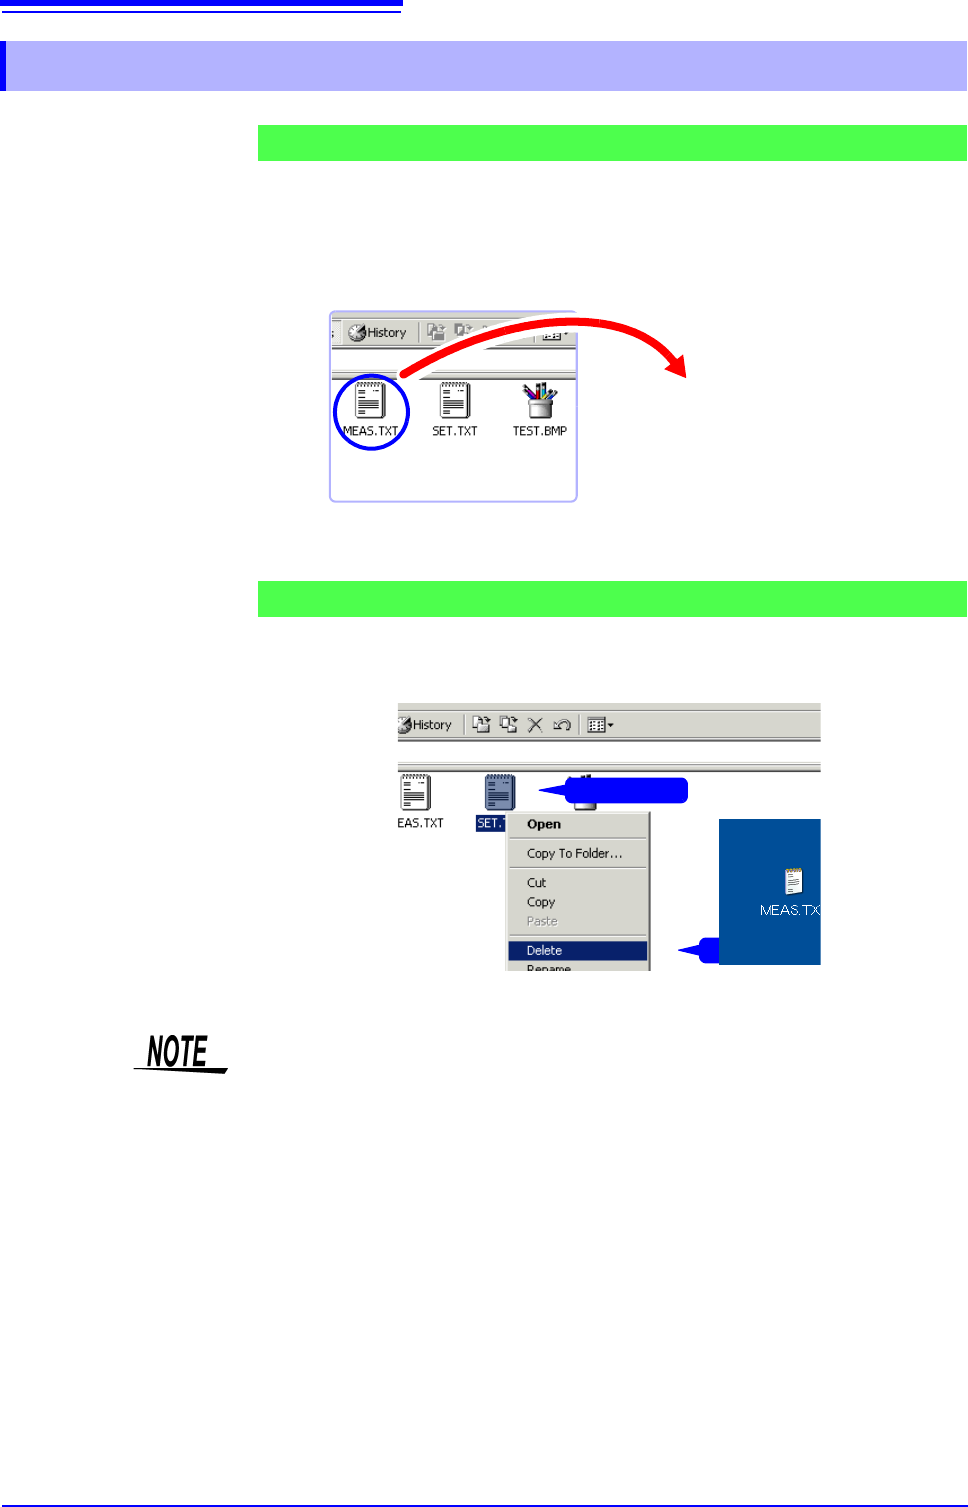
Select the file to download from the folder list and drag and drop* it on the down-
load destination (the desktop or a folder outside the Internet Explorer
window).
*: Click the file and hold the button down. Move the mouse pointer to the target destination,
and then release the button
Minutes and seconds may not be reflected on the file stamp (date) of the file.
Right click a file in the FTP folder list, and select [Delete] or [Rename] from the
pull-down menu.
15.3.3 Using FTP for File Operations
Downloading Files
Deleting and Renaming Files
On PC monitor
Drag & Drop
1
Right click
2
Click
Files cannot be uploaded to the instrument from the computer.

15.4 Wave Viewer (Wv)
331
12
Chapter 15 Connection to a Computer
14
15
The viewer has a CSV conversion function. Converted files may be read by a spreadsheet program.
This section explains how to install and uninstall and how to start and quit the
Wave Viewer.
System requirements
System requirements: PC running Windows 7, Windows 8, or Windows 10.
1. When you insert the Application Disk (CD-R) into the CD-ROM drive, the open-
ing page should appear automatically.
If it does not appear, open the "index.htm" file with your Web browser.
2. Select the language to display (click the English icon).
3. Click the [Wave viewer (Wv)] icon to view Wv specifications and revision his-
tory.
4. Click the [Install] icon at the top right of the page to open the [File Download]
dialog.
5. Click [Open] to display the confirmation dialog to proceed with installation. And
go on the procedure.
6. Click [Next] to open the installation destination selection window.
Click the [Browse] button to change the installation folder.
7. Click [Next] to start installation.
The program is now installed.
Before using the program, review the "READ ME" text file.
In the Windows
®
Start menu, select [Programs] - [HIOKI] - [Wv.] This starts the
Wave Viewer application.
Access the menus of the Wave Viewer application and select [File] - [Exit] to
shut down the program. Alternatively, you can click the Close button at the top
right of the screen.
1. Click the Windows
®
Start button, click [Control Panel], and then click [Uninstall
a program].
The list of the installed programs appears.
2. Select [HIOKI Wave Viewer (Wv)] and uninstall the application.
To upgrade to a newer version, uninstall the old version first and then install the
new version.
15.4 Wave Viewer (Wv)
Installation (Windows 7)
Startup
Shutdown
Uninstallation