MR8740、MR8741_user_manual_eng_20191016H.pdf - 第311页
13.2 Setting the Waveform Area 299 11 Chapter 13 W aveform Evaluation Function (MR8741 Only) 12 13 Creating a new evaluation area Setting metho d Procedure Screen: STATUS 1 Click [ST A TUS] to call the S tatus screen. 2 …
13.2 Setting the Waveform Area
298
To evaluate the waveforms, a evaluation area is required. Two methods are available: one is to load the
already created evaluation area and settings, and the other is to create a new evaluation area.
Requirements for loading waveform evaluation area BMP files
Observe the following requirements when creating waveform evaluation areas on a computer and when load-
ing waveform evaluation areas created on other equipment:
Files that do not satisfy these requirements cannot be loaded properly.
13.2 Setting the Waveform Area
Loading the already created evaluation area
Setting method
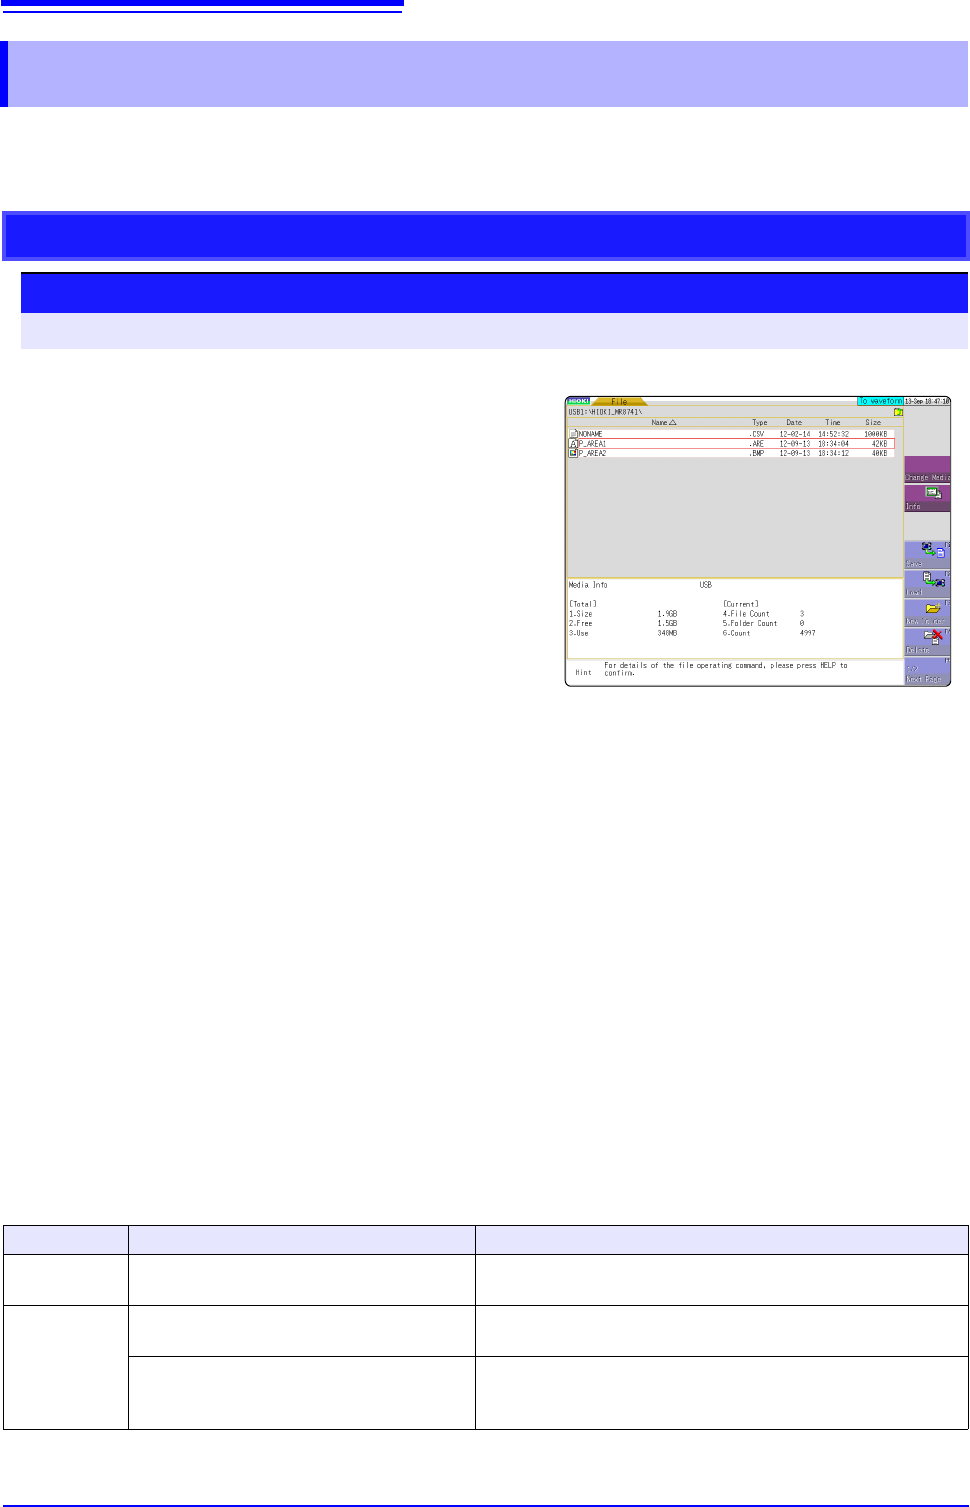
Procedure Screen: FILE
1
Click [FILE] to call the File screen.
2
Select the media for loading.
3
Use the bar cursor to select the desired file.
4
Select [Load].
5
Select [Exec].
6
When no more changes need be made to the
loaded settings, press the DISP key to make the
Waveform screen appear, and then press the
START key to initiate measurement.
To change the settings, first change the contents,
then press the DISP key to make the Waveform
screen appear, and then press the START key to
initiate measurement.
See:"4.3 Loading Data" (p.99)
item
Condition Loading operation
Color
White and black
White pixels are treated as background, and black pixels are
treated as the evaluation area.
Size 501 horizontal pixels
× 626 vertical pixels The file will be used as the evaluation area for the Memory
Function 1 screen.
501 horizontal pixels
× 501 vertical pixels
When using the FFT function, the file will be used as the FFT
evaluation area. When using other functionality, the file will be
used as the memory function XY evaluation area.
13.2 Setting the Waveform Area
299
11
Chapter 13 Waveform Evaluation Function (MR8741 Only)
12
13
Creating a new evaluation area
Setting method
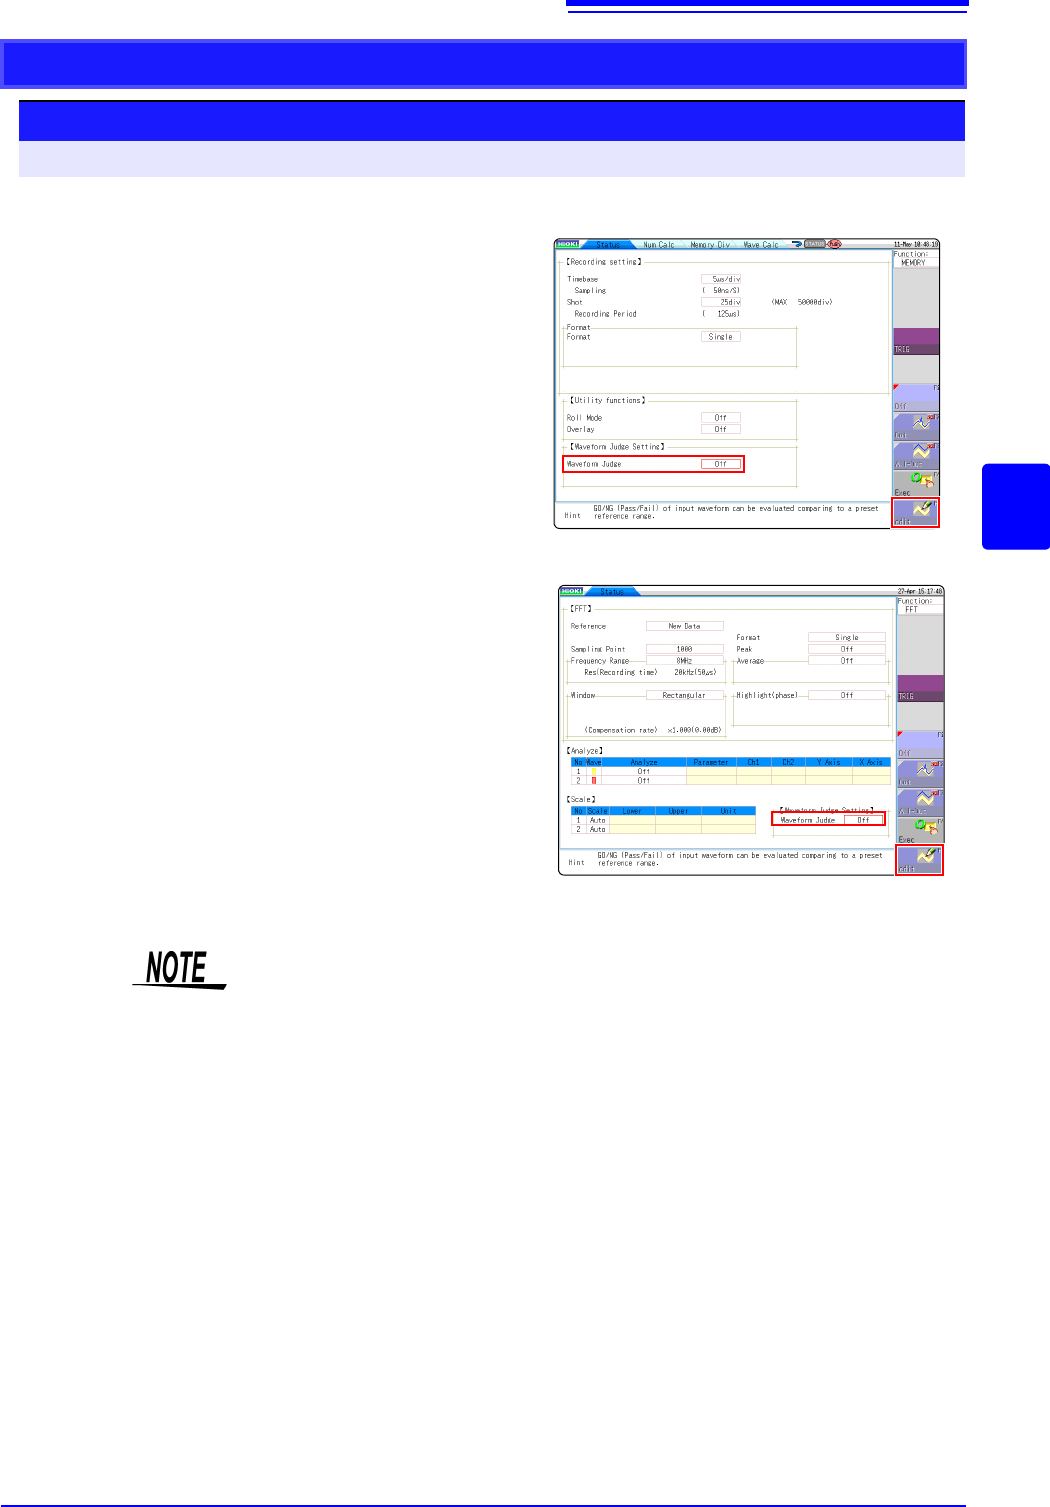
Procedure Screen: STATUS
1
Click [STATUS] to call the Status screen.
2
Move the flashing cursor to Waveform Judge.
3
Select [Edit] from the GUI displayed on the
screen.
4
Make the new evaluation area.
See:"13.5 Creating the Evaluation Area" (p.303)
5
Store the new evaluation area in the internal
memory.
6
After setting the parameters for "Waveform
Judge setting" and "Stop Mode," click
[DISP] to
make the Waveform display screen appear,
and then click
[START] to initiate measurement.
7
Save the evaluation area on the File screen, if
it s necessary.
See:"4.2 Saving Data" (p.87)
Only one waveform evaluation area is stored in internal memory. For example,
when operation is changed from the Memory function screen to the X-Y screen
and the X-Y screen waveform evaluation area is stored, the waveform evaluation
area created for the Memory function is lost.
Function:FFT
Function:MEMORY
13.3 Setting the Waveform Evaluation Mode
300
13.3 Setting the Waveform Evaluation Mode
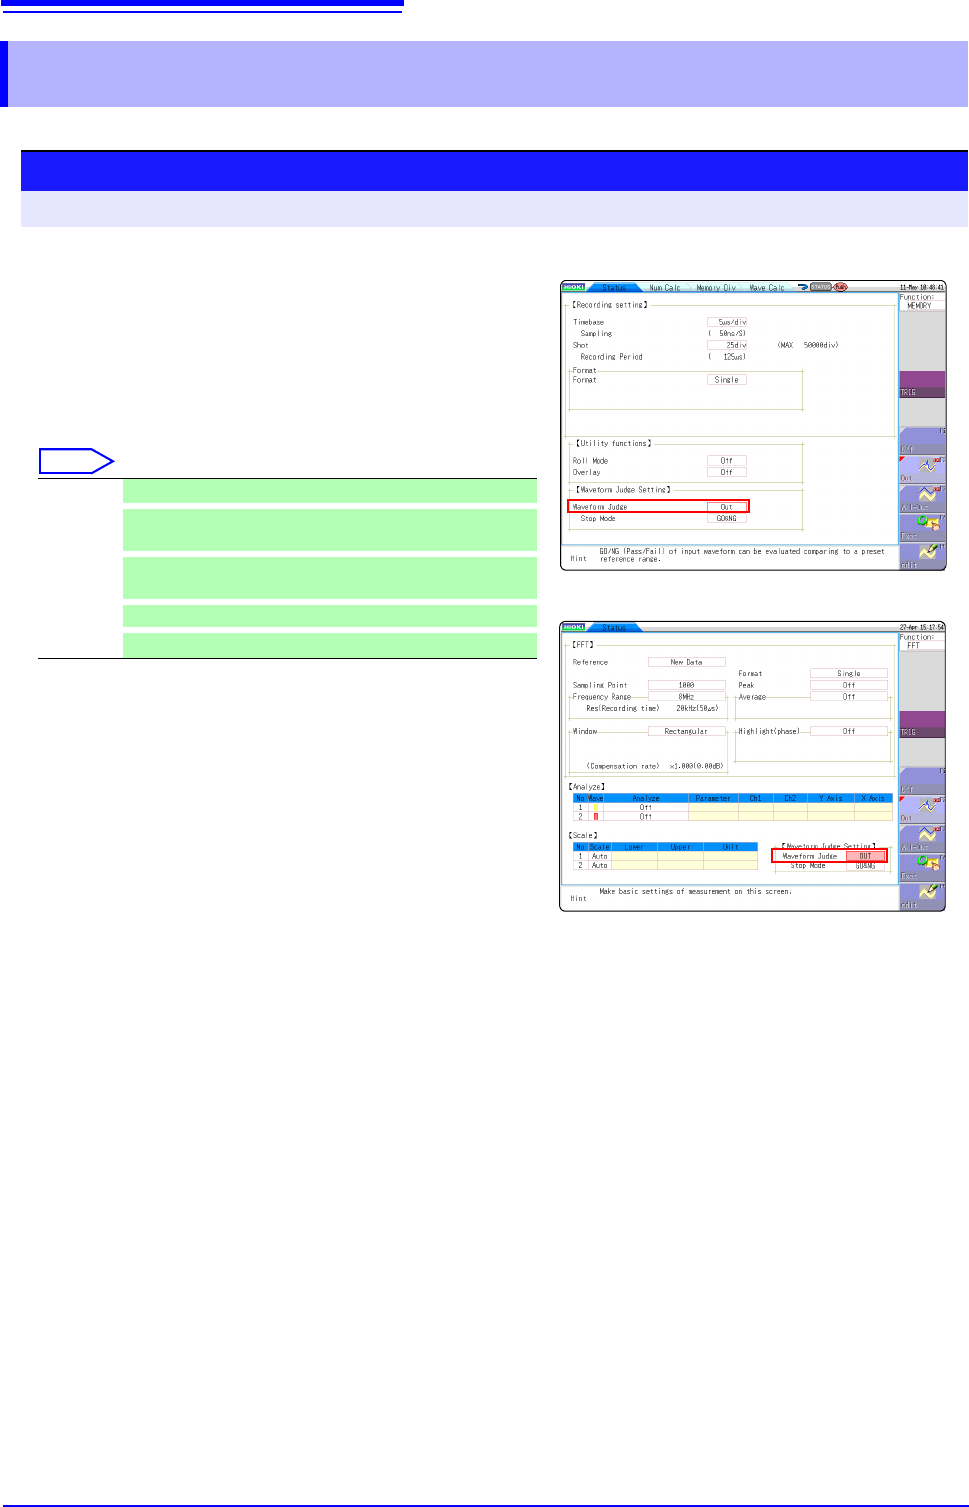
Setting method
Procedure Screen: STATUS
Select
Off Disable waveform evaluation.
Out
Return NG if any part of the waveform leaves the evalua-
tion area.
All out
Return NG if the entire waveform leaves the evaluation
area.
exec
Enable waveform evaluation.
edit
Activate editor for setting up evaluation area.
Function:FFT
Function:MEMORY
1
Move the flashing cursor to Waveform Judge.
2
Select the setting from the GUI displayed on the
screen.