MR8740、MR8741_user_manual_eng_20191016H.pdf - 第149页
137 6 Chapter 7 Utility Functions 7 Various utility functions ar e described in the section . Utility Functions Cha pter 7 Adding Comment s (p.138) Applicable measurement s and settings • Displaying Waveforms During Reco…
6.8 Seeing Block Waveforms
136
This applies to the Memory function only.
If recorded by memory division, the usage status of blocks can be checked. Furthermore, the
desired block can be selected and the recorded waveform can be displayed.
When memory division is not used, depending on the record length, it is possible to display the last
16 measured waveforms.
See: "6.3 Moving the Waveform Display Position" (p.125)
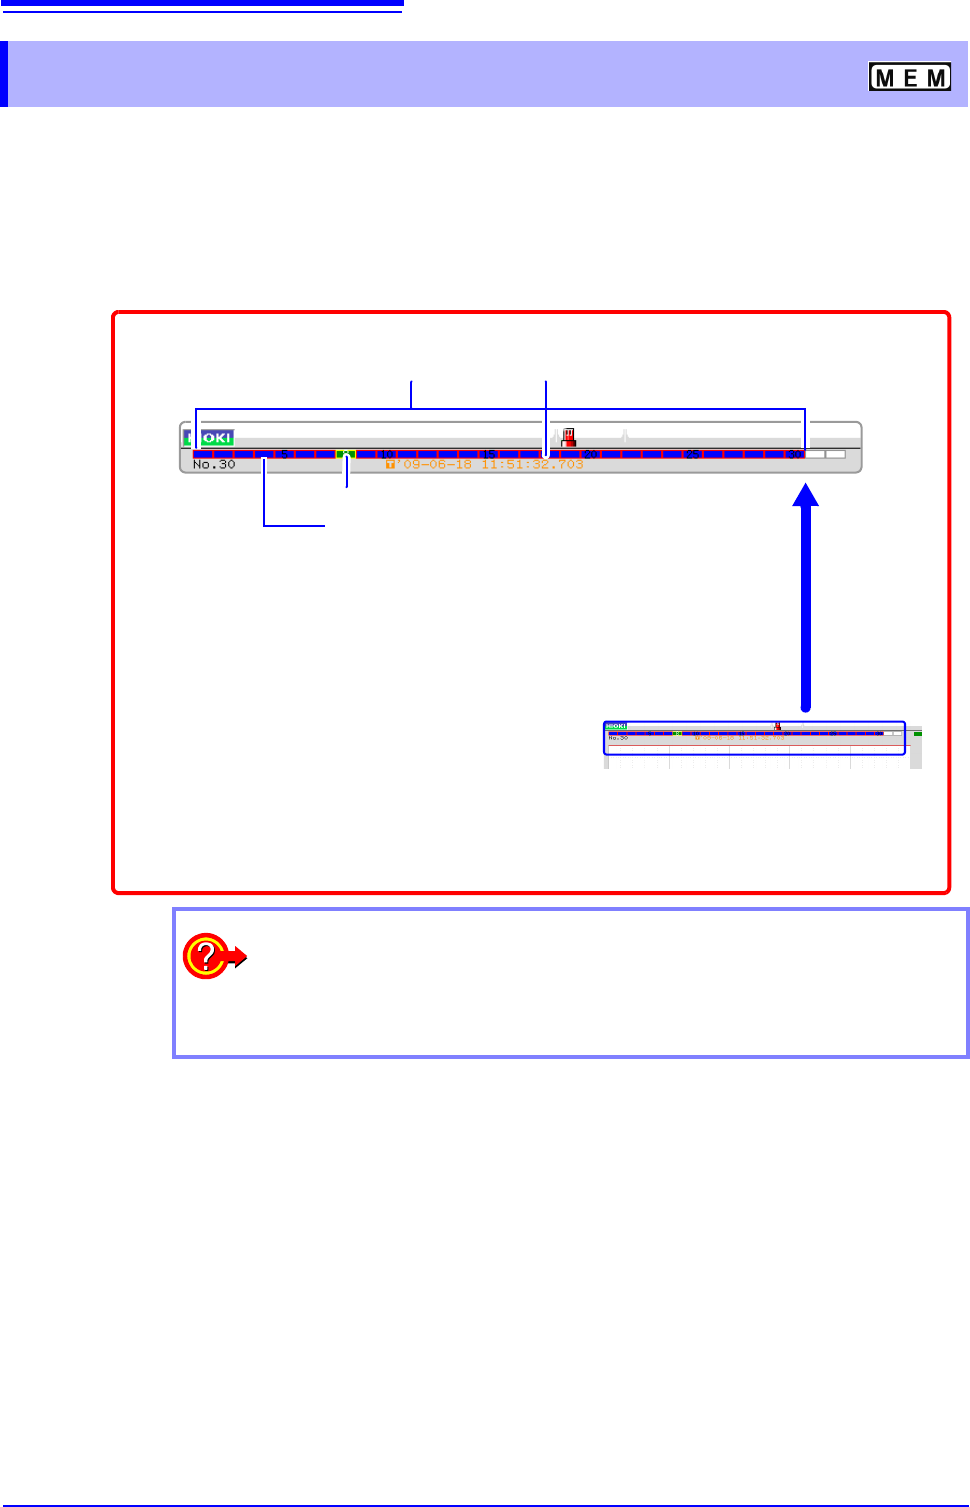
6.8 Seeing Block Waveforms
Data trigger time of the selected block
Blue blocks:
Saved blocks (blocks in use)
Green blocks: Currently selected displayed block
Blocks with light blue frame: Referenced blocks
1
Right-click and select [DISP] to display the
Waveform screen.
Left-click the rectangle of the block to display. When there are more than
32 blocks, click to the right side of the last block to display the next 32
blocks, and click to the left side of the first block to display the previous
32 blocks.
3
When the waveform display position is
displayed, left-click the WAVE button
on the top right of the screen to switch
to block display.
2
When you want to overlap with other blocks (reference blocks)
Open the Status screen to the [Memory Div] sheet and set
[Ref Block] to [On]
and select [All Blks On].
See: "11.2 Display Settings" (p.244)
137
6
Chapter 7 Utility Functions
7
Various utility functions are described in the section.
Utility Functions Chapter 7
Adding Comments (p.138)
Applicable measurements and settings
• Displaying Waveforms During Recording
(p.145)
• Overlaying with past recorded waveforms
(p.146)
Utility Functions
Converting input values (Scaling) (p.148)
Detailed module settings (p.161)
• Making anti-aliasing filter settings
• Selecting the thermocouple type
• Making reference point compensation settings
• Making wire break detection settings
• Making data updating settings
• Executing auto balance
• Making probe attenuation settings
• Making response settings
• Making measurement mode settings
Copying a setting to another channel(p.160)
Fine Adjustment of Input Values (p.158)
Inverting a waveform (p.159)
Setting the waveform display freely(p.155)
7.1 Adding Comments
138
This section explains how to enter title comments and channel comments.
Information about alphanumeric input is also provided.
When you enter a title comment, it can be displayed at the top of the Waveform screen. (Allowed
number of characters: up to 40)
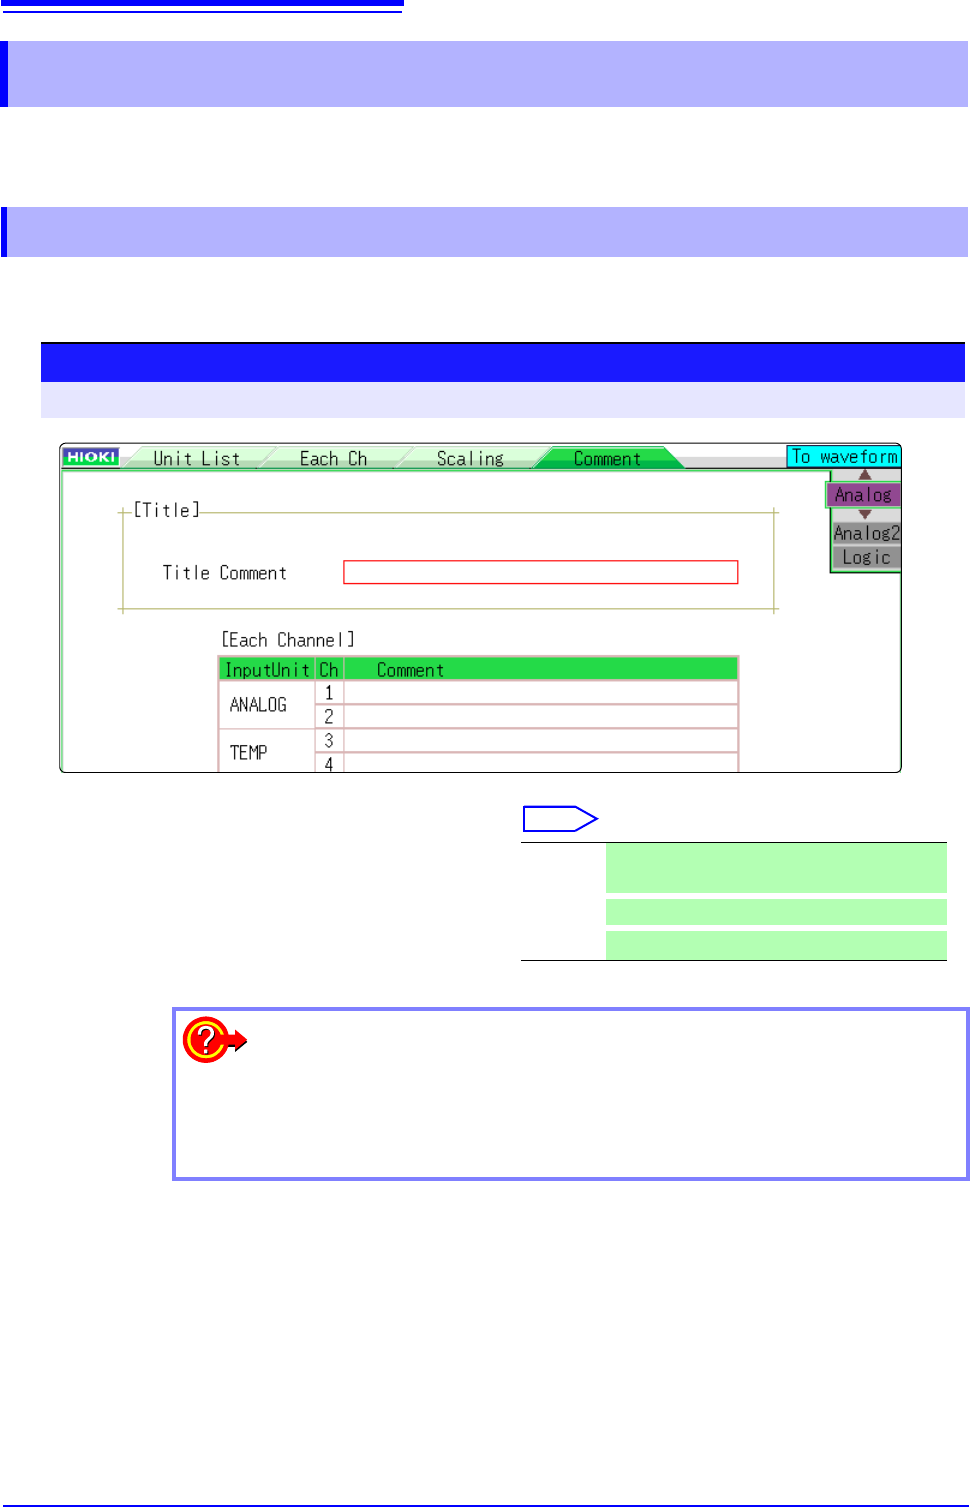
7.1 Adding Comments
7.1.1 Adding a Title Comment
1
Procedure
To open the screen: Right-click and select [CHAN] [Comment] sheet
1
Enter a title comment.
Select
Move the flashing cursor to the [Title Com-
ment] item, and then click.
Input Enter comment text.
See: "Entering Text" (p.141)
Clear
Clear entered information
Undo
Return to condition of preceding step
To select from preset terms
Clicking [PRESET] after activating text input brings up a list of preset terms.
It is also possible to select words from previously entered titles (History func-
tion).
See: "Entering Text From a Term List Or History List" (p.142)