MR8740、MR8741_user_manual_eng_20191016H.pdf - 第122页
5.1 Printing Type and Wo rkflow 110 There are basically three types of printing operations. 5.1 Printing T ype and W orkflow T o print data automatically during measurement T o selectivel y print dat a af ter measur emen…
109
6
Chapter 5 Printing
5
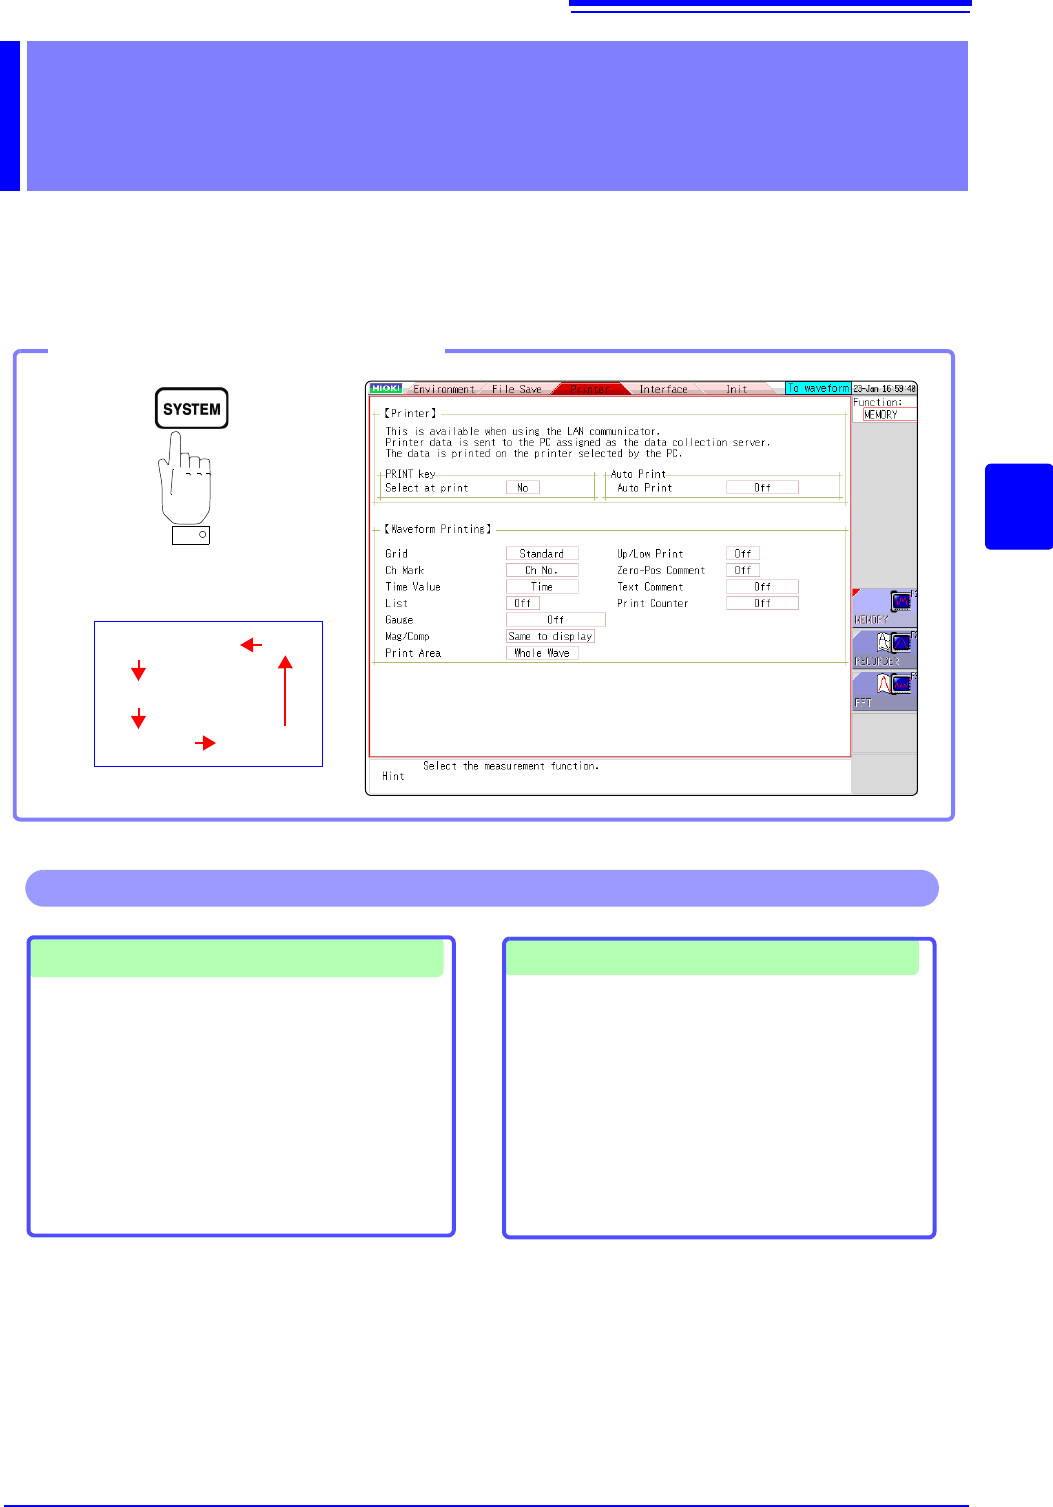
The [Printer] sheet lets you specify the print method and make other printing related settings. The
data to be printed are transferred to the PC connected via LAN and printed by using the printer con-
nected to the PC.
Printing Chapter 5
Opening the [Printer] sheet
Pressing this key repeatedly displays
the various sheets.
[Environment]
[File Save]
[Printer]
[Init]
[Interface]
Making printer settings
• Grid Type ( p.113)
• Channel Marker Type ( p.113)
• List ( p.114)
• Gauge ( p.114)
• Horizontal axis (Time axis) Zoom (Mag/Comp)
( p.114)
• Upper/Lower Limit Print ( p.115)
• Zero Position Comment Print ( p.115)
• Print Counter ( p.115)
Selecting the print method
See: "5.1 Printing Type and Workflow" ( p.110)
• Auto Print ( p.111)
• Manual Print ( p.112)
See: "5.5.1 Screen Hard Copy" ( p.116)
See: "5.5.2 Report Print (A4 Size Print)" ( p.116)
See: "5.5.3 List Print" ( p.117)
See: "5.5.4 Text Comment Printing" ( p.117)
Operations available from the [Printer] sheet

5.1 Printing Type and Workflow
110
There are basically three types of printing operations.
5.1 Printing Type and Workflow
To print data automatically
during measurement
To selectively print data
after measurement
Auto Print
(default setting)
When the "Send Print Key" is exe-
cuted by using Model 9333, print
contents can be selected before
printing. This is convenient to print
different items each time.
At the File screen, the file list is print-
ed. At other screens, a list is printed.
Selection Print
When the Memory function is used,
data are acquired for the recording
length and then printed automatically.
When the FFT function is used, data is
printed automatically after FFT analy-
sis is exited.
In both cases, print contents are se-
lected before the measurement.
To print data immediately
when the "Send Print Key" is
executed by using Model
9333 after measurement
If the "Send Print Key" is executed
by using Model 9333, at Waveform
screen: Waveform
At File screen: File list
At other screen: List
During waveform printing, the range
specified with [Print Area] is print-
ed.
Quick Print
Prepare Model 9333 LAN
Communicator
Set measurement configuration
Set print target for
[Auto Print]
Set the print contents
Measurement
Print
[Printer] sheet
The followings can be print-
ed simultaneously.
• Waveform data
• Numeric value calculation
results
Prepare Model 9333 LAN
Communicator
Set [Print Select] to [Yes].
Start and Stop Measurement
Send Print Key
Select the print contents
Print
[Printer] sheet
Settings window
Either of the following can
be printed.
• Whole waveforms
• A-B waveforms
• Post-/Pre-Trigger waveforms
• Lists (Settings List)
• Report
Prepare Model 9333 LAN
Communicator
Set [Print Select] to [No].
Set the print area
Start and Stop Measurement
Send Print Key
Print
[Printer] sheet
During waveform printing,
either of the following can
be printed.
• Whole waveforms
• A-B waveforms
When both Auto Print and Auto Save are enabled, Auto Save is executed first.
However, when the Roll Mode function (default setting: Auto) is used with the
Memory function, Auto Print has priority.
5.2 Making Auto Print Settings
111
6
Chapter 5 Printing
5
This applies to the Memory function, Recorder function, and FFT function.
Make these settings before measurement.
Measurement data is printed automatically when you press the
START key to start measurement.
Make sure that the PC connected via LAN is prepared.
When performing waveform evaluation, the evaluation area will be printed
at the same time. To disable printing of the evaluation area, set waveform
evaluation to
[OFF]. ( p.300)
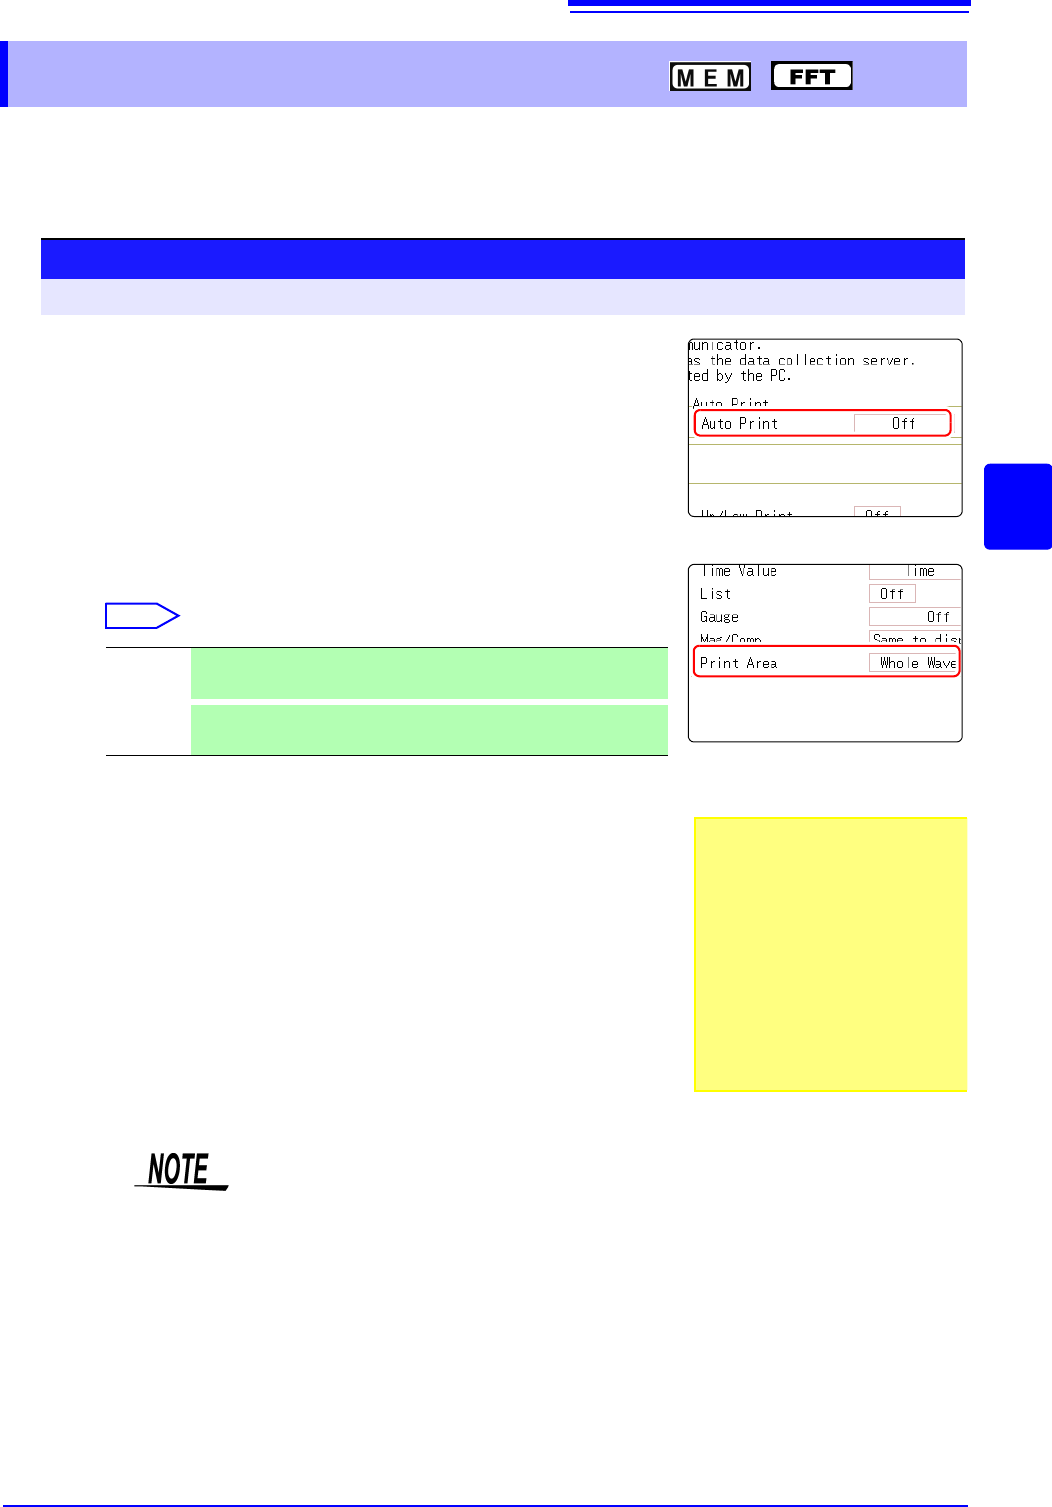
5.2 Making Auto Print Settings
Procedure
To open the screen: Press the SYSTEM key [Printer] sheet
1
Enable Auto Print.
(Memory Function, FFT Function case:)
Move the cursor to the [Auto Print] item.
Select [On].
Default setting: Off (Auto Print is not carried out)
2
(Memory Function case:)
Make print area settings as required.
Move the cursor to the [Print Area] item.
Select
3
Check the measurement conditions and start the measure-
ment. (Press the START key.)
Memory Function case:
Data are acquired for the recording length and then printed auto-
matically.
FFT Function case:
Data is printed automatically after FFT analysis is exited.
When printing is carried out again after stopping, the range selec-
tion will be used.
Whole
Wave
Print all waveform data in internal memory of instrument. (default
setting)
A-B
Wave
Print only A/B cursor defined range of waveform data in internal
memory of instrument.
• To output the waveform
data to the PC con-
nected via LAN
Model 9333 LAN Communicator
is required to be installed on the
PC to which the data is to be out-
put. For more information about
how to operate and configure
Model 9333 LAN Communicator,
in addition to install it on the PC,
see the instruction manual of
Model 9333 LAN Communicator.
• When both Auto Print and Auto Save are enabled, Auto Save is executed first.
• However, when the Roll Mode function (default setting: Auto) is used with the
Memory function, Auto Print has priority.
• If A/B cursor is On during manual printing after acquiring waveform data, the
range will be printed.